|
|
|
|
|
| Author |
|
|
Registered
|
Any interest in my boat trailer project?
Posted this at another Porsche site and got a favorable response. Thought I'd try it here.
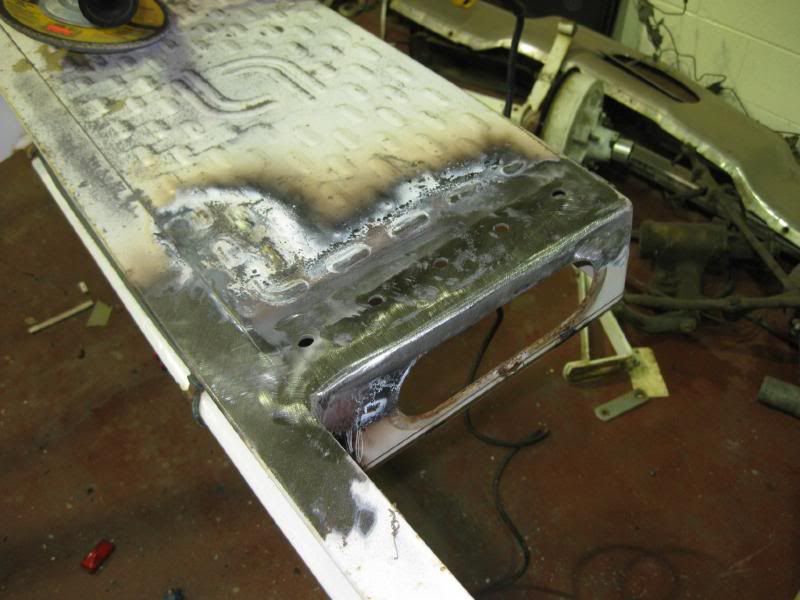
I bought the boat because it was a "Continental". I wanted to be able to pull it onto a concours show field as a 1956 18' Chris Craft "Continental" being towed by a 1956 18' Continental Mark II convertible. I'm really not a boater, I just thought they looked enormously cool together. After spending a good part of last summer refurbishing the boat I was able to get it in the water at the very end of the season. It was the last decent day we had, even though it was only 50°. 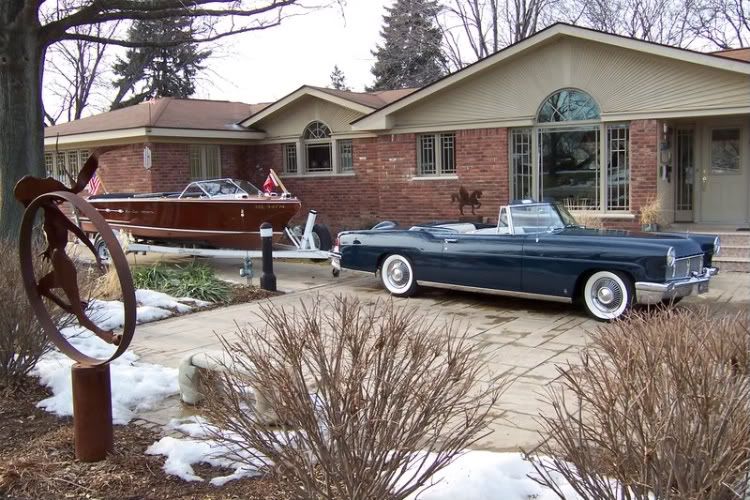 After launching the boat I realized how nasty the trailer looked. Obviously, it had seen a lot of miles on the road as all of the forward facing surfaces were pocked with rust spots where stones had chipped the enamel paint. Since the boat has been invited to shows this year I thought that the trailer needed to go, or be refurbished. I researched what boat trailers looked like in the '50s and found that they haven't changed much at all. That made me take a look at restoring, rather than replacing the trailer. 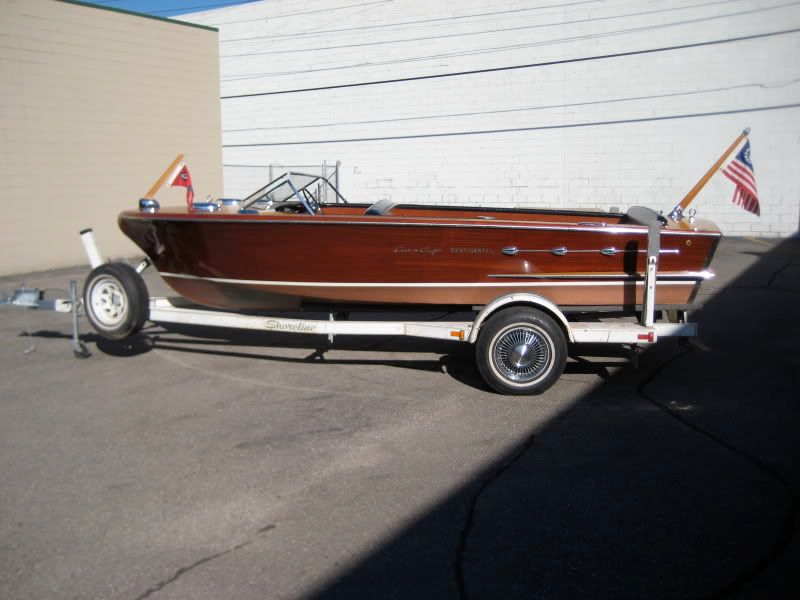 I took lots of pictures of the supports and how they were placed. I found many bent parts that led me to believe that the supports were not in their original position. 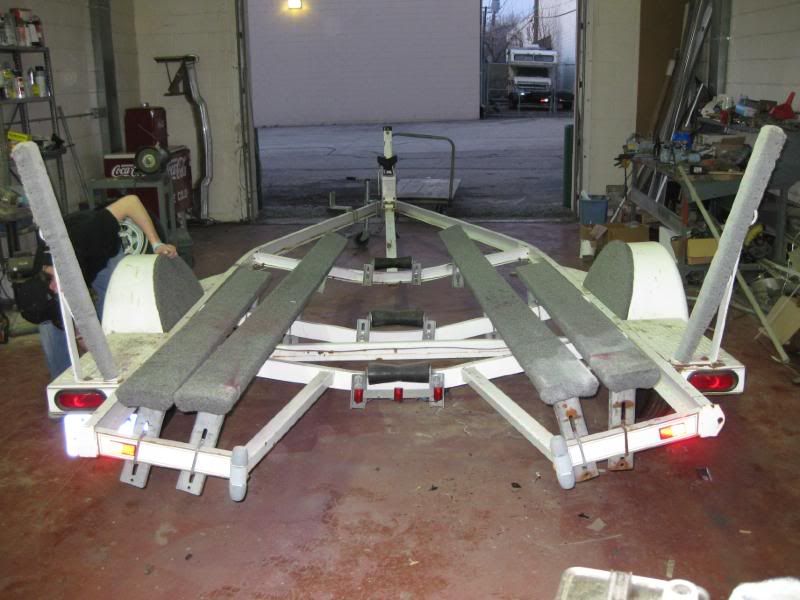 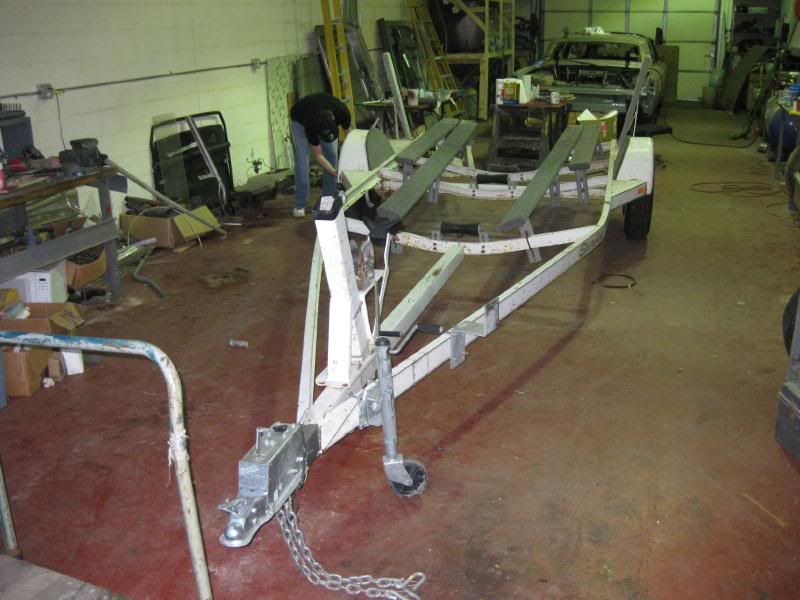 I hate rust. 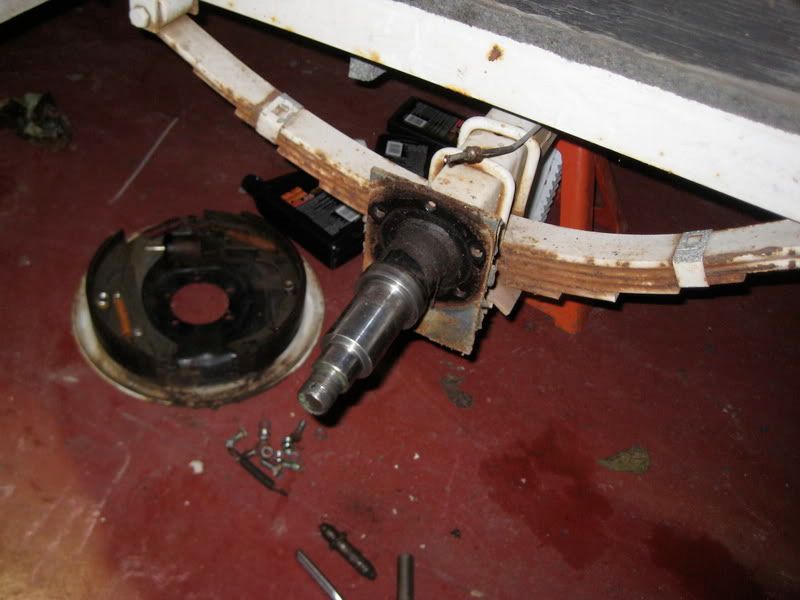 A couple of hours with a couple of good friends and the trailer was stripped to its bare bones. Every part that could be removed, was. 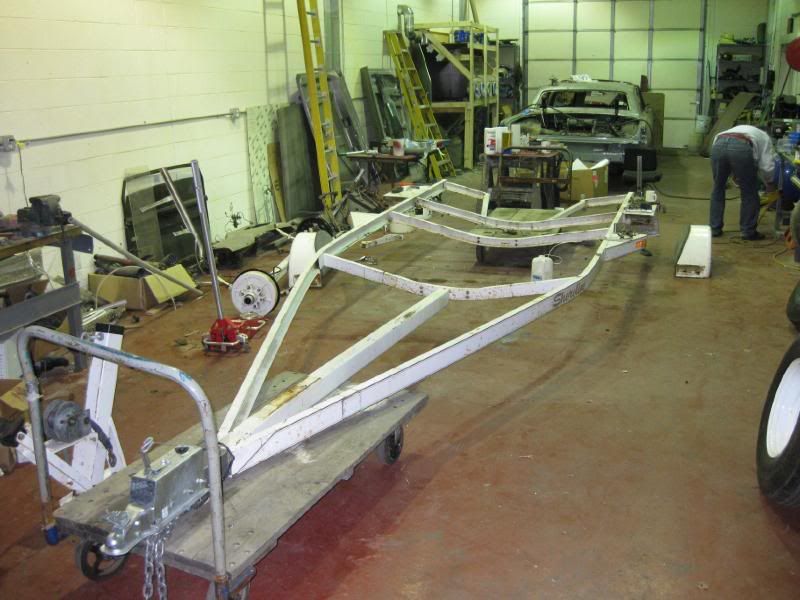 I dropped three come-alongs from eye-hooks in the girders above, giving me the ability to position the chassis where I want it. 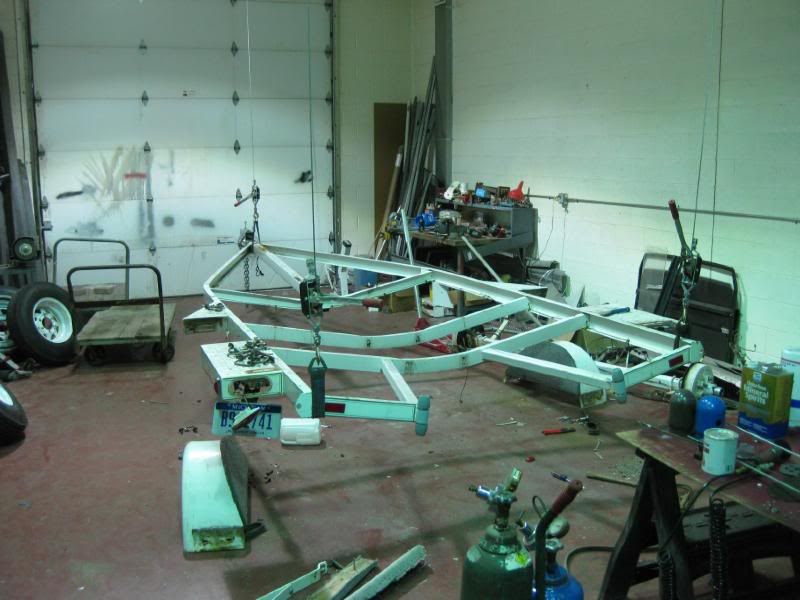 The right rear step had been banged up so I decided to lift it up to work on it. 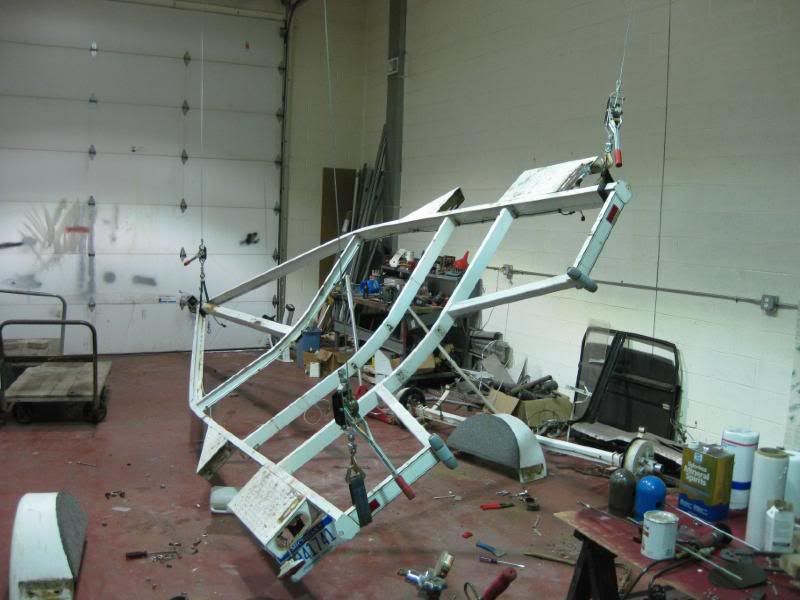 The metal needed to be pounded outward before it could be reshaped so I heated it from the bottom side and used a blunt chisel to reshape it from the inside. There is definitely something about heating metal to cherry red and massaging it into a new form that appeals to my baser instincts. 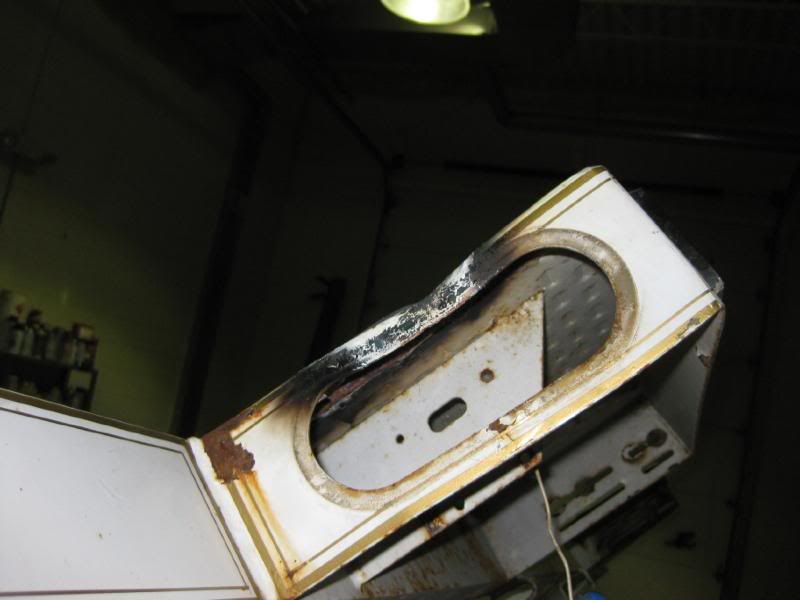 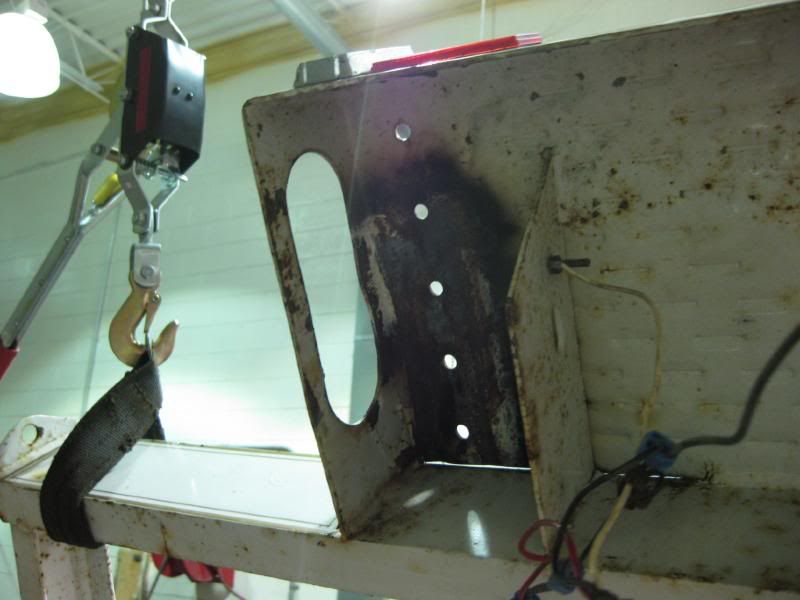
__________________
'56 Mark II convertible'51 Royal Spartanette'56 Chris Craft Continental '68 Lincoln Continental Limo '77 Town Car '55 356 Porsche Continental cabrio |
||
 04-14-2009, 10:58 AM
|
|
|
Registered
|
Grinding down the tool marks is very satisfying, too.
 I noted that everything that was painted or zinc plated, rusted, and nothing that was galvanized was even blemished. That's when I investigated the galvanizing process. We have a local facility that's part of a national chain. I paid a visit to their facility and got a tour of their plant. I was pretty impressed. I talked to the manager and found that galvanizing is very reasonable. I thought their pricing structure was very interesting, too. Sand-blasted metal parts are $.35 a pound to galvanize. It saves two steps over bringing them metal that's ever been painted. There are a lot of parts to a trailer. 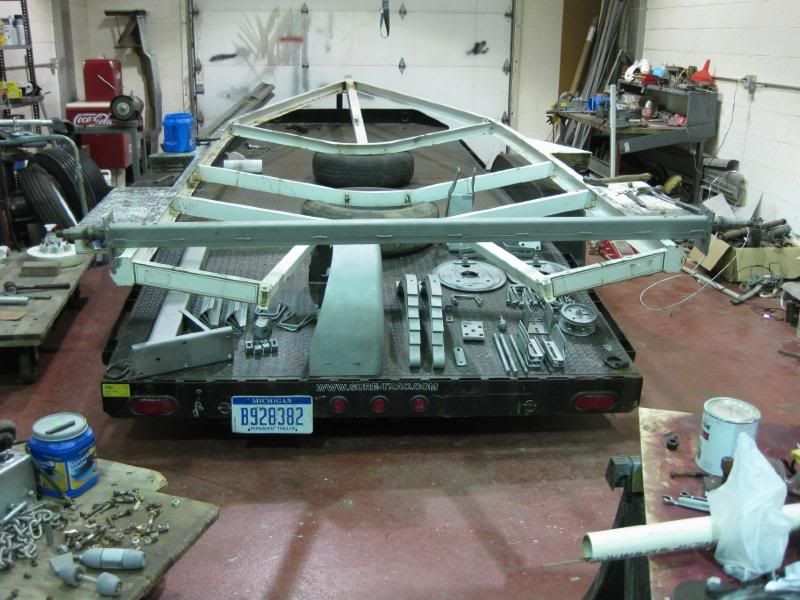 I could have sand-blasted the frame and wheels but they only charged $.21 a pound to burn off the paint. A 20 lb. wheel cost $4.20 to clean. Not worth my time or my sand. The same for the frame. They simply dipped it in the molton zinc tank which is kept at 850°F. That removes 99 44/100% of the paint, but not all of it. Hand detail work is required to get a good job. After it's cleaned it's dipped into several acid and neutralizer tanks to remove any trace of zinc from the dip. Then it goes back into the molton zinc where it chemically bonds to the steel. Great care was used to drill holes into areas that would have trapped air, keeping the metal from reaching the surface of the cleaned steel. I had a decision to make as to whether to quench the hot parts or let them cool naturally. The concensus of people I asked said that quenching might make the trailer chassis too brittle for the use. Here's the pile of parts awaiting the galvanizing of all the nuts and bolts. I'll send a truck to pick it up tomorrow. The pallet on the right has the three trailer wheels wrapped up. You can see the axle underneath the trailer and the pallet under the trailer contains all the other metal parts. 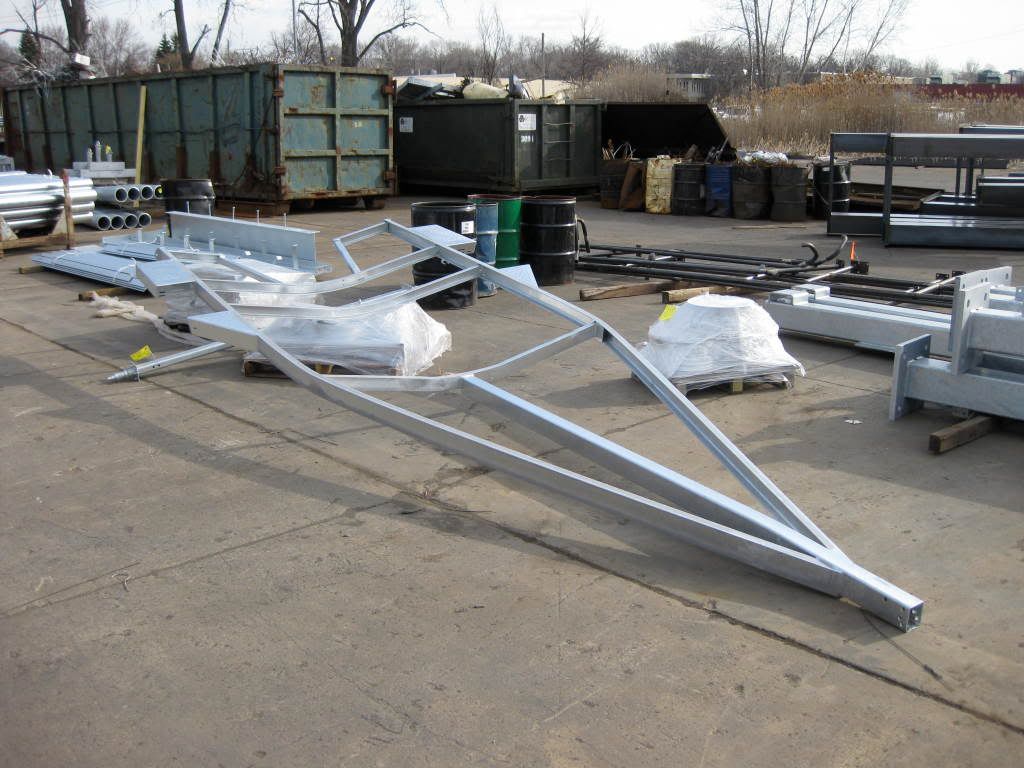
__________________
'56 Mark II convertible'51 Royal Spartanette'56 Chris Craft Continental '68 Lincoln Continental Limo '77 Town Car '55 356 Porsche Continental cabrio |
||
|
04-14-2009, 10:59 AM
|
|
|
Registered

|
Excellent work. A trailer worthy of hauling a Chris Craft
Can't wait to see the final result.
__________________
'75 911S 3.0L '75 914 3.2 Honda J '67 912R-STi '05 Cayenne Turbo '99 LR Disco 2, gone but not forgotten |
||
|
04-14-2009, 12:30 PM
|
|
|
Registered Abuser
Join Date: Jul 2007
Location: Southwest Montana
Posts: 2,738
|
The trailer is good for the long haul nicely done.
That Boat Is gorgeous the car is very nice. More Boat Pictures !!!
__________________
MT 930 1987 930 - Gone but not forgotten A man with priorities so far out of whack doesn't deserve such a fine automobile. I would rather wake up in the middle of nowhere than in any city on earth - Steve McQueen американский |
||
|
04-14-2009, 12:43 PM
|
|
|
Registered
|
Very nice, if you get board my 59 Lewis Craft & trailer could use your magic.

__________________
Byron  20+ year PCA member  Many Cool Porsches, Projects& Parts, Vintage BMX bikes too |
||
|
04-14-2009, 01:00 PM
|
|
|
Registered
|
Quote:
http://forums.vwvortex.com/zerothread?id=3990520
__________________
'56 Mark II convertible'51 Royal Spartanette'56 Chris Craft Continental '68 Lincoln Continental Limo '77 Town Car '55 356 Porsche Continental cabrio |
||
|
04-14-2009, 01:33 PM
|
|

|
|
Detached Member
Join Date: May 2003
Location: southern California
Posts: 26,964
|
Beautiful car and boat combination!
__________________
Hugh |
||
|
04-14-2009, 02:12 PM
|
|
|
Registered
|
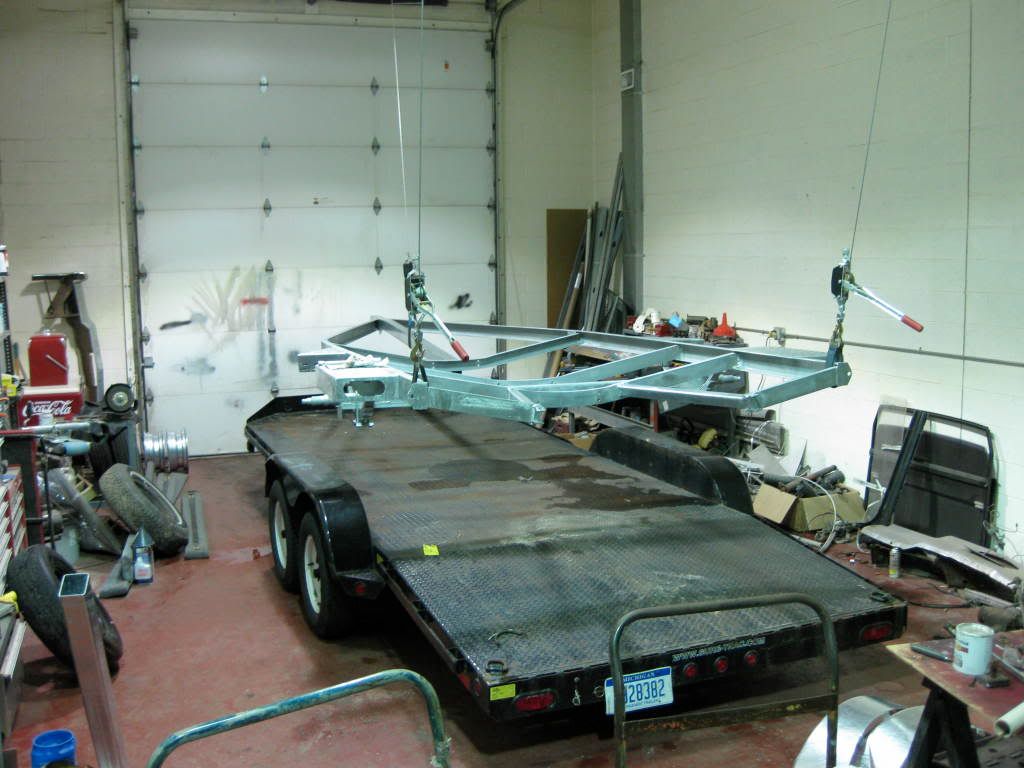
Got the chassis and pile of parts back from the galvanizer. Backed the trailer up and hoisted the frame up to a comfortable working height for me. Used the car trailer as a workbench to install the springs and axle, then pulled the car trailer out.
 I very quickly learned the downside of having everything galvanized. Holes got smaller and threads got bigger, requiring a lot of drilling and tapping. My wife got me the world's best birthday gift 20 years ago, a large Craftsman rethreading tap & die kit. I have used it extensively over the years but it came in most handy with this project. 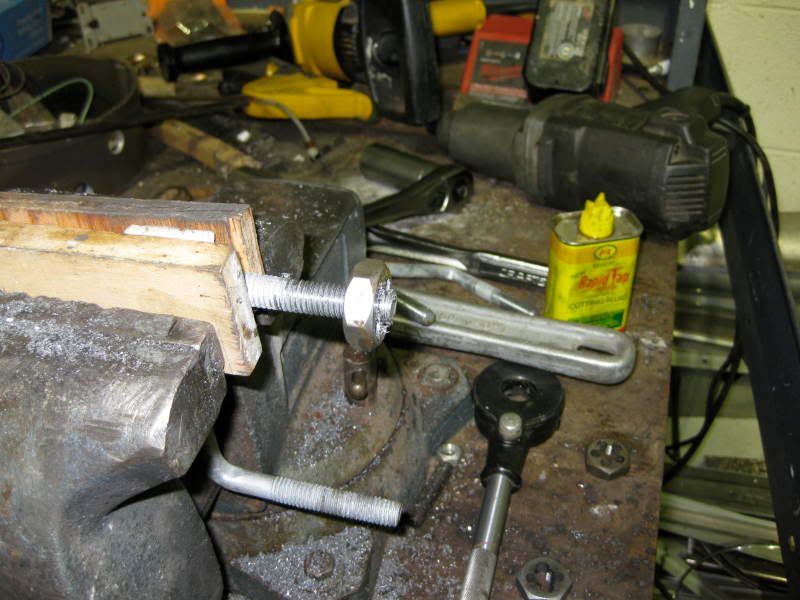 Since everything has a nice heavy coat of zinc, all of the surfaces were covered. The axle spindle has one wear surface and two bearing carrier surfaces that the bearings have to slide over. That meant that all the zinc had to be removed. Luckily the zinc shows white against the steel spindle so I was able to carefully sand it off using strips of sandpaper from sander belts. Tedious puts it mildly. 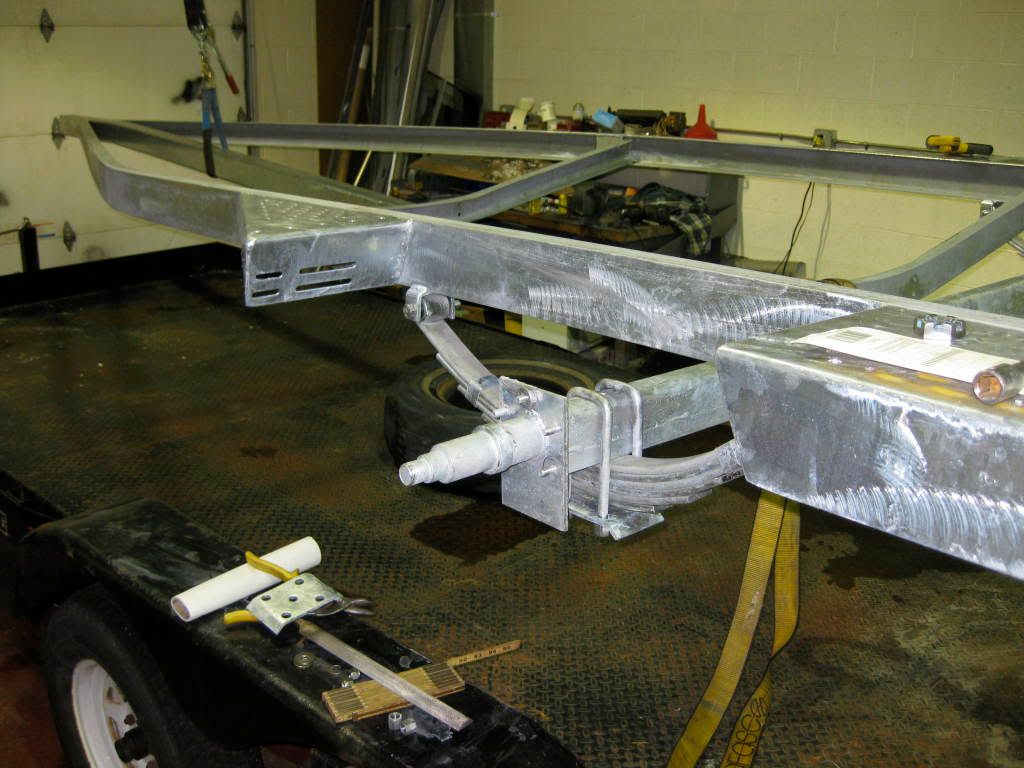 After many hours of hand sanding I was able to slip the bearings over the carriers. 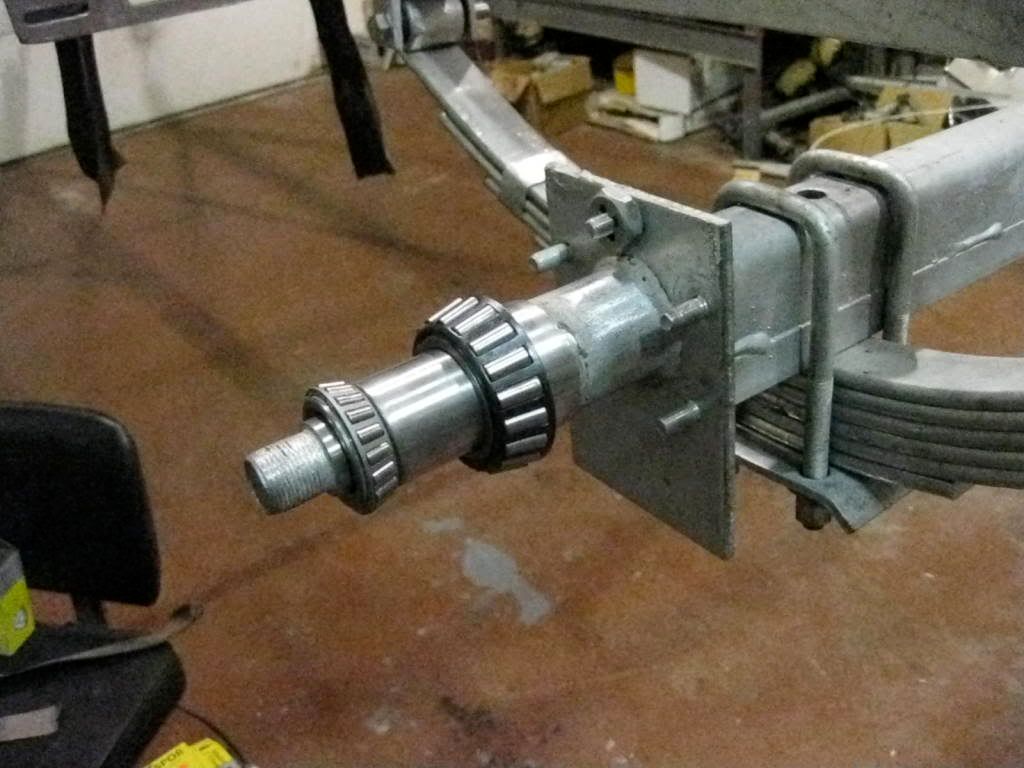 I then realized that my tap and die set did not have the 1"-14 die I needed to clean up the axle nut threads. I called a number of mechanic friends and no one had one. $55 and two days later one arrived from Graingers. In the mean time I installed the backplates. 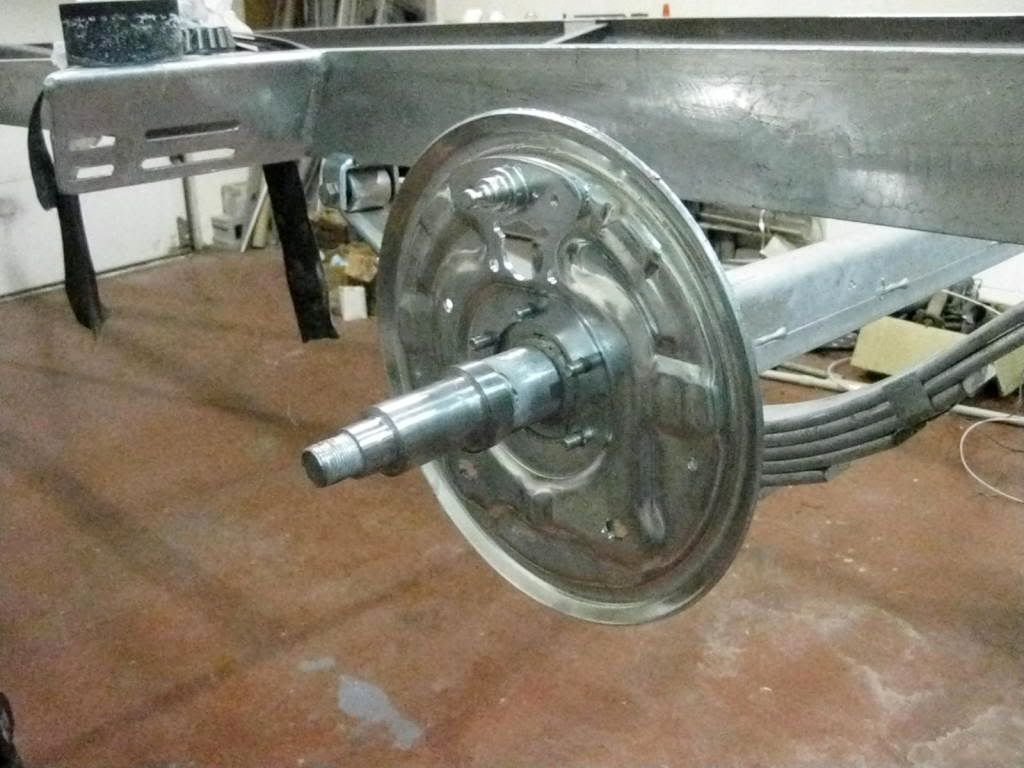 Then I reinstalled the brakes I installed last season. Unfortunately, I found that the machine shop that packed and installed the bearings didn't use marine grease and water got in. I should have noticed, but I didn't. The bearings and races were ruined. I only used it once last year. 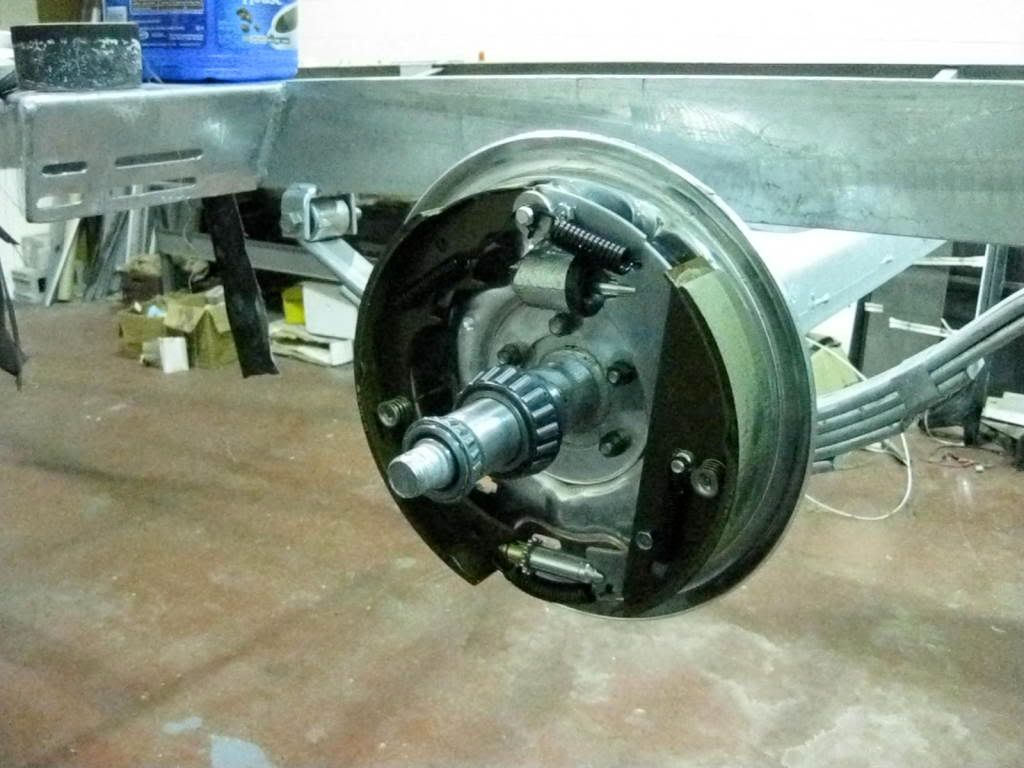 The die came in so I cleaned up the threads and drilled out the cotter key hole. 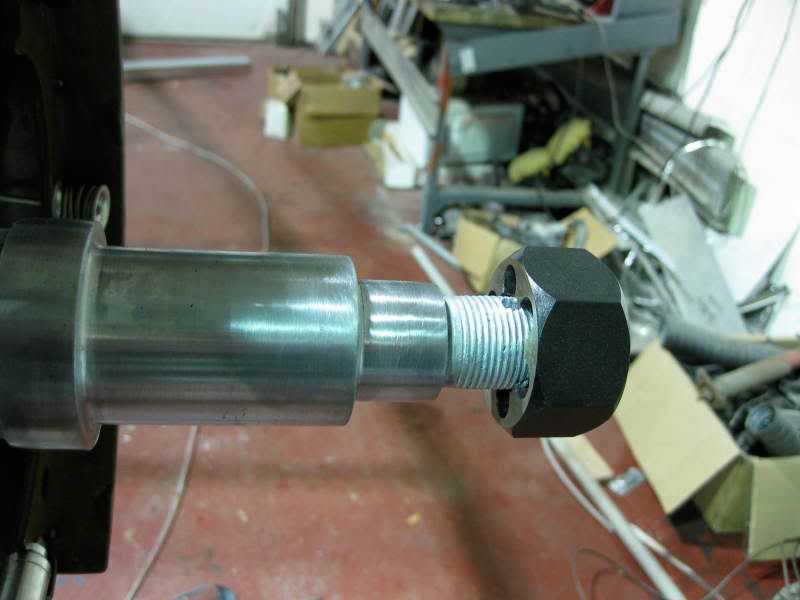 Got the tires remounted on the galvanized rims. When they pulled the rims out of the molten zinc it pooled on one side leaving a noticable mass. That mass had to be counterbalanced by a combination of stick-on and clip on weights. 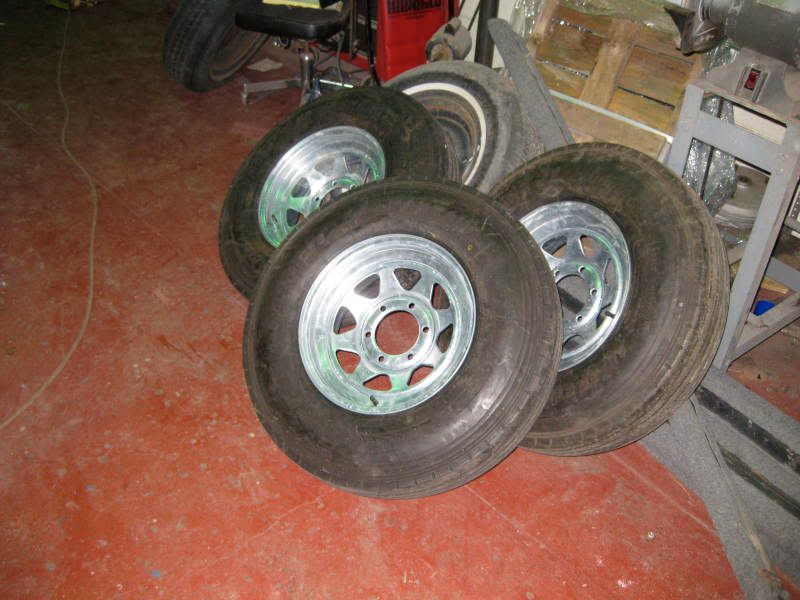 I went with all new stainless brake lines and fittings. InLine Tube is fairly local so I picked them up at their fab shop. Every place that the stainless might get damaged I installed a stainless spring wrap. The rest of the piping is secured to the frame with stainless clips and screws into tapped holes. I took great care to physically protect the brake lines. 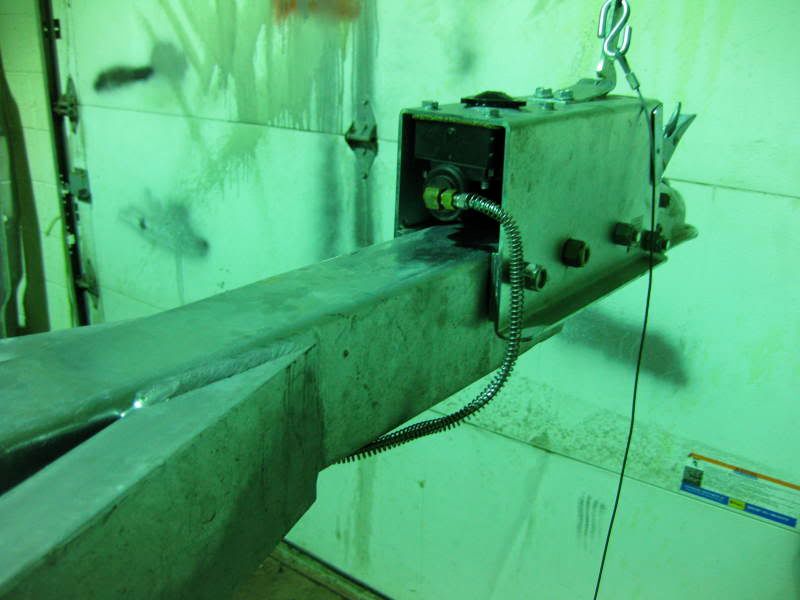 I reused the brass T-block and rubber hose installed last year. I was very careful duing assembly to try and not disrupt the zinc surface. Did I mention I hate rust? 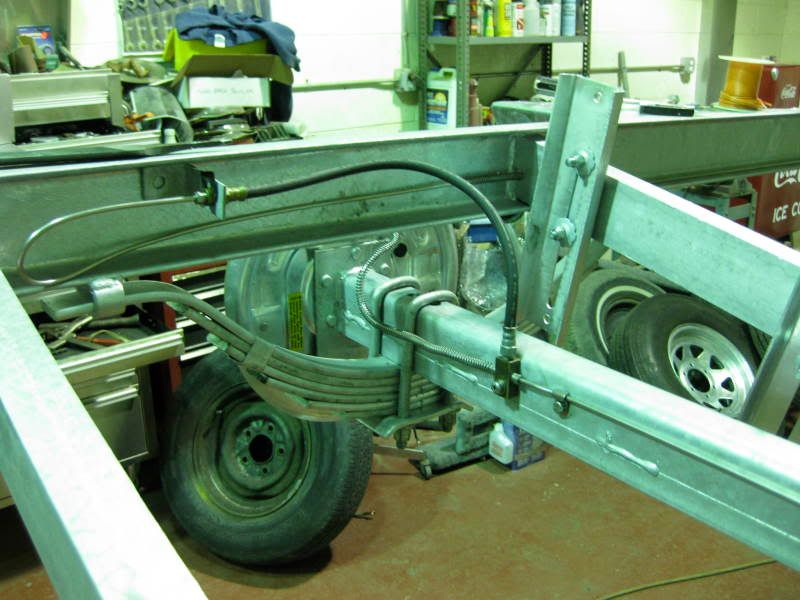
__________________
'56 Mark II convertible'51 Royal Spartanette'56 Chris Craft Continental '68 Lincoln Continental Limo '77 Town Car '55 356 Porsche Continental cabrio |
||
|
04-14-2009, 02:17 PM
|
|
|
Registered
|
Using a 3M grit pad I worked the surface of the zinc, smoothing and polishing it where it shows on either side of the conspicuity strip and on the top rail. You can see that most of the galvanized hardware is back in place. All of the U-bolts were galvanized but the rest of the nuts and bolts are all new stainless. I used nylocks instead of lockwshers. Metro Bolt is directly behind my building. He sometime sees me 2-3 time a day.
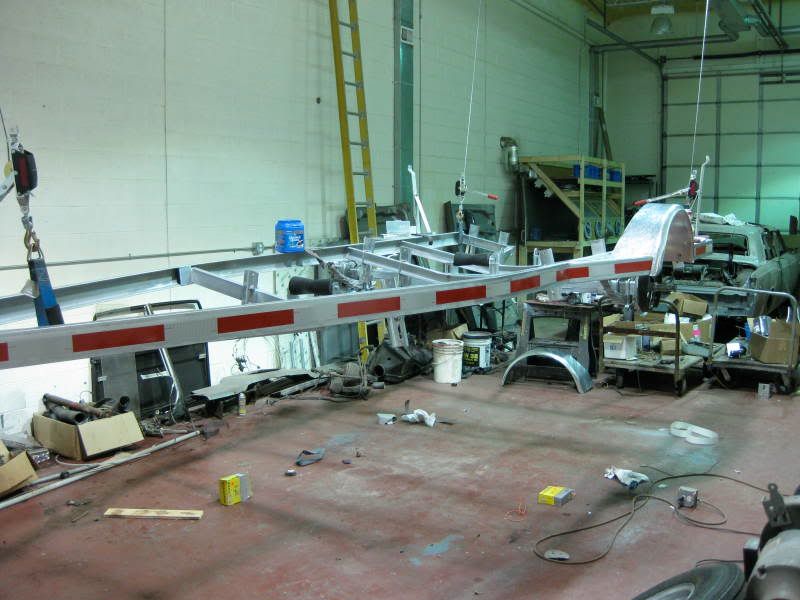 The fenders turned out great. They have that typical galvanized crackle finish, but they're shiny. 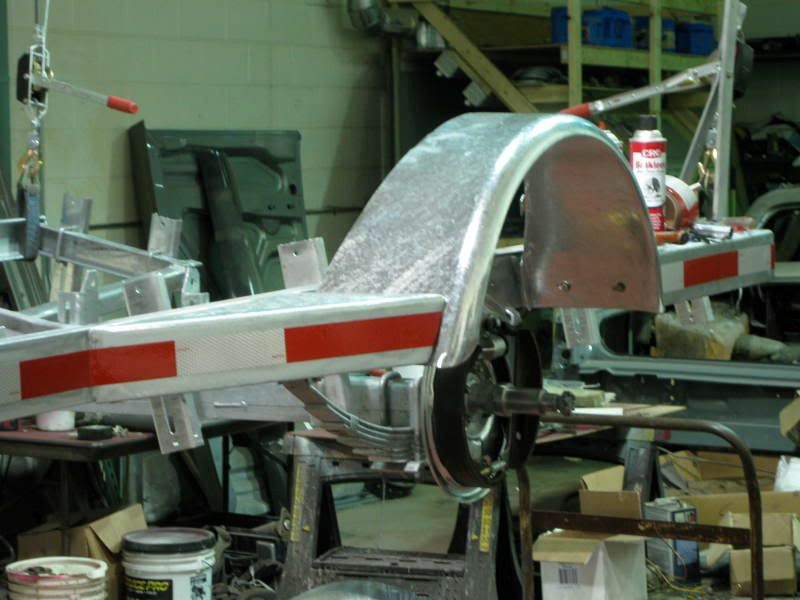 Another couple of days and I'll be test fitting the boat.
__________________
'56 Mark II convertible'51 Royal Spartanette'56 Chris Craft Continental '68 Lincoln Continental Limo '77 Town Car '55 356 Porsche Continental cabrio |
||
|
04-14-2009, 02:18 PM
|
|
|
Banned

Join Date: Mar 2007
Location: Ft.Lauderdale, FLORIDA
Posts: 2,813
|
Dude, the only problem with all this is that the boat, car, and trailer are now so totally beautiful that I don't know how you can justify putting this setup in the water!
Even your house is cool! The windows: The sectioning: is that inside or outside? In 1990 I found a 42 foot Chris Craft Catalina, a "bull nose" boat with a wooden hull. The man that owned it wanted $10,000 for it. I wanted it so bad I could taste it, but I simply couldn't afford it, and nobody would finance a wooden boat. Anyway, many Chris-Craft boats were built in Algonac, just south of St.Clair north of Detroit. I lived there at the time, and my dad had a wooden Chris Craft boat, but he sold it in the early 1970's. I remember riding in it in the Detroit river, near Grosse Ile, where we lived. Somehow, we didn't set the river on fire~ N Last edited by Normy; 04-14-2009 at 08:07 PM.. |
||
|
04-14-2009, 08:04 PM
|
|
|
Registered
|
Quote:
Inside, outside and in-between.
__________________
'56 Mark II convertible'51 Royal Spartanette'56 Chris Craft Continental '68 Lincoln Continental Limo '77 Town Car '55 356 Porsche Continental cabrio |
||
|
04-14-2009, 08:12 PM
|
|
|
Registered
|
Got a freebie powdercoat on the brake drums. Had new races installed. Paid particular attention to bearing grease packing.
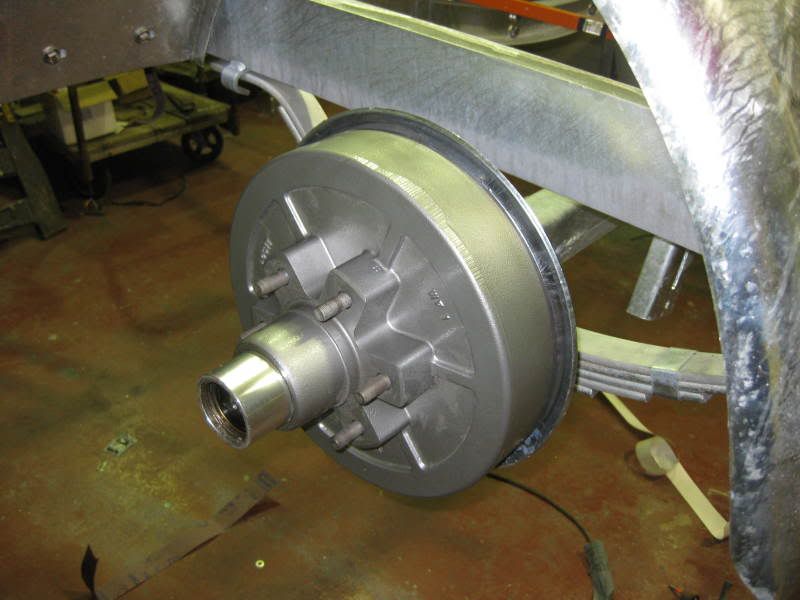 Installed a new wiring harness, careful to keep the wires out of harm's way. 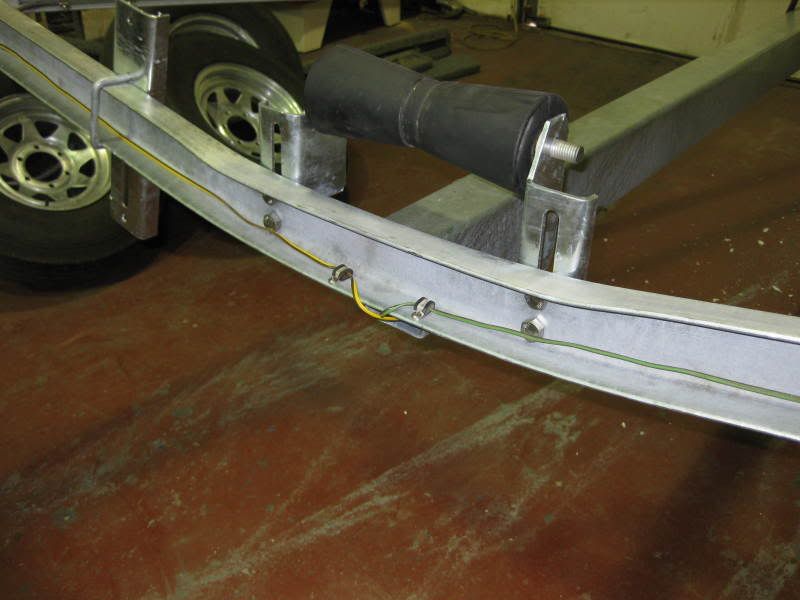 Back on the ground. 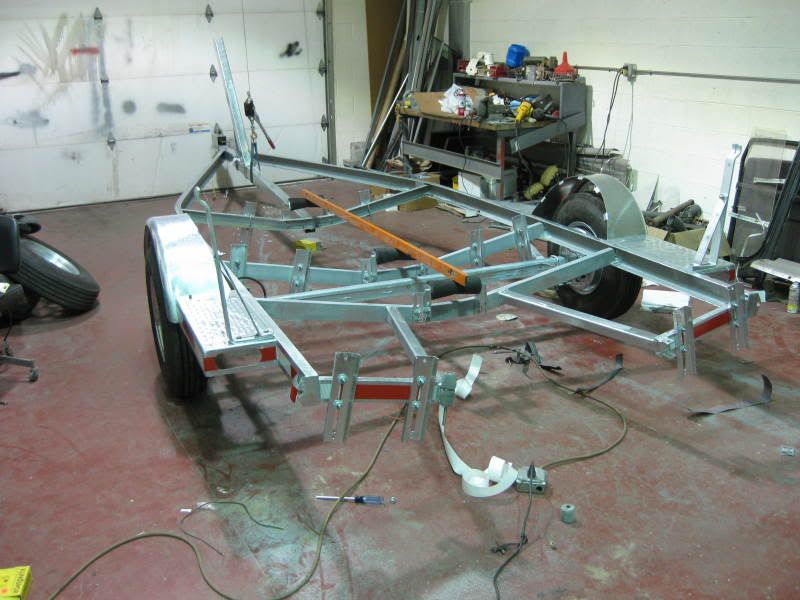
__________________
'56 Mark II convertible'51 Royal Spartanette'56 Chris Craft Continental '68 Lincoln Continental Limo '77 Town Car '55 356 Porsche Continental cabrio |
||
|
04-25-2009, 01:41 PM
|
|

|
|
Registered
|
I took great care to prevent the the wiring from shorting on the chassis. Wherever the wires passed through the cross-braces I sleeved them with heat shrink tubing and secured the wire on both sides to prevent chafing.
 All of my spices were done in a 3M product specifically designed for weathertight automotive applications. What kind of looks like a crimp connector is not. It's a ring of low temperature solder inside a heat shrink tubing with a waxy inner surface. You simply make a mechanical connection by wrapping the wires around each other. Then you slide the tupe over the splice, centering the solder ring over the center of the slice. Using a heat gun play the heat all around the tube. It will shrink and hold the wires. When it gets hot enough the solder tube will collapse and melt into the splice making it very strong and totally waterproof. 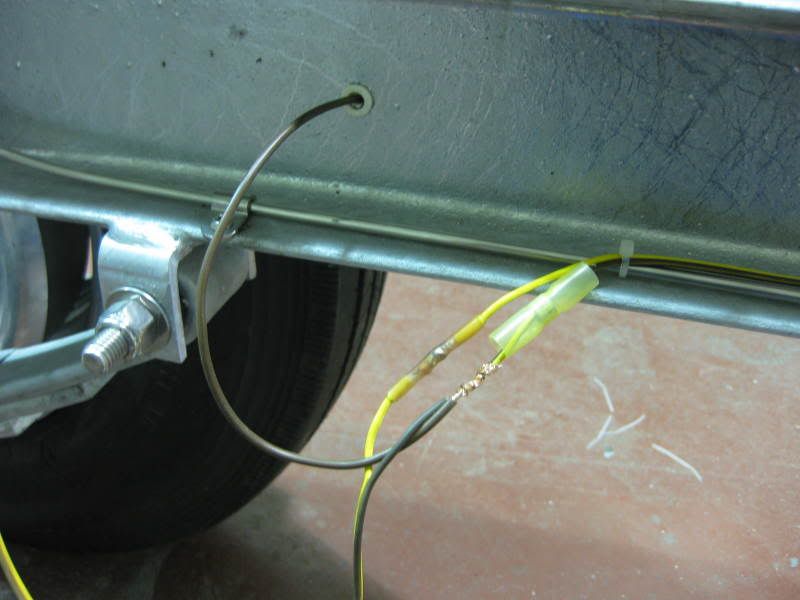 You can see the melted solder in this picture. 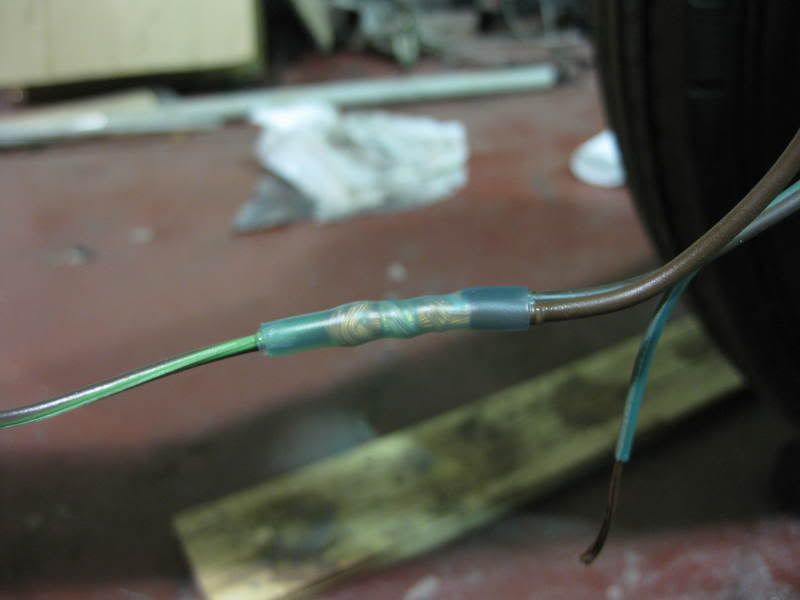
__________________
'56 Mark II convertible'51 Royal Spartanette'56 Chris Craft Continental '68 Lincoln Continental Limo '77 Town Car '55 356 Porsche Continental cabrio |
||
|
05-20-2009, 06:48 AM
|
|
|
Registered
|
I need to replace the rotting and cracked hull support boards. I remembered that I had stashed some clear cedar 2 x 12s in the shed. There were supposed to be used as stair treads for a deck staircase I never built. They've been there for 15 years and I've never used them. Unfortunately, the longest boards were 9 feet and I needed one board to be 11 feet long. They must have come from a huge tree as there's not a knot in sight.
I decided that the purpose of the boards is to distibute the weight over 10 points on the bottom of the hull and spread that weight along the length of the planks. Therefore, I could make a splice in the boards, creating one long enough for my purposes. I squared up the ancient Craftsman radial arm saw and squared up the ends of the planks. I cut the pieces so that they would end up the required 11 feet long. I fitted the radial arm saw with a dado head and set it for its widest path. I cut half-way through each plank 12 inches from the end, creating a one square foot lap joint. That created a lot of sawdust. 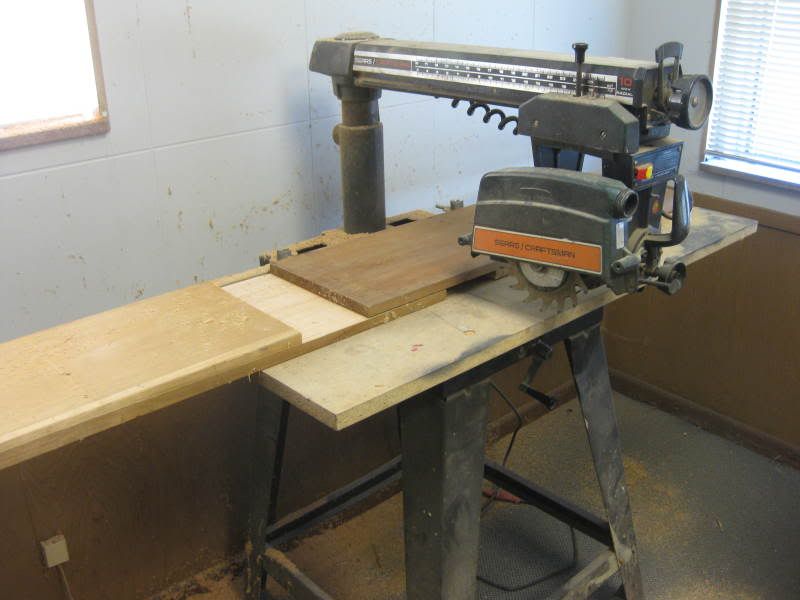 I then cut the boards to 5" wide, making them much easier to handle. 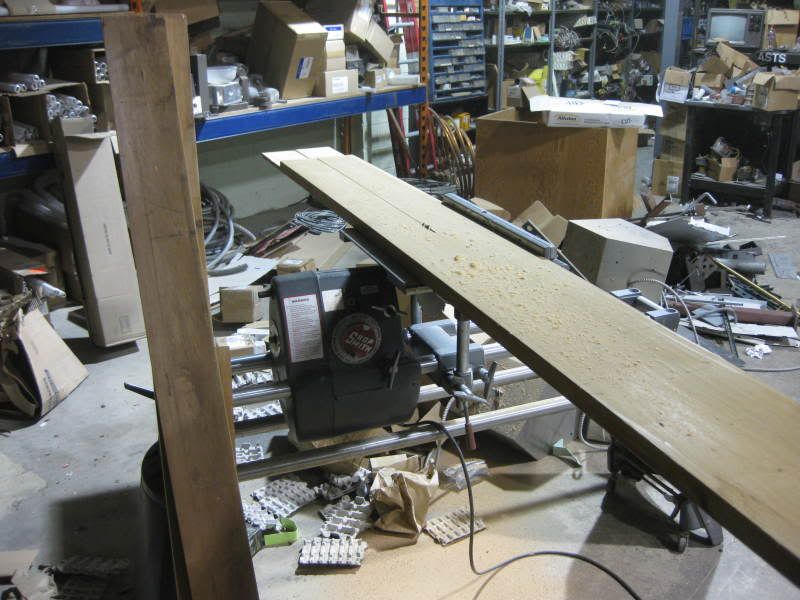 After test fitting I sprayed the mating surfaces of the joint liberally with water. Water is the catalyst for the Gorilla Glue. It expands and fills any joint creating an attachment that's stronger than the surrounding wood.  I clamped up the joints and left them to cure ovenight. 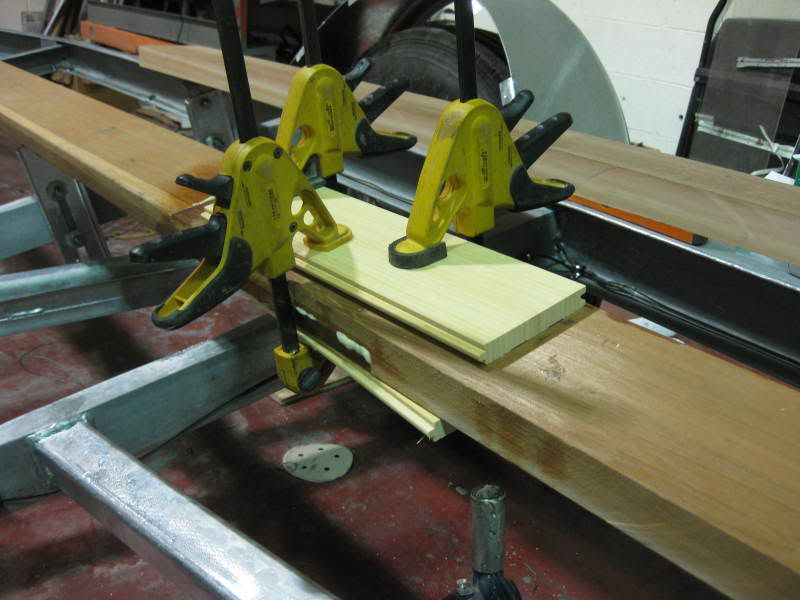 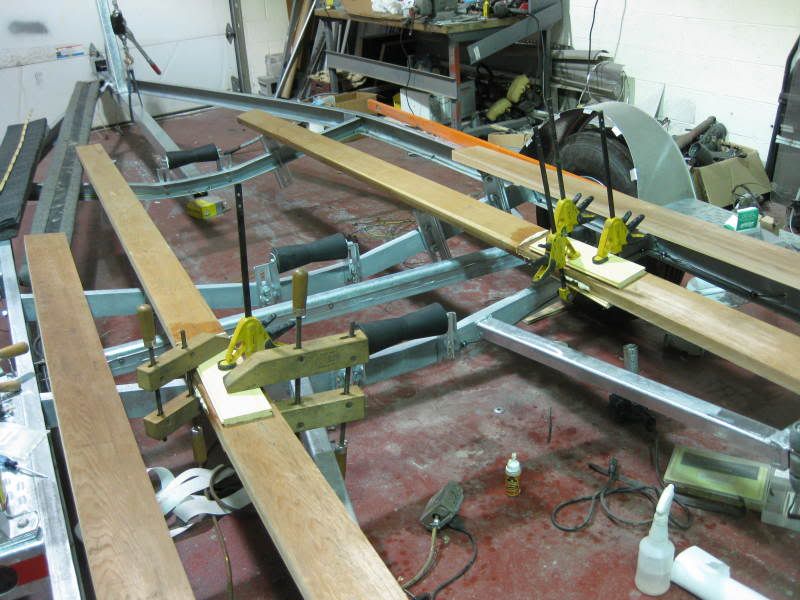 I needed to make some plywood fender well covers, like the originals. This material has a weatherproof face bonded to marine plywood. It's used for sign board so it can take paint and hold it. The plywood side will be carpeted with the same material as the hull supports. 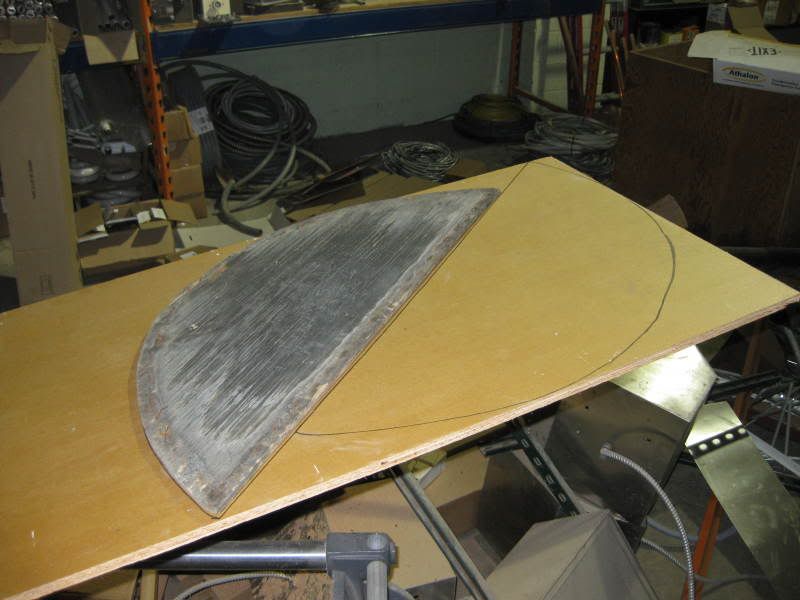 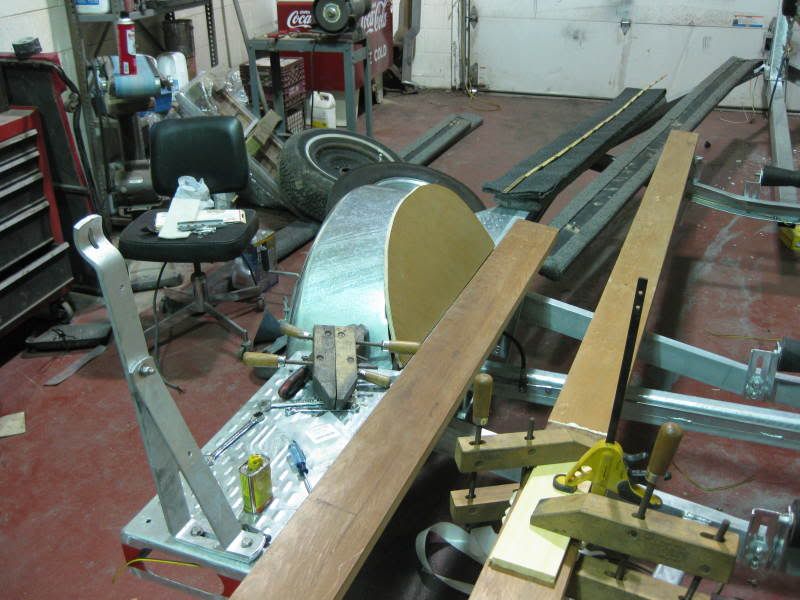 Lots of details.
__________________
'56 Mark II convertible'51 Royal Spartanette'56 Chris Craft Continental '68 Lincoln Continental Limo '77 Town Car '55 356 Porsche Continental cabrio |
||
|
05-20-2009, 06:49 AM
|
|


 Helga
Helga 1975 Porsche 914

 1974 Porsche 914-6 3.0
 1988 Porsche 911
 1970 Porsche 914-6
 1976 Porsche 914 2.0
 1987 Porsche 924S
 Black Beauty
 One of One
 Cabby (Last)
 "Toad Hall"
 1985 Porsche 944
 BFG
BFG 1955 CMC Speedster
 1981 Porsche 911SC
 B&B#2
B&B#2 Black Pepper

