|
|
|
|
|
| Author |
|
|
Registered
|
Parking Shoe Brake Spring Battle
Just before I injury myself trying to get the parking shoe brake spring on the adjuster side in, I thought I'd check to see with the pros if there are any good tips to make the insertion easier.
I'm fitting brand new springs (affectionately known as 901-352-932-10-OEM) and they are naturally very stiff. I'm having a tough time stretching them across the parking brake pads. Bit of heat maybe? |
||
 03-30-2020, 08:51 AM
|
|
|
Registered
|
Pain in the ass for sure. No easy way about it, and I don't think using heat would be a good idea as it may warp the spring.
I did this job a few months ago. I opted for a big flat/slotted screwdriver made by Irwin after trying with needle nose pliers for a while. Worked better as I used leverage to insert the free end into its slot. And i did run into the problem of using the JP Group pads instead of the Porsche ones. Had to spend an incredible amount of time grinding away at the ends, and I'm still unsure if I did it right.
__________________
Paul 1987 Carrera coupe Last edited by Ok here we go; 03-30-2020 at 09:27 AM.. |
||
|
03-30-2020, 09:24 AM
|
|
|
Registered
|
Thanks Paul. The other spring looks even worse!
|
||
|
03-30-2020, 09:28 AM
|
|
|
Registered
|
The way it worked for me was to put it all together first (short spring, top and bottom spring with retainer) and put on the long spring last. The short spring you can put on without effort by hand, its the long one that'll make you question even attempting this job.
With the long spring, hook it onto the bottom pad, then using the slotted screwdriver place the tip into the top hook of the spring and leverage it towards the upper hole. Let the tip of the spring catch the ledge and let the screw driver go. Push the tip of the spring in with the screwdriver. Done.
__________________
Paul 1987 Carrera coupe Last edited by Ok here we go; 03-30-2020 at 09:35 AM.. |
||
|
03-30-2020, 09:33 AM
|
|
|
Registered
|
On the side where the spreading occurs, I attach the spring into each of the shoes (upper and lower) at the same time, then install as a unit. For the other side (adjuster side), get some good needle nose pliers, or vice grip needle nose pliers, to grab and pull up to latch (attach spring to the bottom shoe first). You actually should attach the pins-with-springs (both upper and lower) before you do this last spring latch at the adjuster if you can.
__________________
'87 Carrera (3.4L) w/Turbo, full-bay IC; front bumper aux oil cooler, etc. '07 Boxter |
||
|
03-30-2020, 09:35 AM
|
|
|
Registered
|
haha I think we both said the same thing but in different ways
__________________
Paul 1987 Carrera coupe |
||
|
03-30-2020, 09:39 AM
|
|

|
|
Registered
|
Yup, I was writing when you were posting...

__________________
'87 Carrera (3.4L) w/Turbo, full-bay IC; front bumper aux oil cooler, etc. '07 Boxter |
||
|
03-30-2020, 09:45 AM
|
|
|
Registered
|
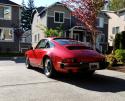
Thank you both - managed to get things sorted by partially removing the lower half (disconnect the spring that has the pin in it) and then bringing the halves close enough to get the non-adjusting side spring together. Learnt a lot for the next one!
Anyway, wanted to reward you both with a photo of a piece of the dream in progress 🙂 
|
||
|
03-30-2020, 10:01 AM
|
|
|
Registered
|
There are a few threads out there now regarding the brake shoes; if you didn’t use Porsche brand, make sure the rotor fits over the assembly now. I made the mistake of buying Dansk shoes, and they are NOT dimensionally correct. Had to grind on them to get them to close the diameter to fit the hub. PITA!
__________________
'87 Carrera (3.4L) w/Turbo, full-bay IC; front bumper aux oil cooler, etc. '07 Boxter |
||
|
03-30-2020, 10:12 AM
|
|
|
Registered
|
Noice! Looks so damn clean too
|
||
|
03-30-2020, 10:12 AM
|
|
|
Registered
|
Lyle, great tip - I'll make sure to slide the rotor over tonight to ensure a fit although I am a bit concerned now as I bought these shoes via Pelican Parts and they are Dansk!
Oh, and I realized I don't have the damned parking brake castellated end nut. Yet another order.. BTW Paul, reason it all looks so nice is clean is that besides the trailing arm, the little black plate and the bolts you see - everything is new. My car was a basketcase - left outside for a decade in a humid climate and had a rough latter half of it's life as it was raced. Basically everything I took off the car was very pitted, including lots of the bolts and other pieces. Having said that, I did blast those bolts you see, zinc coated and polished them. They ended up looking good as new. |
||
|
03-30-2020, 11:04 AM
|
|


 Lucille

