|
|
|
|
|
| Author |
|
|
Registered
|
'78 SC fuel distributor install
I just received my freshly rebuilt fuel dist. and WUR from Tony. The motor is in the car, and I was able to get the WUR installed no problem, FD is a little more challenging. The fuel lines that attach to the back side of the FD have very little slack. The line that attaches with the banjo bolt shouldn't be a problem, as there seems to be enough slack to attach it, but the other two will be tricky. Should I try and attach the lines while holding the FD in my hand, or should I install the FD onto the sensor pate housing, then attempt to attach the fuel lines? I was not the one who removed it initially, so I'm not sure of the proper sequence to put it back. Thanks for the input...Steve
|
||
 03-19-2025, 10:08 AM
|
|
|
Registered
|
I did mine with the Fd loosely fitted with the 3 screws so not to damage the piston. It was a tight fit but got there in the end. I also got my FD from Tony. Works a treat now! Good luck!
|
||
|
03-19-2025, 11:59 AM
|
|
|
Registered
|
Fuel Distributor Installation Sequence
Steve,
Do you remember how you removed the fuel lines from the fuel distributor? Putting it back is the reversed procedure. Install the FD safely on top of the AFM (air flow meter) using the 5-mm screws (3x). Be aware that the plunger of the FD could easily drop to the floor if you dont hold it correctly. One hand underneath the FD. Once the FD is installed correctly on the AFM, then start the fuel lines. There are three (3) fuel lines for FD-031 for the back side: 1). The fuel delivery line from the fuel filter goes to the left most connection (backside). 2). The main return line to the gas tank goes to the middle hole (backside). 3). The smaller hose with a banjo fitting goes to the right most hole (backside). NOTE: Fuel line #1 (above) has also the secondary fuel line for the CSV. This is the most challenging job for this project. Use an endoscope camera or similar tool to do this job easier if you need to install the CSV. The rest of the procedures are easy and simple. Just take your time and be patience. Tony |
||
|
03-19-2025, 12:21 PM
|
|
|
Registered
|
Quote:
|
||
|
03-19-2025, 12:25 PM
|
|
|
Registered
|
Quote:
|
||
|
03-19-2025, 12:27 PM
|
|
|
PCA Member since 1988
|
Foot stomp what Tony said about the plunger falling out of the FD. Be very careful how you handle it until it is in place on the air metering housing.
__________________
1973.5 911T with RoW 1980 SC CIS stroked to 3.2, 10:1 Mahle Sport p/c's, TBC exhaust ports, M1 cams, SSI's. RSR bushings & adj spring plates, Koni Sports, 21/26mm T-bars, stock swaybars, 16x7 Fuchs w Michelin Pilot Sport A/S 3+, 205/55-16 at all 4 corners. Cars are for driving. If you want art, get something you can hang on the wall! |
||
|
03-19-2025, 01:51 PM
|
|

|
|
Targa_PB_78_SC
|
Be careful tightening your banjo bolts. They can snap and the little buggers are pricy. I suggest you get them snug and check for fuel leaks by running the fuel pump, and then more snugging on any leaking. I had to source a new back line from Len the last time I messed with mine (from CSV to the back of the FD) as my old line sprung a leak.
Tiny screw drivers (very short ones) are very handy for placing the top three screws in.
__________________
BareRearedRookie Last edited by mike sampsel; 03-20-2025 at 04:29 AM.. |
||
|
03-20-2025, 04:27 AM
|
|


 911SC
911SC

 67 Datsun stroker 2000
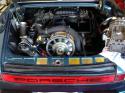 Porsche Targa 1978 SC
