|
|
|
|
|
|
|||||||
 |
|
|
LinkBack | Thread Tools | Rate Thread |
| Author |
|
|
Registered
Join Date: Jun 2005
Location: Central Florida
Posts: 136
|
Hi all. To continue, I'd like to show how I added the oil cooler lines to the 71 Targa. The passenger side door jam had major issues. While I was wire brushing away the paint, I was uncovering huge amounts of bondo.
 and  I couldn't believe that someone would of filled in that much missing metal with bondo, it was coming out like big rocks! Luckly I had a spare lower wing that I was able to use, along with a new door jam. The rocker panel also had a few holes in it.  I wanted to add a oil cooler up in the front fender, so I got a 28 tubed brass oil cooler. The oil lines came from Mocal (Bat) they are the corrigated stainless steel lines that they sold a few years back. They are nice and fairly easy to install and they hold the bends that you put in them.  One of the hard things to make was that bracket support that the two lines go through because the bracket mounts to a curved surface. After making the one and installing it, I decided I needed more support for the lines inside of the rocker. Since the bracket was so labor intensive I settled with using two 'adel' clamps that before the install I bent them to look like they were made to hold two pipes.  From Stoddard, I was able to get a nos 911S passenger fender joining panel that has the cutouts for the oil lines. Through another company I was able to get the grommets that you see. Before the final install, I put the door back on to make sure there were no interference problems. At the rear, behind were the door jam goes,  I cut the back off of the 'stiffener' so the oil lines can be routed like they're supposed to. Then, with a lot of care, I welded the piece I took off back onto that 'stiffener'. I don't have an 'after' picture of the door jam after I installed it, but basicly, I used the large spot welder on the seam along the door opening and on the outer contour with the rear wing, I used aircraft "cherry" rivets every inch. I used the rivets to avoid to much heat to the fender line.  Finally, I wanted to show you all what you see in the engine compartment. I had to weld up two large holes on each side where the a/c lines "used" to go. I don't plan on installing any a/c. But anyone that is trying to add an oil cooler to an early car that never had the oil cooler will appreiciate the time and effort it took to aquire all of the neccessary hardware. I saw and sent back a lot of stuff that just was not good enough. I would get the oil line 'consoles' that had enough corrosion (because of dis-similar metal) that they wouldn't seal. Also if I'm trying to make a car that will last, why use parts that are already worn out? Here is were Cy from Doc & Cy's came through again. He sold me a brand new, never used console, the thermostat and all the lines but one are new also. The total cost for everything including the lines, the adapters (AN to Metric), and the tubed cooler was just over $1000.00. I hope you all found this interesting. On my next post, I'll show you the rear seat area replacement and the repairs done to the corners of the windshield frame. If you missed any of the posts I made, here is a link to the last one, once there you can even go back to the first entry of this story. Flank's 71 Targa restro - Roll over loop replacement Thanks for reading.
__________________
Flank |
||
 06-09-2005, 02:01 PM
|
|
|
Registered

Join Date: Feb 2004
Location: Quad Cities IA
Posts: 1,238
|
Incredible work, very nice and looking forward to hearing more.
__________________
Jay '08 E350 Wagon '74 914 gone '72 T gone |
||
|
06-09-2005, 02:25 PM
|
|
|
Home of the Whopper
|
Where in central Florida are you located? I am just north of Orlando in Casselberry. I'd love to come check out your project.
__________________
The wave is not the water. The water merely told us about the wave moving by Buckminster Fuller |
||
|
06-09-2005, 02:35 PM
|
|
|
Registered
Join Date: Jun 2005
Location: Central Florida
Posts: 136
|
BK911,
I live in Clarcona, in north west orange county. It would be great if you wanted to come out and see the work first hand. Now that the chassis rust repairs are done, I have the body of the Targa mounted to a rotiserie that I made. Those pictures will be coming soon. I'm posting the work in the order I did the repairs, taking pictures from the photo albums, scanning them and then making these threads. Look for more to come later today. Thanks.
__________________
Flank |
||
|
06-10-2005, 07:54 AM
|
|
|
Moderator

Join Date: Dec 2001
Posts: 9,569
|
Flank, damn good post. I have to do this to my '66 eventually and your detailed shots are a big help.
__________________
'66 911 #304065 Irischgruen 96 993 Carrera 2 Polarsilber '81 R65 Ex-'71 911 PCA C-Stock Club Racer #806 (Sold 5/15/13) Ex-'88 Carrera (Sold 3/29/02) Ex-'91 Carrera 2 Cabriolet (Sold 8/20/04) Ex-'89 944 Turbo S (Sold 8/21/20) |
||
|
06-10-2005, 08:19 AM
|
|
|
Registered
Join Date: Jun 2005
Location: Central Florida
Posts: 136
|
Hi all,
Has anyone else used this type of oil line? I hope they don't develope stress cracks. It's not coming back out if it does. I plan to terminate the ends up by the oil cooler and use the short factory hoses to actually make the connection to the cooler. Thanks.
__________________
Flank |
||
|
06-14-2005, 07:02 AM
|
|

|
|
I would rather be driving

Join Date: Apr 2000
Location: Austin, TX
Posts: 9,108
|
Flank, your work is truly inspiring. I love your posts. And I thought I had a bunch of work to do on my car.
your documentation of hiding the oil lines is first rate! I wanted to do this when I replaced my outer rockers but I did not realize how they routed up through the hinge post and vertical fender support. It's all clear now. maybe on the next car. 
__________________
Jamie - I can explain it to you. But I can not understand it for you. 71 911T SWT - Sun and Fun Mobile 72 911T project car. "Minne" - A tangy version of tangerine #projectminne classicautowerks.com - EFI conversion parts and suspension setups. IG Classicautowerks |
||
|
06-14-2005, 07:07 AM
|
|
|
Registered
Join Date: Jun 2005
Location: Central Florida
Posts: 136
|
Novak,
Hi, it's funny you mentioned 'hide' the oil line. At the time I did this, I thought of building a 'stealth' oil cooler fan that would fit inside a 'fake' battery. I would of made some shrouding out of rubber. The back side of the passenger battery box would have holes that would blow air onto the oil cooler. The fan that is inside of the 'battery' would get its power from what would look like the positive lead for the battery. That was an idea anyway. With the engine that I have to go into the car, a 2.2S motor with no A/C, I'm hoping just the 28 tubed cooler will be enough. Thanks.
__________________
Flank |
||
|
06-14-2005, 07:31 AM
|
|
|
Registered

|
More, please. The more detail the better. I'm just about to do the seat pans and A-pillar repair now that I have all of the metal. Thanks.
__________________
Bill G. '68 911 Ossi Blue coupe |
||
|
06-14-2005, 07:32 AM
|
|
|
Registered
Join Date: Sep 2002
Location: Erie, PA
Posts: 450
|
Very nice, I'm impressed!
|
||
|
06-14-2005, 07:39 AM
|
|
|
Registered
Join Date: Jun 2005
Location: Central Florida
Posts: 136
|
Hey Fanatic, Some advice I could give you on doing any of the sheet metal repairs, more than half of the battle is just having the stuff you need to do the job right. It's not a lot of stuff (yeah right), here's a list of the basics:
1. A 220v mig welder with the gas bottle. 2. A welder mask with the auto-darkening lens (I never got one), on the last of my repairs, I was welding up into the foot wells and there is no room to use the old standard mask that you nod your head to make it drop, so I'd just suffer and do it. But I sure wish I had one of those lenses. 3. You'll need lots of clamps, about a half dozen 1" 'c' clamps, a few larger, and a few larger yet. Also get a few of the visegrip 'c' clamps. 4. You'll need lots of 'clecos', you can get used ones from aircraft surplus stores. They come in four sizes determined by their color, the smallest are silver (#40), then copper color (#30), then get all the black ones you can (#21), brass color (#10) and copper again (1/4"). The best size is #21 and #10's a #!0 is the same as 3/16", this is a good size for your 'immitation spot welds'. There are at least two types of clecos. There is the type that you use a special plyers (cleco plyers) and there are the ones that use a wing nut. You'll need both! While the smaller ones (with the plyers) are great for holding things together, the ones with the wing nut really allows you to crank them down and draw that metal in tight, which is what you want. When I use a 'draw cleco' (the type with the wing nut) I like to add a steal washer that the cleco goes through, so when I tighten it, it helps to distribute the load. 5. You'll need a spray can of 'lay-out dye', this blue ink is used for seeing the scribe lines that mark where you want to cut or drill. You'll also need a scribe. 6. You'll want all kinds of lights. The more you can illuminate where you are working, the better. 7. Also you'll want a hand grinder that take the 4" or 4 1/2" grinding wheels. A straight die grinder is also very usefull. These are the basic starter tools that I would recomend. I'm sure the folks out there can add to this. Good luck!
__________________
Flank |
||
|
06-14-2005, 03:09 PM
|
|
|
Registered
|
I have everything but 4 and 5. Regarding welder, I have a 110v Miller Cricket (MIG w/ CO2) that I got from my father-in-law--I hope that will do. Please post a ton of pics and advice. Guys like you and Zeke are invaluable to a lot of us.
__________________
Bill G. '68 911 Ossi Blue coupe |
||
|
06-14-2005, 03:20 PM
|
|

|
|
Registered
Join Date: Jun 2005
Location: Central Florida
Posts: 136
|
Dude I have to be carefull my head doesn't swell up to much with all of these nice comments. But really I'm just your average joe. I can't find my third photo album (the most recent). It has pictures of the finished front suspension pan installation. Plus a killer rotiserie that I made and now have the body mounted to.
But I really appreiciate all of your comments.
__________________
Flank |
||
|
06-14-2005, 03:44 PM
|
|
|
Registered

Join Date: Mar 2005
Location: Austin, TX
Posts: 2,271

|
I can only hope I'll be able to do some of the stuff you are doing, Flank. My car is going to need it!
__________________
Matt J. 69 911T Targa - "Stinky" 2001 Boxster "Stahlgewehr" |
||
|
06-14-2005, 03:51 PM
|
|
|
Registered

Join Date: Dec 2004
Location: Novato, CA
Posts: 3,064
|
Quote:
ianc
__________________
BMW 135i. Nice. Fast. But no 911... "I will tell you there is a big difference between driving money and driving blood, sweat and tears." - PorscheGuy79 |
||
|
06-14-2005, 07:27 PM
|
|
|
Registered

Join Date: Feb 2003
Location: Black Rock, CT
Posts: 4,352
|
So Flank, great stuff! How'd it all work out? Can you point me to the threads I probably missed?? Thanks!
__________________
Jake Gulick, Black Rock, CT. '73 yellow 911E , & 2003 BMW M3 Cab. Ex: 84 Mazda RX-7 SCCA racer. did ok with it, set some records, won some races, but it wore out, LOL[/B] |
||
|
05-04-2006, 12:25 PM
|
|
|
Registered
Join Date: Feb 2003
Location: Black Rock, CT
Posts: 4,352
|
So Flank, great stuff! How'd it all work out? Can you point me to the threads I probably missed?? Thanks!
__________________
Jake Gulick, Black Rock, CT. '73 yellow 911E , & 2003 BMW M3 Cab. Ex: 84 Mazda RX-7 SCCA racer. did ok with it, set some records, won some races, but it wore out, LOL[/B] |
||
|
05-04-2006, 12:31 PM
|
|
|
Registered
Join Date: Jun 2005
Location: Central Florida
Posts: 136
|
Hey Mr. Lateapex, Thanks for the compliment. Here is a link to my latest posting. It covers the rotisiserie I made. Flank's 71 Targa - 911 rotisserie pictures - plus plans so you can build your own.
Then there is one on the front suspension pan installation. Flank's 71 Targa - Pictures of the finished suspension pan installation Also here is one on the Chassis Jig I made to do the suspension pan work. Flank's 71 Targa restro - Home made chasis jig - pictures Then here's a good one on replacing most of an inner fender. Flank's 71 Targa restro - inner fender repalcement From these, you'll find links to carry you back farther. I think there are about six 'installments'. If any one needs any info, I'd be glad to help. Flank
__________________
Flank |
||
|
05-04-2006, 01:28 PM
|
|


 Olive
Olive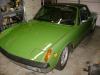 The Turtle
 Ruby
Ruby Brownie
