|
|
|
|
|
| Author |
|
|
6 cylinder symphony
|
Wow - this is an excellent thread.
Sub'd.
__________________
'84 3.2 Targa '89 964 Coupe "What do you mean NEXT project?" - my wife |
||
 02-20-2012, 07:50 PM
|
|
|
Registered
|
ok, amazed by this thread. just read the entire thing in awe.
what is the status now? go to the paint shop and take a pic of the car now. also, when this is all done, please post a video of the car driving. great job!
__________________
tk 08 911 C2S - Sold 13 Audi A4 14 Jeep SRT 500HP |
||
|
02-21-2012, 06:05 PM
|
|
|
Registered
|
So I have to post something...
Great news on the painter
") ...uh, not so much. I know he is alive, I know he has been sick, I know he had some issues, and I know he has been busy...just not on my car. But apparently he hasn't sold it... yet, so there is still hope. I gave his second in command an ultimatum...decide very quickly if a 30 day turnaround is possible, or I come pick up the car AND my deposit. I got a "golden" assurance from number two guy that I was on the front burner...and as a bonus, a 50 picture file of the early 60s Cadillac Hearse that he had just finished. I don't know if it is the fact that this car just got pushed in front of me and got completed to boot...or the fact that I really am not interested in a thread on restoring a hearse. ...uh, not so much. I know he is alive, I know he has been sick, I know he had some issues, and I know he has been busy...just not on my car. But apparently he hasn't sold it... yet, so there is still hope. I gave his second in command an ultimatum...decide very quickly if a 30 day turnaround is possible, or I come pick up the car AND my deposit. I got a "golden" assurance from number two guy that I was on the front burner...and as a bonus, a 50 picture file of the early 60s Cadillac Hearse that he had just finished. I don't know if it is the fact that this car just got pushed in front of me and got completed to boot...or the fact that I really am not interested in a thread on restoring a hearse.Hey, maybe it's me. I guess the guy who owns and had the hearse restored could have very well looked at my lonely ignored targa in the back of the shop and commented, "why would somebody pay to have that old piece of German crap painted"...hey, to each their own I guess. I'll save you guys the drama and not post the link of the hearse restoration  Moving on (rather slowly for me), I have made engine progress on the "engine that if the rebuild could have problems...it will". I ended up using (unbeknownst to me) an AC 70.4 crank. Short and sweet, it had the std pin hole for the pulley, but also a protrusion (nub...opposite of pin hole). I didn't want to grind the nub off, but the pulley that came with the crank was a dual AC pulley. Here's the link to the post on how to remedy to pin-nub problem... 70.4 crank with ac...bummer This is what I had that fit the crank with the pin-hole nub...  This bugger weighs 1780 grams, vs the single standard pulley that weighs 380 grams. The disadvantage of the double pulley is it's weight. The advantages of the double pulley are 1) it fits the crank, and 2) it is 133mm outer pulley lip vs 116mm outer pulley lip. Not to go into great detail, but in a thread a while ago using my green 74 2.7 911...by swapping the fan pulley to a smaller pulley, and swapping the crank pulley for a larger pulley, I increased my fan speed by a factor of 1.3...which by itelf seems like no big deal, but my 2.7 no-front-coolered engine temps dropped 35+ degrees. I am at 8100 ft and the air is thinner up here. So to go from 245 down to 205 degrees coming up the mountain is huge. As this car is smaller displacement, I will run the big crank pulley, and start with the standard fan pulley size up top. As I recall, that will still give me a 1.18 fan speed advantage...if I need more cooling, I'll replace that pulley with the smaller guy. I gave the double pulley to a friend with a massive lathe to turn down to a single pulley...before and after   I owe him a favor...never could have done that on my "vertical mill". Ready to go...this guy is still big, and weighs in at 800 grams, just over twice the weight of the std crank pulley  
|
||
|
03-08-2012, 06:12 PM
|
|
|
Registered
|
Shroud repairs
Nothing fancy about the shroud. I will keep it simple...it is a basic T shroud, with the riveted tan air duct. I have no intent in attempting to convince people that the engine is an S by painting the shroud red. If anything, I want to downplay the the "stroking" of the engine, and coresponding compression boost/ E cam upgrade...by keeping it stock looking. So the shroud-duct looks like crap after 40 years of oil, grease and an ill attempt at rattle-canning the beast.
 No way to strip the fiberglass ...other than by hand, same for the plastic duct. Just a scotchbrite and paint thinner fumes...mmm. But they did clean up and with prime and paint   Ready to reassemble (re-rivet)  Engine is making its way with nice fresh tin...new single pulley not shown yet.   I will close this up hopefully this weekend. As new engines go, this one should be pretty. And with the deadline my painter now has...this and the trannie will be the first items to be installed to create some room. Keep yer fingers crossed Speedo |
||
|
03-08-2012, 06:34 PM
|
|
|
Registered
|
Looking Good

__________________
1975 Carrera Coupe #391 1980 924 11k orig miles 1974 914 2.0 LE Creamsicle 1979 Dodge Lil Red Express 2015 Wrangler Unlimited, and a bunch of bicycles. |
||
|
03-08-2012, 06:36 PM
|
|
|
Registered
|
baby steps....
I reached the point where I needed to push the painter more than a little. I had given him and his number 2, three idle requests, and one not so idle warning. The snow has melted, my trailer is accessible and I have no problem hitching up the trailer and going to save the car. Once verbalized, I got a commitment that the car would be done by the 31st. That would be 17 days, or 408 hours. I'm glad the pressure is not on me
Well, well...this looked like crap when inspected closely    Here is a comparison of the variations on ductwork  I hate the cleaning, but love the refinishing...primed, then back together.   If the month end commitment is realistic...the engine needs to be completed, the tin and engine mount assembled and carbs mounted with linkage. For the moment, it is springtime in Colorado and the garage doors can be opened...although winter is just around the corner. Speedo Last edited by speedo; 04-14-2012 at 07:19 AM.. |
||
|
03-14-2012, 09:38 PM
|
|

|
|
Registered
|
This is a great thread. Are you a Wizard of some sort?
I can barely re-install the screws to hold down the whale tail (and I managed to get the AC condensor to fall off and hit me in my face in the process). I wish that I had some of your skills. Last edited by 4495; 03-23-2012 at 07:45 PM.. |
||
|
03-19-2012, 09:28 AM
|
|
|
Registered
|
A month passes quickly...
Deadline for painter has come and gone. He rustled a bit to suggest activity, and made me make a few phone call to paint suppliers...to see if they could match the code exactly. On a different thread I took some heat for not shooting Gasurit. Hey, he is experienced with his delivery method (PPG) and they (apparently) can match the code perfectly...vs other suppliers having some issues with "tone" that would need to be converted. He is also fastidious about metallics, claiming that the 5 or 6 characteristics (don't make me repeat them) that are important, are less than impressive with "forced" tone conversions/replacements. The painters in the audience will no doubt nod their heads approvingly...me on the other hand just wants to see a panel painted so I can see some freak'in progress. In the meantime, I have not been idle. I sent a car off to storage after reworking/replacing front brake cylinders (356) and brought the "menace" home so that I could more effectively prove to potential buyers that the car did in fact exist...and could be test driven. He is moving on to a happy new owner, and I now have a space in the shop...briefly to enjoy. Whoohoo
The engine rebuild from hell continues...while waiting not so patiently for the targa to come home (hopefully) painted. Seriously...the number of pitfalls that have arisen during this rebuild have been mind-boggling. Again, to save the heartbreak of frustration, (and of course avoid the personal humiliation of repeated ignorance), I have several peripheral threads that sorted through the miriad of rebuild complications...the biggest of which was the lack of valve to piston clearance using my 2.2 T pistons and the E cams. Despite numerous assurances from people much smarter than me...kids it didn't work on my engine. The alternatives to gain that precious extra .25mm ranged from 1) dismantling the long block down to the case to machine the valve relief in the tops of the pistons, 2) ditto on the un-build down to the case to add another cylinder base gasket, to 3) which I chose...which involved less dismantling...and the replacement of the E cam back to the T cam. Still a PIA, but in the end, I gave the engine the valve to piston clearance it wanted, and kept my CR at...well whatever it will be...9+:1 something. The alternator ended up being a replacement Valeo internal regulated beast which also caught me offguard as it had no...zero...nada markings on its face for reconnecting the necessary wires. Some quick help from a couple board members and we got that resolved. Lastly...(for the moment)...I spaced that my dizzie was one of the fine Italian recruits called Sgt Marelli. Uhh...no thanks, so I had to source a good Bosch locally to add to the soup. One of my carrera tensioner studs pulled from the housing necessitating a quick helicoil    The cam timing process for the ump-teenth (sp?) time  Oh yeah...guess I am missing a few exhaust studs too...hadn't noticed that before, unless they are just falling out  While I wasn't looking, the Italian dizzie snuck up onto the engine and acted like it belonged...I caught it.  Starting to look like I am going to actually get this puppy built 
Last edited by speedo; 04-14-2012 at 06:26 AM.. |
||
|
04-13-2012, 11:02 PM
|
|
|
Registered
|
Whadaya mean there are no markings on the back of the alternator?
That was the response from the local electrical shop that rebuilds these things. He thought I was crazy..."they all have markings...look more closely". Yeah, all except Valeo alternators. I figured that the large right hand top post being bigger was the lead from the battery, just needed to ascertain the other two.
 I completely unwrapped the engine wiring harness to evaluate the condition of the typically dried/burnt/cracked wires and replace as needed. Which led to the question of where do I fit three oil sensors on an engine that has locations for two. I have always checked and reinstalled the oil pressure "idiot" switch, the oil temp sensor, and oil pressure sensor on previous rebuilds. I didn't understand why on this engine...I only had the oil temp sensor and the oil pressure sensor. After coming up with a couple alternate ways to incorporate the idiot switch into my oil plumbing...none of which were perfect, I ran across a buddy at a local shop that informed me that on 71 cars, there was no factory idiot switch, just oil temp and pressure sensors. The gauge had the idiot lights to accomodate the e-brake, and alternator, but not oil pressure. New one for me. So, I cleaned up the harness and motored on...ignoring the soon to be forgotten oil pressure switch dilemma. My "second in command" agreed with the assessment...hard to argue with a hot female mechanic dressed to the nines   Coming together...newly refinished shroud and air duct look great. Finally get to show off the cleaned up valve covers  And fresh yellow zinc  The carbs get to dee the light of day again. It's been a long (un-necessary) haul to get this far...although I think it was John Dougherty that commented that the engines that fight the hardest during the build process, usually end up being the best runners. Let's hope so. Tightened up...   Nice looking pair of Zeniths...that looks pretty stock for a lowly 2.2 T engine...right?  Tomorrow I finish up the wiring harness and add the newly plated engine tin, and clutch peripherals. I picked up a new pair of SSIs which will be here by next weekend, so the muffler and heat exchangers will be the last details. I also need to restore a grill this weekend, as I couldn't find one to plug and play. Supposed to snow tomorrow...oh good. Chance to continue the detail stuff in anticipation of the chassis returning with a light blue flavor to it. Link to the painters website and up dates...or not. Hey, at least the car hasn't been stolen off his lot...yet. http://www.streetdreamz-usa.com/waldner/ Speedo Last edited by speedo; 04-14-2012 at 07:21 AM.. |
||
|
04-13-2012, 11:30 PM
|
|
|
Registered

Join Date: Oct 2005
Location: Idaho
Posts: 2,357
|
Speedo,
You have an impressive amount of perseverance - esp. through your struggles with the motor and painter. . . I would've been reduced to a puddle of tears and frustration long ago. Most of my wrenches would likely now be imbedded in the walls of my garage's drywall after having tasted flight! It is looking great however! Here's hoping the waters become less stormy and you have a tailwind for the duration. . . Tom
__________________
'74 911 Red Sunroof Coupe, 3.6L, etc... '76 912 Yellow SPEC 911/911CUP |
||
|
04-14-2012, 05:46 AM
|
|
|
Registered
|
Tail wind would be nice...that would be from the west...
When in fact the wind is from the south east and brought this with it...
 It was sunny and 68 degrees this morning...we're due for 7 inches tonight. Better than the tornados they had out in Kansas. Wrapped up the bulk of the engine today. Wiring harness complete. I need to get some wire bundle holders to hold the harness in place especially where it come through the throttle linkage on the left back side of the fan. Tin fits well.   Linkage and bell crank look good plated.  Cork gasket came for the fuel tank sender so that is now complete.  I should have worked on the grill for the targa, but I have several diassembled grills that all need to be restored. I felt guilty jumping ahead...and this early SWB grill is at the front of the line. Lots of pieces...where do they all go?  Whew...they are numbered.  Still, it is a lot of work to clean and straighten. These early SWB grills have eight studs when original...and they are very weak aluminum. Usually when they are removed, the remover is too heavy handed and the studs are twisted off. I like to remove the vertical splines that have (also very weak) aluminum acorn nuts on the ends and separate all the pieces. Then after fabricating the new steel studs, reassemble. Here we go a bit later...   And the fresh studs.  As I don't have a SWB car needing a grill, this will be FS soon. Next up is the 2.2 grill...also completely diassembled. Completely different repair process though. Repairing grills...hmmm...yes I am a bit bored. At least it's not knitting. Speedo |
||
|
04-14-2012, 06:25 PM
|
|
|
Happiest when Tinkering
Join Date: Jun 2007
Location: Missouri
Posts: 4,688
|
Take a look at your right side cam and tensioner oil line the angle I see in the picture suggests you may have an issue later on down the line that line looks like it is on the verge of a kink. It could be just the picture though.
__________________
" Porsche there is no substitute" I always liked that saying. Air cooled is the only way to go! 76 911 C.R.A.P. Gruppe #2 BIG time TURBO C.R.A.P. Bitz EFI/EDIS Now MegaSquirt 3 76 Blazer also restored by me |
||
|
04-14-2012, 06:47 PM
|
|

|
|
Gorilla
Join Date: Jul 2009
Location: Stuttgart, Germany
Posts: 573
|
Just read all 9 pages. Nice work, I am looking forwarded to digging into my own soon.
Subscribed... Last edited by 95avblm3; 04-15-2012 at 01:48 PM.. |
||
|
04-15-2012, 01:45 PM
|
|
|
Registered User
Join Date: Mar 2011
Posts: 865
|
looks great, you have come a long ways on that engine from last weekend!!!! subd
|
||
|
04-15-2012, 01:58 PM
|
|
|
Registered
|
Took a drive Friday to meet the painter at his shop...
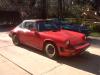
Look what I found!
 Said she was lonely and wanted to come home...nobody was paying attention to her. Painter showed up late, all appologetical and claimed he had an emergency (No Way ) in the morning and the panels he was going to paint to show me the difference between two products...didn't get painted. He promised to meet me in the morning with the panels done. Waving my arms and yelling would accomplish nothing...so I did what my parents used to do with me and bad report cards. I looked at him very sternly, paused and said "Miguel...I don't think you are working at your potential"..."and you are fricking grounded until further notice" Then I did my best imitation of "storming off"...he wasn't fooled. The reason I am giving the guy more than enough rope to hang himself is...I have a shred of hope that my showing up at his shop is a signal that I am done. And truth be told...if I pull the car, there is no way I will ever see my deposit $$. Good news is he showed up the following morning...on time with two excellent examples, and we (son and myself) both voted for the PPG option. Wow...very,very nice. He shot the examples on the hood of an old Alfa, and offered it to me as a peace offering. I declined..."just paint the damn car". Got back to the shop and pulled out the jewelry  I love these things. Like getting wheels back from getting them refinished...expensive but oh boy are they worth it. Upside-down you go...(like a rottiserie for engines)  This engine is getting heavier and heavier the longer it stays on this engine stand. Muffler was waiting patiently in the green house, where else would it be?   Such nice fabrication work on these SSIs. I always buy the MFI variants as they can be used for carbs or MFI...whereas the non MFI versions can only be used for carbs. Clean for now.   Gotta remember to cap off the warmup spout on the drivers heat exchanger top. |
||
|
04-29-2012, 07:55 PM
|
|
|
Registered
|
If you get bored easily...or don't like repairing decklid grills, pass on this...
Me however, I don't bore easily...while I am waiting for my car to get painted, and I have these damn grills that I disassembled, and haven't made much headway on finishing. They take a lot of time...and well, time is something I have. I also have the close cousin of time, and that happens to be extra elbow grease. One of these is pertinant (correct grill for the car) and the other is a SWB grill (yet another I ended up with) that is much like a puzzle...lots of small pieces. Which one first...70-71, why not.
These are notorious for the studs being broken. Most of the time when they are offered for sale, more than one stud has been sheared, and the studs are "captured at manufacture" by being sandwiched in between the 1-3-5 verticals. The verticals consist of a topside that has the 11 fins that the vanes clip onto which is riveted to the bottom support... thus capturing the six studs. When the studs shear, if someone doesn't want to drill out the three rivets and replace the studs, the easy fix is to drill down through the top plate, remove the broken stud and replace with an allen bolt of same thread diameter. I will replace the studs correctly by drilling out the rivets and separating the plates. The plates separated, sandblasted and painted as well as the mesh (debris protectors) that are affixed to the bottom of the grills.   The horizontal vanes waiting to be cleaned and reassembled  Fresh dome head aluminum rivets ready to go to work  And the mother of all hand riveters (standard issue aircraft) and the dies   Works much better having three hands with this beast...one hand to support what is to be riveted, and two hands to operate the riveter. Before...  During...  And after with a fresh stud  Wow...exciting, time for more popcorn. Last edited by speedo; 04-30-2012 at 07:52 PM.. |
||
|
04-29-2012, 09:41 PM
|
|
|
Registered
|
Goes much quicker...
Actually not...remember that "three hands thing"? I'll fast forward. The original grill had the rivet heads painted the color of the verticals...black. I like the aluminum color of the rivets ( I can always paint them later if I change my mind)
Partially assembled...remember, the verticals have to capture the new studs and the ends of the mesh before being riveted. And, the spacing between the bolt (stud) holes needs to be exact to match the holes in the decklid, so, not so random   Slowly taking shape. Center rivets in the verticals need to be hand riveted as the jaws are not deep enough to use the tool. I use one or two of the vanes to help with positioning  Starting to assenble the vanes   And the important part...the reason why we took it apart in the first place, fresh long studs  Sort of a before and after...although this is another 70-71 grill missing vanes with broken studs...and the finished grill for comparison  Side view complete  The SWB grill is far more complicated as it has three times the parts...plus rivets and acorn nuts. You guys are bored...we'll save that one for later. Maybe I'll have some paint pics in a day or so and we can get back to the targa.  Speedo Last edited by speedo; 04-29-2012 at 10:17 PM.. |
||
|
04-29-2012, 09:58 PM
|
|
|
Bird. It's the word...
|
Never bored watching your work Lars

__________________
John Forcier Current: 68L 2.0 Hotrod - build underway |
||
|
04-30-2012, 12:08 AM
|
|
|
Tired Member

|
one word...Artisan
__________________
Glenn Daily Driver - '78 911SC RoW Endurance Racer - '85.1 944 Street/Track Project - '86 951 Race Project - 944 Spec |
||
|
04-30-2012, 04:20 AM
|
|
|
sancho
Join Date: Sep 2008
Posts: 129
|
This is awesome please keep going.....
__________________
1980 SC targa blue-SOLD 1986 Carrera wide body white |
||
|
04-30-2012, 07:06 AM
|
|


 Hester
 1974 Porsche 911 2.7
 1975 911 Carrera
 1984 Porsche 911 Turbo Look
 1984 Porsche 911 Turbo Look
 1969 Porsche 911T 2.7RS Spec with Webbers
 "The Porsche"
 Endurance Racer
 944 Spec "The green car"
 Scalded Cheetah?
