|
|
|
|
|
| Author |
|
|
Registered
|
My first tune-up
Hello All!
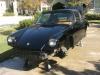
I've been a Porsche owner for just over 3 years now. I decided that it was time for me to dive in a little deeper, so I got the tune-up kit from Pelican and have dug in. I've got a few questions, and I have seen an incredible response to just about any question posted. Here's my baby  I've been getting some really good help from my local club, but I wanted a common place to post my progress and pics. Performing the following: 1) oil/filter change 2) air filter change 3) fuel filter change 4) new distributor cap and rotor 5) new spark plugs 6) valve adjustment I've drained the oil, removed the belts, replaced the alternator belt (old belt was slipping when I tried to move the crankshaft), removed the spark plugs, made room for the valve adjustment. When I removed the fan pulley, I was surprised to find 0 shims in the middle of the pulley. When I replaced the belt, I put 2 shims in thinking it may need some since it's a new belt. It slipped worse than the original, so I moved them back to the spare stack. Is that unusual to have 0 shims in the center of the pulley? I just got things to where I was going to check the intake valve for cylinder #1. I spent several minutes trying to get the feeler into the gap, but I couldn't. I'm pretty nervous about screwing things up (no money to replace stuff!), so I wanted to see if it looks like intake valve #1 indeed needs adjustment. Here are the pics:    In the second image with the rotor, I think I've circled what should be cylinder #1, but it's not lined up like I thought it should be. Any ideas? Thanks in advance for any help! Rob 1986 911 Carrera Coupe |
||
 10-18-2010, 10:16 PM
|
|
|
Registered
|
More Info/Questions
Here are some pics of my plugs:
  I thought they looked good enough, but didn't know if there was anything subtle that I should be looking for. Rob |
||
|
10-18-2010, 10:26 PM
|
|
|
Registered
|
Hi Rob,
l'm yet to have a tinker myself as l've had my 89 coupe for only a couple of months ,but have you looked at our hosts tech info center. Go to 911 tech articles then to 911 valve adjustment backside method looks a lot easier good luck and enjoy 
|
||
|
10-18-2010, 10:26 PM
|
|
|
Registered
|
Gerry,
I've read both articles, and I've decided I'm gonna try the "normal" way. I'm also going to look through the forum to find any info on the "back side" method too.
__________________
- Rob '86 911 Carrera Coupe |
||
|
10-18-2010, 10:49 PM
|
|
|
Senior Advisor

|
With a (perfect) motronic engine, plugs will always look great so no need to check them, use NGK or Bosch normal copper plugs (the $2.45 ones) No need for the super duper ones with our ignition system. Push the belt in on one side when cranking the engine by hand, don't try to make the belt tighter by removing shims. It only has to turn the alt. over, too much tension might harm the bearings in the alt. The distributor can be installed anywhere as long as #1 is aligned at TDC. Also, the dissy turns 1/2 the crank so you get 2 TDC's per revolution of the distributor. when you think it's at TDC, wiggle the rockers to see there is no tension on them. This is the correct TDC. And yes, the mark on the dissy should line up but doesn't have to (hard to fathom that right now but that's ok). Buy a shop manual.
__________________
08 Cayenne Turbo Last edited by James Brown; 10-19-2010 at 02:10 AM.. |
||
|
10-18-2010, 11:24 PM
|
|
|
Registered
|
What about 101 projects for your porsche 911 ( Wayne Dempsey), l just ordered it also brought a workshop manual cd rom on line for about $30 AUS/US don't worry l'm enjoying the exchange rate while l can

|
||
|
10-19-2010, 12:35 AM
|
|

|
|
Registered
|
The back-side method has been well covered here and is an acceptable way of adjusting your valves. Looking at the rocker you want to adjust, rotate the engine until the cam lobe for that rocker is pointing toward the engine away from the foot of the rocker. The foot is now on the "back-side" of the cam. Loosen the adjustment nut and back off the adjustment screw so you can get the feeler gauge between the adjustment screw and the top of the valve stem. Adjust the screw so there is drag on the gauge when you move it in the gap; not too much drag and not too little. It's a feel thing.
Once you have the screw where you want it, turn it in just a little to take up the stretch the lock nut will produce when tight. The stretch will open up the gap just a little. Tighten the lock nut and check the gap by moving the feeler in the gap again looking for drag. You'll know if it's too loose or too tight. Move to the next rocker. A Bentleys would be a wise purchase. Lindy |
||
|
10-19-2010, 06:32 AM
|
|
|
Registered
|
I never did manage to get the feeler into the gap, I had to loosen the adjusters, put the gauge in, and then snug up. The guys with earlier cars have piles more room than I do with the 3.2, almost all cylinders require a fair bit of patience to sort out (at least for me as a first timer on this engine). I found that once I was happy with the feel (drag of the feeler) (locked of course), I removed the gauge. After that, I tried to move the rocker up and down, sometimes I didn't feel that "micro" movement necessary, so I would do it over. A shade too loose is better than too tight. Good luck
|
||
|
10-19-2010, 07:23 AM
|
|
|
Registered
|
I've got the 101 Projects, so I will look at that too. I also have the Bently book, and it is pretty good. What type of shop manual did you get on CD? $30 sounds like a reasonable deal.
I also purchased a DVD that goes through all of this step by step, but it wasn't as specific as I needed for this particular part. It's at Yellow Cap Garage - Homepage. I think it was around $40.
__________________
- Rob '86 911 Carrera Coupe |
||
|
10-19-2010, 07:29 AM
|
|
|
Registered
|
No Shims in the middle of the fan pulley?
Should I be concerned that there weren't any shims in the middle of the fan pulley? That means that I cannot adjust it tighter in the future. I didn't have a problem with the old one, but I'm not sure how old it was (I've had the car for 3 years).
I look forward to getting back into the garage this evening.
__________________
- Rob '86 911 Carrera Coupe |
||
|
10-19-2010, 11:57 AM
|
|
|
abides.
|
Mine only uses one shim behind the pulley. I use the service free conti belts from Pelican and I never have to adjust the tension.
Also, that is the normal place for the distributor rotor at TDC.
__________________
Graham 1984 Carrera Targa |
||
|
10-19-2010, 01:07 PM
|
|
|
Registered
|
Thanks! I'll keep trying to get the feeler into the gap. Maybe I'll move on to the next one just to see if I can get the feel.
Things were working well prior to this, so I'm not trying to "fix" anything as far as I know. I just thought it was time to check and make any adjustments, if necessary.
__________________
- Rob '86 911 Carrera Coupe |
||
|
10-19-2010, 03:15 PM
|
|
|
Registered
|
Modify my gap tool?
Hello,
After looking some more at the tech article for the valve adjust procedure, I noticed that the tool being used is a bit different than the one I purchased. Here is the one in the article:  Here is the one that I purchased:  Besides the color being different, the one in the article has angles more like 90 degrees than the one I purchased. It seems like it's harder to get mine in there to test the gap. I don't want to break mine, since I don't have another one, but I think I'm going to try and bend it more like the one in the article.
__________________
- Rob '86 911 Carrera Coupe |
||
|
10-19-2010, 05:41 PM
|
|
|
Friend of Warren
Join Date: Oct 2000
Location: Lincoln, NE
Posts: 16,500
|
The tool you have will work just fine. Just be patient and have some spare blades for when you bugger up the first one. And keep checking the screws that hold the blade in. They will come loose and you don't want one falling in the engine!
The distributor is in the right position. Remember the plugs fire before TDC so the rotor should be before the mark on the distributor when the crank timing marks are aligned. Don't worry about the fan belt. Dump the expensive spark plugs. Next time you buy some get NGK BPR6ES. Will work just as well as the expensive ones.
__________________
Kurt V No more Porsches, but a revolving number of motorcycles. |
||
|
10-19-2010, 06:31 PM
|
|
|
Registered
|
Frustration!
My aim was to try and get the feel by finding a valve that felt like what is described in all the literature that I have looked through, but I haven't found one yet.
I fiddled with #1 intake for the longest time, and finally broke down and loosened everything up. I was able to get the gauge into the gap, though the pivoting foot didn't help much. With the feeler in the gap, I tightened the screw and then the nut. When I removed the wrench, the rocker moved out. It was like the weight of the wrench was compressing the rocker down to the feeler. I loosened things up again and tried again, this time making sure that the rocker was already all the way out. I think I got it, but I wanted to make sure. I wanted something to compare it to, but the #1 exhaust, #6 intake, and #6 exhaust were all too tight to get the feeler into. Is it "normal" for all of the valves to be too tight? I don't know when the last time this was done, but I suppose that whoever did it may have been biased toward it being pretty darn tight. I don't know. I am really frustrated right now. This shouldn't be taking anywhere near as long as it has. Tomorrow night, I'm just going to do what the book says and forget about trying to find a "baseline" to go by. 1) Check it 2) If it doesn't feel right, loosen it up completely 3) tighten it up to where I think it feels right. That's all I can do. Thanks to everyone for listening and offering advice!
__________________
- Rob '86 911 Carrera Coupe |
||
|
10-19-2010, 09:03 PM
|
|
|
Max Sluiter
|
I have always heard that valves get tighter with mileage because the valve seat slowly erodes and the valve then sits deeper in the head. You want to make sure the valve is closed long enough to transfer heat so you open the gap to make less time the cam opens the valve. Tighter clearances can make more power in race engines.
__________________
1971 911S, 2.7RS spec MFI engine, suspension mods, lightened Suspension by Rebel Racing, Serviced by TLG Auto, Brakes by PMB Performance |
||
|
10-19-2010, 09:11 PM
|
|
|
Registered
Join Date: Apr 2008
Location: Miami
Posts: 961
|
Don't be discouraged. If its your first time, it is difficult, especially with the engine in the car. Your three steps are a good way to go. If it becomes too hard to check a particular valve, you might have to skip that step and start loosening. Get a flashlight to help you see what you are doing.
__________________
1979 SC, Slant nose wide-body cab conversion. AEM Infinity EFI, COP, supercharged! |
||
|
10-19-2010, 09:14 PM
|
|
|
muck-raker

Join Date: Jan 2009
Location: Coastal PNW
Posts: 3,059
|
Don't get frustrated, you're doing fine.
It is common for the valve train to tighten up between adjustments, especially if it has been over 15K miles since your last adjustment. It is also fine to loosen the adjustment nut so you can slide in the feeler gauge. Gently tighten the adjusting screw finger tight, then do the same with the lock nut. You are right on track. The goal is to be able to tighten that stuff to the point where it creates a slight (but tight) drag on the feeler gauge. You will get the feel for it after a few adjustments. And, the next time you do your adjustments, it will probably go twice as fast.
__________________
STONE '88 Cabriolet, using EP Slick 20w50 partial synthetic Snake Oil...just as Rommel intended.  Deny Everything; Admit Nothing; and Always Make Counter-accusations 
|
||
|
10-19-2010, 09:20 PM
|
|

|
|
Registered
|
Rallen, first of all don't pay attention to the time it's taking, quality work is the goal. The 3.2 (with stock heat exchangers and exhaust) offers very little room to see and maneuver properly. Even if you could see well, fitting a very fine bit of "foil" into a space that is supposed to be snug already.... um well, I'd like to see how other guys manage it. The smaller, earlier engines have so much more room, you could probably "pry" the valve down a tad to enable you to slip the gauge in. In my car, some of the valves are done exclusively by feel.... I certainly have no vantage point to see the space between the rocker and the valve. My first tune up took the whole weekend, valve adj, filters, oil, non stock wires, and a few small sundry items. Although I was amazed at where the time went, I was happy with the outcome. Like the others have said, you're doing fine...
|
||
|
10-19-2010, 10:01 PM
|
|
|
Registered

|
Stick with it Rob! You'll get it. First time I did mine, I was fortunate that I had the engine out. It's time to adjust mine again and this time the engine is still in the car. My only saving graces are that I removed all the heat and A/C junk years ago and I have to take my premuffler off anyway, so things should still be fairly easy to get to.
Can't offer too much help in how to go about it. Not sure I can explain over the innernets how I learned.
__________________
Make sure to check out my balls in the Pelican Parts Catalog! 917 inspired shift knobs. '84 Targa - Arena Red - AX #104 '07 Toyota Camry Hybrid - Yes, I'm that guy... '01 Toyota Corolla - Urban Camouflage - SOLD |
||
|
10-19-2010, 10:24 PM
|
|


 First Porsche

 Grenade
 Grenade
 1984 Porsche Carrera Targa
 1971 Porsche 911S
 1984 Porsche Targa 3.2L
