|
|
|
|
|
|
|||||||
 |
|
|
LinkBack | Thread Tools | Rate Thread |
| Author |
|
|
AutoBahned
|
Yet Another Boring Hot Rod Rgruppe Car - Part VI, Interior Cabin & Controls
The interior cabin is, of course, the reason that a vehicle exists at all. It is where ergonomics or the lack thereof is most critical. You could put someone in a simulator and if done properly, they would have no way of knowing they were not in a car. You hear the good sounds here but also the bad noises. You operate the vehicle and experience all the control inputs here. So, the cabin is pretty important.
All your various senses are brought to bear here it is where you look out the windshield, hear the engine, feel the steering and shift knob, and smell the oil being deposited on the windshield in a nice fog. The cabin is where Walter Mitty had his fantasies 
|
||
 04-04-2010, 03:55 PM
|
|
|
AutoBahned
|
And the cabin is also where you will spend a lot of time, so while a striking visual display may impress at first glance...
  You need something you can live with for a good long while - they do look good though. |
||
|
04-04-2010, 03:58 PM
|
|
|
AutoBahned
|
There are good reasons why Porsches and other German cars have rather plain interiors – your attention should be focused on the road, not on the inside of the car. But I sometimes think that the black interiors are too sparse and too dark.
Then again, some have made their interiors very stark indeed. Here is a pic that Grant G. posted of his car -- it is stark in a different way.  For me, it is too stark and too noisy – there is nothing to absorb any sound, but it does have a certain machine-like esthetic to it that I like. I just don’t think I could live with it for very long. Here is another interior – even more stripped down:  Some of you recall Dane’s car:  Very nice looking, but I haven’t gone that way – at least, not yet. Last edited by RWebb; 04-04-2010 at 04:21 PM.. |
||
|
04-04-2010, 03:59 PM
|
|
|
AutoBahned
|
Porsche must have thought the simple spare interiors needed some color and texture too they evolved the gauges to even plainer, black on black pie faces with no chrome trim at all (as per Ferrys desire) but look at the interior fabrics in the 1980s:

|
||
|
04-04-2010, 04:02 PM
|
|
|
AutoBahned
|
Here is how mine looked when I bought it:
 and I have some ideas on a few minor changes to it. But more about that later. |
||
|
04-04-2010, 04:03 PM
|
|
|
AutoBahned
|
Before making it pretty, let's first make it work right...
And I am talking about the Shifter and the Pedal Cluster. The shifter and its bushings transmit all the good and bad feel from the transmission to your hand. A lot of the negative experiences people report about shifter feel is caused by worn transmission synchros or gears, together with gouged out bushings. One of the first things I did was to buy a used newer shift tower and rebuild it according to Sherwoods instructions.    I installed the Porsche SC-RS style short shifter: 
|
||
|
04-04-2010, 04:09 PM
|
|

|
|
AutoBahned
|
I bought a different and newer shifter to get access to the shift tower with the newer improved design relative to the one in my 1973 car. I bought it on ebay and it turned out to be heavily pitted. The ebayer who sold it had filled the pits with grease or gunk and posted a murky pic to conceal them.
  I put a leather cover over the base so the pitting was not a big deal. Some people drill the shift housing:  Again, this saves little weight and in an unimportant place, though it can make a nice visual design cue for real weight savings efforts made elsewhere. I also traded some parts for a new rear shift coupler. I may put in a Wevo unit someday, but that will have to wait for another upgrade cycle. So that is it - for now - on the shifter itself. |
||
|
04-04-2010, 04:15 PM
|
|
|
Registered
Join Date: Jul 2000
Location: So. Calif.
Posts: 19,910
|
Good progression Webb.
However, so as not to confuse those who might use the following photo to install said factory short shifter, the shifter "fork" or "shift pivot housing" as photographed for clearance inspection, is incorrectly oriented for installation. the "curved" edge should face toward the shift knob.  Sherwood |
||
|
04-04-2010, 05:33 PM
|
|
|
Registered
Join Date: Dec 2001
Location: Cambridge, MA
Posts: 44,449
|
Quote:
__________________
Tru6 Restoration & Design |
||
|
04-04-2010, 05:55 PM
|
|
|
AutoBahned
|
Quote:
Overview of the Shifter OEM '72 shifter is the crudest of the bunch, '73 is much better, more precise, further improvements in '77 (tall housing with the brass adjusting nut in the front) '85 was the final improvement & created what is called a semi-short shifter with 10% shorter throws. Not to be confused w/ the M241 short shifter. 5/87 Pano or Up-Fixin vol. VIII has a great analysis by Russ Dickerson of all of the shifters and their operation. Evolutionary Details of the Factory Shifters p/n 911-424-019-06 applies to all the shift housings (shifter base) The same lever (both bend & length) was used from 1975 - 1984. In 1977, the threaded pin and jamb nut were added to the shift housing to facilitate neutral gate adjustment. If you have a shift tower with the neutral gate adjuster you're in good shape to update to a stock '85 shifter, or an M 241. If you have a lever by itself, remove the bushing (ball cup) from its lower end. Measure from the center of the ball on the end of the lever to the center of the pivot pin hole. If the distance is 42mm you have an '84 or earlier lever. If the distance is 46mm you have a standard equipment '85/86 lever. If the distance is 54mm you have an M 241 lever. Fortunately all cars with a 915 transmission (from '72 86) use the same shift rod (in the tunnel) and coupler. '73 - 76 cars should have the shift tower updated to take advantage of the adjustable neutral gate, but it's not necessary. The '85 was 10% shorter than '84 and earlier models. The same shifter was standard in '86, but the M 241 option (sometimes called the "super-short shifter"), available for both years, was an additional 10% shorter than the stock shifter in '85/86 models, and 20% shorter than '84 and earlier cars. It was developed in conjunction with the SC/RS program. The factory achieved the reduction in shift throw (in '85) by raising the pivot pin on the lever by 4mm. In addition to the new lever, different pressure springs, a guide plate and a fork were needed. The M 241 pivot pin location was raised an additional 8mm more than the stock '85/86 shifter, which pushed the envelope of comfort, making a shift throw that required substantial effort from the driver. (I love the M 241 version, but for the amount of traffic that I deal with, shift effort is too high.) In addition to a new lever (911 424 017 11) the M 241 setup requires a fork, a carrier plate, 2 x pressure springs, a guide plate, pin and buffer plate. All parts but the lever use "954" prefix part numbers. The M 241 "kit" was part number 911-424-931-00. L-shaped bracket L-shaped bracket with its nylon bushing mounts on top of the tunnel sheet metal, not below. This is the "concave ring-shaped bushing" that Wayne mentions as tending to wear out frequently on p. 107 of the 101 book. Use a plastic compatible grease on the bushing. Loosely fasten the 2 small Allen screws, then fasten the 3 larger ones. Torque all. |
||
|
04-04-2010, 05:59 PM
|
|
|
AutoBahned
|
part II of core dump - translated from hexadecimal...
Upgrades to Stock Shifters 2002 April Pano (or Excellence) mag has an article on shifter fixes Lubrication Sherwood uses Valvoline SynPower Synthetic Grease with moly #985 or #986 in the ball cup and on the shift rod along the path of the rod bushing. The coupler bushings are installed dry. After you disassemble and clean the shifter parts ... and are reassembling, be sure to check for play at the fork pivots. fore-and-aft play needs to be eliminated, sometimes new washers are needed to shim for wear. Be sure to lubricate well with moly grease everything that moves in the shifter! Aftermarket Upgrades Jack Olson: The primary benefit of the Seine gate/lockout device (and the more expensive, less-functional Robotek equivalent) is not to decrease wear on the tranny, or to make the process of shifting more 'precise,' but to create a shifter which is more difficult to mis-shift, in order to prevent mechanical over-revs that destroy engines. Gate guides, like the tranny-based Wevo, or the shifter-based one pictured, are to guide shift selection with more accuracy, and -- I'm guessing -- to put less stress on the tranny components when shifts are made with less accuracy, as the chassis twists and the engine gets torqued around during high-stress use. The gates are also going to lessen the feeling of a 915 being a 'stick in a bucket.' Then there are also shifter replacements, like the Wevo, and the Rennshift, which -- mostly for racing applications -- also send more precise movements back to the tranny than the stock units are capable of, and, again, reduce the stick-in-a-bucket feel. There are really three categories we're talking about, and (confusingly) their functionality overlaps slightly. For my money, if you want to avoid the (common) occurrence of a mechanical over-rev as the result of a missed shift, the Seine device is the smartest and most cost-effective move. Beyond that, as you're tuning the high-performance shift capabilities of a car (meaning making shifting more precise under chassis-stressed, high-revving situations), then the Wevo internal gateshift, and related components (coupler, bushings, replacement shifter, etc.) are the path you're eventually going to want to follow. For a street-driven Porsche, my feeling would be that most of this stuff (outside of the Seine device) is overkill. but… "...shortens throws by 30% and adds a precision and a predictability that the factory set-up with new bushings and proper adjustment can not approach." JO - Nov. 2006 Grinding Housing for Gate Shift Kit Regarding the amount of material to remove if a factory short shifter is used with the Gate Shift kit; "a fair amount of metal to be removed", I suppose, is relative. It's really not that much. Here are two images; the first is a stock, unmodified shift housing showing the side opening. The second image shows the opening after metal removal (with die grinder, dremel, drum sander, or equiv.) to accommodate a factory short shift kit. All other "short shift" kits do not require this modification. Shift Linkage Adjustment 1. Check the bushings in your shift linkage. This includes the 2 at the coupler between the rear seats, the one under the housing which is in the hoop retained by the 2 smaller bolts on the shift housing and the cup at the bottom of the shift rod. Make sure they are in good shape, they are cheap and easy to replace. 2. Make sure that if you have a later housing, that the longitudinal pivot pin is nicely snug, not too loose. You can tell if you have this housing as it will have a lock nut on the front (visible when you peel back the rubber boot around the shift lever. Consider upgrading to the later (post '78) housing and factory short shift kit if you haven't already. 3. Make sure your clutch is adjusted right. It should engage about 1/4 to 1/3 up from the floor board (IMHO) and have about 20mm of free play, measured by pulling the clutch pedal back...as there is a spring which is pressing it towards the floor board, hence the bit of tension. 4. Follow the factory shifter adjustment procedure. It is as follows: (a) Take off the cover between the rear seats which exposes the shift coupler. Pull up the shifter boot, particularly so you can see the lower part of the shifter lever where it bends from "angled back" to more vertical. (b) Loosen the retaining bolt which pinches the shift rod on to the spline on the shift coupler. Let it be very loose. (c) WITH THE TRANSMISSION IN NEUTRAL, rotate the shift coupler clockwise when viewed towards the front of the car. You should be able to feel the coupler rub against the various shift stops as you rotate it back and forth. Rotate it to the furthest clockwise position, as seen when you are facing forward (i.e. top towards the passenger seat). Don't pretend you are Tarzan and turn it with huge force....lightly is all that is necessary.. (d) Keep your hand on it and hold it there. Don't let it wiggle, if it does, turn it back to the furthest clockwise position. (e) Move the shift lever so that the more vertical part of the lever is vertical (i.e. 90 degrees to the level...sticking straight up so to speak). Move it so that it lightly touches the side of the shifter housing which is on the 1st/2nd gear side.....closest to the driver. Again, gently. (f) They should now be properly aligned.....lever closest to the driver with bottom part vertical, coupler clockwise in the neutral plane. (g) Carefully tighten the pinch bolt. Make sure it is quite tight. (h) Check things out. You must be able to engage reverse clash free (give the gear a little bit of time to stop after you stomp on the clutch), shifting should get to all the gears easily when driving.....things don't work as smoothly when stopped and lastly, there must be a little bit of rotational play when 5th gear is selected. This is checked by shifting into 5th, and feeling whether you can wiggle the shift coupler with your hand. It should just click back and forth slightly...not much, but clearly discernable play. (i) Assuming all is well, put all the covers back. If it is not well....my fervent suggestion is that you START OVER at (b) ....I have never had any luck fiddling with the linkage. While you have the shifter out to change the ball-cup and shift rod bushings ... disassemble, clean, re-shim, and relube the 915 shifter parts in the left half of the diagram below. In particular, you want to eliminate any play or looseness associated with both pivot pins #5, and #7 ... you will probably need to put in additional washers to take up slack caused by wear of the existing spring washers and anything they wore against after the factory lithium grease turned into gray, gritty paste. After proper lubing with Valvoline SynPower Synthetic Grease with moly #985 or #986 and reassembly ... there should be ZERO play in the shifter X-Y-Z plane movements! Shift Rods This is the long rod that runs through the tunnel from the shifter back to the shift coupler. They sometimes bend. The one for the type 901/911 transmissions is a different length than the one for the 915 trans. The dimple in the rod end (for the pointed Allen screw of the shift cup) should point towards the driver’s side of the car. Aftermarket Shift Couplers SmartRacing Products I bought the unit from SmartRacing Products (smart-racing.com), 408-369-9997 for $225 plus $10 shipping/insurance. The unit is called the Apex Universal 911 Shifter Coupler. I chose the SmartRacing for price and installation convenience – it literally took me 10 minutes. Important: if you go with the SmartRacing part, install by putting the tranny into 1st gear then disassemble. Put the new unit in, line up the shifter to first gear area and tighten the bolt. No fancy aligning problems. Wevo The WEVO stock 911 PSJ unit does not require anything more than a few minutes replacing the OEM part. Shift Bracket – “L” shaped under Shifter When installed, the bracket with the circular bushing is dissassembled from the shifter base and slid into the tunnel and then bolted back up to the base through the bolt holes in the tunnel. The "L" bracket goes below the top of the tunnel sheet metal. Last edited by RWebb; 04-05-2010 at 10:37 AM.. |
||
|
04-04-2010, 06:00 PM
|
|
|
Registered
Join Date: Dec 2001
Location: Cambridge, MA
Posts: 44,449
|
excellent, thank you. My 73 915 shifts with fingertips like butter right now, so I'm leaving it alone. Just filled with Swepco today. Good info for a winter project next though.
__________________
Tru6 Restoration & Design |
||
|
04-04-2010, 06:10 PM
|
|
|
AutoBahned
|
sure thing -- BTW... instead of butter smooth shifting, you may want to try olive oil -- better longevity
also, hope you got my allusions to your "temporary perfection" thread - very true concept |
||
|
04-04-2010, 07:58 PM
|
|
|
Registered User
|
Great information Randy. Thanks for sharing.
__________________
Mark Jung Bend, OR MFI Werks.com |
||
|
04-05-2010, 06:31 AM
|
|
|
AutoBahned
|
my pleasure Mark - more to come...
|
||
|
04-05-2010, 10:36 AM
|
|
|
I would rather be driving

Join Date: Apr 2000
Location: Austin, TX
Posts: 9,108
|
Randy, I look forward to the additional information.
Now, where did you get the picture of the blue car interior with the 915 shifter pedestal? Perfect alternative to a Hargett/fabcar shifter to improving the shift knob placement. I want to see how the shift rod was reconfigured. Do you have any more pictures or a link to the car/build?
__________________
Jamie - I can explain it to you. But I can not understand it for you. 71 911T SWT - Sun and Fun Mobile 72 911T project car. "Minne" - A tangy version of tangerine #projectminne classicautowerks.com - EFI conversion parts and suspension setups. IG Classicautowerks |
||
|
04-05-2010, 10:42 AM
|
|
|
AutoBahned
|
Jamie - it is just a pic I grabbed off of this site at some point - no idea re more info on that car, but maybe you can troll thru the drilling holes thread (active today) or run a search on holes to find more. Good Luck.
|
||
|
04-05-2010, 10:44 AM
|
|
|
Registered
Join Date: Jul 2000
Location: So. Calif.
Posts: 19,910
|
Quote:
I think I've seen visuals of the shift rod which angles upward from the tunnel via a u-joint on each end. Obviously a track car with or without a proper parking brake setup due to the protruding shift rod. Sherwood |
||
|
04-05-2010, 10:48 AM
|
|
|
I would rather be driving
Join Date: Apr 2000
Location: Austin, TX
Posts: 9,108
|
Sherwood, That is exactly what I was thinking. At the anticipated angle I would suspect that the top of the tunnel would need to be notched or pushed down to clear the u-joint at the shift input shaft.
Thanks Randy, Carry-on.
__________________
Jamie - I can explain it to you. But I can not understand it for you. 71 911T SWT - Sun and Fun Mobile 72 911T project car. "Minne" - A tangy version of tangerine #projectminne classicautowerks.com - EFI conversion parts and suspension setups. IG Classicautowerks |
||
|
04-05-2010, 11:03 AM
|
|
|
coolcavaracing.com

|
I want more

__________________
Pål (Paul) - The Norwegian lost in Finland... 1978 911SC 3.6 | 2001 Boxster S Racing Car | 1966 912 based 911 RSR replica racing car (for sale!) come and follow the Porsche Sports Cup racing fun and me at www.facebook.com/coolcavaracing 
|
||
|
04-05-2010, 11:17 AM
|
|


 1957 Porsche 356 A Coupe 2.7 Short Stroke
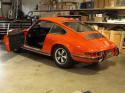 1972 Porsche 72 Coupe
