|
|
|
|
|
| Author |
|
|
Registered
Join Date: Aug 2008
Posts: 844
|
Oil Tank Rubber Seal ???
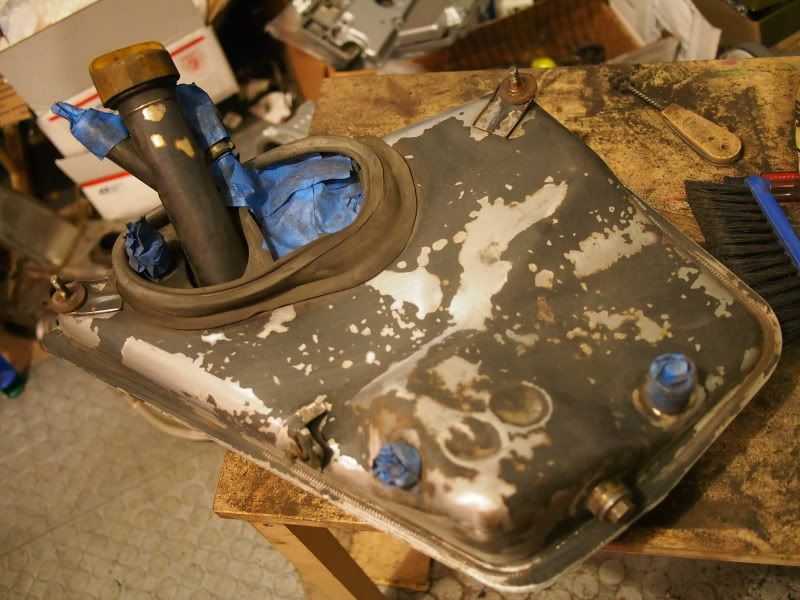
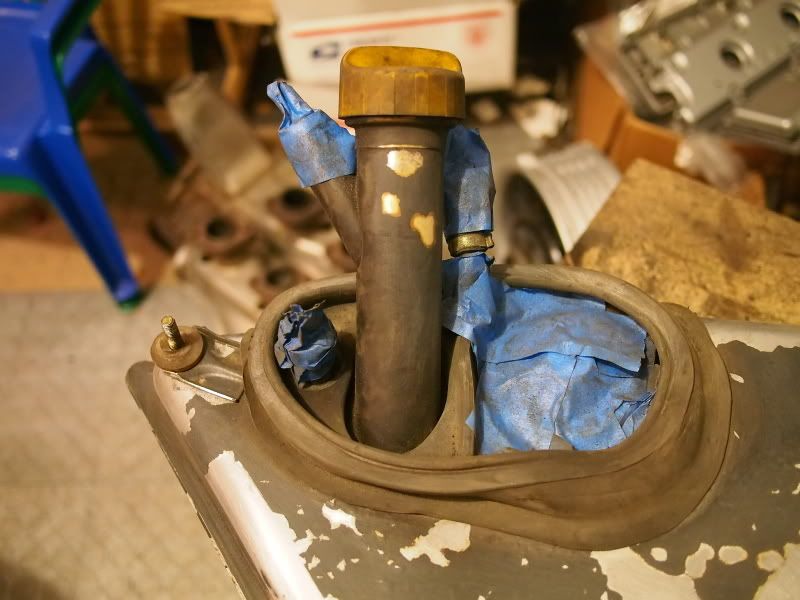
Anyone know what holds the rubber seal in place? Is it epoxied on there? I want to refinish it, but don't want to powder coat.... any recommendations on a tough black finish? Also, has anyone made a home made style guard to protect the tank from tire bombardment? TIA...
|
||
 07-09-2012, 05:58 PM
|
|
|
Weekend Mechanic
Join Date: May 2008
Location: Toronto, Canada
Posts: 740
|
The seal is held on by contact cement. You can carefully pull it off the tank and it will come away in one piece. I pulled the rubber seal off mine, taped up the holes, wire brushed the whole thing clean, and sprayed with 2 coats self etching primer and 2 coats Wurth Satin Black. If you powder coat I think you'd have to remove the oil level sender as I don't know how it would deal with the oven. After the paint cures you can reattach the seal with contact cement.
__________________
86 911 Carrera Targa 
|
||
|
07-09-2012, 08:25 PM
|
|
|
Registered
Join Date: Aug 2008
Posts: 844
|
thanks targamania... will do your same procedure.
|
||
|
07-10-2012, 05:25 AM
|
|
|
Fleabit peanut monkey
|
I think I used 3M weather strip adhesive on my old seal. Once tank is bolted in the seal is not going anywhere
|
||
|
07-10-2012, 08:24 AM
|
|
|
Registered
Join Date: Aug 2008
Posts: 844
|
thanks guys... makes sense, seals not going anywhere.
|
||
|
07-10-2012, 08:47 AM
|
|
|
Registered User
Join Date: Apr 2012
Posts: 224
|
any tricks or proper methods to remove the tank??
|
||
|
07-18-2012, 08:58 AM
|
|

|
|
Registered User
Join Date: Feb 2011
Location: Bellevue, Wa
Posts: 2,437
|
hey Ferd!
I did one of these 2 weeks ago. Kinda fun little job. i used some black Wurth sealant , very light amount just to hold it in place till it was installed - for finish, how about an epoxy paint? that stuff is tough and self leveling - available at Home depot tips: put an oil filter on the tank - helps center the gasket plug all the holes when putting the tank in the car to avoid contamination. dont over tighten the level sending unit nuts (I have been told they can snap off) if it leaks when filled you can just snug them up till it stops leaking (I had a very small leak there) get a new filler cap, they are cheap and look nice for removal, its a snap, you need to remove those crazy hard plastic washers inside the engine bay - "unscrew" the washers - get the car up HIGH - remove the fender support strut and rear wheel have fun, post "after" pics
__________________
Ed M 86' Coupe |
||
|
07-18-2012, 09:09 AM
|
|
|
Registered User
Join Date: Apr 2012
Posts: 224
|
thanks mate..
|
||
|
07-18-2012, 09:19 AM
|
|
|
Registered
Join Date: Aug 2008
Posts: 844
|
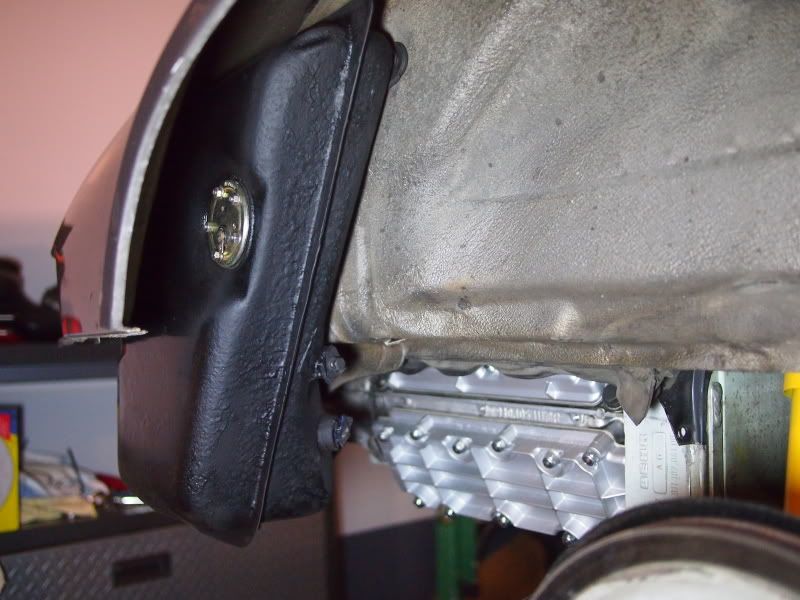
Thanks Ed... funny, I used epoxy (great minds think alike). Plus, I used some undercoating spray at the front of the tank for tire bombardment. Now Im pulling out oil hardlines. Might pull the trigger on ER lines... mines are pretty beat up and might just sell them with the thermostat. What do you think of these threads on the thermostat? Thanks for the tips on putting the seal back... gotta de-grease the thing first.
Fastdog, pull the wheels off, Undo all hoses attached to the tank, pull out the fender bracket and und the nut inside the engine bay. Like Ed say, unscrew the rubber retainers that holds the tank. Should slip right out... Oh yeah... you gotta drain the oil. Some pics    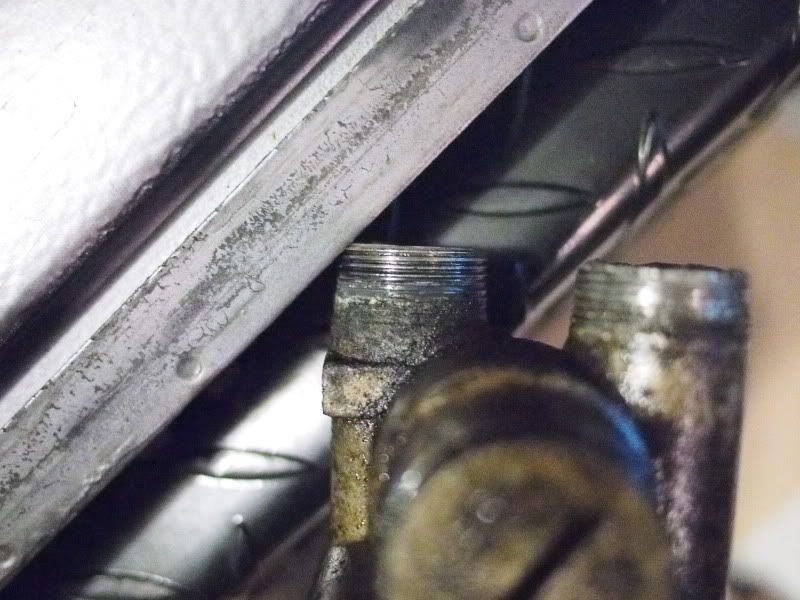  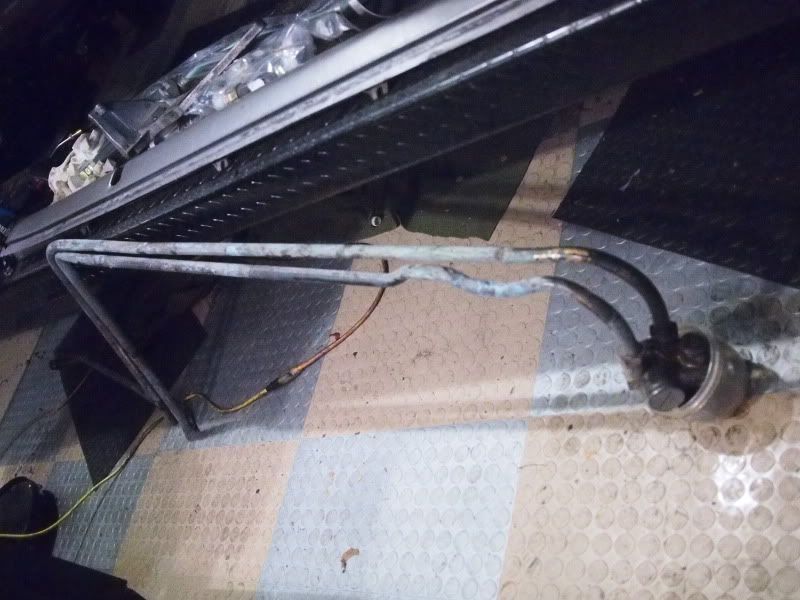
|
||
|
07-18-2012, 12:25 PM
|
|
|
Registered User
Join Date: Feb 2011
Location: Bellevue, Wa
Posts: 2,437
|
Nice paint job!
those threads are the reason I opted NOT to swap to SSI's and 2in1out exhaust.. I feared that would be a part needing replacement after I stripped it out.... yours dont look too bad IMO - the thing is it's hard to tell how much of the major dia on the threads is missing. If you can measure the OD on both threads and compare...I would say they should be within a couple thousandths (0.000-0.006 in) between the two as the one on the left looks OK as a "standard" to use for the one on the right if it ends up leaking you can always replace it later...I hear they tend to seep or weep rather than blow off and dump all the oil on your rear tire (rolling eyes) You've been busy! I am planning a big project this winter if I still have money come winter...wait I mean if summer ever gets here (in Seattle summer has not yet arrived, hell spring barely made it)
__________________
Ed M 86' Coupe |
||
|
07-18-2012, 12:39 PM
|
|
|
Registered
Join Date: Aug 2008
Posts: 844
|
I hear ya Ed, thats pretty good discipline on leaving well alone. As for me... not so much. This should be it... then Im done. :roll eyes:
Looking forward to hear your next winter adventure... |
||
|
07-18-2012, 12:54 PM
|
|
|
Registered
|
I used Por15 and then black epoxy paint on mine. My 1973.5 tank originaly had a wire mesh screen tacked to the front edge for debris protection. I bought a similar type at Home Depot to replace the original. I don't have a picture of mine, but here is what I found on the Forum.

__________________
Ed 1973.5 T |
||
|
07-18-2012, 01:36 PM
|
|

|
|
Registered
Join Date: Aug 2008
Posts: 844
|
Ive seen that pic before and wondered how it stayed on... the tacking made sense but I kinda like the bolt on approach just in case you need to get to the sensor.
|
||
|
07-18-2012, 07:57 PM
|
|
|
Registered
Join Date: Aug 2008
Posts: 844
|
Back on... quite happy how it turned out.
|
||
|
07-24-2012, 02:12 PM
|
|


 1981 Porsche 911 SC Targa
 The Other Woman
