|
|
|
|
|
| Author |
|
|
Registered
|
Adjust valves 2.7 - first time experience
I read the manuals and studied the tech article.
http://forums.pelicanparts.com/porsche-911-technical-forum/664950-1976-911s-garage-find-road-20.html I thought I would add a few extra pointers to the instructions to help out. I have never adjusted valves before. It wasn't that hard but there were a couple of things I discovered that might be more obvious for you seasoned DIYers. Overall, it isn't that hard so for the newbies, you don't want to shy away from this one. After the covers were removed and the spark plugs, turn crankshaft engine pulley CLOCKWISE only until TDC is lined up with mark on fan. Turning it counter clockwise (or anti clockwise for you brits) any significant distance could damage the chain tensioners. Not sure why, but all the instructions are pretty clear on this one.  In the tech article it refers to Z1. My engine doesn't have a Z1. There are 3 marks on the pulley which refer to 120 degrees. One of those marks has a 1 next to it and also has a small dab of yellow paint indicating TDC. Here it is lined up with the mark on the fan housing and you can see a small 1 on the front of the pulley next to the line.  Verify the the distributor points to the mark distributor housing. Looking from cylinder 1 toward the fan (front left side of the engine), it'll be at the 1 o'clock position. What confused me originally, was this distributor doesn't look like your normal distributor (like a little arrow), so make sure you are looking at the metal point that skims the points inside the distributor cap. You may have to spin the little plastic cover below the distributor to see the mark. Here you can see it lined up properly.  This shows the location of each cylinder with the proper labelling.  I purchased 2 feeler gauges. I got the ones that are bent at 30 degrees, but i couldn't easily get the gauge in, so I removed the feeler blade and bent the tool to 90 degrees. Was much easier to use.  I had difficulty getting the blade between the valve post and the rocker foot, I found this trick works pretty well. Don't try to push the blade from the front, but line up the side of the blade then twist it in.    When adjusting, I would first test the gap, some of them were perfect and didn't need adjusting. If in need of adjustment I loosened the bolt, turned the screw and kept testing the feeler gauge until it got the right feel before tightening the bolt while holding the screwdriver steady. Its hard to explain feel with words, but let me give it a shot. There should be a little grab to the blade but you shouldn't need to tug at it. You shouldn't be able to move the blade with a slight tap, but you don't need much force to move it. You should be able to slide the gauge back in without loosening the screw again. I did intake 1 then exhaust 1, turned pulley clockwise 120 degrees to next mark, then 6 intake, 6 exhaust. Following the order listed everywhere is 1-6-2-4-3-5. Out of the 12 valves, 5 didn't need adjusting. Once they were all done, I tested them all again, none needed a readjust. One other point. My engine was out due to other repairs, so this was pretty easy to access everything. Now that I have done this, I think it'll be easier to do it installed in the car. I may drop it next time anyway.
__________________
1976 911S; 1957 Mercedes 190SL; 1982 Ferrari Mondial Coupe; 1991 Nissan Figaro; 2001 Panoz Esperante ; 1969 Pitts S1C http://forums.pelicanparts.com/porsche-911-technical-forum/664950-1976-911s-garage-find-road.html |
||
 02-12-2017, 09:23 AM
|
|
|
Registered

Join Date: May 2002
Location: Portland, Oregon
Posts: 12,712
|
Nice pointers.
I would add one. If you have a micrometer, set it to 0.004" and practice sliding the gauge in and out of it to get a feel for how it slides.
__________________
Harry 1970 VW Sunroof Bus - "The Magic Bus" 1971 Jaguar XKE 2+2 V12 Coupe - {insert name here} 1973.5 911T Targa - "Smokey" 2020 MB E350 4Matic |
||
|
02-12-2017, 09:31 AM
|
|
|
Registered
Join Date: Aug 2014
Location: Newquay, Cornwall, UK
Posts: 382
|
Quote:
------------------------ Good write up, the only thing i would add, would be to whip a spark plug out, and verify TDC with a long screwdriver, particualry for your pulley, less so if it says Z1, just be sure not to jam it against the spark plug hole threads, if you go too far past TDC |
||
|
02-12-2017, 10:20 AM
|
|
|
Registered
|
My pulley has much the same markings and I found that if you take an inspection mirror and look on the back side of the pulley the Z1 is marked there. May not be there on yours but it is on mine.
|
||
|
02-12-2017, 11:45 AM
|
|
|
Been here a while
Join Date: Apr 2004
Location: East coast, west coast, typ. 35,000 ft
Posts: 2,451
|
I'll add a local pointer...not really....but if the motor is in the car, yes, it's a bit tougher, but by supporting the rear of the motor and doing what is referred to as a partial engine drop, it helps a lot.....you can leave almost everything connected, drop the rear of the motor down a few inches and it makes acccess pretty easy for a valve adjustment.
__________________
looking for 1972 911t motor XR584, S/N 6121622 |
||
|
02-12-2017, 12:59 PM
|
|
|
Registered
|
Quote:
__________________
1976 911S; 1957 Mercedes 190SL; 1982 Ferrari Mondial Coupe; 1991 Nissan Figaro; 2001 Panoz Esperante ; 1969 Pitts S1C http://forums.pelicanparts.com/porsche-911-technical-forum/664950-1976-911s-garage-find-road.html |
||
|
02-12-2017, 03:37 PM
|
|

|
|
Registered
|
Quote:
__________________
1976 911S; 1957 Mercedes 190SL; 1982 Ferrari Mondial Coupe; 1991 Nissan Figaro; 2001 Panoz Esperante ; 1969 Pitts S1C http://forums.pelicanparts.com/porsche-911-technical-forum/664950-1976-911s-garage-find-road.html |
||
|
02-12-2017, 03:38 PM
|
|
|
Registered
Join Date: Jun 2011
Location: Hudson, Ohio
Posts: 1,474
|
Quote:
__________________
Northeast Ohio 1987 Porsche 911 Targa 1966 VW Beetle, 6V |
||
|
02-12-2017, 04:28 PM
|
|
|
Vintage Owner
|
Much of the difficulty does arise in getting access to the valves. On my 914-6, I often wonder if dropping the engine may not be the best first step.
__________________
84 Targa (sold) 70 914-6 (sold) 73 914-6 2.7 conversion (sold) 75 GMC Motorhome (sold) 2016 Cayenne |
||
|
02-12-2017, 05:45 PM
|
|
|
Registered
Join Date: Oct 2006
Location: MYR S.C.
Posts: 17,335
|
you want drag on the feeler, more on the intakes.
DO NOT loosen the nut very much. if too tight kind of turn the adjuster with the nut as I loosen it. if too lose I only loosen the nut enough so that when I tighten it I can turn the adjuster with it. I make very small changes and I use the slot in the adjuster as a dial indicator to determine how far I moved it. I just had my 930 engine out and adjust the valves. I was making 10-15 degree changes and that was sometimes too much. if you can get the feeler in they are not too tight.
__________________
86 930 94kmiles [_  _] RUNNING:[__] NOT RUNNING: ____77 911S widebody: SOLD _] RUNNING:[__] NOT RUNNING: ____77 911S widebody: SOLD88 BMW 325is 200K+ SOLD 03 BMW 330CI 220K:: [_ _] RUNNING: [__] NOT RUNNING:01 suburban 330K:: [_ _] RUNNING: [__] NOT RUNNING:RACE CAR:: sold |
||
|
02-13-2017, 04:25 AM
|
|
|
Registered
|
Great write up. Thanks for sharing.
|
||
|
02-13-2017, 06:42 AM
|
|


 911s
911s Mercedes
 Mondial
 Figaro


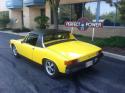 1970 Porsche 914-6 (sold)
 1973 porsche 914-6 conversion (sold)
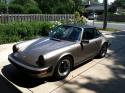 1984 Porsche 911 Carrera Targa - sold
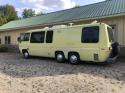 GMC Motorhome
 1988 Porsche 911
 1987 Buick Regal (Grand National)
