|
|
|
|
|
| Author |
|
|
Registered
Join Date: Apr 2009
Location: Israel
Posts: 352
|
General failure (exclamation light) question
Hi Guys,
I have noticed that from time to time when I start the car the "general failure" (exclamation light) stays on. Only when I press the exclamation button it turns off. It happens randomly and I just cant find the reason why it does that :-\ I checked the main warning unit and went through all the solder points and it seems to be in order as well. What can be the reason for the general failure" (exclamation light) to stay on after starting the car? Thanks!
__________________
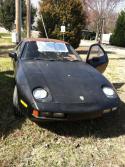
Porsche 928S 4.7L 1980 European redhead 
|
||
 12-02-2013, 05:27 AM
|
|
|
Registered User
Join Date: Oct 2011
Location: Oklahoma City, Oklahoma
Posts: 352
|
Loose timing belt warning?
__________________
\Brad/ '82 928 Automatic w/Competition Package Black/Red |
||
|
12-02-2013, 05:57 AM
|
|
|
Antsmands
|
Quote:
__________________
1983S 5 Speed / Platinum Metallic / Dark Brown Interior / GE NightHawk LED Headlights / Super Bright LED / Flex-a-lite Cooling Fan / Dragon Gauges / Custom Auto Sounds Spare Tire Sub Woofer / H3R HalGuard Fire Bottle |
||
|
12-02-2013, 09:45 AM
|
|
|
Registered
|
I think that the car is question is a 1980 Euro - I do not believe that it has any timing belt warning. I know that my 1981 US does not.
Check lights at power on - make sure all of them work. I had many burnt out bulbs on mine when I got it. The actual failing sensor could be masked by a burnt out bulb. For me, I had issues with "Brake Press" until I both replaced my MC and reflowed the solder connections in the Central Warning control unit. From the description, solid "!" that goes out when the cancel button is pressed - I saw this symptom when I was getting the bulb check warning. I had to clean up all parking light sockets and replace the bulbs to fix this. I actually got into this hobby to learn stuff and fix things. Central Warning issues kept me busy for many weekends - Enjoy!
__________________
-- David 1981 928 US 5spd Red |
||
|
12-02-2013, 10:06 AM
|
|
|
1982 928 us
|
also can come on when fuels low -yellow lit at gas gauge- itll throw the ! on.
__________________
1982 Porsche 928 us |
||
|
12-02-2013, 09:23 PM
|
|
|
Registered
Join Date: Apr 2009
Location: Israel
Posts: 352
|
Quote:
I am not aware of any sensor in the timing belt...its 1980 euro model. Am I missing something? Thanks for the help!
__________________
Porsche 928S 4.7L 1980 European redhead
|
||
|
12-03-2013, 06:31 AM
|
|

|
|
Registered
Join Date: Mar 2010
Location: Texas
Posts: 2,139
|
Probably more information than you'd ever want, but here you go:
(From the Porsche Electrical Trouble shhoting and Repair manual) Operational test I. Up to Model 83, the warning lamps are extinguished by the engine cranking pulse (terminal 50). Accordingly, it is necessary to crank the engine, without letting it run, in order to switch off the warning lamps. To do this, pull the HT lead, terminal 4, off the distributor and apply it to ground (earth) (screw heads on crossbar mounting). I I. From Model 84, the warning lamps are no longer extinguished by the cranking pulse, but by the voltage rise of the alternator, terminal D +/61. The switching threshold is in the region of > 6 V, i.e. when the engine starts and if the alternator charging circuit is in order (voltage rise >6V), the warning lamps are extinguished. This means that, even when there is a break at D t/61, the warning lamps go off immediately the ignition is switched on because terminal 15 (+) is applied to the central indicator via the charge indicator lamp. In order to switch off the warning lamps to test them, it is necessary to separate the multipoint engine connector in the engine compartment after switching on the ignition (lamp test ). Connect terminal 1 on connector (front wiring harness) to B+. The warning system,with the exception of oil level and oil pressure, can now be tested. ZW - central warning lamp ZW - central warning lamp WL - warning lamp / warning lettering Q- acknowledge button (in center console) - functions together with ZW from Mod. 79. 1. Brake light Operate foot brake. - Brake light WL must go off 2. Handbrake Apply handbrake (or connect cable on handbrake contact to ground) - Handbrake WL, ZW and Q must light up. The two lamps go off only when the handbrake is released. 3. Coolant temperature Pull cable con11ec1or terminal W (smaller connector lug) off the temperature transmitter on the elqine and colmect it to ground. - Coolant temperature WL, ZW and Q must light up. Press acknowledge button, ZW and 0 go off, WL must continue to glow. The WL goes off when the ground connection is removed. 4. Oil level up to Model 83 The transmitter IS fitted on the front of the oil sump. Pull cable off transmitter and hold it against ground, or additionally connect multipoint connector part of front wiring harness terminal 6 to ground and attach the connector. - Oil level WL, ZW and Cl must flash. Press acknowledge button, all lamps must continue flashing. All lamps must go off when the cable is attached to the transmitter, or when the ground connection is removed. 4a. Oil level from Model 84 Connect connector P3 (M23 model 85 and later) on CEB to ground (connector remains plugged in). - Oil level WL, ZW and Cl must flash. Press acknowledge button, all lamps must continue flashing. All lamps must go off when the cable is attached to the transmitter, or when the ground connection is removed. 33 CENTRAL WARNING 5. Oil pressure up to Model 83 Separate multipoint engine connector. Use auxiliary cable to apply connector part of front wiring harness, connector socket No. 2, to ground. - Oil pressure WL, ZW and Q must flash after about 2 seconds. Press acknowledge button, all lamps must continue flashing. The lamps must go off when the auxiliary cable is removed. 5a. Oil Pressure from Model 84 Connect connector P2 (M22 model 85 and later) on CEBto ground (connector remains plugged in). - Oil pressure WL, ZW, and 0 must flash after about 2 seconds. Press acknowledge button. all lamps must continue flashing. The lamps must go off when the auxiliary cable is removed. 6. Brake lining wear Separate one plug connection of a lining contact segment. (Front left-hand side of engine compartment at level of brake master cylinder.) - Brake lining WL, ZW and Q must light up. Press acknowledge button - ZW and 0 go off, WL continues to glow. Reconnect plug connection, WL continues to glow. Note: Allow the individual warning lamps (WL) to continue glowing in the following tests until you have checked through all items - otherwise you will have to keep repeating the procedure as per Section I or il. 7. Coolant level The transmitter (float) is located Inside the coolant expansion tank Pull off cable and joln the cables plug connections together. - Coolant level WL, ZW and Q must light up after about 20 seconds. Press acknowledge button, ZW and Q go off and WL must continue glowing. The WL continues to glow after the cable bridge is disconnected. 7a. Coolant level from Model 84 Trip warning as described under 7. Press acknowledge button so that only the WL glows. Fit hand pump VW 1274 on coolant filler neck and pressurize cooling system to at least 0.5 bar gauge. Switch off ignition, wait about 10 seconds and then switch It on agaln. The coolant level warning lamp must light up. Depressurize cooling system. Switch ignition off and on agaln. No warning lamp should light up. 8. Windshield/headlight washer water level Remove cover plate from CEB in passenger foot well. Connect auxiliary cable to ground and other end to: Connector K, terminal 5 (Ml4 model 85 and later) or Connector Q, terminal 6 (none on 85). (This circuit saves you from having to remove the guard plate in the right-hand wing - in front of the water reservoir.) ~ Washer water WL, ZW and 0 must light up after about 20 seconds. Press acknowledge button. ZW and Q go off, WL must continue glowing. The WL continues to glow after the connectlon is removed. 9. Fuel level Remove cover plate from CEB in passenger footwell. Connect auxiliary cable to ground and other end to R15. - Tank reserve WL, ZW and Q must light up after about 20 seconds. Press acknowledge button, ZW and Q go off, WL must continue glowing Plug in connector, the WL continues to glow. 34 CENTRAL WARNING ,I - :: IL 1 10. Brake circuit failure (up to Mod. 83) deleted from Model 84 Pull off one connector base from the brake light switch on the master cylinder and use auxiliary cable to join together the opposing connector sockets. - Brake circuit WL, ZW and Q must flash. Press acknowledge button, all lamps must continue flashing. Disconnect connector bridge and reconnect connector base to brake light switch - all lamps, ZW, Q and WL, must continue flashing. Note: The flashing warning indicator can only be cancelled by briefly disconnecting one battery cable. - Repeat Section I or II for the following tests 11. Brake fluid level A pressure switch (extended float) can be seen at the top of the brake fluld reservoir Press this switch down - or bridge the cable connection. - Brake fluid WL, ZW and Q must flash after about 20 seconds. Press acknowledge button, all lamps continue flashing. Release float pin, or disconnect bridge, all lamps (ZW, Q and WL) conttnue flashing 12. Tail light/brake light The tall and brake hght IS momtored by a lamp test unit behind the ZEL Tthe lamp test unit IS new from Model 84 and can be retrofltted. Switch on parklng Ilght, depress foot brake (brake light WL must go off). Check rear hght function on vehicle. In order to check this Item It IS necessary to unscrew the rear light lens at one side of the vehtcle. - Take out tail light bulb. - Switch on parklng Ilght. - Tail light WL, ZW and Q must light up after about 5 seconds Press acknowledge button - ZW and Q go off, WL must continue glowing. The tall light WL goes off when the bulb IS refltted. Switch off Ilyht! Remove brake light bulb - depress foot brake. Brake light WL, ZW and Q light up - press acknowledge button ZW and Q go off, WL must continue glowing. The WL continues glowing when the bulb IS refitted and only goes off after the brake has been depressed once. Note: Ensure that both rear lights (brake/tail light) are fitted with bulbs of the same make and rating - the central warning will otherwise switch on the warning lamps although the lights are functioning properly. 12. ABS anti-skid (anti-lock) system Remove relay XVII from CEB, switch on ignition. - ABS WL, ZW and Q must light up. Press acknowledge button, ZW and Q must go off, WL must continue glowing. Refit relay. 13. Tooth belt tension Disconnect plug connecter in front of belt housing. - Tooth belt WL, ZW and Q must ligth up about N 3 min. Press acknowledge button -
__________________
John Curry (Drift King) 928OC member Grand Prix White 1994 GTS AT (The GTS) Black 1989 GT (The GT) and Cobalt Blue 1989 S4 AT (The Blue Car) 1986 Euro AT Indishrot 1984 Euro S AT (The Stepson) and Black Metallic 1984 Euro S 5 speed (The Schwartz) |
||
|
12-04-2013, 04:25 PM
|
|
|
Kool
|
I hope that was cut and pasted....
__________________
Ron 1978 5sp (#30) project-Wreckscue, 1979 5sp Euro Project 1982 5sp resto project, 1985 Auto S3 1984 Parts car (the fire car) 1987 s4 (parts, or maybe project) (Yes, I now have 4 project Sharks) |
||
|
12-04-2013, 08:09 PM
|
|
|
Registered
Join Date: Mar 2010
Location: Texas
Posts: 2,139
|
Whaddya mean? Typed every letter myself!
CTRL C CTRL V LOL But really, there are loads of good information there.
__________________
John Curry (Drift King) 928OC member Grand Prix White 1994 GTS AT (The GTS) Black 1989 GT (The GT) and Cobalt Blue 1989 S4 AT (The Blue Car) 1986 Euro AT Indishrot 1984 Euro S AT (The Stepson) and Black Metallic 1984 Euro S 5 speed (The Schwartz) |
||
|
12-04-2013, 09:20 PM
|
|
|
Registered
Join Date: Apr 2009
Location: Israel
Posts: 352
|
Nice typing!!!
 So I understand that in 1980 there is a sensor for the timing belt tension? Can you please tell me where can I find the "Tooth belt tension" , specifically, where is that "plug connector in front of belt housing"? Thanks!
__________________
Porsche 928S 4.7L 1980 European redhead
|
||
|
12-05-2013, 05:53 AM
|
|
|
Antsmands
|
Hello Yoni_d;
Not sure about your 1980 Euro but on my 1983 S the belt tension plug connector is positioned in the area of the passanger side belt housing adjacent to the ac compressor. I had to remove mine when it took off the belt cover as it is bolted to the by one of the retaining bolts. My tension warning light actually never went off as my belt just broke off a tooth and jumped timing while driving on the expressway. You will have to remove this portion of the belt cover to check the belt tension with a tensioning guage. This is a good thing to do even if the warning is not do to the belt tension. If it jumps timing even by one tooth the car will immediate shut down and not restart until the belt is reset. Good Luck!
__________________
1983S 5 Speed / Platinum Metallic / Dark Brown Interior / GE NightHawk LED Headlights / Super Bright LED / Flex-a-lite Cooling Fan / Dragon Gauges / Custom Auto Sounds Spare Tire Sub Woofer / H3R HalGuard Fire Bottle |
||
|
12-05-2013, 06:46 AM
|
|
|
Recovering dismantler
|
Quote:
Neil
__________________
Neil 2009 Mini Cooper 2004 Mercedes CLK500 2024 Subaru Outback Touring XT 2020 Entegra Coach Last edited by neil30076; 12-05-2013 at 07:34 AM.. |
||
|
12-05-2013, 07:23 AM
|
|

|
|
1980 Porsche 928
|
Mine comes on when my RPMS drop below 1,100. I drive a US 1980.
|
||
|
12-05-2013, 05:05 PM
|
|
|
Antsmands
|
Quote:
Thanks for the correction, as you state the belt tension is not linked to the warning light system and therefore is not his problem. Sorry to give out incorrect information. My car did shutdown like someone turned off the ignition while on the highway at about 70mph. Thought it was a FI relay and after many other checks turned out to be one torn tooth on the timing belt. Hard to see as it didnot rip completely off, just torn. Had to run my fingers over the belt to find it. New belt, reset timing and car started right up. Just wanted to clarify.
__________________
1983S 5 Speed / Platinum Metallic / Dark Brown Interior / GE NightHawk LED Headlights / Super Bright LED / Flex-a-lite Cooling Fan / Dragon Gauges / Custom Auto Sounds Spare Tire Sub Woofer / H3R HalGuard Fire Bottle |
||
|
12-06-2013, 05:00 AM
|
|
|
1982 928 us
|
omg im blind by the time I got to 12. thnk you much all lights are correct and working in strength and switches.... but always(for yrs I haven't fixed yet) whenever headlights come up and on, the inst always throws - taillight red word like 3 5 seconds, just phazes in. which throws ! ! (pressed) will go out but red word stays. Got to try working through no, 12 . thought it was a partial circuit to a circuit and lights are good/legal (don't sneeze) so I leave it alone,lol.
__________________
1982 Porsche 928 us |
||
|
12-07-2013, 09:12 PM
|
|
|
Registered
Join Date: Apr 2009
Location: Israel
Posts: 352
|
Well, it was a bad taillight after all
it was a bad connection so thats the reason for the "random" warning light. Amazing... Thanks guys for your help!
__________________
Porsche 928S 4.7L 1980 European redhead
|
||
|
12-08-2013, 04:22 AM
|
|
|
928: Serial Enabler
Join Date: Sep 2007
Location: Elkhart, Indiana
Posts: 2,929
|
Along with the USA and ROW 32V cars in 1985, The 2nd and 3rd years of the 16V Euro dual distributor cars, 85 and 86, actually did get the belt tensioner warning system. The change is noted in the first few pages of the "Service Info Tech" document for the 85 Euro car that can be found on the CD set. The warning system did not get fitted to 84 and earlier, any market.
__________________
84,85,86 928 cars Last edited by Landseer; 12-08-2013 at 09:39 AM.. |
||
|
12-08-2013, 09:31 AM
|
|
|
Network Native

Join Date: Jan 2007
Location: SoCal
Posts: 10,349
|
Quote:
OTOH I have an 84 motor so the timing belt cover may not have a spot for the connector, but that I could have fixed. Far as I know the connector isn't available other than a pigtail cut from some other harness. Its encapsulated too I think, although same connector I'm told is used on the 944 windshield antenna connection. |
||
|
12-10-2013, 03:06 AM
|
|
|
928: Serial Enabler
Join Date: Sep 2007
Location: Elkhart, Indiana
Posts: 2,929
|
Same connector on 928 windshield antenna, too.
I have one if you need, but so should Mark. Nothing wrong with a little splice here and there.
__________________
84,85,86 928 cars |
||
|
12-10-2013, 07:58 PM
|
|
|
Network Native
Join Date: Jan 2007
Location: SoCal
Posts: 10,349
|
Splices are so not perfect.
Carl makes a replacement harness, but he seems to be looking without success for a source as well. Porsche sells a pigtail for $21 (19) 944 645 185 01 - connecting cable  PET | 944-2 | llustration 911-00 | radio 
|
||
|
12-10-2013, 08:42 PM
|
|


 1983 Porsche 928S
 1982 porsche, current driver 928
 1992 Mercedes Benz 300E
 1978 Porsche, parts only 928 Euro
 1985 Porsche 944
 380 SLC MB
 TBA
TBA Whitey
 Pontoon
 1981 928
 1984 928 S Euro
 1986 928S
