|
|
|
|
|
| Author |
|
|
Registered User
|
Fuel line help
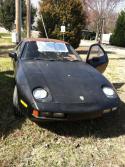
Hi everyone. I started on the fuel line replacement project today. I bought the kit from Roger, and read the procedure online. I can't seem to find a diagram that matches up to my system, but I have the path figured out. The problem I have is the one piece of tubing that comes up from the main line (passenger side)to the first pressure regulator. I can't get it undone. Any suggestions? There is not much room under there and I don't want to bugger up the nut. I can't seem to get it from the top either.
I would appreciate any help. 84 US 928S Auto.  Here are the other hoses that did come out ok. They are all I could find.   
__________________
1984 Porsche 928 S (US) 2002 GMC 2500HD Full time Nerd |
||
 03-22-2015, 06:45 PM
|
|
|
Registered User
|
And yes, the injectors are up next once I have this part done. =)
__________________
1984 Porsche 928 S (US) 2002 GMC 2500HD Full time Nerd |
||
|
03-22-2015, 06:50 PM
|
|
|
Kool
|
I had to use a Dremel, and grind off the ferrel, then cut the hose off the fitting, then put a new hose on the fitting, and clamp it. Not an easy task...mine was (still is) frozen....served it purpose for now, but I will be replacing the entire hard line in the future, with all new fittings....
Good luck.
__________________
Ron 1978 5sp (#30) project-Wreckscue, 1979 5sp Euro Project 1982 5sp resto project, 1985 Auto S3 1984 Parts car (the fire car) 1987 s4 (parts, or maybe project) (Yes, I now have 4 project Sharks) |
||
|
03-22-2015, 07:20 PM
|
|
|
Registered
Join Date: Mar 2010
Location: Texas
Posts: 2,138
|
The only success I have ever had getting that connection undone was an overnight bath of PB Blaster and line wrenches placed just enough apart that I could get both hands on them to squeeze the life out of them. It broke loose and mashed the crap out of my finger, but I got the connection loose.
__________________
John Curry (Drift King) 928OC member Grand Prix White 1994 GTS AT (The GTS) Black 1989 GT (The GT) and Cobalt Blue 1989 S4 AT (The Blue Car) 1986 Euro AT Indishrot 1984 Euro S AT (The Stepson) and Black Metallic 1984 Euro S 5 speed (The Schwartz) |
||
|
03-22-2015, 09:19 PM
|
|
|
Network Native

Join Date: Jan 2007
Location: SoCal
Posts: 10,349
|
If you cut the hose you might be able to use two box end wrenches, otherwise you need some long handle line wrenches. Wrench on the metal line needs to keep all torque off the metal line, its called counter holding.
|
||
|
03-23-2015, 05:04 AM
|
|
|
Registered User
|
Just finished my fuel lines a few weeks ago, same year as yours. Yes, that fuel line along the passengers side can be a bugger. Once I finally got the sonofagun off I used a cut off wheel to cut the ferrels off and then clamped the new hoses with injector style clamps. I left the clamps slightly lose until I positioned the line on the car, that way I'd be able to get at them (if retightening was needed) once the fitting ends of the lines are tightened up.
The injector hoses went on pretty easily. Getting the old lines off was a pain in the ***, but with patients and a sharp knife...they will eventually fall victim to your will. I reused the caps/hats/whatever-you-want-too-call-them that ride above and below the fuel lines. The 7mm fuel line worked the best and seemed really snug. The 7.5mm I bought seemed a little loose and a clamp would have been necessary, in my opinion. The 7mm took a bit of strength to push them on snugly, so I sprayed a small amount of silicone on the inner part to help aid there movement over the barbs. It's important to cut the injector fuel lines the right length...or in my opinion...a tad longer (maybe one mm). The tiny extra length makes the upper steel fuel rail push them down even tighter after everything is button back up. This was just my preference, your opinion of this may vary. Don't forget to replace all of the rubber grommets on the injectors. If they are like mine...they will just fall apart when handled. The 7.5mm seemed fine for the two horseshoe shaped fuel lines in the rear of the engine compartment (the ones you have pictured). The two lines that have compression fittings used 13.5mm and seemed very snug during assembly. I added a heat shield material to both of these lines, along with conduit. That way, if they were to leak unexpectantly the conduit would funnel the fuel down and away from the exhaust manifold (and hopefully give me time to get it shutdown). I've ran the car for about ten hours total since installing the new lines...and so far...so good. Good luck, Brian. |
||
|
03-23-2015, 04:50 PM
|
|

|
|
Registered User
|
Thanks everyone. I will hopefully get back to the project on Friday and see how it goes...
__________________
1984 Porsche 928 S (US) 2002 GMC 2500HD Full time Nerd |
||
|
03-23-2015, 05:42 PM
|
|
|
Registered User
|
I used a combination of soaking in PB blaster overnight, a 17mm line wrench, an extra long 19mm wrench, tapping with a small hammer, and some grunting. I got it to break pretty quickly! New one is installed already! I was putting the short bend lines back on and noticed it was in the way of the fuel rail for doing the injectors so I left them off for now. The rear one to the fuel cooler is installed as well. I do have a new issue though. I am not quite sure how the connector comes off the injector. I don't want to break it at all. Any suggestions there?
As a side note, 3 of the 4 short hoses to the injectors on the first rail I removed are cracked!! Scared the crap out of me when I saw what I had been driving with... Tons of gunk around the injector ports. I will be cleaning this all up. Excuse the messy project car... 
__________________
1984 Porsche 928 S (US) 2002 GMC 2500HD Full time Nerd |
||
|
03-27-2015, 03:44 PM
|
|
|
Network Native
Join Date: Jan 2007
Location: SoCal
Posts: 10,349
|
Use a pick to remove the metal locking clip, then it slides right off.
|
||
|
03-27-2015, 08:59 PM
|
|
|
Registered User
|
Awesome. I just didn't want to break them. I've been known to do that.... Let me tell you about the $90 for a Speedo and Tach needle adventure...
__________________
1984 Porsche 928 S (US) 2002 GMC 2500HD Full time Nerd |
||
|
03-27-2015, 11:17 PM
|
|
|
Registered User
|
I just pulled up on the plug, while they were still bolted to the intake, and they came right off. The metal spring clip just slid right over the detents without much resistance.
Little late now, but I would have blown all of that grime and dirt off prior to removal. Not a big issue, however, make sure you plug up those injector holes good before you start blowing dirt and grime around. I even taped the exposed ends of the metal fuel lines, as to eliminate dirt from getting into them while blowing off the engine a second time, before final installation of everything. Then I removed the temporary plugs from the injector holes and wiped out the holes really good, where the injector seats, before installation. Sounds like you are making pretty good headway though, and yes, the last fuel lines to go on were those horseshoe shaped ones at the rear of the engine. For what it's worth...if you plan on doing the spark plugs after this project...be sure to blow out around the spark plug, before removal, with compressed air after removing the wires...there was a ton of dirt gathered around each one of mine. Good luck, Brian. Last edited by The Deputy; 03-28-2015 at 03:44 AM.. |
||
|
03-28-2015, 03:41 AM
|
|
|
Registered User
|
Yeah, there was/is so much gunk on there. I tried to clean it off a bit, but it's going to take some work. I will make sure the holes are plugged up. Thanks for the pointers. I think I'm just getting used to every job being three times the work/time I was planning for this first time through. Once it's cleaned up, regular PM should take care of a lot of these messes. Next projects not necessarily in order: leaking steering rack swap, new upper A arms ( bad ball joints), transmission leak, chin spoiler, front grill, passenger front fender repair/replace (and associated misc parts), wheels, tires, alignment, paint, stereo, A/C, cruise control, and on, and on. I do love this car though. Having a blast fixing away!
  
__________________
1984 Porsche 928 S (US) 2002 GMC 2500HD Full time Nerd |
||
|
03-28-2015, 04:02 PM
|
|
|
Registered User
|
Here's today's update. I've got the injectors out and removed all the old hoses. The hoses were in pretty bad shape indeed, cracking and crumbling just with my hands. With as much of a mess everything is, I've decided to send my injectors to Witchhunter and get them cleaned up and tested. I'll take the time while they are out to clean up all the crap on the top of the engine. It's a mess. While I was looking around at some stuff I noticed a few things.
Pic 2 and 3 shows some moisture I'm pretty sure is not supposed to be there. I will keep an eye on when I get it cleaned up. Could this be a future problem? Pic 4, 5, and 6 show the MAF. Is that supposed to just float there like that? Are there no bolts (other that the air cleaner box) to hold it in place? I will get this all cleaned up also. I'm guessing this may need some attention? And lastly, Pic 7. What is this and what should it be connected to? I found it dangling about mid way down the engine bay on the passenger side. I'm not sure where it goes... Progress though. I hope you guys had a great weekend as well! =) Pic 1  Pic 2  Pic 3  Pic 4  Pic 5  Pic 6  Pic 7 
__________________
1984 Porsche 928 S (US) 2002 GMC 2500HD Full time Nerd |
||
|
03-29-2015, 03:50 PM
|
|
|
Network Native
Join Date: Jan 2007
Location: SoCal
Posts: 10,349
|
Some of these cars have had a hard life.
|
||
|
03-29-2015, 05:39 PM
|
|
|
Registered User
|
Agreed. I don't have a great history on this car. It was parked for 6 years at some point though. I'll get her back in shape, or go broke trying!
__________________
1984 Porsche 928 S (US) 2002 GMC 2500HD Full time Nerd |
||
|
03-29-2015, 08:14 PM
|
|
|
Registered
Join Date: Mar 2010
Location: Texas
Posts: 2,138
|
Is picture 7 the remains of the coolant pressure switch?
Look at the small hoses from the reservoir. One should have a sensor and a set wires that look like the wires in your hand. If there is a piece of hard line about 3-6 inches long in between the rubber lines and no sign of anywhere else to plug wires into, then your coolant pressure sensor probably started leaking and was bypassed with a short piece of hard line.
__________________
John Curry (Drift King) 928OC member Grand Prix White 1994 GTS AT (The GTS) Black 1989 GT (The GT) and Cobalt Blue 1989 S4 AT (The Blue Car) 1986 Euro AT Indishrot 1984 Euro S AT (The Stepson) and Black Metallic 1984 Euro S 5 speed (The Schwartz) |
||
|
03-30-2015, 12:42 PM
|
|
|
Registered User
|
Quote:
Yes, that engine is a mess. Mine was nearly as bad...but not quite. I'd grab a shop-vac and suck as much dirt and hood insulator remnants out of there as possible. Actually, I'd lay a blanket over the engine compartment and take a plastic scraper to what is left of your hood insulator. It will just keep dropping crud into the engine bay each time you bump it...so just get rid of the old thing. Unless you have already removed the hood that is. Quote:
Quote:
Quote:
Quote:
Good luck, with your adventure and keep the pictures coming. Brian. |
|||||
|
03-30-2015, 04:20 PM
|
|


 BluTwo
 TBA
TBA Whitey
 Pontoon

