|
|
|
|
|
| Author |
|
|
Unoffended by naked girls

|
Webers again
Got the motor back in Sunday. Those ATV / Motorcycle lifts are awesome. Put the motor in all by myself in 1/2 hour. 2 hours later everything's hooked up and ready to fire up. Spin, spin. Nothing. Whats that gas smell? Had my neighbor spin it for me. Float bowl vents look like drinking fountains (these IDTs havent had fuel in 'em for 3 years). Rap on the inlets with a wrench and everything settles down. Pulled the plugs so as not to hydraulic and pump the gas out. dry the plugs. try to start again. Pop, pop, ptooey, and about a half pint of fuel spurts out of each of the pipes. (all over the neighbor's pants, he puts out his cigarette.) So...
I ordered the rebuild kits from our host and will now wait for UPS. Is there anything extremely Porsche-like to the rebuild? I've got a lot of info from here and the a couple of Weber sites. Doesn't look bad at all at first glance, but you never know... One more thing. P.O. or P.P.O. buggered up one of the carbs needle caps. (16mm cover over the seats) Soft brass and really stuck on. Any secrets other than filing new flats on the cap so's I can get a smaller wrench in it? Sorry, long post, and thanks in advance....
__________________
Dan 1969 911T (sold) 2008 FXDL www.labreaprecision.com www.concealedcarrymidwest.com |
||
 12-10-2002, 04:27 PM
|
|
|
Registered
Join Date: Jul 2000
Location: Gainesville, FL
Posts: 329
|
Not hard
Get a good exploded view of a Weber IDA as a model and do one at a time. Not hard - clean work area - stay organized - go slow - compare to the diagrams as you disassemble. NOTE ALL SETTINGS AS YOU GO. Get a gallon of carb cleaner with a basket to soak all the parts. I had to put the carburetor body in one side up at a time to soak and flip it over (too big) to get it all immersed. It took be about 120 minutes plus soaking time per carb and less for the second one.
Better yet get a Weber manual (I purchased the HP book by Pat Braden) and read how the circuits work several times so you will understand their function as you disassemble. The general consensus is that you should not remove the throttle shafts and plates unless they need to be rebushed. Buggered plug - Be very careful that your wrench/socket is the correct size and apply downward pressure as you turn so they do not slip. Get a 16mm 6-sided socket if possible. Mine were also VERY tight. You will also need the tool for setting the float level and a synchrometer - they are money well spent. Adjusting is more difficult but there are several excellent threads on PP that you may already have. Do the anti-percolation modification if it has not already been done. Also pay attention to worn ball sockets in the linkage and replace any that have noticable play. You will gain several HP just from actually getting full throttle. Best of luck -
__________________
Joe Riley 84 Carrera Targa 69 911S Coupe Click here for 911S project "updating as I go" |
||
|
12-10-2002, 06:52 PM
|
|
|
Unoffended by naked girls
|
Got me a gallon of Berrymans. I did order the sync tool. I'm going to make a bowl level tool
 Settings were WAY off. 9 - 11 turns out on the mixture screws and 2 or 3 on the bleeds. Things must have barely run. Acelerator pumps just drizzle. Good thing is the throttle plates really seemed to seal well. Had about an inch of fuel in the #1 throat! Settings were WAY off. 9 - 11 turns out on the mixture screws and 2 or 3 on the bleeds. Things must have barely run. Acelerator pumps just drizzle. Good thing is the throttle plates really seemed to seal well. Had about an inch of fuel in the #1 throat!  BAD carbs...BAD!  Good thing is, I've only got a couple of grand in it (except time) and the other mechanicals are in pretty good shape... Thanks for the advice!
__________________
Dan 1969 911T (sold) 2008 FXDL www.labreaprecision.com www.concealedcarrymidwest.com |
||
|
12-10-2002, 08:02 PM
|
|
|
Bird. It's the word...
|
Don't hesitate to pull everything apart and fiddle! Remember there are two of them, so you can always refer back to the other one (they are identical). Wayne's book has a chapter on rebuilding webers too.
Good luck
__________________
John Forcier Current: 68L 2.0 Hotrod - build underway |
||
|
12-10-2002, 10:13 PM
|
|
|
Registered

Join Date: Apr 2002
Location: Santa Clara, CA
Posts: 5,668
|
I had the same problem with the brass plugs over the needles.
Tip from JW that worked for me - Grind away the end of your socket so the bevel is gone. You'll get more socket-hex contact area. Failing that, use a chisel and hammer to rotate and loosen the plugs. The get replacements from PMO. The PMO plugs are bigger and much easier to get a socket on without stripping. As far as dissasembling the throttle plates, I find it isn't that tough. I was able to improve the seal between throttle plate and bore by repositioning them.
__________________
Chuck Moreland - elephantracing.com - vonnen.com |
||
|
12-10-2002, 11:32 PM
|
|
|
Unoffended by naked girls
|
Quote:
__________________
Dan 1969 911T (sold) 2008 FXDL www.labreaprecision.com www.concealedcarrymidwest.com |
||
|
12-11-2002, 06:55 AM
|
|

|


 1969 Porsche 911 T 2.0 L

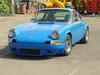 1969 Porsche 911T 2.7RS Spec with Webbers
