|
|
|
|
|
| Author |
|
|
Registered User
Join Date: Nov 2010
Posts: 27
|
AOS (air oil separator/oil fill tube) Disassembly Tips?
I'm working on replacing all the o-rings on the AOS and found out there is apparently another o-ring in the top of the unit under the cap where the vacuum hose connects and feeds back to the intake. How do I take the cap off without destroying it?
While in there I found that the vacuum line to the temperature vacuum switch for the tank purge was busted off as well. While we're at it, anyone know what this hole is beside the lower AOS hole?  Where these tabs are supposed to attach for the dipstick tube (right now it's just held to the car by being stuck into the engine)? 
|
||
 06-03-2018, 03:56 PM
|
|
|
Registered
Join Date: Sep 2008
Location: Atlanta area
Posts: 445
|
Mine has a different configuration, but yes there should be a way to bolt the dipstick. Don't forget the o ring.
__________________
Bruce P. 2011 Cayman Base, LSD, Sport Chrono. 1988 951 totaled and missed  "You're the best I ever had" --JJ Cale |
||
|
06-04-2018, 06:40 PM
|
|
|
Registered
Join Date: Mar 2008
Location: Nashville, TN
Posts: 4,061
|
you will see around the edge of the "AOS black top cap" some little plastic fingers...gently pry from underneath with a thin screwdriver, the fingers will bend out of the way and unlatch.
the big o-ring under that cap is kind of invisible (by now it has turned hard and is black so it blends in to surrounding material), you will need to use your small screwdriver or a pick to get it out. that mystery hole next to the AOS lower port is a blind hole - it doesnt go anywhere, it is a remnant from original block machining. |
||
|
06-05-2018, 09:28 AM
|
|
|
Registered User
Join Date: Oct 2013
Location: Oklahoma City
Posts: 505
|
Id be interested to know if your lower AOS port resembles mine...

|
||
|
06-05-2018, 10:41 AM
|
|
|
Registered
Join Date: Mar 2008
Location: Nashville, TN
Posts: 4,061
|
thats what they look like,...sort of like a "chip" broke off, but they all look like that.
must be a lot of chips 
|
||
|
06-05-2018, 10:44 AM
|
|
|
Registered User
Join Date: Nov 2010
Posts: 27
|
My research also led me to something about how the inside of that hole looks chipped and that is normal.
I figured those tabs were what holds the cap on. Thanks for the verification. Unfortunately I wasn’t having much luck getting them off. I can get one but that seems to have no affect on the cap’s ability to hold on. Guess I’ll just have to work at it harder. Last edited by unL33T; 06-05-2018 at 02:46 PM.. |
||
|
06-05-2018, 10:59 AM
|
|

|
|
Registered User
Join Date: May 2017
Posts: 181
|
Quote:
Is it necessary to replace that top cap gasket? I'd like to avoid prying on the 30 year old plastic if it's not necessary. Sent from my iPad using Tapatalk |
||
|
06-05-2018, 08:49 PM
|
|
|
Registered User
Join Date: Nov 2010
Posts: 27
|
Got it off. Wouldnt want to do that too many times.
The gasket looked fine to me but Im no expert. Would rather replace it for peace of mind. |
||
|
06-06-2018, 02:35 AM
|
|
|
Registered
Join Date: Mar 2008
Location: Nashville, TN
Posts: 4,061
|
may as well since it's available and not that hard to do, when doing the other 2 seals.
(there's actually only 1 seal, there are just 2 in this photo showing where it goes) 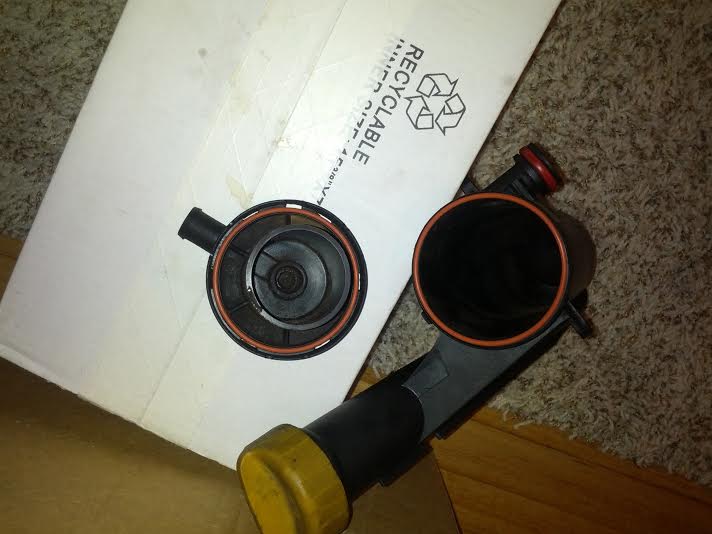
|
||
|
06-06-2018, 10:40 AM
|
|


