|
|
|
|
|
| Author |
|
|
Registered
|
yea my seats also had the yellow fading thing going on - I went to a craft store and got some fabric dye pens - spent an afternoon coloring my seats (trying to stay within the lines) - came out ok - we'll see if that lasts - so he can order this material in the original colors and design - one of my rear seats has a tear which I tried to patch with iron on reinforcements - can't tell with casual look but would be nice to have a proper repair
__________________
84 928 S - SOLD 2012 Cayenne S |
||
 01-14-2016, 02:23 PM
|
|
|
Registered User
|
Yes, Rob had the black with white pin strip in stock. Which I believe you have in your 84 now. He could get other patterns and colors, too...from what I understood anyway.
I can't remember right off what one rear seat recovering costs. I'll look for the detailed receipt he gave me. Brian. |
||
|
01-14-2016, 04:25 PM
|
|
|
Registered User
|
Been doing a bit of work on #225
Before...
 After...  Found some phone dials for her a few months ago. Then, over last weekend... Went down to Classic9leather and picked up the seats/door cards for old red Friday. Two thumbs up on the excellent work! Thank you, Rob and associates. Installed everything this morning, besides the drivers door card...since the door panel is still getting glued up. Snapped a couple pictures of her new goods.   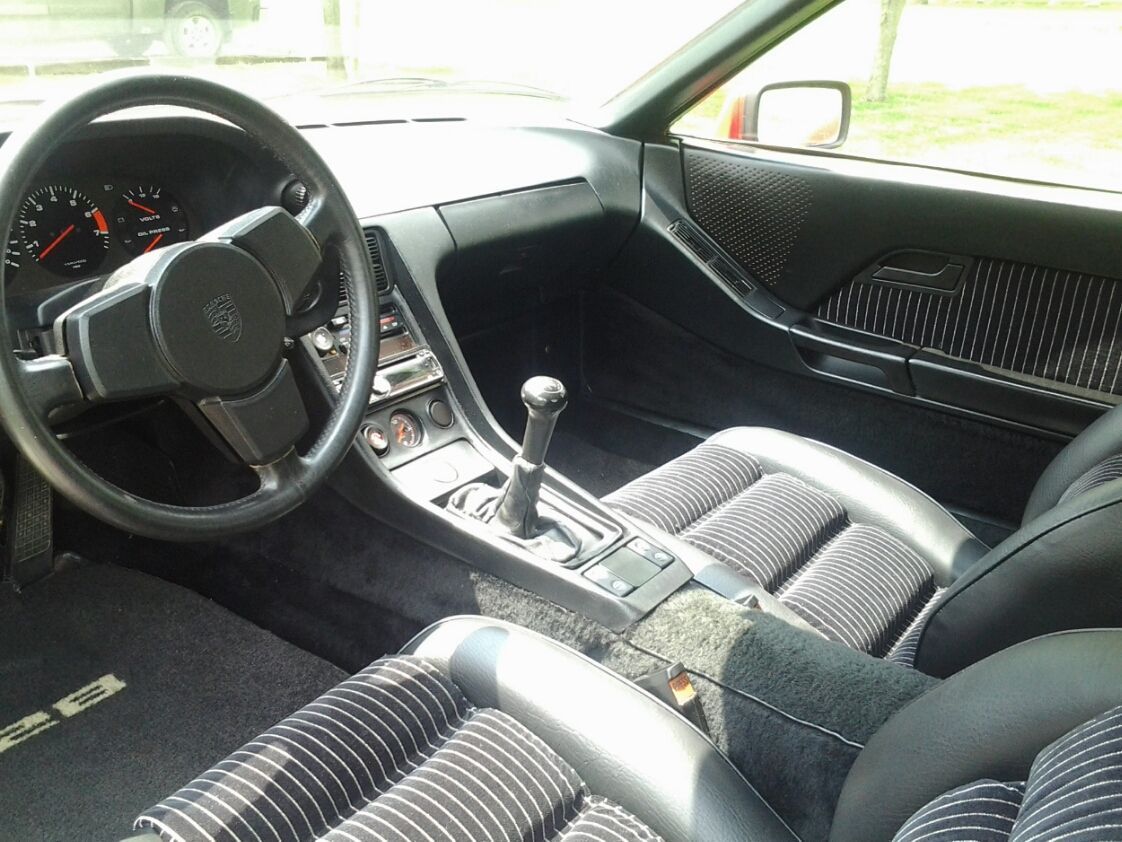  Loving the new phone-dial rims. Tires have cracks you could fit a quarters edge in, so shake-down suspension speeds were well under wide-open-throttle conditions. Plus, she doesn't have plates or insurance.  She stopped, coming in the drive and wondered why old blacky was sporting her old Cup 1 wheels.  Ended up putting her inner fender wheel covers, belly pan, fan shroud and other bits back on...since she was getting a little "to" disassembled for my likings...and she is "suppose to be" my retirement project. Changed the oil and she didn't seem so clattery on start up the last couple times. But, tomorrow morning will be the true test. Now, the rest of the story...(for anyone who is still following along...lol) Pulled the zip-lock bag out of the hatch that contained the fasteners for the seats and counted everything out, eight seat frame bolts and threaded bottom washers, four allen-headed bolts for the rear seats and four black screws for attaching carpet...good to go. Start with the rear seats and they are done within minutes. Bolt in passenger seat, no problems...go to start the drivers seat...and I only have three seat frame bolts and bottom threaded washers. Searched the entire car, garage, tool box, everywhere... approximately ten times...and couldn't find the fourth one anywhere. It's like it just disappeared into thin air. Luckily, I had one from #613 and finished up. Never encountered anything like this in my life, usually, a few backtracking trips and the items is found. Anyhow, all's well that ends well. Now, old red is moveable...so I can get started on the garage improvements. Paint, lighting changes, cabinet...and maybe an additions (work shop). Brian. |
||
|
05-31-2016, 09:21 AM
|
|
|
Registered User
|
It's nice to have old red moveable again.
 She will stay like this until I do the total disassembly when I retire. Brian. |
||
|
05-31-2016, 09:26 AM
|
|
|
Registered
|
wow congrats to you on getting it back to driveable and even more so for never having a part walk off on you - i'm constantly running up and down the stairs to my "parts department" where I have boxes and buckets full of loose bolts and parts to replace something I just had in my hand- when is retirement day? - did that 4 years ago - never looked back
__________________
84 928 S - SOLD 2012 Cayenne S |
||
|
05-31-2016, 11:25 AM
|
|
|
Registered User
|
Okay, I lied...could keep myself from doing more on the 78.
Had to get creative, since front brake pad sensor harnesses for "early model year 78's" are NLA.
Had to cut the ends off of my old sensor wires and connect them to a newer set. There are only three pictured, since I wanted to install the rear one and retain its routing intact. Not like I would ever forget or something...  Even put the yellow parts stickers back on three of them, one was missing. One still has a hand written "number change" over top of a different number. Like they say..."the devils in the detail".  The two on the left are the ones I spliced together, the portion that is shrink tubed goes behind the inner fender and nearly impossible to see. 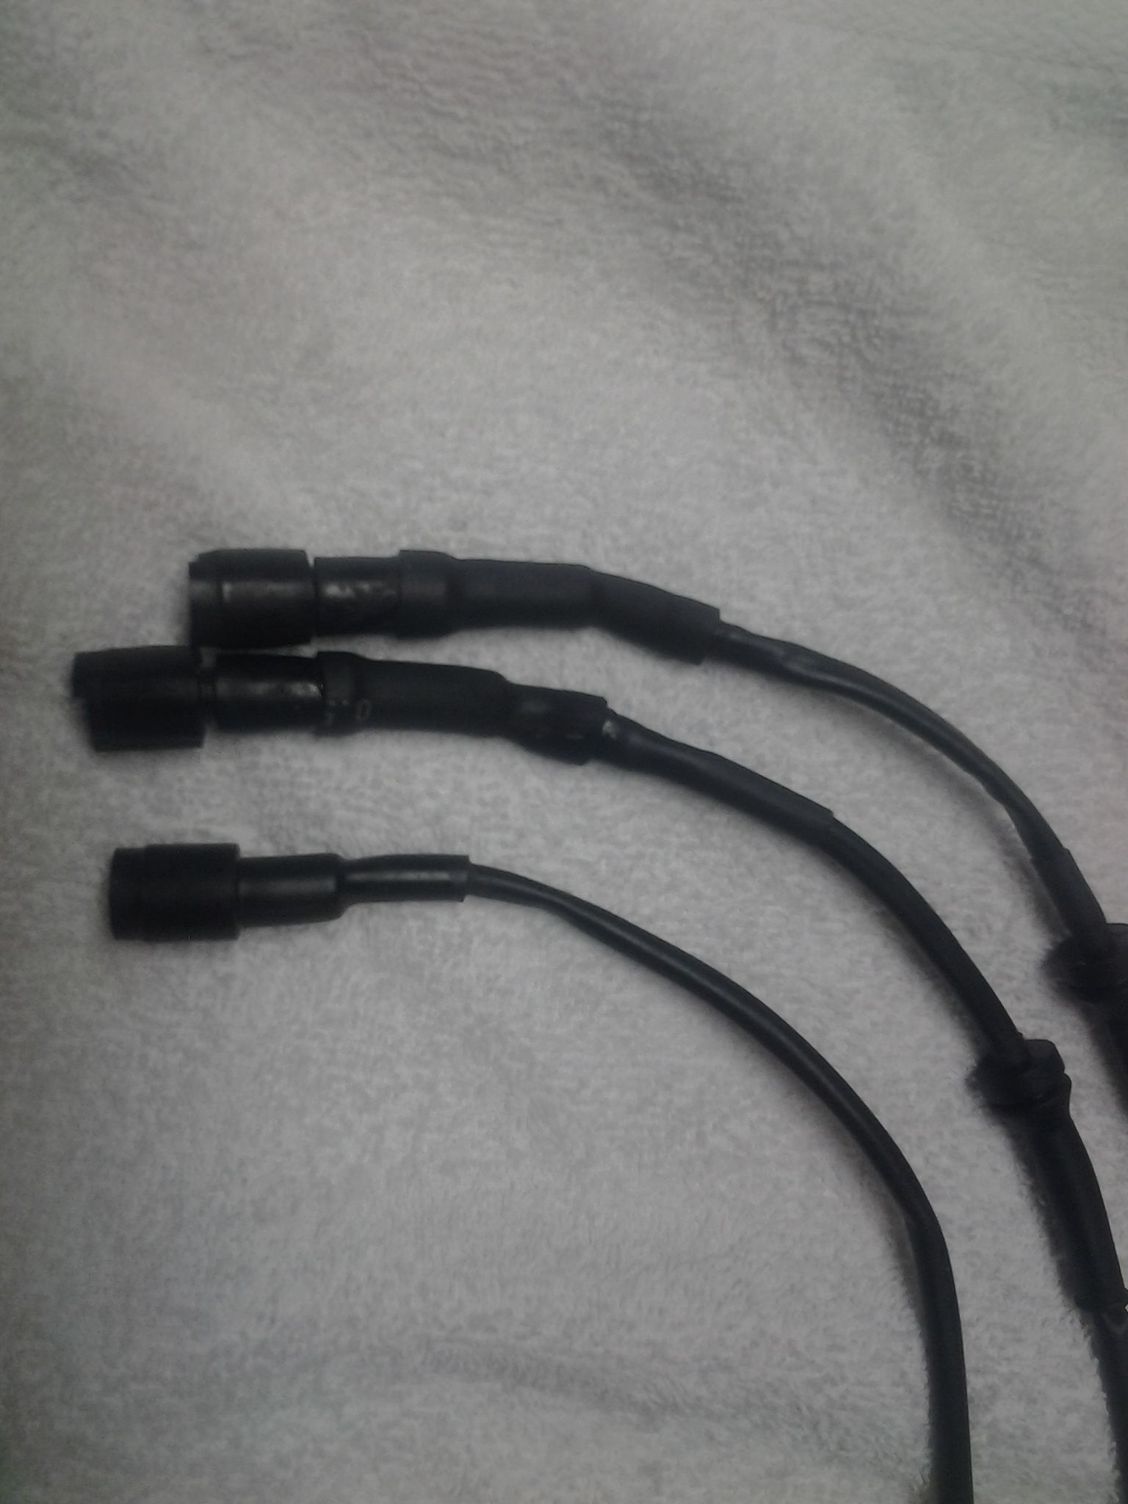 Finished installing the drivers door panel the other day, new clips made all the difference in the world. Vents are still in repair mode.  Coming along...slowly, but surely.  Brian. |
||
|
07-22-2016, 05:55 AM
|
|
|
Registered User
|
The "rabbit hole"...
 Did some welding, grinding, sanding, wire brushing, repeat this process several times, priming to keep things from rusting...it will be a few days before I can shoot color...humidity level is through the roof. 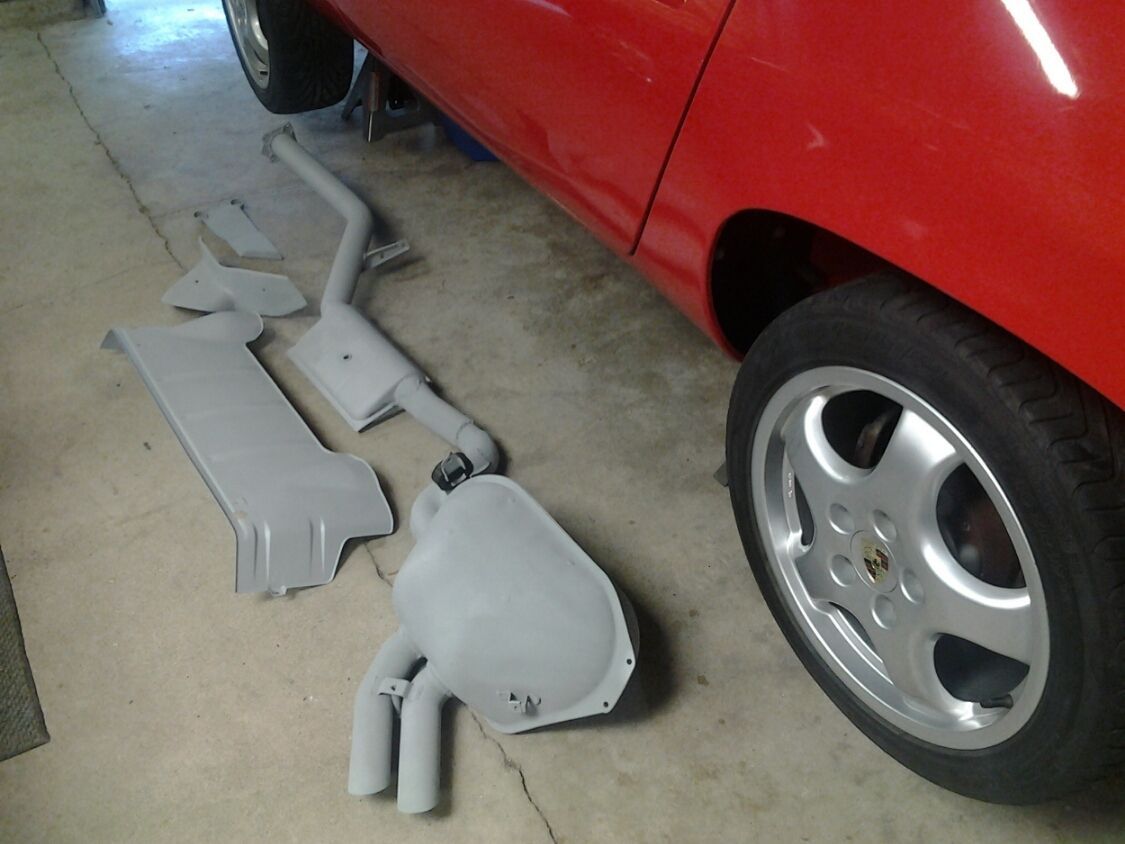 This pile amounts to 30 hours of hard labor.  Date code...  Muffler is from an 82, so I had to modify a front muffler bracket.  Captive nut, so no trying to get two hands in a tight spot.  Complete bracket. Yes, these hanger parts would normally be cadmium coated...but I just want to preserve them from further rust...and get it somewhat respectable for Hell (928 get together in Hell, Michigan). They will get coated correct, when the car comes completely a part.  Not sure if this hose would last another 100K, so I changed it...hope I didn't jump the gun.  My arms and fingers gave up the ghost...and the battery box went to the media-blasting shop. Should be done tomorrow. The other powder-coating place called today and said my phone dial rims are done. Been trying to get this thing ready for Sharks in Hell...but it's not looking good. Brian. |
||
|
07-22-2016, 05:59 AM
|
|
|
Registered
Join Date: Jun 2007
Location: Pittsburgh, PA
Posts: 650
|
I love your car Brian!
__________________
Ed 85 928 5 spd (guards red over tan) 07 Shelby GT500 6 spd (torch red over two tone black and red leather) |
||
|
07-22-2016, 06:31 AM
|
|
|
Registered User
|
Really enjoying your excellent progress.
|
||
|
07-22-2016, 09:25 AM
|
|
|
Registered User
|
Ten minutes of my time and $300.00 later...
 Ten minutes of my time and $25.00 later.   Just need to find the double piece hood liner. Maybe, I'll just remove it for now, can't stand the look of it anymore.  110 heat index the other day...so it will have to wait. Heck, I had a hard time laying down primer in this humidity. Humidity, in my humble opinion...sucks. Brian. |
||
|
07-26-2016, 09:09 AM
|
|
|
Registered User
|
Okay, after a short break in the house...decided to tackle the hood liner.
Old hoodliner scrapped right off, piece of cake. Should be done in a few more minutes, for sure.  The bounties of my labors.  Then some mineral spirits got filled into a spray bottle...and the tedious part of the job began. About half way through...and as sweat poured from every square inch of my body...I thought this whole idea may have been a mistake. But, I continued on.  Finally...finished. One hour from start to finish.  Looks much better now. Plus, no more crap falling on the engine and me, when I bump the hood with my head. Brian. |
||
|
07-26-2016, 09:12 AM
|
|
|
Petie3rd
Join Date: Jul 2000
Location: Philly PA
Posts: 4,528

|
Roger sells a new hood pad its already got the new adhesive on it about 96.00
__________________
^^^ Stan ^^^ 2019 BMW K1250 GS 2016 HD RK 1988 S4 Auto , Elfenbein Perlglanz, Pearl Gray 1982 5sp Met black and tan sport seats |
||
|
07-26-2016, 09:22 AM
|
|

|
|
Registered User
|
Worked on the door panel vents today. Typical problem, broke round nubs that insert in vent control housing. Plus, broken vent ribs in vent housing (not pictured).
Donor vent on left, broken vent center piece on right.  Took a razor knife and cut nubs off donor, then took a 1/16 drill bit and drilled a small hole in the center of the donor nub(s) and broken vent's center piece. Cut a short piece of 16 gauge wire and glued the nub to it, then cut to desired length (just long enough to bottom out in vent center piece hole) and glued the nub into the center vent (thumb) control piece. Both vents done and in place.  Had to make the small retainer wire that holds all three vents motion in unison, while moving the center vent thumb control. A bit of trial and error here. Used 18 gauge mechanic wire for the first one, failed. Was worried about the fact that it wasn't spring steel to begin with and my worries were justified. Even tried heating the wire up cherry red and quenching it to harden it some, hoping this would make it more rigid. However, this didn't work well enough to find reliable.  Had an old choke cable off my push mower hanging on the wall in front of my face, so I pulled out the inner wire...and used that. It was much more difficult to bend, but did the trick. Old one on the right, new one on the left, above^^^^.  ^^^^Worked on this part today, also. Cut new rubber gasket. For those still following along...name this part or give location. Anyhow... Battery box painted and installed.  Belly pan painted and installed.  Passenger side door vents will get worked on today.   Finished putting the final touches on the muffler and exhaust pipe, should be able to install this evening. Brian. |
||
|
07-29-2016, 09:21 AM
|
|
|
Registered User
|
Installed passenger side door vent. Thought it would be a piece of cake repairing this vent, since I'd just repaired drivers side...but it fought me tooth and nail.
 Installed rubber cushion and battery.  Even installed a piece of rubber over battery, just in case we roll over when and if the original ball-joint let loose.  New original battery box cover, thank you very much Alex!  Time to install exhaust.  Painted and ready to go.  Towel for protection and a creeper ride for smooth sailing under old red.  Easy installation, roll exhaust under car, lift front pipe and install gasket and two bottom nuts and bolts, leave loose. Move to rear and lift, install rear bracket bolts and it's in place to install the rest of the hanger bolts and brackets.   Tip-less...  Time for a bit of a break on old red...garage needs cleaned, painted and rewired for more lighting. Brian. |
||
|
08-30-2016, 09:27 AM
|
|
|
Registered User
|
Smashed this thing to smithereens while removing the rubber fuel lines. Picked this one up at Sharks in Hell, from Mark (Sharks), thank you very much. Cleaned old rusty crud out of the upper neck and adjustable spout, then removed/replaced inner sleeve on clamp end.
 Turned out pretty nice, in my opinion. Might install tonight if the mood strikes me. P.S. Just looked at the picture while posting...calm down ladies Installed the phone dials, for an up coming car show.  Time to spread her wings and fly.  Yes, she needs a good cleaning.  Installed some rubber to the phone dials.   The car show is 99.999999999999 percent, if not higher, all American muscle...so there probably won't be a welcome wagon waiting for us...lol. Just keep telling myself...car guys, are car guys.  She looks just about the way she would have in January of 78. Brian. |
||
|
08-30-2016, 09:30 AM
|
|
|
Registered
Join Date: Jun 2007
Location: Pittsburgh, PA
Posts: 650
|
fantastic Brian - beautiful result! Love the comment about the filler neck too!
__________________
Ed 85 928 5 spd (guards red over tan) 07 Shelby GT500 6 spd (torch red over two tone black and red leather) |
||
|
08-30-2016, 09:14 PM
|
|
|
Registered User
Join Date: Dec 2011
Location: Alpine, CA.
Posts: 456
|
Very very nice!
__________________
Mark 1981 928 |
||
|
08-31-2016, 02:58 PM
|
|
|
Registered
|
Nice work, I think the brake calipers were painted black when new.
I have a poster of a "78" and they are shiny black in the pic. but that could have been done for the poster. Very nice work, looks great. This is what I did to mine, not stock but they wont rust. 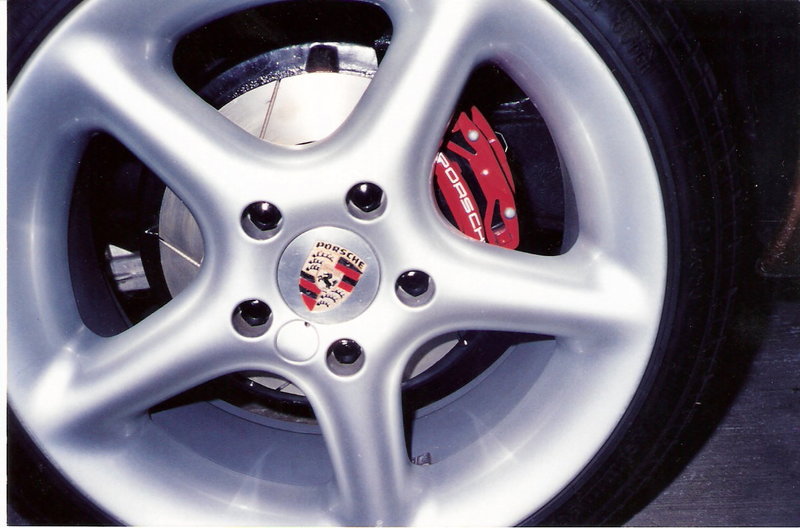
__________________
"Por ' sche" is a two syllable word. "79" US |
||
|
09-01-2016, 05:43 PM
|
|

|
|
Registered User
|
^^^^ Caliper looks very nice red, I'd be interested in seeing a picture of that poster though. All research or discussion I've seen, says the calipers were cadmium plated. But, who knows? I've seen plenty of pictures of early 78's that have slight variations, in one way or another.
What type of rim is that? I've seen a lot of Cup 1 and 2 rims, but yours seem different. I'm thinking they are off a Boxster maybe? Like they way they look, they're pretty tough looking. Brian. |
||
|
09-02-2016, 01:15 AM
|
|


 1987 Porsche 928 S4
 24 karat
