Hi, I posted this on a couple of other sites, and so thought that I would do the same here. I needed to replace the CVJ boots on my wife's 325XI, but was apprehensive about the amount of disassembly and special tools that were needed. I decided to make my own tool to do the job, here's what I made in all it's glory:
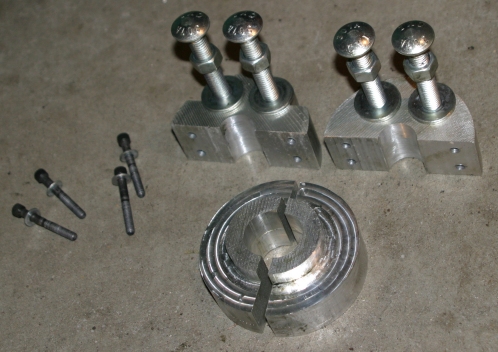
It's made out of aluminum, because I could band saw it, and because you can run aluminum past a router if you mount a 1/4" end mill in it. I used some stuff called Nikx Stikx to lube the mill, but it still dulls after a while because of the speed of the router. You can see some of the milling marks where I spun the tool.
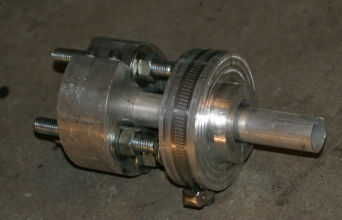
Here's the tool mounted to a piece of aluminum tubing that represents the axle.
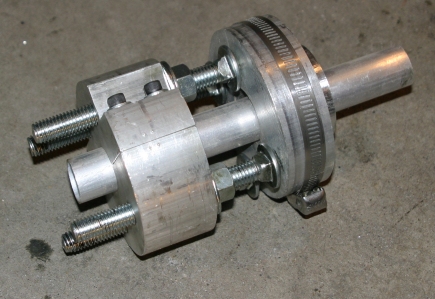
This is way overbuilt, but I had read so much about how tough the joint comes apart (a BMW tech told me that it was almost a press fit) that I made sure the tool would do the job. If I made it again, I would just have slotted the pusher rather than use a band clamp to hold two pieces together. The pressure needed is nowhere near this level of construction. The carriage bolts are 1/2". Seriously, 5/16" or 3/8" would be sufficient, and only two are really needed. Note that I made an extension on the pusher part, so that the tool pushed on the CVJ itself, and not the housing. It's hard to get the axle to line up square with the CVJ housing, but with the extension it doesn't matter.
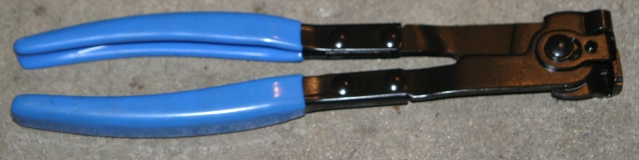
I bought two other tools to make the repair simpler. A boot clamp squeezer:
And a ball joint separator:
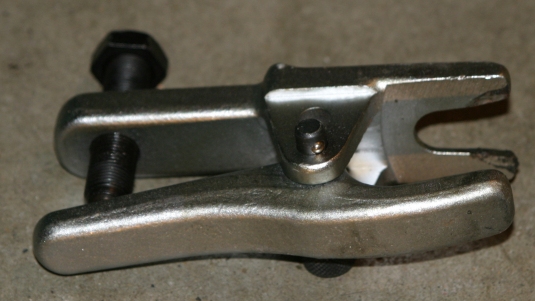
I didn't like this particular ball joint separator. It was too bulky to fit well between the CVJ housing and the top of the ball joint nut. Hard to see, but here's a closeup without the tool.
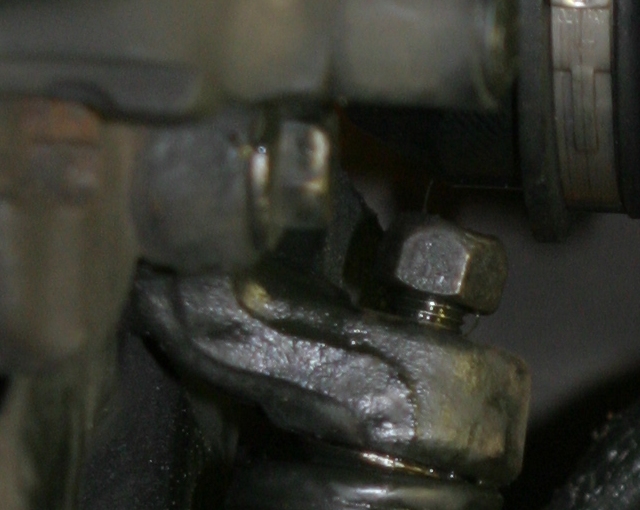
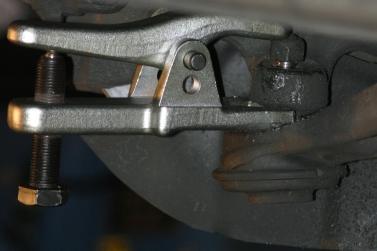
Not much space there. Look at how precariously it is caught on the edge of the nut in the picture below. I have the nut on far enough so that the bolt is just level with the top of the nut. Not sure what's a better make. I got it to work, but there have to be better units out there.
Here's the repair:

Wheel off, I pop the swing-arm. This is the only nut that I removed from the car during the entire repair. Note that I left the nut on the top so that when it popped, it didn't fly around. Once you've popped the swing arm, you can move the outboard axle assembly around pretty easily so be careful not to pull on the brake line or the wire to the wheel speed sensor. There's also a leveler under here that senses level for the headlights. Use care.
I'll show the rest of the repair in the next post.