|
|
|
|
|
| Author |
|
|
Registered
Join Date: Mar 2017
Posts: 79
|
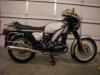
Installing 1200S Luggage Rack Details
I just received the rack, came with no instructions. I can figure it out Im sure but would be nice to have a copy of the instructions if anyone has them you can email them to jimszx9r@mindspring.com
Thanks |
||
 10-01-2017, 04:48 AM
|
|
|
Talk Less, Say More

Join Date: May 2000
Location: Moab Utah. Home of wierd red & orange radioactive stuff... And 1 billion tourists.
Posts: 13,179
|
What rack?
OEM luggage?
__________________
cRaIg CaRr 2000 Dyna FXDX, 2001 Sportster Sport, 2000 R1100S,2007 R1200S,2015 rNineT,2015 Gold Wing, 2023 F850GS,2023 R1250RS, 2017 Triumph T100, 2019 Jeep Rubicon, 2005 Jeep Sport, 2001 Corvette, 1978 Porsche 928. 2001 GMC Sierra 2500HD, 22 pairs of shoes. 24 bottles of beer. |
||
|
10-01-2017, 05:46 AM
|
|
|
Registered
Join Date: Mar 2017
Posts: 79
|
Factory BMW rear rack for sport sidecases
|
||
|
10-01-2017, 10:47 AM
|
|
|
encantado

Join Date: Jun 2016
Location: 13413 / 92660
Posts: 207
|
 Open seat lock (1) and remove the front seat. Disengage rear-seat lock by means of pull cord (2) and pull the rear seat forward to remove.  Remove screws (1). Remove both clips (2). Pull the rear trim panel to the rear to remove, noting retaining pin (3) of the rear light. [Repeat for other side.]  Lay the rear panels on a clean, soft underlay. Working from the inside of each rear panel, position the centre bit at point (1) in the moulded contour and drill the holes [d = 18 mm].  Disconnect plug (1) of the number-plate carrier. Release bracket (2) of the heat shield. Remove screws (3) and remove the number-plate carrier.  [left] Pull cable (1) out of cable guide (2). Remove screws (3). [right] Hold the number-plate carrier in position and install screws (1) [8 Nm].  On each side, remove screws (1) from the footrest plate. Clean all threads.  Seat lug of bowed tube (1) on lug of bowed tube (2). Slip screws (3) with washers (4) through both lugs and bring the two bowed tubes into alignment. Slip washers (5) onto the screws and install nuts (6) [8 Nm].  From below, on each side work case carrier (1) into position with the front lugs against footrest plate (2) and locate the carriers with screws (3). Seat the rear lugs on frame bottom section (4) and locate with screws (6) and washers (5). Align all components, making sure that they are free of stress and strain, and tighten all the screws. Tighten screws (3) [19 Nm]. Tighten screws (5) (sic. - I think these should be screws (6)) [8 Nm].
__________________
"Its what makes life interesting, finding the balance between cigarettes and tofu." Last edited by darkonaut; 10-01-2017 at 12:30 PM.. |
||
|
10-01-2017, 12:26 PM
|
|
|
encantado
Join Date: Jun 2016
Location: 13413 / 92660
Posts: 207
|
 Connect plug for number-plate carrier (1) to plug (2). Install cable (4) in holder (3) on the heat shield. Route cable (4) underneath bracket (5) and along the frame tube and secure it to the case carrier with cable ties (6).  Clean all threads. Lower cross-member (1) into the tail section from above and use screws (2) and washers (3) to secure it to frame (4) [8 Nm].  Slip the rear trim panel into position underneath the tank cover from behind, noting retaining pin (3). Engage screws (1) and tighten them just enough to hold them in position. Install both clips (2). [Repeat for other side.]  On each side, secure mushroom-head mount (3) to the cross-member with screw (4) [19 Nm]; align the rear trim panel in such a way that edge of bore (5) in the rear trim panel is clear all round the mushroom-head mount. Tighten all the screws installed in the rear trim panel beforehand until hand-tight [emphasis mine].  Mount the opened case on the motorcycle. Turn key (1) toward the RELEASE position. Hook bottom rest (2) of case over bowed tube (3). Tilt the case up and into position against mushroom-head mount (4), pulling the RELEASE lever up until mushroom-head mount (4) is at the rear end of adapter (5), then press the RELEASE lever down. The mushroom-head mount must now be locked.  Slacken screws (6) at bottom rest (2). Press bottom rest (2) down onto the bowed tube, making sure that inboard catch (7) on bowed tube (3) is located in recess (8) in bottom rest (2). Tighten screws (6) [8 Nm].  Warning WarningInadequately secured cases can impair road safety. Make sure that the cases do not wobble and that there is no play at the anchorages. The bottom anchorage requires adjustment as soon as slight play becomes perceptible after prolonged use.
__________________
"Its what makes life interesting, finding the balance between cigarettes and tofu." |
||
|
10-01-2017, 12:43 PM
|
|
|
Registered
Join Date: Mar 2017
Posts: 79
|
Thanks darkonaut. I don't think I could have gotten the install without it. So ready to drill the two holes this morning and finish up the install. I bought the kit new but there was no hardware bolts or instructions. Thanks again!
|
||
|
10-02-2017, 04:37 AM
|
|

|
|
encantado
Join Date: Jun 2016
Location: 13413 / 92660
Posts: 207
|
glad i could help! good luck with the rest of the install--what's the saying, measure once cut twice?
__________________
"Its what makes life interesting, finding the balance between cigarettes and tofu." |
||
|
10-02-2017, 06:25 AM
|
|
|
Registered
Join Date: Dec 2020
Posts: 7
|
Hallo, sorry I've just bought the rack, and cannot understand why I should remove number plate and plug darkonaut shows in the first picture here. I mean, it seems I can just use screws to link the rack to rear frame. Plug, cables, number plate should not get in the way of the rack....
|
||
|
12-30-2020, 07:41 AM
|
|
|
Registered
Join Date: Dec 2020
Posts: 7
|
Sorry, I refer to those pictures
 
|
||
|
12-30-2020, 07:48 AM
|
|
|
Registered

|
You need to remove the number plate as the bolts that hold the cable guide on are only accessible from the top of the number plate. The cable guide gets removed and you then use zip ties to retain the cable.
Look at the 5th set of photo's and you will see the screws I mean. The hardest part of this whole episode is drilling the holes in the bodywork......it's actually easy to drill, but also easy to screw up the holes and mess up your bodywork. It's been over 10 years since I installed my mounts, so I am only going off of these photos. Hope that helps.
__________________
09 HP2 Sport,07 R1200S,05 KTM 640 Adventure,00 KTM 520 EXC,82 R100S,72 Hodaka 125 Wombat Last edited by Droptarotter; 12-30-2020 at 06:13 PM.. Reason: My brain doesn't work |
||
|
12-30-2020, 06:10 PM
|
|
|
Registered
Join Date: Dec 2020
Posts: 7
|
thank you very much for your help. Just would like to ask you one more question: is it really necessary to remove cable guide? I'd like to leave it there...
Really I guess I won't drill the bodywork: at the moment I'll use just soft bags, not original bmw' ones, so don't need that linchpins. Do you think I need to mount also this plank? 
|
||
|
12-31-2020, 03:13 AM
|
|
|
Registered
Join Date: Dec 2020
Posts: 7
|
took a look to the bike. Maybe there's not enough space for the rack if I don't remove the guide. I have seen also I have to remove the bodywork anyway (otherwise it's impossible to screw the upper bolt), so i'll mount the plank too. Thank you for your help
|
||
|
12-31-2020, 06:24 AM
|
|

|
|
Talk Less, Say More
Join Date: May 2000
Location: Moab Utah. Home of wierd red & orange radioactive stuff... And 1 billion tourists.
Posts: 13,179
|
I thought there were drilling marks molded into the inside of the rear bodywork.
There are many threads on this board regarding the R1200S luggage and rack install.
__________________
cRaIg CaRr 2000 Dyna FXDX, 2001 Sportster Sport, 2000 R1100S,2007 R1200S,2015 rNineT,2015 Gold Wing, 2023 F850GS,2023 R1250RS, 2017 Triumph T100, 2019 Jeep Rubicon, 2005 Jeep Sport, 2001 Corvette, 1978 Porsche 928. 2001 GMC Sierra 2500HD, 22 pairs of shoes. 24 bottles of beer. |
||
|
12-31-2020, 11:00 AM
|
|
|
Registered
|
Quote:
The plank as you call it is there to mount the two "hangers" for the hard bags. If you are going to use soft bags, you won't need all these pieces mounted and, depending on the soft bags, you might not need any of the bag mount parts at all?? Quote:
Gioel; Once you have the soft bags mounted, show us what you have come up with. As much as I like the hard bags for functionality, I really hate how they look! To me they are an afterthought and look out of place. I have often thought of using my Mosko R80 soft bags, but I also know those bags would damage the bodywork if it wasn't protected somehow. Cheers
__________________
09 HP2 Sport,07 R1200S,05 KTM 640 Adventure,00 KTM 520 EXC,82 R100S,72 Hodaka 125 Wombat |
||
|
12-31-2020, 05:47 PM
|
|
|
Registered
Join Date: Dec 2020
Posts: 7
|
Guess you're right, maybe i didn't need the rack, but yes - as you wrote - I was afraid that without 'em, bags could scratch the bodywork. And I bought the kit at half price!
I'll publish some pics as soon as possible, wish to mount it tomorrow, but my bags suck... I have to admit that I like BMW' ones, but they are really expensive. And too big. Anyway, I think I'll use bags a couple of times every year, and free hangers are ugly  PS Sorry, I'm italian ") , i use a lot of wrong terms , i use a lot of wrong termsQuote:
|
||
|
01-01-2021, 02:58 PM
|
|
|
Registered
|
Gioel;
Don't worry about being Italian, I'm Canadian and I'm sure I have a lot of problems myself!! Once I forgot I had the BMW bags mounted and clipped my buddy's bike.....the mishap ripped my bag right off. Thankfully one of the guys had crazy glue and a few extra straps so I managed to keep going, but I have never liked how far out the bags protrude. They are not as neat as the Krauser bags on my Airhead. Post pics of what you come up with!! Cheers
__________________
09 HP2 Sport,07 R1200S,05 KTM 640 Adventure,00 KTM 520 EXC,82 R100S,72 Hodaka 125 Wombat |
||
|
01-01-2021, 05:28 PM
|
|
|
Registered
Join Date: Dec 2020
Posts: 7
|
I run out of battery and could just take a couple of pics... And I just had time for an attempt, I'm not very happy about the result: bags are too close to the wheel, and it's not safe, I need to find an other way to put them
 
|
||
|
01-04-2021, 02:25 PM
|
|
|
Registered
|
I thought you would mount them by hanging over the passenger seat and fasten the lower part of the bags to the saddlebag frame??
But that would damage bodywork??? I also have a Hattech mount that replaces the passenger seat and I have thought I might be able to hang soft bags by using the Hattech??? Check this thread; Hattech R1200S Luggage Rack Cheers
__________________
09 HP2 Sport,07 R1200S,05 KTM 640 Adventure,00 KTM 520 EXC,82 R100S,72 Hodaka 125 Wombat |
||
|
01-05-2021, 09:28 PM
|
|
|
Been Nowhere Done Nothing

Join Date: Sep 2020
Location: Nor-Cal: Sierra Nevada's
Posts: 455
|
I like using just a tail bag on my S bike. Quick snap on straps make it easy to get on and off. Use the same bag on my other bikes.
 
__________________
05 R1100S BCR, 04 R1150R 16 S1000XR, 24 S1000RR, 21 Ducati 950S |
||
|
01-06-2021, 09:19 AM
|
|
|
Talk Less, Say More
Join Date: May 2000
Location: Moab Utah. Home of wierd red & orange radioactive stuff... And 1 billion tourists.
Posts: 13,179
|
The problem with the R1200S is that it's a bike that never knew what it really was for.
"Sport Sport Sport" Or Simple Sport Touring bike. I just used a tail bag also on my old one. I thought there were little nylon hooks under the seat somewhere. Unless I'm thinking of a different bike... 
__________________
cRaIg CaRr 2000 Dyna FXDX, 2001 Sportster Sport, 2000 R1100S,2007 R1200S,2015 rNineT,2015 Gold Wing, 2023 F850GS,2023 R1250RS, 2017 Triumph T100, 2019 Jeep Rubicon, 2005 Jeep Sport, 2001 Corvette, 1978 Porsche 928. 2001 GMC Sierra 2500HD, 22 pairs of shoes. 24 bottles of beer. |
||
|
01-06-2021, 11:30 AM
|
|


 1978 Porsche 928
 2003 BMW Dakar
 2000 Harley-Davidson Dyna FXDX Super Glide Sport
 2007 BMW R1200S
 2010 BMW F800GS
 1983 Honda XL600r
 2000 BMW R1100S
 2001 BMW F650GS
 1982 BMW R100S
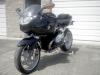 BMW R1200S
 KTM 520
 HP2 Sport

