|
|
|
|
|
| Author |
|
|
Registered
|
Dr. ColorChip Road Rash Paint Chip Repair Kit Review
We all face it everyday, road debris like small rocks, pebbles or gravel, blasting the front-end of our beloved cars. I'm the type that notices every new paint chip each time I wash my car, yes it's a given with a daily driver, but what to do about it?
The folks at Dr. ColorChip have created a series of repair kits which address this exact issue and does a fantastic job of it! We used our E90 as a tester; this car's faced all kinds of items kicked-up into it from day one, especially from track day lapping. The specific kit we're using is the Road Rash Paint Chip Repair Kit which includes everything you need to get the job done right, plus the packaging is super cool! Included in the kit:
We started with a clean area on the left fender which had four small chips:  It's nice because you have a choice of brushes; for this spot we chose a microbrush. After shaking the small bottle of paint, we began to apply the paint with small dabs just outside the chip area and then, using a thumb, quickly smeared the paint over the chips leaving a flat surface:  After allowing the paint to dry for a few minutes, it was time to remove the excess using the SealAct blending agent. Have to admit, it's initially nerve-racking to stand and watch paint dry on your car but it all works out in the end! Using the supplied blending cloth with even pressure, we removed the excess paint and this part you just get a feel for - some spots require slightly more pressure than others - but still, we're talking light pressure: 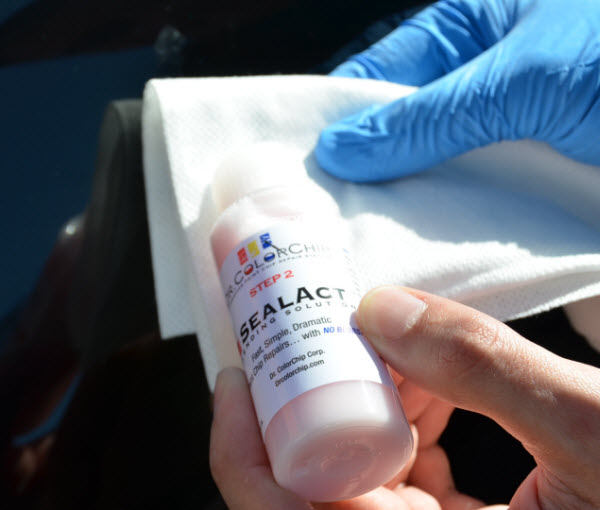  Finally, it's time to buff out the area with the supplied microfiber towel. Buff clean and take a look at your work. We were impressed with the results and believe an even better result might be attainable using Dr. ColorChip's Squeegee: 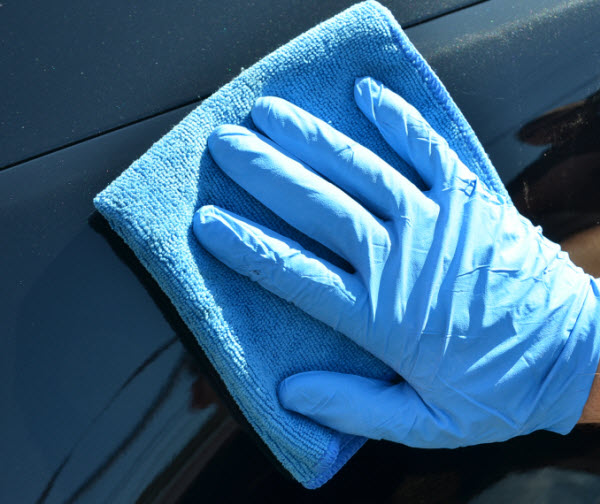  Does this repair kit return your paint to what it was directly off the showroom floor? No and it's not meant to do that but it does do a fantastic job and performs just as advertised by Dr. ColorChip. This particular kit will cover up to 2 dozen chips! For further product information within our catalog, go to: Dr. ColorChip Road Rash Repair and Squirt N' Squeegee Kits |
||
 02-14-2014, 02:00 PM
|
|
|
Registered User
Join Date: Jul 2013
Posts: 6
|
I've used their product on four of my BMW's and am always pleased with the results. It's possible to build up the chip with multiple paint applications too.
Recommend it to everyone! |
||
|
02-19-2014, 03:07 PM
|
|
|
Registered User
Join Date: Feb 2014
Posts: 4
|
You forgot a step, you need to smear the paint. It helps dry it faster and makes it easier to build up as well. So when you apply the solution, it will make a much better build and cleaner fill.
Here is the video: Dr. ColorChip paint chip repair live demo - YouTube This was done at the BMW Oktoberfest. |
||
|
02-20-2014, 04:28 AM
|
|
|
Registered User
Join Date: Feb 2014
Posts: 4
|
|
||
|
02-20-2014, 04:33 AM
|
|


 911.360.0601
 The 85


