|
|
|
|
|
| Author |
|
|
Registered User
Join Date: May 2018
Location: Australia
Posts: 280
|
My 1983 Japanese 911 Cab Project
Hi all, first post here and this forum has already proven to be an awesome resource.
What have I gotten myself into?! I picked up my 1983 911 Cabriolet last week- my first Porsche! Originally imported from Japan into Australia, back in 2005 I believe. It was then sold on to the owners who I purchased it from. The lovely gentleman that I purchased it from had it for about 10 years and over that time spent quite a lot of time and money on it. Mostly focused on converting it from LHD to RHD. Unfortunately he became sick and had to move the car on for someone else to be able to finish his hard work. or find a pile of cash to pay an auto elec to sort it out for me. In order to do the RHD Conversion, he got in contact with a VicRoads approved (local road authority) engineer who had experience with Porsche steering conversions. The engineer advised him what was required to meet the required approvals. So, most of the work has been completed. The steering has been swapped across, the dash has mostly been completed, as have the pedals amongst other things. The engineer's certificate still hasn't been ticked off... so, once I get it running, I'll have to do the final few jobs to meet the engineer requirements. The interior has pretty much been stripped out with all the door cards and rear inner panels needing replacing. The carpet has been replaced - I think with a homemade set... it will do for now. I've heard the car running for about 10 seconds... enough to hear that that there wasn't any obvious knocking or scary sounds... however there was quite a bit of smoke. The previous owner reckons this is because he overfilled the oil. Hopefully that's true and it's not valve guides or similar. Once we got it home yesterday, we gave it a good vacuum and wiped down all of the interior as it was really, really dusty. I felt much better once it was all cleaned out. The car was originally white, but sprayed Red in Japan. I was told that the car had only completed 83,000km's in it's life (as per the speedo reading) but there's no matching documents to prove this is correct., Also I find it strange that someone would respray a car before it had done even 100,000kms. I personally dont think the speedo reading is correct - but who knows. I actually love that this car comes from Japan. I visit Japan as much as I can, so for me, it's an awesome bit of history. I'd love to find out more about it's Japanese owners and where in Japan it lived before coming to Australia.  Brand new seats installed by previous owner. I don't love the colour - but they seem like very nice seats. Shame they aren't just plain black. The owner wanted to go for a 90's red theme inside it seems. 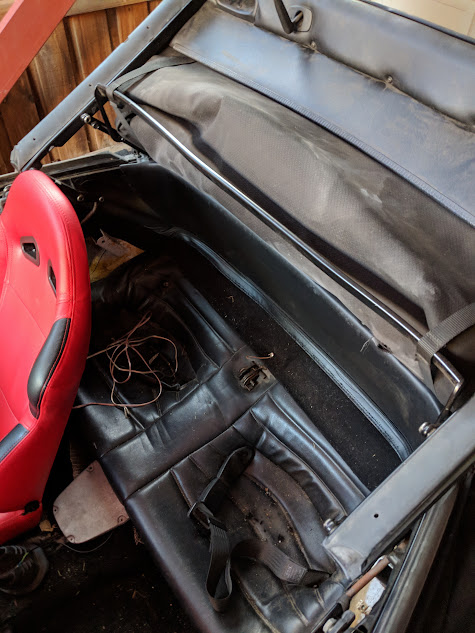 Including steering wheel and gear shifter cover.  This is the nightmare I have in front of me. I know nothing about car electrics. I can do engines and bodywork... but electrics I have no experience with. I'm wondering if it would be easier to start again with a brand new wiring loom. I guess this is what happens when someone does a DIY steering conversion.  Some more Japanese delivered Porsche goodness.   What do you do when your car is full of electrical gremlins? Add some more electrical components to complicate things! (Previous owner installed this). Don't know if it's hooked up yet.  Please let me know if you see anything completely out of place in the engine bay  One of the dashboard bits that isn't working. The Handbrake light works ok, but the seatbelt light does not... possibly not hooked up correctly... or maybe a blown bulb. 
|
||
 05-08-2018, 06:55 PM
|
|
|
Registered User
Join Date: May 2018
Location: Australia
Posts: 280
|
For some reason the photos of the car didn't work in the original post:
  
|
||
|
05-10-2018, 10:23 PM
|
|
|
Administrator

Join Date: Aug 2016
Location: Los Angeles, CA
Posts: 6,087
|
Welcome to the forum and congrats on the purchase! What are your goals with the car? Please let us know if you have any questions or if we can assist with any part needs. For reference, I'm attaching a link to our site's DIY tech articles - if you're planning on working on the car yourself, these guides should be very helpful.
https://www.pelicanparts.com/911/911tech_articles.htm |
||
|
05-11-2018, 01:09 PM
|
|
|
Registered User
Join Date: May 2018
Location: Australia
Posts: 280
|
Quote:
I thought the first job I should get underway on a car that's been sitting for about 10 years is to drain the oil, check the valve clearances and replace the oil filter. As well as hope that big chunks of engine dont fall out with the oil! Well, I drained the oil and I managed to find a tiny amount of metal attached to the magnet in the sump. I'm thinking this is not such a big deal at this point. I'll keep an eye on it at the next oil change and see what happens.  There was also some white goo at the bottom of the oil tank. I assume this is condensation because it's been sitting for so long.  Next I thought I'd adjust the valve clearances - which i've done many, many times on my VW's and can get it done in probably 30 mins, incl oil change. On this Porsche I wasn't so lucky. Somebody has gone crazy with the RTV silicone sealant around the valve covers. I've been working on getting the valve covers off for 2 whole days!! Managed to get the tops off yesterday and look at what was underneath.   It's like they just threw the sealant in the direction of the heads... I mean - look at that, it's even on the adjusting nut! And by the looks of the oil leaks on the heat exchangers, it didn't do a very good job at keeping the oil in!  Also, can anybody tell me where this tube is supposed to connect up to? Somebody mentioned it's the warm up regulator?  My aim for the car is firstly to get it running nicely. Then because it's been converted from LHD to RHD by the previous owner, I have to get a Engineer certificate before it can be registered here in Australia. Once that's done - I will just work on the little jobs that need doing and get out and drive it!! |
||
|
05-13-2018, 06:08 AM
|
|
|
Registered User
Join Date: May 2018
Location: Australia
Posts: 280
|
Just to try and keep everything together... here is another thread that I posted separately about my stuck valve covers Help! Stuck lower valve covers! Advice needed!
Turns out that once I finally got my valve covers off, I found myself a nice broken head stud. GREAT! A few people told me that I should just get the car driving and worry about it later. But I'd rather get the motor reliable and safe before I drive it. Since it's Winter here in Melbourne anyway, the goal is to have it done by spring/summer! So, today, I disconnected everything that I could find attached to the engine... This photo was earlier in the day so a few things might still be connected in the pic   I spent a LONG, LONG time trying to undo the nut on the oil line that was connected to the hard line at the rear right back corner of the engine. It wouldn't budge. I soaked it in WD-40, tried hiting the spanner with a hammer (including my finger) still wouldn't budge. People had suggested blowtorch, but I dont have one and didnt feel confident using flame. I was very tempted to just cut the hose to drop the engine, but then I realised 2 things. One being it was going to cost about $200-300 to replace. Also to replace it I would still have to undo the other end at some point which looked much more difficult. So, I went all MacGuyver style and used what I had available to me. Which ended up being the internal part of a jack stand as a extension on the spanner. And so I didn't have to hold the spanner onto the hard oil line, I jammed it against the jack stand itself. I ended up standing on the dodgy extension that I made and it popped off first go. Happy days. Only problem was it took most of the day to attack this, so I had about an hour left of light.    The last hour was spent fumbling my way around trying to get at the hidden bolt above the starter motor to try and drop the engine out. |
||
|
06-03-2018, 04:12 AM
|
|
|
Registered
|
Can you see the last 3 digits on the part number on the warm up regulator? It looks like an 089 and if so, that plugged line should connect to vacuum line. The vacuum provides enrichment as rpm increases. See if the picture helps.

|
||
|
06-03-2018, 05:07 AM
|
|

|
|
Registered User
Join Date: May 2018
Location: Australia
Posts: 280
|
Quote:
|
||
|
06-03-2018, 05:12 AM
|
|
|
Member 911 Anonymous
|
Wow, you got your work cut out for you.
Break a Leg Brother!
__________________
'85 Carrera Targa Factory Marble Grey/Black * Turbo Tail * 930 Steering Wheel* Sport Seats * 17" Fuchs (r) * 3.4 * 964 Cams * 915 * LSD * Factory SS * Turbo Tie Rods * Bilsteins * Euro Pre-Muff * SW Chip on 4K DME * NGK * Sienes GSK * Targa Body Brace PCA/POC |
||
|
06-03-2018, 09:46 AM
|
|
|
Registered User
Join Date: May 2018
Location: Australia
Posts: 280
|
well... today I stuffed up...pretty bad.
After trying to undo a single CV bolt for 4 hours, so that I could remove the engine and transmission together, I probably should have walked away and came back tomorrow to take the engine out. But stubborn me, decided to stick at it, since the engine was ready to be dropped out. I stuck the ATV jack under the engine and a floor jack under the transmission. I unbolted everything and the engine lowered down. I wiggled the engine backwards, but couldn't get the transmission shaft out through the hole in the floorpan. I decided to jack the car up a little higher. But in order to do that, I had to take the jack from under the transmission. I put a block of wood under the transmission, but, as I jacked the car higher, the block tipped over, the transmission slipped and hit the deck. Probably about a foot drop. Ugh!!!!!   From what I can tell, the transmission landed on the support plate underneath. It appears the shaft didn't hit the ground...I hope. My only concern is that the drop might have damaged or cracked the transmission case or the area around the bolts in the engine case. Unfortunately it's winter here and this all happened as it was getting dark, cold and even started raining. I had to pack up and head inside and pretty much leave the engine and transmission as is. I'm going to head out tomorrow morning and pick up a flat bed dolly to rest the transmission on. No idea how i'm going to lift it onto there though. I think I'm going to have to take the bumper off to make it easier to remove the engine too. Ah well. Back at it tomorrow. |
||
|
06-16-2018, 05:42 AM
|
|
|
Fahren mit dem Wind.

|
It is most likely fine. See the part circled in yellow in this photo:
 That tanish part is the connector for the CIS lambdaO2 sensor. These things are Unobtanium and they disintegrate into dust - literally. So be very careful when you remove that.
__________________
Keeper of the 1983 911SC Cabriolet Registry (http://911sccabrioletregist.freeforums.net) Caregiver to: 1983 911 SC Cabriolet - Fahern mit dem Wind. (Moss Green Metallic over Champagne and Brown Leather) |
||
|
06-16-2018, 11:29 AM
|
|
|
Speed Metal Army General
Join Date: Apr 2012
Posts: 457
|
This guy knows the fly spot where they got the champagne!
|
||
|
06-16-2018, 11:33 PM
|
|
|
Registered User
Join Date: May 2018
Location: Australia
Posts: 280
|
Quote:
Sent from my Pixel 2 using Tapatalk |
||
|
06-16-2018, 11:57 PM
|
|
|
Registered User
Join Date: May 2018
Location: Australia
Posts: 280
|
Quote:
|
||
|
06-17-2018, 12:41 AM
|
|
|
Registered User
Join Date: May 2018
Location: Australia
Posts: 280
|
Well, big weekend for me... finally managed to drag the engine out from under the car.
Ended up removing the bumper, which was made more difficult by the bolts in the bellows spinning freely. I ended up having to cut one of the bolts with a dremel cutting tool to get it off. Looks like a new set of bellows will be on order. Thankfully one of the cheaper Porsche parts! For those interested, I needed the car 88cm off the ground, using my ATV jack to get the engine out. It cleared, just. I hate to think how high it would have needed to be without removing the bumper! My jack stands were 47cm high and I had to go buy some concrete pavers to put the stands on to increase the height by about 5cm which did the trick.   As you can see, even from this photo, this is a prime candidate for a triangle of death repairs. I can also see quite a lot of weeping around the seals of the transmission. There is a LOT of gunk around the RHS of the transmission mount. |
||
|
06-24-2018, 10:53 PM
|
|
|
Registered User
Join Date: May 2018
Location: Australia
Posts: 280
|
 Spent quite a bit of time labelling all the wires on the wiring harness before removing the CIS as a whole from the top of the engine. I have no idea how people remove the CIS without dropping the engine. 2 of those nuts were almost impossible to reach, even out of the car.  Mmm oily:  I plan to do a compression test before I do any more of the tear down, just to see how the internals of each cylinder are sealing. This will be helpful as I've never driven the car and have only heard it run for 10 secs or so. |
||
|
06-24-2018, 10:56 PM
|
|
|
Registered User
Join Date: May 2018
Location: Australia
Posts: 280
|
One question I have is that I neglected to release the clutch helper spring before removing the unit from the car. Mainly because I didn't quite understand how it was supposed to be released and I didn't want to fiddle with it under the car when it was right in front of my face, as the guides suggest it can release with a fair bit of force.
What would happen if I seperated the transmission and engine with the spring in place? Can that even be done? If i need to release it, what exactly do I do? It's still quite accessible the way I have the transmission resting on a dolly. |
||
|
06-24-2018, 11:07 PM
|
|
|
Registered User
Join Date: May 2018
Location: Australia
Posts: 280
|
Not much progress this week. I intended to do a leak down test on my engine before I pulled it completely apart as I haven't really heard the engine running or driven it. So, I thought it would help give me an idea of what the rings and valve seating was like and might help me decide what I will re-use and what I wont. And if head work is required or not.
I ended up busting my leak down tester that I got from ebay when I was trying to fix it! It was leaking from a connection, so I tried to tighten it up. In doing so, I snapped off the whole thread section! So, by the time i bought parts to fix it, the $30 tool ended up costing me $90! At least I managed to get the leak down test done and all cylinders checked out pretty much exactly as per the photo below.  The spark plugs all looked a bit oily, but that was expected, as the engine was blowing a LOT of smoke... apparently because the PO overfilled the engine by filling up when engine was off. The fact that the leak down test checked out and the spark plugs are oily pretty much confirmed that to be the case i'd say. Good news.  Happy that I believe that I have the oil pressure filled tensioners  Didn't get as much of the tear down done as I wanted to do, because I was fixing that bloody leak down tester. But I did come across this hole in the engine tin, where it had been rubbing against the exhaust. Obviously taking the paint off and allowing it to rust through. You can see where it had been rubbing on the exhaust in the next photo. I wonder why this would be.... something must be sitting incorrectly.  
|
||
|
07-03-2018, 05:54 AM
|
|
|
Registered User
Join Date: May 2018
Location: Australia
Posts: 280
|
Sorry about the ridiculously large pictures - they are coming straight from my phone/google account.
This weekend, I'll continue the tear down and hopefully get the engine on a stand after I borrow an engine crane from a friend. I'm going to have to track down one the of the Porsche 9191 cam tools... which isn't so easy in Australia. And to import the tool costs about $100 for the tool and $100 in postage!! I'm wondering why I wouldn't be able to use a universal style cam holder tool. The only real difference that I can see is that the porsche tool (other than looking a lot more solid) holds the cam in 3 places, whereas these tools hold them in 2. 
|
||
|
07-03-2018, 06:02 AM
|
|

|
|
Registered User
Join Date: May 2018
Location: Australia
Posts: 280
|
Finally got the engine onto a stand... that was a bit of an effort considering I have the 930 style exhaust setup on the japanese 1983 import. This meant that the cross over pipe prevented the VW Alley yoke from attaching without removing the cross over pipe and loosening up the heat exchanger.
 Well, it looks like I found out the reason the engine was blowing so much smoke when I saw it running for those 10 seconds before buying it.  Spent a couple of days attacking the exhaust nuts. Soaked them with deep creep and it make the nuts which were accessible by a impact wrench zip right off! I was left with 4 that I couldn't access with most tools. I ended up rounding them off too much to get a grip on. I found the best way to destroy them was just to smash them with a punch and hammer. Took less than half an hour with that technique.   
|
||
|
08-09-2018, 05:38 AM
|
|
|
Registered User
Join Date: May 2018
Location: Australia
Posts: 280
|
When i was removing the oil fed tensioner pipes, I found this little tiny piece of metal on the LHS... I'm not 100% sure if it came from inside the hose or if it was sitting on the little shelf on the outside of the cover and i only noticed it when i pulled off the hose. I thought maybe it was part of a timing chain. But, i assessed the chains as best I could while they are still attached and they looked ok.
WHen i zoomed in on a photo of the distributor drive gear that I took through the side of the case, it looks like a small piece of metal has been chewed by the gears... I wonder if it was this metal.   I also dragged a magnet through the oil that I had drained out and found these pieces of metal... 
|
||
|
08-09-2018, 05:50 AM
|
|


 1983 SC RoW
 Marble Grey
 1962 Porsche 356B Roadster S 90
