|
|
|
|
|
| Author |
|
|
Registered
|
Removal of heat exchangers on sc engine
I'm in the process of removing the heat exchangers on my sc engine. I am deathly afraid
of snapping studs and I've been lucky so far with 3 nuts and 2 cap nuts removed with no broken studs. But I have 7 more to go. With the thousands, tens of thousands heat exchangers removed on air cooled engines, has anyone come up with the fool proof method of removing nuts without breaking studs? I'm using a combination of torch, induction heater, penetrating oil, and even candle wax and lots of patience. Can anyone suggest something that I haven't done? Thx Hugh |
||
 12-09-2021, 05:12 PM
|
|
|
Registered

Join Date: Mar 2001
Location: Marysville Wa.
Posts: 22,519
|
One at a time, heat bright red all around, with OXY ACET, wait a few secs so they get dull red, so the metal isn't so soft and give it a bit of a snap with your ratchet. If it doesn't crack loose, do not continue, just repeat the above. Done hundreds that way and can't remember the last one I broke. You will need a looong 8mm 3/8 drive allen socket for the allen nuts and a medium or long 3/8 extension and 13mm wobbly socket.
__________________
https://www.instagram.com/johnwalker8704 8009 103rd pl ne Marysville Wa 98270 206 637 4071 Last edited by john walker's workshop; 12-09-2021 at 05:38 PM.. |
||
|
12-09-2021, 05:33 PM
|
|
|
Registered
Join Date: Oct 2008
Location: Nash County, NC.
Posts: 8,547
|
I’ve used propane for years the nuts get cherry red then they unthread easily
Remember the sockets stay hot too Bruce |
||
|
12-09-2021, 05:34 PM
|
|
|
Registered

Join Date: Jun 2016
Posts: 355
|
Remember that when an object with a hole is heated, the hole gets larger. (We use this fact when we use a freezer to create more slop before pressing a bearing?)
So ideally, try to heat the nut or the casting more than the bolt/stud. The difference in expansion helps to break the weak oxidation weld. (This reinforces John's point about not forcing it, if the weld did not break.) |
||
|
12-09-2021, 08:37 PM
|
|
|
Registered

Join Date: Feb 2006
Location: Ontario Canada
Posts: 2,948
|
 For me the secret was what John said. I was fortunate enough to have the engine out and heads, cam housing and exchanger on the bench. I purposely used tools that i could not have enough mechanical advantage to break the stud, just a regular 8mm allen key and a 13mm wrench i think it was. As they were short if i couldn't remove it with just those tools it wasn't ready and reheated it again cherry as John said. Once they were ready they just came out with those tools. 
__________________
1976 Yamaha XS360 ( Beats Walkin') 1978 911 SC Targa ( Yamaha Support Vehicle ) 2006 Audi A4 2.0T (Porsche Support Vehicle ) 2014 Audi A4 2.0T Technik (Audi Support Vehicle) |
||
|
12-10-2021, 06:01 AM
|
|
|
Registered
|
This is such great info. When reinstalling do you guys all cover threads with Anti-cease?
|
||
|
12-10-2021, 08:07 AM
|
|

|
|
Registered
Join Date: May 2019
Posts: 49
|
 I did the following which worked like a charm. Mine were extremely rusty.
This worked for me, but each car is different, good luck |
||
|
12-10-2021, 08:18 AM
|
|
|
Registered
|
Thanks guys. Lots of great instructions/ideas.. I have one exchanger removed and will report back on my progress.
The main reason for removing the exchangers was to be able to completely clean the engine after determining where the oil leakage was originating. I was hoping to go with Dry Ice Blasting but that was crazy expensive so I will be looking for another alternative. Anyway, one step at a time. Thanks to those that replied. Last edited by hughc; 12-11-2021 at 03:01 AM.. Reason: not classy |
||
|
12-10-2021, 12:15 PM
|
|
|
Registered
Join Date: Mar 2001
Location: Marysville Wa.
Posts: 22,519
|
No brandon here. Keep it classy.
__________________
https://www.instagram.com/johnwalker8704 8009 103rd pl ne Marysville Wa 98270 206 637 4071 |
||
|
12-10-2021, 07:40 PM
|
|
|
Targa_PB_78_SC
|
Quote:
None anywhere else on engine, none on my spark plugs. Change your plugs every 3 years or so ... plugs and anti seize cause a rousing discussion here.
__________________
BareRearedRookie |
||
|
12-11-2021, 04:46 AM
|
|
|
Registered
Join Date: Jan 2004
Location: Sin City
Posts: 1,652
|
I do the same thing as Mr. Walker describes, but I only have a MAPP torch. I also presoak using Kroil for days before the first try, and then respray frequently during the work. I like Kroil better than PB Blaster, but have used both with success on most projects.
My experience says that the key is not to rush it. Work a nut/stud a little, and if it's not moving, respray it and try the next one. I recently took a couple of days of periodic attempts to get all 12 of mine off without breaking any. And I have several that are pretty corroded and could have snapped easily if overworked, so this careful approach works. Take your time and be very sympathetic. |
||
|
12-11-2021, 05:30 AM
|
|
|
Registered
Join Date: Jul 2013
Location: Brisbane, Australia.
Posts: 2,674
|
I'm using a small oxy/acetylene setup very similar to theiceman. I don't worry about PBblaster etc.
Get them cherry hot, then apply pressure with the tool. It's amazing just how much easier they undo after they have been red hot. Once you've used this type of heat, you won't need to use anything else.
__________________
Always learning. www.aircooledporsches.com.au See me bumble my way through my first EFI and TURBO conversion! https://youtu.be/bpPWLH1hhgo?si=GufVhpk_80N4K4RP |
||
|
12-11-2021, 07:15 AM
|
|

|
|
Registered

|
Quote:
__________________
📸 https://www.instagram.com/porsche.tech 📸 |
||
|
12-11-2021, 06:47 PM
|
|
|
Registered
|
I just posted a video on my YouTube channel of heat exchanger removal.
I've never done it before and it went well for me as rookie, but I ended up buying a big boy torch (oxy/acetylene) One commenter said its easier to remove the exhaust as one complete unit after the hex and barrel nuts are removed from the head studs. I tend to agree this would work even better than the way I did it. Here's the vid: https://youtu.be/tmXnd47CA8U You can do this! I didn't have any luck with the mapp gas crap that is available today!
__________________
www.ahhgaragetime.com |
||
|
12-11-2021, 07:55 PM
|
|
|
Registered
Join Date: Mar 2001
Location: Marysville Wa.
Posts: 22,519
|
Yup, all in one piece, muffler included.
__________________
https://www.instagram.com/johnwalker8704 8009 103rd pl ne Marysville Wa 98270 206 637 4071 |
||
|
12-11-2021, 08:43 PM
|
|
|
Registered
|
Quote:
|
||
|
12-11-2021, 09:15 PM
|
|
|
Registered
|
Fait accompli Finished that job this am. no broken studs. What a relief. Now to clean the engine. Thanks guys for all the assistance.
hughc |
||
|
12-13-2021, 03:54 PM
|
|
|
Registered
Join Date: Mar 2001
Location: Marysville Wa.
Posts: 22,519
|
Tres bien!
__________________
https://www.instagram.com/johnwalker8704 8009 103rd pl ne Marysville Wa 98270 206 637 4071 |
||
|
12-13-2021, 04:05 PM
|
|
|
Registered
Join Date: Jun 2007
Location: Raleigh, NC
Posts: 121
|
Is there any risk of damage to the magnesium engine cases or even getting one to ignite if using oxyacetylene? I need to replace my exchangers, but kind of worried about a hot flame under there.
A quick google search has O/A temp at 3000C and magnesium ignition at 480C. Apologies if this is a dumb question. |
||
|
12-13-2021, 07:25 PM
|
|
|
Registered
Join Date: Feb 2012
Location: Ventura County, CA
Posts: 874
|
Is it common to replace the all the studs?
Sent from my iPad using Tapatalk
__________________
84 Carrera, heavily modded Please follow me @chopped_up_fitness |
||
|
12-13-2021, 08:21 PM
|
|


 67 Datsun stroker 2000
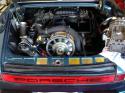 Porsche Targa 1978 SC

