|
|
|
|
|
| Author |
|
|
Registered

Join Date: May 2003
Location: Boise
Posts: 141
|
need help after crash :-(
Hello,
BUMPING UP THIS THREAD WITH UPDATES AT THE BOTTOM! thanks Well, after 18 years of owning my 1980 911 SC, it happened, I had an accident :-( I did a 180 on a 2 lane freeway, hit the side rail and got out of it with no injuries (I was doing around 80km/h at the time I lost control, most likely due to a flat/deflated tire). The main damages are on the left wing. What advices can you give me on how to disasemble/remove said wing to repaint the car? Any gotchas? Can you point me to any how tos or exploded diagrams showing where/how it is attached? Thanks, Cyrille  
Last edited by hpmad; 12-28-2020 at 06:52 AM.. |
||
 10-25-2020, 11:20 AM
|
|
|
Registered
Join Date: Jul 2013
Posts: 1,111
|
Pretty easy removal of the wing overall. Some small bolts near windscreen can be a pain. Also, some fenders have a small tack weld on the bottom from what i'm told. My cars had all the fenders off prior, so i've never seen this tack weld first hand. Headlight need to come out to get access to a bolt.
|
||
|
10-25-2020, 12:17 PM
|
|
|
Vintage Owner
|
Luckily it appears that the damage is confined to the fender, so hopefully can simply be unbolted and replaced. However, look carefully at the suspension strut and other areas for any other damage just in case. Matching faded yellow paint can be a challenge.
__________________
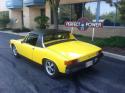
84 Targa (sold) 70 914-6 (sold) 73 914-6 2.7 conversion (sold) 75 GMC Motorhome (sold) 2016 Cayenne |
||
|
10-25-2020, 02:06 PM
|
|
|
Registered
|
What does it look like from the inside of the bonnet? Specifically the flange that the fender bolts into? Is it still straight? Any kinks?
__________________
Rodney Nelson - '72 911T (Undergoing Full Resto), '82 SC (Grand Prix White) Gone for 20 yrs and now back, '86 951 (Guards Red) Caught Fire, '71 911T (Tangerine) Sold, '72 911E (Grand Prix White) Sold, '86 951 (Black) Sold, '79 SC (Grand Prix White) Sold, '71 911T (Irish Green) Sold |
||
|
10-25-2020, 03:30 PM
|
|
|
Heck, Im only 5 not 71!

|
Quote:
__________________
Pat Henry Targa80 1980SC Targa (Mocha Brown) |
||
|
10-25-2020, 05:04 PM
|
|
|
Registered
|
That will rub out?
|
||
|
10-25-2020, 05:48 PM
|
|
|
Registered
|
Check for nicks on the right side of the hood. Looks like minor damage make sure hood gaps are straight when reinstalled. A bit of fiddling and it will be right.
|
||
|
10-25-2020, 05:51 PM
|
|
|
Registered
Join Date: May 2003
Location: Boise
Posts: 141
|
hello,
Thanks for the advices... Yes, things looks straight from the inside. Apart from inside the bonnet area, where else are they bolts that I need to unscrew? Cyrille |
||
|
10-26-2020, 02:00 AM
|
|
|
Registered

|
Bonjour Cyrille,
I see you are in France. There's a great fan community there. Maybe the guys from the 912club.fr can help you (source parts, source a good garage near you). Salutation Flo
__________________
Regards, Flo / 79 SC streetrod - Frankfurt, Germany Instagram: @elvnmisfit |
||
|
10-26-2020, 02:06 AM
|
|
|
83 911 Production Cab #10
|
Quote:

__________________
Who Will Live... Will See  83 911 Production Cab #10, Slightly Modified: Unslanted, 3.2, PMO EFI, TECgt, CE 911 CAM Sync / Pulley / Wires, SSI, Dansk Sport 2/2, 17" Euromeister, CKO GT3 Seats, Going SOK Super Charger |
||
|
10-26-2020, 02:09 AM
|
|
|
Registered
|
Two screws attaching the "smile" trim, one in the headlight bucket and about 10 along the hood
David |
||
|
10-26-2020, 03:03 AM
|
|
|
Registered
Join Date: Nov 2001
Location: Denver
Posts: 9,738
|
I see also damage to the bumper and valance. I'd start by removing the bumper- spray lubricant on all the nuts and bolts you can see, especially the little nuts on the back of the bumper lights- and then work from there. That gives you better access to a lot of the parts you'll have to remove.
Pretty straight forward. |
||
|
10-26-2020, 07:58 AM
|
|

|
|
Registered
|
It finally looks like there are people out there starting to make DIY videos for this car.
https://www.youtube.com/results?search_query=porsche+911+fender+removal+
__________________
1986 Bosch Icon Wipers coupe. |
||
|
10-26-2020, 11:45 AM
|
|
|
Registered
Join Date: May 2003
Location: Boise
Posts: 141
|
Great! Thanks for these vidéos!
|
||
|
10-27-2020, 12:00 AM
|
|
|
Registered

Join Date: Jun 2016
Posts: 355
|
Looks as if you only slapped the side. However, you might want to get the alignment checked, by the best shop you can find, before you start bolting stuff back on and start tweaking gaps.
|
||
|
10-28-2020, 08:36 AM
|
|
|
Registered
Join Date: May 2003
Location: Boise
Posts: 141
|
Update.
Hello, Thanks to confinement, I was not able to make any progresses on the car until the xmass holiday. I have been able to spend around 1 day on this.. and then it started snowing! Hozever, that was enought for me to unbolt the wheel arch and take some pictures. Can anyone tell me what these 2 plastic reservoir in the driver side wheel arch are? I assume one is for the windsheild washer... but the other one? Another question: how do I remove the plastic black thingy in front of the hood to repaint things? they are bolds under the wheel arches, but in the front part, where is it attached? The bumper seems to be slightly bent downward. any clue how to fix this? Thanks so much for your help. Cyrille Here are more pictures. any   
|
||
|
12-28-2020, 06:59 AM
|
|
|
Registered
|
Hello Cyrille
there is a forum and many members are in your neighborhood.I am a member there past 10 years.. Doing good but remove all the stuff under the fender as well.. Ivan https://www.type911.org/forum/forum.php
__________________
1985 911 with original 502 191 miles...808 198 km "The difference between genius and stupidity is that, genius has its limits". Albert Einstein. |
||
|
12-28-2020, 08:22 AM
|
|
|
Registered
|
Man, hate to see this. Glad no one was hurt.
The other plastic reservoir that sits on the windshield washer reservoir is the expansion tank for fuel vapors. Pretty sure you will have to remove the bumper to unbolt the smile. Once the bumper is off, you can assess the front of the tub to see if that's why the bumper is bent. If you're lucky, you will just need new bumper shocks or crush tubes. Good luck!
__________________
2000 Boxster S and 2016 Audi A6 |
||
|
12-28-2020, 08:43 AM
|
|

|
|
Registered
Join Date: May 2003
Location: Boise
Posts: 141
|
hello,
Thanks for the infos. How do you remove the bumper? Cyrille |
||
|
12-28-2020, 10:18 AM
|
|
|
Registered
|
remove the side harmonicas remove the front rubber and under are 4 nuts ,remove them ..
Ivan
__________________
1985 911 with original 502 191 miles...808 198 km "The difference between genius and stupidity is that, genius has its limits". Albert Einstein. |
||
|
12-28-2020, 11:12 AM
|
|


 1970 Porsche 914-6 (sold)
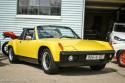 1973 porsche 914-6 conversion (sold)
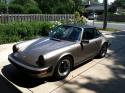 1984 Porsche 911 Carrera Targa - sold
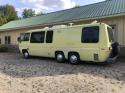 GMC Motorhome
 1972 Porsche 911T

 Porsche 911
 Das Babe
 Das Babe Metalberiech
 2000 Porsche Boxster S
 Audi A6
