|
|
|
|
|
| Author |
|
|
Senior Member
Join Date: Sep 2001
Location: Chesapeake, VA
Posts: 1,699
|
Great set of pictures!
__________________
Chris 1988 911 Carrera Targa (driving project started JAN 2022) 1970 911E - Long since gone 1972 911 Targa - gone 1987 911 Carrera - gone Retired FA-18C Driver |
||
 01-13-2023, 10:35 AM
|
|
|
Registered
|
Hi,
I am going to try my first engine drop on my 1977 911 S Targa and was planning on doing it with jack stands. I see in your pictures that you also used jack stands. Can you provide some more info on your stands? I was planning on buying some 6 ton stands that have a max-lift of 23". Any other tips or suggestions? Thanks |
||
|
01-13-2023, 11:08 AM
|
|
|
Original Owner

Join Date: Dec 2002
Location: San Antonio, Texas
Posts: 1,907
|
I use BIG RED T43202 Torin Steel Jack Stands: 3 Ton in the front. They go to about 19 inches but I don't use that much. In the back I have BIG RED T46202 Torin Steel Jack Stands: 6 Ton. They go to 24in and I use most of it.
I think the main trick to using jack stands and not wobbling around at 30 inches is to remove the rear bumper. That gives you an extra 5-6 inches and you should remove it anyways just to clean things up. The motorcycle lift is really important as you want one that goes down quite low but lifts to 20-21inches to facilitate getting the engine up on an engine stand without a hoist or messing around too much. A yoke is imperative as is some type of flywheel lock and a clutch alignment tool. Other than the yoke, these are cheap. As soon as the engine is out lower the car/jacks stands most the way back down for work like running fuel lines, doing CVs etc. You really don't want it up wobbling at 16-22+ inches when working on it. The car is much much lighter when the engine is out. I'm going to post the easy way to remove and reinstall the rear SC bumpers- not the Bentley way! They make it way way too difficult. The front also can be done much easier than the Bentley method.
__________________
tsuter 78 911SC Turbo Targa Thaaaats Right!! |
||
|
01-13-2023, 11:31 AM
|
|
|
Senior Member
Join Date: Sep 2001
Location: Chesapeake, VA
Posts: 1,699
|
Perfect timing on the drop questions, headed towards that route as well. Have been wavering on getting a QuickJack, or the analog method. Look forward to seeing the write up on the bumper.
__________________
Chris 1988 911 Carrera Targa (driving project started JAN 2022) 1970 911E - Long since gone 1972 911 Targa - gone 1987 911 Carrera - gone Retired FA-18C Driver |
||
|
01-13-2023, 11:37 AM
|
|
|
Registered
|
[QUOTE Look forward to seeing the write up on the bumper.[/QUOTE]
Me too |
||
|
01-13-2023, 12:11 PM
|
|
|
Original Owner
Join Date: Dec 2002
Location: San Antonio, Texas
Posts: 1,907
|
Rear Bumper Removal/Install - the easy way
Removing/Installing the rear SC bumper the easy way.
1. Pretend it is an IROC one piece bumper 2. Never, ever, never mess with those little bellows nuts on the rubber acordions (unless you like misery) This method probably isn't original but here are pics for reassembly- taking off is the reverse with the exception of removing the bumperettes until the bumper assembly is fully off the car. 1.The bumper(assembly) has seven parts. One bumper, two bellows, two fender side skirts and one lower valence. Assemble all of these on the ground with all nuts fully tightened.  2. Now hang the bumper assembly on the two bumper shocks (not on the four bolts just yet) and attach the two bumper rubber cover strips with their single bolt. Also thread the two license plate cable wires through the back of the bumper in the grommet holes. Position your bumperettes ready to go.  3.Notice the side skirts hang down! And the bellows is completely attached to bumper.  4. Now remount both bumperettes. This could have been done before you hung the full assembly on the two shocks, but for old farts like me it is heavy and easier to attach it now. When you are removing the bumper - remove it complete like the next picture. Just be careful that you license plate wires don't tangle inside the bumperettes and can be pulled cleanly out the grommet in the back of the bumper. Notice how the bumper does not hang down as much now and the side skirts are closer to their final position.  5. Now move the bumper off the shocks and get it aligned and on to the four big bumper bolts. Do not put the nuts on yet.  6. Now go to each side skirt and use a plastic trim tool to shove the rubber lip on the top of the bellows in behind the fender sheet metal below the tail light assembly. Also lift up the side skit and start the three sheet metal screws that attach the skirt t the quarter panel. Do not tighten. Leave a 18/" gap for your beading to go in.  7. Inside fender pic shows the three sheet metal screws (3 each side) . These are all directly accessible on the driver side! And 2/3 are directly accessible on the passenger side. Even without removing the tires! The sixth screw in back behind the oil tank can be removed with a 12" extension and a wobbler for the screw. It is the only one that is moderate difficult. In this next pic you see them as well as two of the bellows nuts that were fully installed OFF the car.  8. Once both side skirts have their sheet metal screws started but not tight reinsert te beading and get everything lined up and the tighten down the three screws to lock it all in. See perfect corner follows: Before and after beading and tightening up.  
__________________
tsuter 78 911SC Turbo Targa Thaaaats Right!! |
||
|
01-14-2023, 07:17 AM
|
|

|
|
Original Owner
Join Date: Dec 2002
Location: San Antonio, Texas
Posts: 1,907
|
Rear Bumper Removal - More
9. Here is a pic on how to get those sheet metal screws easy! And the harder one with the wobbler. Now put the two bottom nuts on the side skirt supports. Two each side and tighten them in. The side skirts are now fully attached and lined up to the bellows and they are in correct with beading and all.
  10.So now you shove the bumper in on the four bolts (the bellows will push in a bit)  11. I use a 2x4 block and small jack behind the valence to level the bumper (its not on the bumperette) as I tighten in the four big nuts ( two on each side) and the bumper gets pulled in under the weather stripping.   12. Wire your license light assemblies back in and wrap the rubber bumper strips that cover the four nuts/bolts last (secure with a little screw) when things are perfect.  Done. Disassembly is reverse but you can leave the bumperettes on until you lift off the entire assembly. Just be careful your wires pull through. Simplified steps for disassembly: 1. Detach the end nearest bumperette of each(2) rubber bumper strips and remove four big nuts retaining the bumper to its big bolts. 2. Remove the license plate lights and shove the wires well into the bumperettes 2. Remove two lower side skirts bolts (two each side) attaching side skirts to support arms 3. Remove three sheet metal screws (3 each side) from side skirts to fender and the beading. 4. Pull entire bumper assembly back while tilting side skirts down and it is off. No muss no fuss. Summary: Pretend its an IROC one piece! And never ever never mess with those bellows nuts on the car unless you like misery. Front is the same...Just only two sheet metal screws per side and one side skirt bolt per side. Remove it as one piece. Don't mess with the bellows.
__________________
tsuter 78 911SC Turbo Targa Thaaaats Right!! |
||
|
01-14-2023, 07:18 AM
|
|
|
PCA Member since 1988
|
"1.The bumper(assembly) has seven parts. One bumper, two bellows, two fender side skirts and one lower valence. Assemble all of these on the ground with all nuts fully tightened."
That makes six. 
__________________
1973.5 911T with RoW 1980 SC CIS stroked to 3.2, 10:1 Mahle Sport p/c's, TBC exhaust ports, M1 cams, SSI's. RSR bushings & adj spring plates, Koni Sports, 21/26mm T-bars, stock swaybars, 16x7 Fuchs w Michelin Pilot Sport A/S 3+, 205/55-16 at all 4 corners. Cars are for driving. If you want art, get something you can hang on the wall! |
||
|
01-14-2023, 05:02 PM
|
|
|
Original Owner
Join Date: Dec 2002
Location: San Antonio, Texas
Posts: 1,907
|
Quote:
__________________
tsuter 78 911SC Turbo Targa Thaaaats Right!! |
||
|
01-14-2023, 06:30 PM
|
|
|
Original Owner
Join Date: Dec 2002
Location: San Antonio, Texas
Posts: 1,907
|
CIS Pressure Gauge
Engine back in with that new fuel pump and those new fuel lines and lots of connections ...time to test pressures and look for fuel leaks before adding oil etc.
I use a modified CIS pressure tester. By modified, I mean it attaches at the top of the WUR with M12 Female and attaches to the disconnected fuel line from the WUR with an M12 Male. No need to mess with the connections/lines on top the Fuel Distributor. No good room to get there and why disconnect the whole line when you can just connect at the WUR only? Modified this gauge set years ago....  Hooked up the battery and jumpered the fuel pump relay with my little trick fused jumper with toggle switch. Using roofing nails as the wire pins! Yikes!  Ignition on and flipped the toggle on, fuel pump started spinning and went looking for leaks and checking system pressure! Nice! Showing 5 Bar - 72psi!  System pressure is tested with your pressure test kit valve closed, but open and close the valve several times to bleed out the air. Mine has a schrader valve as well to release air in the gauge connection. Purged all the air. No leaks that I can see or smell. No puddles! Turned the toggle switch off for running the fuel pump and then the ignition and then went to lunch! About 60minutes later residual fuel pressure holding at 20psi and still no puddles! Success! Time to add oil and start planning the first engine start up! 
__________________
tsuter 78 911SC Turbo Targa Thaaaats Right!! |
||
|
01-15-2023, 06:42 AM
|
|
|
Original Owner
Join Date: Dec 2002
Location: San Antonio, Texas
Posts: 1,907
|
First engine start
First start this week - up on the stands still... about 9 quarts of oil Castrol 20-50 and transmission reloaded with Swepco 203.
I had run the fuel pump before verifying system and residual pressures while looking for leaks so the fuel lines were primed. A few cranks and she fired up into a fast idle. Ran for about 1 minute of so and then shut it down to look for any bad oil leaks and then started again ran for several minutes. She whirs, she purrs.... Broke a 44 year old air filter box strap! Darn rubber just a bit old! Time for two new ones.  Car is staying on the jack stands a bit more as I'm going to replace two complete front strut assemblies with brand new Bilstein struts complete w inserts. That'll give me a chance to inspect and repack the front wheel bearings and bleed out the brake system with some nice new DOT4 Typ200! Replacing both struts because I have a 44 year old Boge strut and a 22 year old Bilstein strut up front! Kinda like running two different tire manufactures on the left and right front. Yikes! Don't ask!
__________________
tsuter 78 911SC Turbo Targa Thaaaats Right!! |
||
|
01-20-2023, 11:35 AM
|
|
|
Crusty Conservative

|
Slight improvement
Quote:
__________________
Bill 69 911 T Targa, 2.4E w/carbs (1985-2001) 70 911 S Coupe, 2nd owner (1989- 2015) 73 911 T Targa, 3.2 Motronic (2001- ) |
||
|
01-21-2023, 08:17 AM
|
|

|
|
Original Owner
Join Date: Dec 2002
Location: San Antonio, Texas
Posts: 1,907
|
Rennline mechanical hood strut
Yes as you can see in the pic above, the deck is up and no wood support. I did install the mechanical strut on the left. No strut at all on the right. Next time I drop the engine I think I may drill that back firewall for a right side strut mount....but you must then use a hydraulic strut....that will eventually fail again and again....
In any case I'm keeping the center wood prop for maintenance and use the mechanical strut...well probably not too much...but it does work. Started replacing both front struts complete yesterday. Got everything off but now need to get that pesky spacer that is pressed on the old spindle remove it and put it on the new ones. Pics to follow.
__________________
tsuter 78 911SC Turbo Targa Thaaaats Right!! |
||
|
01-22-2023, 05:05 AM
|
|
|
Original Owner
Join Date: Dec 2002
Location: San Antonio, Texas
Posts: 1,907
|
Front Strut Assemblies
So two new Bilstein strut assemblies complete went on the front this weekend. Plenty of posts on how to R&R Struts so I wont recreate that but I do have a couple tips on the trickier parts.
First use a real tie rod ball joint separator to get the tie rods off. Dont just hammer on the top of the loosened castle nut trying to pound it down . Second for separating the pin on bottom of the strut from the A-Arm ball joint AFTER you have removed the nut/washer and retaining pin, I find it best to jack up the strut taking load off the A-Arm and thus allowing you to bang down on the A-Arm (hard to do this if it is already hanging all the way down)  If you do this, then you can get a bar in there and lever/pound the A-Arm down and the strut up to get it out of the ball joint. Here it is out  Those ball joints last forever unless your car has really been abused. The first pic above was the old Bilstein (green) strut coming out and the second was a 44year old BOGE (black)!. Dont ask . Now what I think is the most difficult part getting the wheel bearing spacer ring off the back of the spindles. Almost makes you want to buy new ones at $50+ea but they also last forever. If you cannot feel wear grooves on it with your finger nail its good. I rig up my gear puller (you need one that has at least a 5working space) on the spindle and use a clamp to hold the jaws in tight. The grab area on that spacer bushing is very small!  In fact, it is so small that on the BOGE strut I used an angle grinder and made a little more space behind the spacer for the gear puller jaws to grab. In the red circle area below.  Start screwing it down. It will come off as you clamp those jaws into the gap with each turn. If the gear puller jaws pop off you may need to either grind the puller jaw tooth or the strut behind the ring.  Now putting them back on to your new struts you do not need any fancy presser. Mount your struts on the car (top first loose, bottom retaining pin, washer ,nut, then tie rod, then tighten it all up then place the old spacer on the spindle and tap it in using a 1 1/4 in sched 40 piece of PVC.  The dust shield can be bolted on either before or after you press/tap on the spacer. There is an o-ring also but as tight as that spacer is I cant imagine what the O-ring actually does. Light grease helps. Tap tap tap . 
__________________
tsuter 78 911SC Turbo Targa Thaaaats Right!! |
||
|
01-22-2023, 08:56 AM
|
|
|
Original Owner
Join Date: Dec 2002
Location: San Antonio, Texas
Posts: 1,907
|
Front struts
The last thing you do before rehanging the caliper and bleed in your bakes is put the wheel hub/ rotor on with nicely repacked bearings front and rear and the only thing to watch is the thrust washer on the outside just behind the wheel bearing adjusting nut.
  When the wheel bearing adjusting nut is tightened down you should be just able to shove the washer around behind it with a screwdriver. Too loose--- wheel bearing failure, too tight wheel bearing failure. Make sure the hub/rotor assembly was shoved tight all the way on the spindle.   Red Grease is your friend Thats about it for struts at least the areas that give me the most issues. Pesky spacers for sure! Oh, if you had trouble removing the wheel rotor/hub dust cap...that big one...just pound harder....
__________________
tsuter 78 911SC Turbo Targa Thaaaats Right!! |
||
|
01-22-2023, 08:57 AM
|
|
|
Original Owner
Join Date: Dec 2002
Location: San Antonio, Texas
Posts: 1,907
|
Alignment time
Closed the front hood and motored down to Bob Jones place for a nice professional four wheel street alignment today. Back on the road by the end of the day!
 When I pick up, I'll try and get a pic or two of some fine 356's getting work done. 
__________________
tsuter 78 911SC Turbo Targa Thaaaats Right!! |
||
|
01-27-2023, 09:10 AM
|
|
|
Original Owner
Join Date: Dec 2002
Location: San Antonio, Texas
Posts: 1,907
|
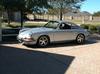
And thaaaaat's it! The Three Month Winter refresh is done. Oct 28, 2022 to Jan 27,2023. Amazing how the car ran today at 70-75mph for 40miles on the highway with a brand new alignment and tires!
Bob's got so many cars in the shop. Funny thing he said was "Its nice to still get someone who actually does work on their car. Most these guys don't even add air to the tires!" So in addition to the engine maintenance list up on page 2 the SC Turbo Targa got: 1. New rear adjustable spring plates 2. New Rear sway bar bushings 3. New rear Bilstein shocks 4. New rear axles w CVs complete 5. Fancy six piece chassis fuel lines tank to engine (Courtesy of Pelican Len Cummings BoxsterGT) 6. New Front Bilstein strut assemblies complete both sides 7. New Tie Rods 8. New front sway bar bushings 9. New lower steering column bearing/bushing in smugglers box 10. New Tires - Firestone Indy 500s 11. Repacked front Brake bearings/bleed brakes all DOT4 12. And a fancy Rennline mechanical rear deck strut  See you all next year...gotta go do some driving!
__________________
tsuter 78 911SC Turbo Targa Thaaaats Right!! |
||
|
01-27-2023, 02:51 PM
|
|


 1970 Porsche 911S 2.2l MFI
