|
|
|
|
|
| Author |
|
|
Black Badger
|
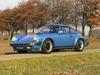
 I just finished upgrading the AC on my 83 SC with a "RetroAir" kit - http://www.mrjaguar.com/ . I promised I would share the experience and upload many photos; see thread Ready to Upgrade the 83 SC A/C I started a new thread because I wanted to let everyone know that this RetroAir upgrade ROCKS!!! The installation was fairly easy and cooling is absolutely stunning. For temorary testing , windows open, idleup @ 1000rpm, and 75 degrees outside, my vent temp shows 28.5 degrees. Running in normal traffic, still 75 to 79 degress outside, the vent temp shows 34/35 degress. I in no way represent Mrjaguar (they're in Dallas and I'm in LA). I do have some great and not so great things to say about the overall kit and installation. But overall, this kit is abosolutley fantanstic. I will upload photos to this thread and share the "what to lookout fors" that I experienced during my adventure. I hope to get that info up tonight, but may be as late as Friday (wife is using the camera). Please keep checking, I will get the info up. ************************************************** ** Here you Go: ************************************************** ** All, here are some photos of the AC upgrade. I tried to also add the text for my experience (step-by-step), the gotchas, tricks, etc. but the text is 1500 plus words and the board will not let me post more than 1000 words. If you think you might want to implement this kit and would like the text, PM me with your e-mail and I'll be glad to send it to you. Here is a sample of the step-by-step text: Here are the general steps in the overall process, but please read the "gotchas" before doing any of these steps (NOTE: Although there were a couple of "bumps" in the road of this mini project, "Rock" from Mrjaguar was always available and always willing to do whatever it took to make this project a success. Thanks Rock! Removed COMPRESSOR: - I updated mine with Sanden 507 compressor (new compressor not part of kit, but can be purchased from Mrjaguar; comes with mount adapter and R134a service port adapters) - you will need to keep the OEM mount and bolts to mount the new compressor's and reinstall - buy 8 ounces of PAG 100 oil - Drain all oil from new compressor and replace with same amount of PAG 100 oil - compressor has oil fill plug - I used a graduated cylinder to empty compressor oil, let it drain for 24 hours and got about 3 ounces of oil (yours may differ) - using very small funnel, pour 3 ounces of PAG 100 into compressor - set compressor aside for later install Removed REAR CONDENSOR: - will be replacing with new one from kit - will not reuse condenser mounting plates, but keep the minor nuts and bolts from the removal, will need later Installed REAR CONDENSOR: - note: the new rear condenser is not as long and is taller than the original and the suction and discharge ports are on one side of the condenser As a result, clearances will be very tight; you must get this rear condenser install "dead on" - The original hose connections to this condenser were from the compressor discharge port to the passenger side of the condenser; the other was from the front condenser to the driver's side of the rear condenser - the new condenser will come with three new mounting brackets, two for the front sides of the condenser (towards front of car) and one for the rear center (rear of car) of the condenser (note: the two side brackets I received were too short and the mounting holes did not line-up with the mounting holes on the new condenser; Rock at Mrjaguar said they must have sent the older version of these two mounts and said it would take three weeks to have new ones sent... I just used spacers and modified the holes to match the new condenser instead) - for the center mount you will reuse the original speednut, but because the new condenser is a little taller than the OEM condenser, you will be drilling a new hole about 3/8" away from the original mounting hole. - proper orientation of the new condenser is kind of obvious because it is concave like the original However, it needs to be centered horizontally (side-to-side) and the front edge (towards front of car) will have about 1/4 to 1/6 inch of clearance from the body of the car... i.e., the front edge of the condenser will "just clear" body of the car when the deck lid is opened and closed. This positioning is important due to both the body, engine fan, and compressor clearance as well as the fitting and length of the new hoses. Also, the condenser's suction and discharge ports will be oriented to the driver's side of the engine compartment. Removed EVAPORATOR FAN INLET PORT: (under kickboard inside passenger side - hold resistor pack - need to remove this to get the evaporator assembly out of the smuggler's box and you MAY also be removing the resistor pack from the inlet port - see more below. - the kit comes with an upgraded brushless 3-speed fan, so if you use the fan upgrade the OEM resistor pack will not be reused, but do not remove resistor pack until you have successfully mounted new fan from kit. Note: I replaced the original OEM fan and it was probably the hardest part of the entire project... see more below, YOU MAY DECIDE NOT TO USE THE BLOWER MOTOR UPGRADE. Removed EVAPORATOR AND EXPANSION VALVE: - will replace both with new one from kit - Here are a few things to note about the evaporator replacement - new evaporator is slightly taller on corner near expansion valve, so closing the evaporator box with new evaporator will be a challenge - kit comes with new blower fan (and instructions) but may pose a few problems - new blower fan mount is "cheesy" and is held on with a hose-clamp and this hose clamp leaves about 1/16 of an inch clearance between it and the inside of the squirrel-cage fan - positioning the new motor in mount is trial and error; need to be check with new evaporator installed in lower portion of evap box to ensure proper adjustment of mount fan with squirrel cage. - squirrel-cage fan has balance weights on blade that may interfere with hose-clamp - be careful to make sure top of new motor does not touch evaporator when it's all assembled - the original evaporator has a capillary tube guide in which the capillary tube slides into. This guide is inserted through a hole in the top of the evaporator cover and into the fins of the original evaporator. The new serpentine evaporator has very dense fins and inserting the capillary tube guide needs a little thought to create a path for this guide tube through the new serpentine evaporator. To do this, I first closed the two haves of the evap box together (with new evap inside), and then slowly inserted a bamboo cooking skewer into the guide hole opening of the upper half of the evap box. I did not insert the stick all the way, only enough to get the correct angle and position I then separated the evap box halves again to expose the new evaporator and the new guide impression I started with the bamboo stick. Now I used the bamboo stick to carefully create a hole all the way through the serpentine evap fins with the right position and angle. Once gain, I reassemble the two evap box halves and now insert the original capillary tube guide through the hole in the top half of the evap box and down into my just create hole through the serpentine fins. ----------------------- cut--------------------------------- Overall, the kit was simple to install with simple tools. I haven't been able to test the performance in sweltering heat, but I have no doubt it will perform well.      
Last edited by perryb; 12-17-2007 at 02:39 PM.. Reason: Added more info and pics |
||
 12-12-2007, 02:01 PM
|
|
|
UnRegistered User
|
Cool!
Looking forward to seeing that!
__________________
Bill K. "I started out with nothin and I still got most of it left...." 83 911 SC Guards Red (now gone) And I sold a bunch of parts I hadn't installed yet. |
||
|
12-12-2007, 04:15 PM
|
|
|
Registered

Join Date: Nov 2006
Location: Columbia, S.C.
Posts: 310
|
I will be curious to see how it does when the temperature gets over 90 with high humidity.
__________________
Smoke 1982 911SC Rosewood SCWDP # 0097 |
||
|
12-12-2007, 04:43 PM
|
|
|
Zink Racer
Join Date: Aug 2005
Location: Spokane WA
Posts: 4,052
|
subscribed
__________________
Jerry 1983 911 SC/Carrera Franken car, 1974 914 Bumblebee, 1970 914-4, 1999 323ti |
||
|
12-12-2007, 05:33 PM
|
|
|
Registered

Join Date: Nov 2005
Location: CA
Posts: 7,286
|
Wait until summer perry. you can't test AC now

__________________
Fat butt 911, 1987 |
||
|
12-12-2007, 05:41 PM
|
|
|
Registered
|
Quote:
 . .
__________________
Steve Sapere aude 1983 3.4L 911SC turbo. Sold |
||
|
12-12-2007, 07:09 PM
|
|

|
|
Registered
Join Date: Jul 2007
Location: Halifax, Canada
Posts: 1,216
|
Quote:
|
||
|
12-12-2007, 07:34 PM
|
|
|
Registered
Join Date: Nov 2005
Location: CA
Posts: 7,286
|
is that a "free ac" or "manual ac"? :lol:
__________________
Fat butt 911, 1987 |
||
|
12-13-2007, 10:54 PM
|
|
|
911 addict
Join Date: Feb 2007
Location: Atlanta, GA
Posts: 259
|
Nice work- I am about to tackle this soon!
__________________
1987 Carrera Cab Toyota Landcruiser 500SL |
||
|
02-08-2008, 08:19 AM
|
|
|
Black Badger
|
Update on AC replacement... we've seen quite a few 99 to 100+ days here in Southern California and the AC is still extremely COLD. I do not regret doing this conversion.
__________________
--------------------- 83 Cabriolet |
||
|
06-29-2008, 10:12 AM
|
|
|
Registered
Join Date: May 2008
Location: NY
Posts: 394
|
Mind my asking what the cost was?
__________________
1985 Carrera Targa in the fastest color......Black........Growing list of goodies now includes SW Chip, M&K premuffler, Sport muffler, DME update, etc. |
||
|
06-29-2008, 10:36 AM
|
|
|
Carrera 3.0 1975
|
Are you Dutch??
Last edited by André 3.0; 06-29-2008 at 11:42 AM.. |
||
|
06-29-2008, 11:07 AM
|
|
|
Registered

|
Subscribed... What are the perforated holes down each side of the rear condenser for? They sort of look like a universal mounting bracket... Did you go with the R134?
Thanks,
__________________
Mitch Leland "03" 996 C2S-LS3 V8-480 HP "84" 911 Turbo Look-Sold w/ found memories |
||
|
06-29-2008, 01:35 PM
|
|


 1983 Porsche SC Cabriolet 3.0

 1983 Porsche SC
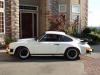 1983 Porsche 911SC
 1975 Porsche Carrera 3.0 200hp
 2003 Porsche 996 C4S
 Interior
 996 C4S - LS3 V8
 006 C4S - LS3 V8
 LS3/480 HP
