|
|
|
|
|
| Author |
|
|
Registered
Join Date: Jan 2000
Posts: 6,950
|
Many go with the polished rim out of neccessity and not desire. The only way to fix a curbed or scratched rim is to polish it out, but it leaves a mismatch with the anodized rim surrounding it. I never was a fan of anodization on the rims anyway. They seem to be more worrysome to care for then polished rims. I've read many times of owners using an incorrect cleaner that etches them and then they are reserved to the "use vaseline and pray" method of hoping they return to the original finish. With polished rims, Just using a nice aluminum cleaner and your done.
Phil brought up a good point about adhesion with aluminum primers. About 6 months after doing my rims as described, they chipped horribly, despite using a selfetching primer for aluminum. It seems the forged aluminum fuch use has such a hard surface, most rattle can paint doesn't seem to bite to it. Whatever they use from the factory is very, very, good stuff. It is always better to use this as the base coat in repainting because of the strong adhesion. Just roughen up the surface with some 400 prior. On an RS style paint job, I eventually bead blasted the areas that required paint by taping off the polished areas. This allowed the bead blasted areas to come right up to the polished patterns. This would of been very difficult with trying to do this by hand. It is this area also that is most prone to chipping. Since doing this, I've had no issues for 2 years. 
|
||
 12-04-2004, 04:31 AM
|
|
|
Registered

|
For my two cents...
I just redid my Fuchs. Spent $30 on materials and about 60 hours of elbow grease sanding down to bare aluminum. My paint was chip/worn etc in the centers as well. Talked with an automotive paint pro near me and got some tips and paint. Once I had the wheels sanded and polished (with exception of the black which I just sanded smooth) I then masked the wheels back to factory spec and used a self etching primer and three coats of satin black paint. There was no need to take all the paint off, just a good sanding was all that was required. Came out real nice. Can post pictures if desired. Jim
__________________
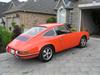
Jim Dean LL.B. - London, Ont, Canada. 1969 911T "Blood Orange" Euro (Brought over from Germany in 86) Engine and brake system rebuilds 2006 & 2007 "Oversteer scares passengers, understeer scares drivers." |
||
|
12-04-2004, 06:51 AM
|
|
|
Recreational User
Join Date: Mar 2004
Location: A Mile High
Posts: 4,159
|
I understand the Fuchs to be an alloy of magnesium with not much aluminum.
|
||
|
12-04-2004, 06:52 AM
|
|
|
Registered
Join Date: Jan 2000
Posts: 6,950
|
Quote:
|
||
|
12-04-2004, 08:15 AM
|
|
|
Somewhere in the Midwest

Join Date: Oct 2001
Location: In the barn!
Posts: 12,499
|
AA6082 is; Al 0.9Mg 1.0Si 0.7Mn
--OR-- 0.9% Mg (Magnesium) 1.0% Si (Silicon) 0.7% Mn (Maganese) 97.4% Al (Aluminum) |
||
|
12-04-2004, 08:20 AM
|
|
|
Registered
Join Date: Aug 2004
Location: lubbock,TX
Posts: 45
|
I fully polished my fuchs about a month ago, took about 30 hours of solid work, no standing aroung drinking beer time in that figure. I used the aircraft stripper, it worked great on the rears, and not so great on the fronts. Then I used the oven cleaner which seemed to work just fine for me, what the oven cleaner missed I just used a soft brass brush. I started polishing with a drill, then me nieghbor brought over a right angle grinder, took the same fully sewn polishing wheels as the drill, but made the process go much faster. You can buy a cheap right angle grinder at harbour freight for about 30 dollars, and it will save you untol hours polishing. It spins faster, and has more power, dont use the unsewn polishing wheels with it as they will not last but about five minutes.
|
||
|
12-04-2004, 08:30 AM
|
|
|
Go Speedracer, go!

Join Date: Aug 2002
Location: Indianapolis
Posts: 1,951
|
Great thread. I'm trying to find a project to do while I wait for the white stuff to disappear, and I have a couple of questions. 1. How do you know where to mask the paddles on the RS style paint job? 2. once done, how do you protect the polished surface since it is now bare aluminum and exposed to the elements?
ps. anyone have a picture of a silver coupe with polished paddles?
__________________
1981 SC ROW Coupe Last edited by SpeedracerIndy; 12-26-2004 at 09:56 AM.. |
||
|
12-26-2004, 09:50 AM
|
|
|
Registered
Join Date: Aug 2004
Location: lubbock,TX
Posts: 45
|
As far as asking the painting is concerned, I just looked at pictures of RS style wheels and tried to get it close. There is nothing you can put on the polished sections to protect the surface that will not dull the polishing work. I just use mothers billet aluminum polish and go over the polished areas by hand, it does not take that much work to renew the shine if you do it frequently.
|
||
|
12-26-2004, 10:01 AM
|
|
|
Registered

|
Am I doing this wrong - I went through three of these with my dremel on one wheel?? Any trick to it? Also, what to you recommend to take out the deep pits - I've only found 220 in wet/dry paper.
Thanks, Rob |
||
|
01-05-2005, 09:08 AM
|
|
|
Registered

Join Date: Jun 2003
Location: Corona, CA
Posts: 3,336
|
Quote:
I know the pride in doing it your self, but 60 hours?
__________________
85 911 SuperSport No more looking! The jewel is mine! 89 Jeep Wrangler A jewel in the rough 2000 Grand Cherokee Family Wagon with Jewels on board |
||
|
01-05-2005, 10:04 AM
|
|
|
Registered
Join Date: Nov 2002
Location: Los Angeles
Posts: 729
|
For $90 each wheel at Al Reed, they stripe, paint polish and powder coat a clear layer for easy cleaning. If you go to the shop, you will now how dusty and toxic it is. The dust are all over the place. For all the work, you can not beat the price.
 
__________________
Caliber 1987 911 Cabriolet |
||
|
01-05-2005, 10:08 AM
|
|
|
Registered
|
BUT shipping them to Al Reed and back would be costly from Canada, AND, yes, doing it myself was a good feeling of accomplishment.
Being the first time I had attempted this, I tried various techniques and did a lot of experimenting. This ate a lot of the time. Once it got down to masking and painting the last two wheels, I had these done in about 2 hrs, masked, primed, and 3 coats of paint. It got easier and faster, the more comfortable I got. Jim
__________________
Jim Dean LL.B. - London, Ont, Canada. 1969 911T "Blood Orange" Euro (Brought over from Germany in 86) Engine and brake system rebuilds 2006 & 2007 "Oversteer scares passengers, understeer scares drivers." |
||
|
01-05-2005, 10:20 AM
|
|

|
|
Banned

Join Date: Jan 2004
Location: San Jose, Ca
Posts: 1,897
|
 [img] [img]List of items: One can of Black Primer Hot Rod Black One can of Satin Black Paint One sheet of 220 Sand Paper One Blue or Red Bright Boy Scouring pad One Roll of pinstriping tape Two Rolls of masking tape, One Thin and One Thick Use satin black, its between gloss and flat. Heat the wheel with a blow dryer, make sure they are clean. You need to mask off the edge, towards the centers first. You need a thin roll of pin striping tape Automotive Grade. Very carefully edge a little above the paint line. Don't try to match the paint line, you'll under-spray. Then mask off the rest of the wheel regular masking tape. Make sure you pop out the center caps from the inside. When you heat the wheel, it allows for the tape to stick. Once the wheel is masked off. Take 220 Sand Paper and scuff down the paint. You don't need to remove it, just make it a smooth surface. This allows for the new paint to stick correctly, will also prevent any future pealing. Make sure you scuff along the edges, in the spoke area etc. After you sand, take a blue bright boy scouring pad and use this to finish the fine sanding. Make sure it is dry. Take your blow dryer and blow off any paint dust. Spray a light, even thin coat of "Black Primer" allow for 10 minutes to dry. After 10 minutes blow-dry it for a moment or two to blow off any particles ect. It should be dry to the touch. Then spray a light, even coat of satin black paint. Wait for 4 minutes then re apply. For the center caps - Lightly sand them - One Coat primer - Two coats paint. Allow the paint to dry for 20 minutes. Carefully pull off all the tape down to the pinstipping tape. When you pull the edging tape off, pull the tape off turning it away from the paint. This insures the tape pulls away from the paint for an even line. Let the paint dry until the following day. List of items: One can of Black Primer One can of Satin Black Paint One sheet of 220 Sand Paper One Blue or Red Bright Boy Scouring pad One Roll of pinstriping tape Two Rolls of masking tape Its sounds like a lot, its very easy. |
||
|
01-05-2005, 09:57 PM
|
|
|
Registered

|
Quote:
He has customers queuing up/waiting in line! Sub-question: How is it that an American California one-man shop (I didn't write two-man outfit!) can, at a very reasonable price, do what seems to be impossible in all of ye hand-crafty old Europe? Beats me!
__________________
Belgik 1988 Carrera 3.2L |
||
|
01-05-2005, 11:51 PM
|
|
|
Registered
Join Date: Aug 2004
Location: Fort Lauderdale
Posts: 257
|
I guess Al Reid does a great job, but I have found another small shop in Fort Lauderdale that does great work also.
I don't want to post an address but if you e-mail me I'd be happy to give you his name dak911@bellsouth.net...
__________________
PCA and BMWCCA member for many years 09 Boxster Base PDK (No spare tire)  05 M/B CLK 500 AMG (Spare tire)  07 BMW 530xiT (Spare tire)
|
||
|
01-06-2005, 04:10 AM
|
|
|
Registered
Join Date: Mar 2003
Location: Darnestown, Maryland
Posts: 914
|
I did simular to Jason, but the original paint on the paddles was mostly worn off because the PO must have run it thru the car wash weekly. The worn area matched the wire drum that cleans the wheels in most car washes. I did remove most of the paint with 220 on a random orbit sander and dremel. Sanding probably took 30-40 min per wheel.
I used the self etching primer and followed up with satin black. Worn 220 (By hand) also get's some stuborn stuff off the anodized areas and sort of matches the texture of the original finish. Just gotta go in the same direction. I had a problem with one wheel and I think it's because it was cold when I painted it. I ended up with a krinkle type finish in a few areas. After a few days I sanded it smooth and shot it again. Same problem. The second time I put it under a halogen light over night. Anyone have a clue what would cause this?
__________________
Bill Miller 81 Targa Guards Red 3.6, M&K 1 out, S4 brakes 83 ROW CAB Rubinrot Metallic (RIP) |
||
|
01-06-2005, 07:39 AM
|
|
|
Registered
|
Al Reed nice guy. Incredibly affordable. If you have more than on project happing. You probably don't have the time to invest 8 hours a wheel. Al gets it done quick and easy. I know some purist don't like full polish. But the are my wheels.

|
||
|
01-06-2005, 08:11 AM
|
|
|
Banned
Join Date: Jan 2004
Location: San Jose, Ca
Posts: 1,897
|
I had a problem with one wheel and I think it's because it was cold when I painted it
Bill,
Humidity and temperature is your enemy when I comes to painting. As well as making sure your primer surface is absolutely dry prior to painting your wheel. Light, even coats. It frustrating when you have too resand and paint. Hope this helps. Jason |
||
|
01-06-2005, 08:47 AM
|
|

|
|
Registered
Join Date: Aug 2004
Location: Fort Lauderdale
Posts: 257
|
Sometimes caused by some small bit of oil or fingerprints in the places that it wrinkles.....
__________________
PCA and BMWCCA member for many years 09 Boxster Base PDK (No spare tire) 05 M/B CLK 500 AMG (Spare tire) 07 BMW 530xiT (Spare tire)
|
||
|
01-06-2005, 12:40 PM
|
|
|
Registered
Join Date: Jan 2000
Posts: 6,950
|
Wrinkles usually indicate the paint below is incompatable. Either it is paint that has partially cured and the addition of fresh paint creates a wrinkling effect or it has a paint on it that some remnants are remaining and causing the problem. I would spot sand the area, use a degreaser, and then repaint.
|
||
|
01-06-2005, 03:00 PM
|
|


 1969 Porsche 911T
 1988 Porsche 911 Carrera 3.2 litre
  1987 Porsche 911 Targa Carrera 3.2
