|
|
|
|
|
| Author |
|
|
Eng-o-neer

Join Date: Dec 2011
Location: Los Angeles
Posts: 3,108
|
I'm in the midst of replacing the spring plate bushings on my '84 M491, and I've hit a bit of a snag. The bushings that are in there now are Weltmeister poly-graphite suckers that are a very, very hard plastic.
I managed to remove them from the spring plate covers with a mini sledgehammer and a drift, but it wasn't an easy couple of hits and it popped out. I expect they are very firmly lodged in the chassis as well. How do I get these things out? Is there a "good" way? My first thought was to hammer a wedge of some kind in there, but I expect it to be very very difficult to pry. Maybe I could use a piece of wood to protect the chassis, but this seems like it has a low chance of success. My second thought was to cut it out with a sawzall. I will surely catch the chassis, so I'd rather not. My third thought was a bearing puller, but they mostly punch from the center. I found a pilot bearing puller or two, but they were not large enough for the almost 2" internal diameter. I found a blind hole puller that might do it, but it may also just lodge itself in the plastic or not have enough space behind the fender... Arrrg. 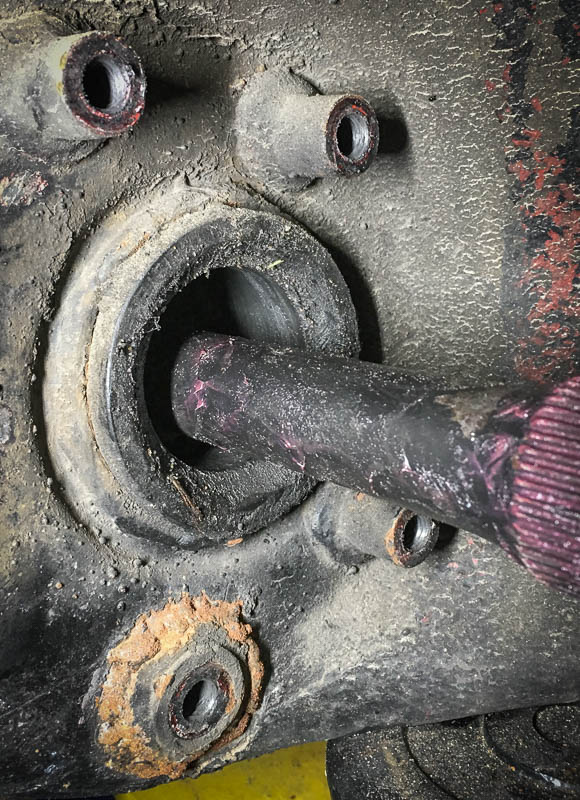
|
||
 06-19-2017, 09:36 AM
|
|
|
Disbanded
|
sawzall them to W/I an 1/8" or so to the body in 4 or 5 places then use a screw driver to finish the cut while prying. id say the more relief cuts you make in the bushing the more likely it is to be able to be pried out.
__________________
78SC PRC Spec911 (sold 12/15) https://www.youtube.com/watch?v=f7I6HCCKrVQ Now gone: 03 996TT/75 slicklid 3.oL carb'd hotrod 15 Rubicon JK/07.5 LMM Duramax 4x/86 Ski Nautique Correct Craft |
||
|
06-19-2017, 11:13 AM
|
|
|
Eng-o-neer
Join Date: Dec 2011
Location: Los Angeles
Posts: 3,108
|
It's not looking good for the sawzall...I can only get it in there at a formidable angle.
I could probably go in straight with a hand blade but then I'd want to kill myself. |
||
|
06-19-2017, 01:57 PM
|
|
|
Registered
|
Instead of a sawzall what about a mini-hack saw?
 This should be small enough and you can control the cutting to avoid cutting into the bushing support metal. |
||
|
06-19-2017, 03:03 PM
|
|
|
I would rather be driving

Join Date: Apr 2000
Location: Austin, TX
Posts: 9,108
|
I am going to guess that the bushing was not sized and was pounded into place. In this case, you will have a hard time to cut the compressed urethane.
I have a small 12" crow bar that fits inside. you can leverage the bushing out working around the perimeter to pry out. Slow. but it usually works.
__________________
Jamie - I can explain it to you. But I can not understand it for you. 71 911T SWT - Sun and Fun Mobile 72 911T project car. "Minne" - A tangy version of tangerine #projectminne classicautowerks.com - EFI conversion parts and suspension setups. IG Classicautowerks |
||
|
06-19-2017, 03:27 PM
|
|
|
Disbanded
|
had not considered the fender well obstructing the angle of the sawzall until you mentioned it. how about a jig saw? still a tight fit, but maybe doable.
or how about removing the T-bars and a long piece of galvanized pipe and "push" them out via BFH from the other side? the splines on the t-bar diameter should fit a piece of 1/2" ridged pipe or even a ridged steel conduit
__________________
78SC PRC Spec911 (sold 12/15) https://www.youtube.com/watch?v=f7I6HCCKrVQ Now gone: 03 996TT/75 slicklid 3.oL carb'd hotrod 15 Rubicon JK/07.5 LMM Duramax 4x/86 Ski Nautique Correct Craft Last edited by juanbenae; 06-19-2017 at 04:36 PM.. |
||
|
06-19-2017, 04:33 PM
|
|

|
|
Disbanded
|
copper pipe even with a cap sweated on it so the sharp edges of the pipe do not simply cut into the bushing increasing it's wedge. copper might be easier on the splines the t-bar mates into. the torsion tube daylight at each side so in theory you could send the pipe "ram" all the way thru.
or heat it and see if it loosens the grip
__________________
78SC PRC Spec911 (sold 12/15) https://www.youtube.com/watch?v=f7I6HCCKrVQ Now gone: 03 996TT/75 slicklid 3.oL carb'd hotrod 15 Rubicon JK/07.5 LMM Duramax 4x/86 Ski Nautique Correct Craft |
||
|
06-19-2017, 04:40 PM
|
|
|
Eng-o-neer
Join Date: Dec 2011
Location: Los Angeles
Posts: 3,108
|
Dang. Good ideas, but they all seem a bit barbaric. Is cutting and smashing the common removal technique or are these bushings unheard of these days?
Current favorite is to cut with the sawzall as much as I can in two adjacent places, and hope I can smash that piece out with a drift and sledgehammer...The thought of manually hacking grooves by hand in that tiny space is already making my wrist hurt. I had thought about the jigsaw, too, though I don't think it has enough throw to get to the back of the bushing... Maybe melt it with a torch? I'm wary of getting the metal too hot... The long-pipe drift idea is interesting...I suspect I might end up with a combination of "techniques" for this... |
||
|
06-20-2017, 03:33 PM
|
|
|
Registered
|
pneumatic autobody saw
__________________
81 sc 3.0 turbo wb coupe |
||
|
06-20-2017, 05:00 PM
|
|
|
Dial 911
|
Hi...A propane type heat temp won't do any damage to the torsion bars casing.
If it is glued in, I would think that the heat may let you pull/pry it out ay...To get a slot in the bushing going, maybe you should try using a drill bit...One that is just a bit smaller than the thickness of the bushing...You could finish it off with just a handheld hacksaw blade... Just wrap some tape around it where you would hold it.
__________________
Cheers! Simplicity is the ultimate sophistication. Leonardo Da Vinci Last edited by A horse with no name; 06-20-2017 at 06:49 PM.. |
||
|
06-20-2017, 06:09 PM
|
|
|
Navin Johnson
Join Date: Mar 2002
Location: Wantagh, NY
Posts: 8,830
|
Quote:
Just snap a jigsaw blade down, and have at it Or wood chisel and start hacking... Or, get a torch and stand back... burn the mofo out... or at least get it hot enough so that it is "plastic" again, and pry it out
__________________
Don't feed the trolls. Don't quote the trolls  http://www.southshoreperformanceny.com '69 911 GT-5 '75 914 GT-3 and others |
||
|
06-20-2017, 06:19 PM
|
|
|
Registered
Join Date: May 2010
Location: atlanta
Posts: 1,982
|
A slide hammer could work.
|
||
|
06-20-2017, 07:51 PM
|
|
|
Heck, Im only 5 not 71!

|
Harbor freight sells a vibrating saw that sells for about $20. The blade is short and can be mounted on a L angle. There should be plenty of room to do the cuts in the bushing.
__________________
Pat Henry Targa80 1980SC Targa (Mocha Brown) |
||
|
06-21-2017, 03:48 AM
|
|
|
Almost Banned Once
Join Date: Feb 2009
Location: Adelaide South Australia
Posts: 38,656

|
Have you tried grabbing it with a good pair of pliers and pulling it out? Pull it out a bit at the top and work your way around.
It may be not as bad as you think.
__________________
- Peter |
||
|
06-21-2017, 04:29 AM
|
|
|
Registered

Join Date: May 2006
Location: Rocklin, CA
Posts: 803
|
I would make a cut or two on the lip using a Dremel tool, a cut large enough to slip a flat head screw driver or pry tool in there. You want to overcome the adhesive by getting between the torsion tube and the bushing and pry that SOB out.
|
||
|
06-21-2017, 07:24 AM
|
|
|
El Duderino

|
Can you get the t-bar out? What if you could rig up something like a metal plate that is the diameter of the bushing and a long threaded rod? I'm thinking of something with a slot in the middle and some nuts/washers that would let you slide it through the opening and then secure it to act sort of like a wall anchor bolt to grab onto the backside of the bushing. Then with the threaded rod attached through the t-bar hole you would have plenty of room to use a slide hammer outside.
__________________
There are those who call me... Tim '83 911 SC 3.0 coupe (NA) You can't buy happiness, but you can buy car parts which is kind of the same thing. |
||
|
06-21-2017, 08:58 AM
|
|
|
Eng-o-neer
Join Date: Dec 2011
Location: Los Angeles
Posts: 3,108
|
Well that kinda sucked, but I was ultimately successful.
My first attempt was to drill a hole and slip a piece of wire through it to see if I could just yank it out. That had no chance (wire snapped), so I pulled the torsion bar out, and got to cutting. The "race" in the chassis has a lip to prevent bushings from pushing in too far, which means you can't really cut the bushing down to the edge. I used a sawzall at an angle to cut channels in the bushing, being careful not to dig into where I thought the lip was inside. It's worth noting that my car is a widebody, so there was more room back there than you might find on most. 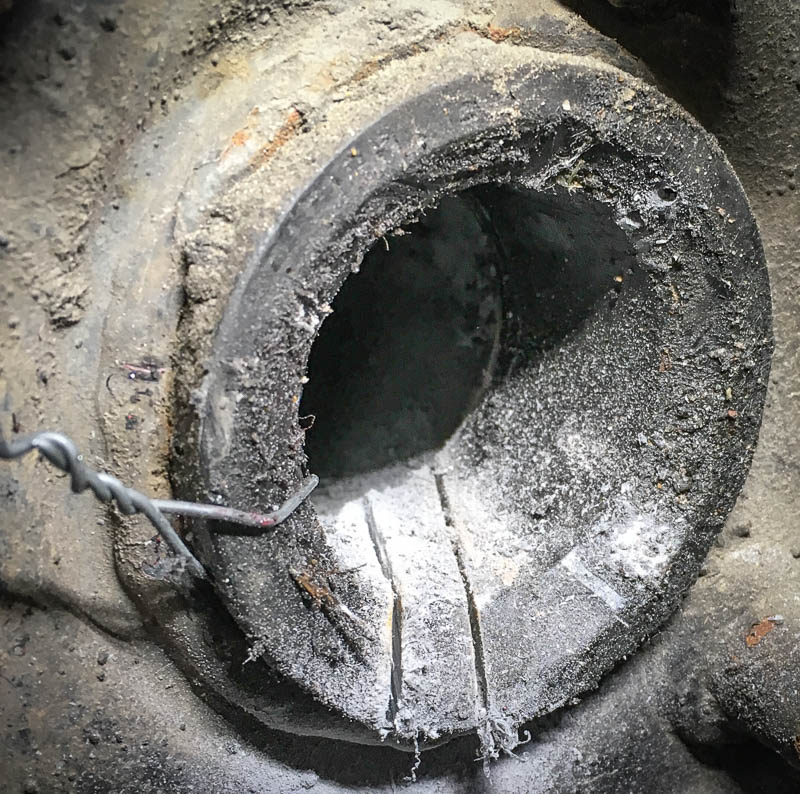 I then tried to use a drift to punch out that bit, but it only knocked out the outer lip portion. I used an air chisel to cut the rest out: 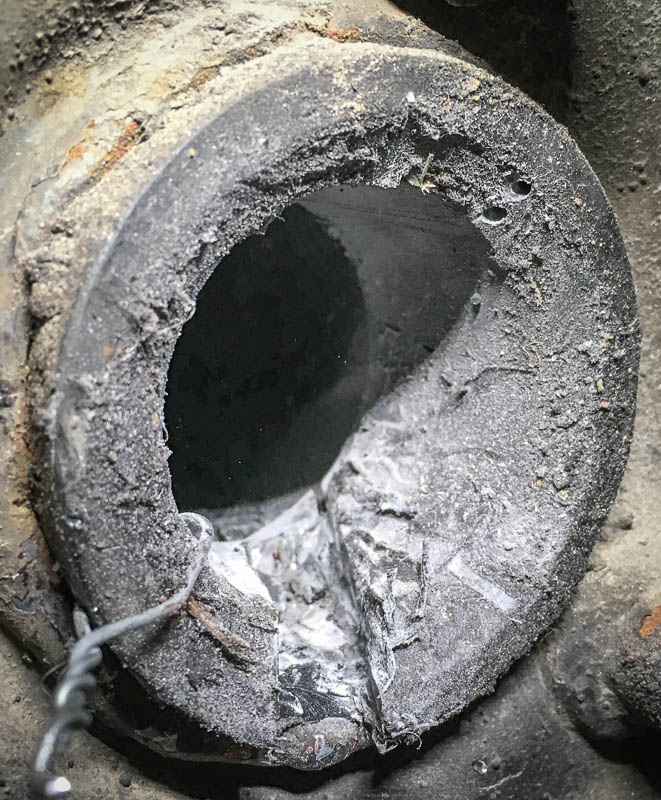 I tried punching the thing with a drift a few times to see if it would knock out, but it wasn't moving much. I wound up cooking it with a propane torch and wedging a screwdriver in, and kinda pried and pulled it from a few spots. 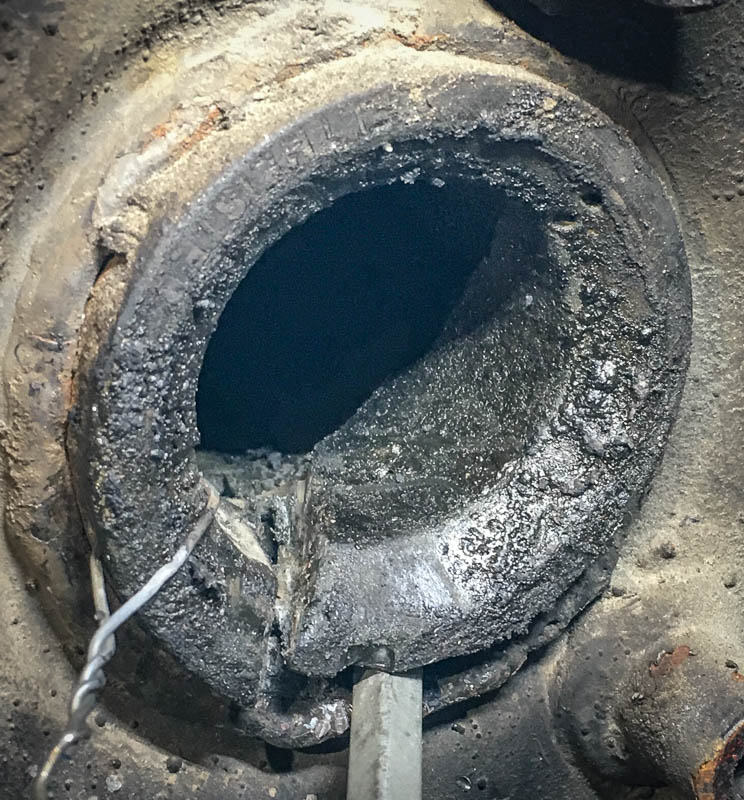 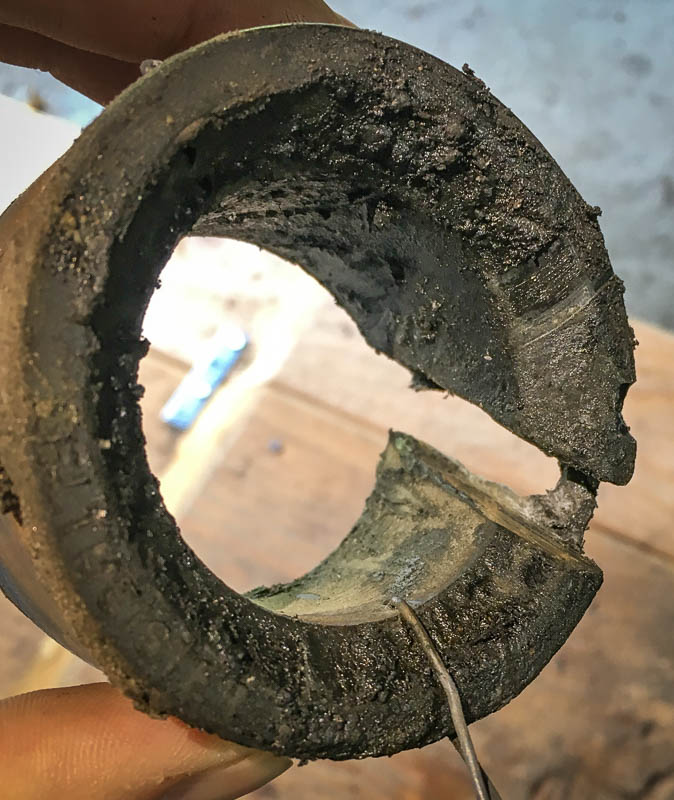 Though I went slowly and was conscientious, this was a somewhat haphazard process. You can see where I nicked the lip with my sawzall. There was also a gouge in the lower portion of the race that required a bit of scrubbing with a round file. I'm irritated, but it shouldn't be a problem for any bushings I put in—this isn't a crankshaft. 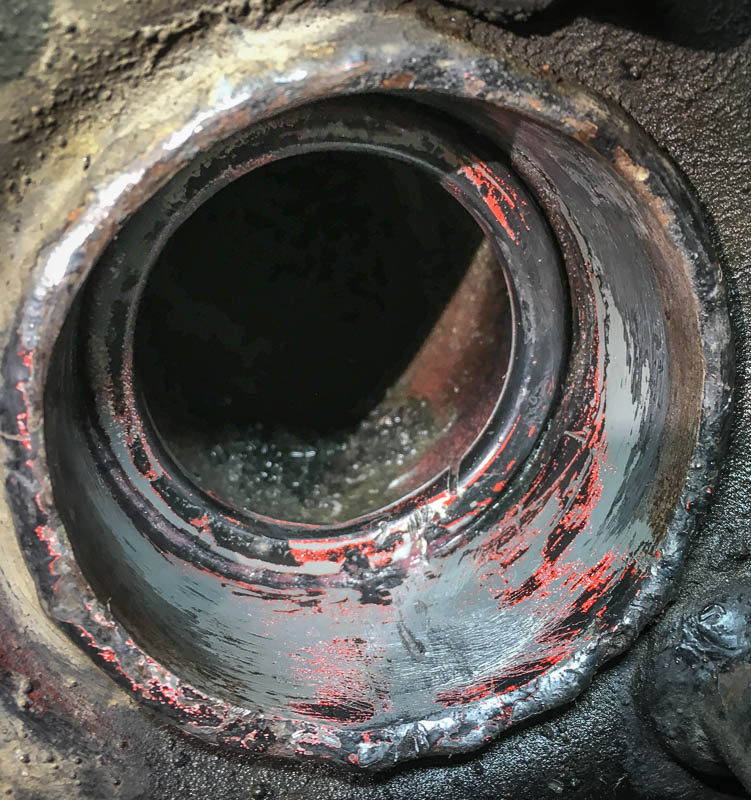 I tried a few different methods for the left side of the car (cooking and prying with no cutting) but nothing worked without removing a significant amount of material from the inside, as with the right side of the car. I had some success with cooking it, hammering a screwdriver in sideways on opposing sides, and prying with both, but it wasn't as easy as it sounds. In the end it worked out without damage in much the same way as the other side. 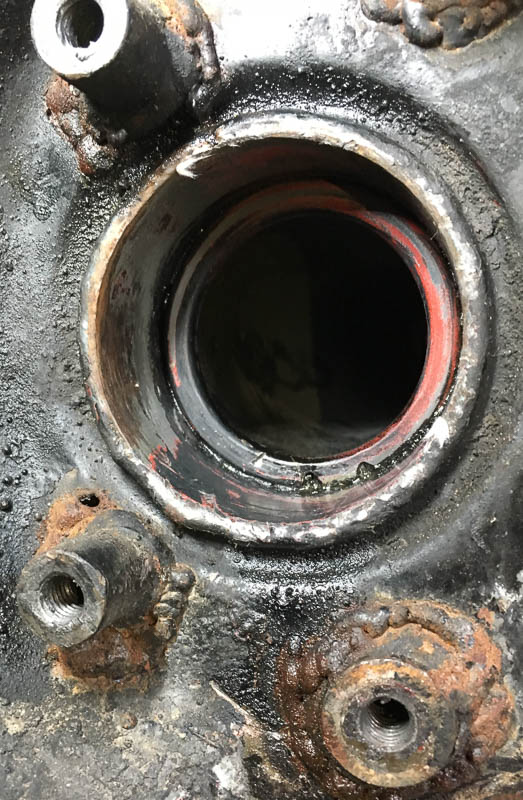 I cleaned them up, made sure they were smooth, and put some Mobil 1 synthetic grease to make sure they didn't flash rust or anything while I wait for parts to arrive. If I had to do it again I would try harder to source a screw-type puller that could straddle the bearing...Failing that, I would try and get a small slide-hammer and something that would hook in. I really wonder how people pull polybronze bushings out...Maybe nobody ever has! I'm just glad it's over...Now I can wrestle with getting the new rubber bushings in! Last edited by Tremelune; 06-26-2017 at 10:43 AM.. |
||
|
06-26-2017, 10:38 AM
|
|
|
Dial 911
|
Well done!... You'll find that it's quite easy to do when replacing with your ER's rubber bushings ...Getting your ride height back to where you want it, be a further challenge... It sure was for me.
Edit: Oops!...I forgot, you purchased ER's 'quick change' kit! 👏...It will no doubt be worth it's weight in gold eh!
__________________
Cheers! Simplicity is the ultimate sophistication. Leonardo Da Vinci Last edited by A horse with no name; 06-27-2017 at 02:48 PM.. |
||
|
06-26-2017, 02:42 PM
|
|

|
|
Registered
|
Why would anyone want to use the Poly graphite bushings after that. I would've use a multi tool to remove that old bushing.
|
||
|
06-26-2017, 04:50 PM
|
|
|
Registered

|
Quote:
Why did you want to rplace them?
__________________
Regards, Flo / 79 SC streetrod - Frankfurt, Germany Instagram: @elvnmisfit |
||
|
06-27-2017, 03:09 AM
|
|


 the 23 car
 The Natty
 domino
 *SOLD 1st 911 - (D) Series 1970-1971
 *SOLD 2nd 911 - (D) Series 1970-1971
 * SOLD 2021 - 3rd 911 - (G) Series 1973-1989
 Carrera Cab with top down Photo from LR side
 Carrera with the top down
 Silverado
 Cheyenne
 1983 Porsche 911SC Coupe
 2011 Mercedes-Benz E350 Cabriolet
 Porsche 911

