|
|
|
|
|
| Author |
|
|
Registered

Join Date: Jul 2012
Posts: 645
|
'85 Carrera bought as a flip, turned into something else
Clickbait title.
 I've been on this forum for a while, mostly lurking, buying and selling parts and cars and jumping into conversations when I think I have something to say, which isn't very often. My favorite type of thing to read here are the build threads and I always wanted to have a car and a build worthy of documenting. I think I'm building one now, so I'm going to show my version.   A little backstory on the car: I found this '85 Carrera in late 2015 on the PCA classifieds. The son of the original owner was selling for his mother who took ownership after his father passed. He and his mother had been driving the car sparingly in the last couple years and mom thought it was time to let it go. The car sounded driver-quality, and it was priced right.. I was planning on picking it up and driving back home, fixing a few things, and selling it (which I shared with the seller). Figured I'd have an adventure, experience a Carrera of my own for a while, and make a couple bucks. The car was out in DC, I'm in San Diego. The car sounded solid enough - Ran and drove fine, well-loved with ~186k miles, all records from new, a restoration around 2001, not too much rust (ahem..), and a recent brake job - replacing all flex lines, calipers, pads, and 2 rotors. I was emailed a 30 second clip of the car running, and a few photos.. good enough for me to wire a deposit, get a cashiers check and a one-way plane ticket! Oh, and I mailed a bunch of hand tools the week before the trip, so I wouldn't be completely boned if something happened out on route 66 solo, in the middle of the night. Foolproof plan. The trip was fun. 2700 miles in 2.5 days. I really wish I would have taken more time, more photos, noise-cancelling headphones and an ipod full of music or a Walkman or something. DC to Nashville in one day (in that hurricane - dumping rain 80% of the time), slept 4 hours in the car in a parking structure. Second day to Amarillo, rented the finest $40 hotel I could find and crashed for 6 hours, then took the back way through 29 palms on my way home - out in the desert where it was windy and raining. Anyway.. got the car back, decided not to do much to it after all because I couldn't set a cutoff point if I were to get into it.. You make one thing look nice and everything around it would look like doo-doo. So the new plan was to throw it up for sale and see what happens.. Well, nothing much happened. A few commitments and a lot of runaround and I decided to keep it and do something with it later. I knew it'd be a hot-rod because I don't think the world needs another bone-stock silver Carrera. No offense to anybody who has one - I just saw this car as an opportunity to do something fun.   I kept going back and forth on what to do. Or thrashing around, I guess. Colormatch IROC fiberglass bumpers and a duckbill? Paint IROC bumpers Martini colors and keep the body silver? Backdate to '73RS? Naaaaaahhhhh.. A Carrera coupe is a good jump-off for so many different options.. In the end, I decided on a narrow-body '74 IROC-inspired car. Funky 70s color, short hood, smooth rockers, no flares, duckbill, RSR-style 16x7s and 8s. I wanted a single flag mirror and bright window trim. Racy stripped-down interior, but nice materials - something original, and still comfortable. And body color was making it's way inside, inspired by some of the Singer cars. Lose some weight, do a mostly factory rebuild but add a little reliable and smoggable power (euro P/C, chip and injector upgrade, exhaust). Nothing over the top anywhere, but definitely not stock, and hopefully something fresh. Oh, and working AC and heat. Right now the car is painted, engine is built, most everything is refinished and it's being re-assembled as time permits. I'll post the photos I've taken along the way in the coming days and get this thread updated in real time as the car goes back together. |
||
 07-18-2017, 09:08 PM
|
|
|
Registered
Join Date: Jul 2012
Posts: 645
|
The car ran and drove fine, but it was tired and dirty. I initially planned on pulling the engine, cleaning it up, maybe a new top end. I also planned on re-using much of the interior but I got hit with while-youre-in-there-itis. Nope, total re-do.
I pulled the engine.  I pulled the interior  Floors looked solid! So did the parcel shelf, rear seats, all the interior zones that usually have issues (even in galvanized cars) looked good. Except the kidney bowls and rockers. And inner fender where the AC lines were routed.  
|
||
|
07-18-2017, 09:39 PM
|
|
|
Registered
Join Date: Jul 2012
Posts: 645
|
I'll use this double post spot as a mood-board. These are all inspiration for my car.
 I'll be doing my take on this decal-job. Sounds goofy on a street car that's mostly stock but I think I can pull it off. And if I can't, they come right off.. Here's "Mullholland911" car. He's a user on here - I found this photo on a google image search a while back and figured out he's on here. IROC or RS-inspired, but narrow-body and not over the top. Stance is right, etc. Well done, sir!  The Singer interior I'm pulling inspiration from. I love the painted sills and rear seat pan. I'm going with a darker brown leather and suede - color code is "cognac" I'm doing Pole Positions.. Initially I was going to cut the headrest off and graft in d-shaped headrests from a 70-73 car, but I think I'm going to just leave the one-piece ones there. I'm also doing a woven Pascha insert in the seats and on the doors - tonal, not high-contrast - same color cognac suede and leather. I think lollipop seats would make more sense given the era I'm styling the car after, but I already have the Recaros. Plus I hear those lollipops are for slender folks, and this car has to fit a wide range of butts if I'm to find a buyer..   Pascha, in case you haven't seen it.  Color inspiration: I like blue shop towels and Cheetos. I think it's a pretty original color combo - should look nice. 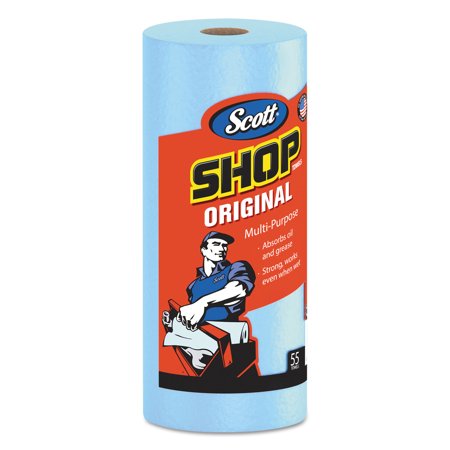 
Last edited by Flynt; 07-19-2017 at 12:56 PM.. |
||
|
07-18-2017, 09:41 PM
|
|
|
Registered
|
Watching your progress.......good luck and keep us posted

__________________
'71 914-6 #0372 '17 Macan GTS |
||
|
07-19-2017, 05:18 AM
|
|
|
Crusty Conservative

|
Flynt,
Welcome, and thanks for sharing what looks to be a very interesting journey. Will be watching your progress with anticipation.
__________________
Bill 69 911 T Targa, 2.4E w/carbs (1985-2001) 70 911 S Coupe, 2nd owner (1989- 2015) 73 911 T Targa, 3.2 Motronic (2001- ) |
||
|
07-19-2017, 05:53 AM
|
|
|
Registered
|
Cool car, story and project. I bought an 82 coupe in 2014 with similar miles and what looks like similar localized rust. Agree that the projects on PP make great reading. Best of luck to you, John
|
||
|
07-19-2017, 10:37 AM
|
|

|
|
Black and Blue

Join Date: Jul 2000
Location: Austin, TX USA - Ya'll
Posts: 2,555

|
sub'd!
__________________
Kemo 1978 911 SC Non-Sunroof Coupe, two tone Primer Black and SWEPCO Blue, Currently serving as a Track Whore 1981 911 SC Sunroof Coupe, Pacific Blue Project, Future Daily Driver |
||
|
07-19-2017, 11:26 AM
|
|
|
Under the radar
Join Date: May 2007
Location: Fortuna, CA. On the Lost Coast near the Emerald Triangle
Posts: 7,129
|
You had me when I saw the rust on the floor....

__________________
Gordon ___________________________________ '71 911 Coupe 3,0L outlawed #56 PCA Redwood Region, GGR, NASA, Speed SF Trackrash's Garage :: My Garage |
||
|
07-19-2017, 12:13 PM
|
|
|
Registered
Join Date: Oct 2016
Location: Kansas
Posts: 1,254
|
east coast cars are almost ALWAYS going to have some rust due to all the salt they lay down during the winter months.
My car was from CT, and it shows from the rust. Looking forward to seeing how you go about repairing the rust. I'm still trying to find someone within driving distance (<100 miles) who is confident to repair my rust. 8 months of looking and still haven't found someone.
__________________
1987 Porsche 911 Carrera Coupe |
||
|
07-19-2017, 12:44 PM
|
|
|
Cars and Cappuccino
|
Got the IROC front bumper for 9 " flares if you go that direction. Never painted, Packed and ready to ship. Will cut you an awesome deal.
Subscribed..... |
||
|
07-19-2017, 03:17 PM
|
|
|
Registered
Join Date: Jul 2012
Posts: 645
|
Thanks fellas.
tdw - thanks for the offer, but I have a bumper :thumbup: Trakrat - The cost to have somebody who's done it before repair the rust is going to be very expensive - it is a ton of work. I'd suggest getting a welder and DIY if you have the time. Lots of work, but rewarding - plus you know it's done right! Here's what the rust looked like. If your car looks like this, know that there are around 14 panels under this all laid over one another like lasagna, and you've probably got rust in at least the top few..  I thought the other side was good. A magnet stuck to it, felt solid, no rust.. Started digging into it a little deeper because I had to address the rust in the rocker, anyway.. Popped some spot welds and took a peek..  Oh boy. You can kind of see the goo they shot in there to fill the holes back when they had the car painted in '01. Big globs of caulk or seam-sealer, maybe a little layer of bondo smeared on top, then that panel spot-welded over it all. Looked good, a magnet stuck to it, sounded solid when I tapped on it!  So, the fix for this (at least how I did it) is: - Cut the body panel from about halfway up the wheel arch to the door frame, then down the rocker just behind the jack tube. Cut straight, with a small blade - Drill out spot welds in the doorsill for your new removable panel - Pull it off and have a looksee. I don't have a pic of the carnage on the drivers side, but it looked like the passenger side (not quite as bad, but you know..):  So now that I knew what I was dealing with I started cleaning it up and figuring out a plan of attack. I decided to keep as much factory metal in there as a majority of it was still surprisingly solid! I cut out chunks of it here and there and thought about how I was going to need to build it up on my way back out. I tried to keep all the cuts straight because it's much easier to build new panels that fit nice when the edges are straight.  This is that zone cleaned-up and ready for patch panels (which you can see I've been busy mocking up in white posterboard) Last edited by Flynt; 07-20-2017 at 01:50 PM.. |
||
|
07-20-2017, 01:44 PM
|
|
|
Registered
Join Date: Oct 2016
Location: Kansas
Posts: 1,254
|
your jack point looks to be in solid shape. and I'm REALLY surprised the bottom corner is still solid.
This makes me think that the car was left outside in poor/wet weather rather than being driven in it.
__________________
1987 Porsche 911 Carrera Coupe |
||
|
07-20-2017, 01:50 PM
|
|
|
Registered
Join Date: Jul 2012
Posts: 645
|
I think it's from snow and salt flinging off the rear tires, up into the kindey bowl zone and maybe freezing, or packing up in there? They way these things are built, it's a perfect spot for crud to get caught up forever.
The inner fenders were covered in factory schutz plus a thick, asphalt type coating which probably saved them! The underside of the floor still had all the factory schutz intact for the most part - a few little scrapes and cracks here and there. That stuff really does it's job unless it's compromised. Same with the galvanizing and e-coat. |
||
|
07-20-2017, 01:56 PM
|
|
|
Registered
Join Date: Jul 2012
Posts: 645
|
Cardboard mockups. This made it much easier to figure out compound curves - there are a lot in this area. I tried to patch with as few pieces as possible - lots of fit-up, bending, grinding, etc. I had an angle grinder with a grinding stone, another with a flap wheel, an air powered cutoff wheel, a body hammer, a few screwdrivers, some magnets, wire brushes, scotchbrite, and a few other things floating around through this process.
 Nearly done, one piece again. A handful of pieces built up from the inside out.  Done, painted with Zinc-rich primer, panel wax sprayed inside, ready for finishing and welding the body back on. I was checking fit-up of the Restoration Design door sill corner here. No way I could have made that piece - great value at $75!  Also - forgot to mention, when attacking surface rust - I used a fine-grit flap wheel, phosphoric acid and wire brushes. Use discretion - if the metal is too pitted and weak, cut it out! I got lucky, for the most part. And here's a teaser of a super rough mockup of the Pascha woven inserts. This was scrap leather, just to get an idea of how it'd look. I dig it. The real hides are a lot nicer. 
|
||
|
07-21-2017, 01:03 PM
|
|
|
Registered
Join Date: Jul 2012
Posts: 645
|
More rust repair, then I'll move on. Same process here.
This is the inner fender that was all rusted out in the first set of pics. Crud sat up on the bumper mount behind the AC lines and rusted it's way into the trunk. Not a fun piece to make - lots of thinking and cardboard mockups. Final product looks alright.  Before and after - same side, up top. Easy peas compared to all that other stuff. 
|
||
|
07-21-2017, 01:10 PM
|
|
|
Registered
Join Date: Jun 2000
Location: bottom left corner of the world
Posts: 22,808
|
Good skills!!!
|
||
|
07-21-2017, 01:37 PM
|
|
|
Schleprock
Join Date: Sep 2000
Location: Frankfort IL USA
Posts: 16,639
|
Agreed with Bill. Nice fabrication talents!
If I can ask, where do you source the phosphoric acid? I was going to get some to strip anodizing from aluminum parts
__________________
Kevin L '86 Carrera "Larry" |
||
|
07-21-2017, 01:46 PM
|
|
|
Registered

|
Subd
Love the silver lightweight posted for inspiration. Scott
__________________
Scott "Houston, Tranquility Base here, the Eagle has landed" Silver 1984 M491 Sunroof Coupe |
||
|
07-21-2017, 02:00 PM
|
|
|
Registered
Join Date: Jul 2012
Posts: 645
|
Thanks for the compliments!
Now that I was back to square one with a solid chassis, I moved to the inside and started making things look nice. I wanted to do a body-color painted rear seat pan, which ties into the inner rockers. When I pulled up the carpet, it didn't look like it'd be too difficult or time-consuming. I figured - clean up the carpet glue, clean up and fill-in some spot-welds with a skim layer of bondo, primer and call it good! Essentially, that's all it takes - but it is a ton of work! There are about 100 spot welds spread out all over the place, a few seams where panels are spot-welded together, 6 rivets per side on the rockers where the heat tubes are riveted to the panel, a big, unsightly crevice where the seat mounts are welded to the chassis, and a bunch of ripply sheetmetal from stamping. Oh, and I re-routed the wiring that went up under the carpet on the drivers' side left inner rocker/floor corner. It now goes up the center with the shifter shaft and throttle cable, etc. Here's what I started with after using a cup wire wheel and getting up most of the carpet glue:  Here it is nearly done:  Back seat zone:  I welded the seat mount to the chassis, and smoothed out with a skim layer of bondo. Spot welds were kissed where needed with a flap wheel to knock some of the "peaks" and slop off and skimmed, some of the stamping wrinkles I didn't smooth out entirely because I wanted to use as little bondo as possible. You can kind of see the inner rockers and where the seat mount "gutters" were smoothed out in this photo.  The carpet will be oatmeal square-weave, and it'll just be on the flat surfaces, center tube, front and rear kick panels. not sure if I'll leather-wrap the edge or just do yarn bound.. |
||
|
07-21-2017, 04:00 PM
|
|
|
Registered
Join Date: Jul 2012
Posts: 645
|
Phosphoric acid I got at home depot. Make sure to dilute (I think I did 6:1), and rinse the panel when done! My technique was a spray bottle of the diluted acid, a fine wire brush, a microfiber, mildly soapy water, and a dry microfiber. Dry the panel with a heat gun and spray immediately with zinc-rich primer.
This is the stuff: 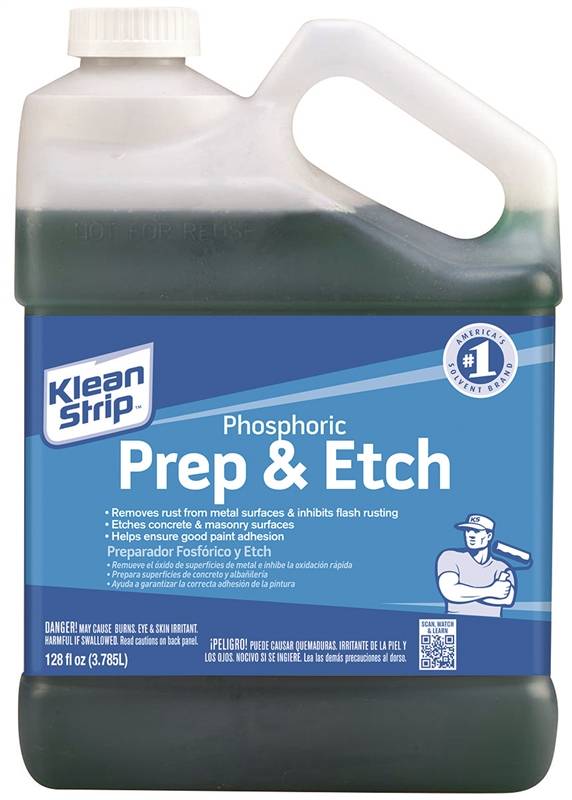
|
||
|
07-21-2017, 04:08 PM
|
|


 Michael's Six
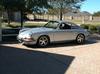 1970 Porsche 911S 2.2l MFI
 My Garage
 1971 Porsche 911
 Baja Bug
 1985 Porsche 911
 Beast
Beast
