|
|
|
|
|
| Author |
|
|
Registered

|
Hi,
I don't like the idea of drilling holes in my otherwise original dashboard... ------------------ '74 Porsche 914 2.0l '90 VW Vanagon 1.7l Diesel |
||
 09-12-2001, 08:30 PM
|
|
|
Registered
Join Date: Dec 1969
Location: Lompoc, Ca. 93436
Posts: 178
|
Thanks Nathan. That's exactly what I needed. If I get off early tommorow like today and yesterday, maybe I'll get it in by Saturday. But I think we'll have a full day tommorow after two down days. I hope the whole nation is back to normal tommorow.
Bee Jay |
||
|
09-12-2001, 10:44 PM
|
|
|
Registered

Join Date: Dec 1969
Location: chula vista ca usa
Posts: 5,720
|
You can use the hole from the cigar lighter, but it may be a little large. You can make a washer to fit under the button flange so it won't fall into the dash. Good luck.
|
||
|
09-13-2001, 07:30 AM
|
|
|
Registered

|
Aren't there some smaller holes already in the dash to the left of the cig lighter? You could bore those holes out and technically not be adding more holes. It would be "cooler" to have the button on the left of the steering column...to make up for the lack of key on that side as many other porsches have.
Nathan |
||
|
09-13-2001, 08:10 AM
|
|
|
Registered
|
If you feel through the woven material on the dash, you will find that several holes already exist. I have a hole to the left of my cig lighter and several holes to the left of my ignition switch. If you have a /4, I bet there is a hole in the location of a /6 ignition switch.
|
||
|
09-13-2001, 09:30 AM
|
|
|
Registered
Join Date: Dec 1969
Location: Lompoc, Ca. 93436
Posts: 178
|
OK. I started my starter button installation today. I made pretty good progress. There was no hole where the six key switch should have been, but I have a 73. Here is a list of steps taken:
1. disconnect battery (OK, I didn't really do this, but every body says to. 2. drop lower dash knee pad 3. Remove steering wheel. (yes you have to) 4. Remove light switches. (head, fog,& flashers) 5.Carefully peel back vinyl 6. Drill a small hole 1 3/4" to the right of the fog switch hole. 7.Using a 1 1/4" hole saw, drill a 1 1/4" hole. 8. Test fit starter button. 9. Called it a day, electrical connections tomorow. Bee Jay I will now attempt to attach a picture. It didn't take. I'll email the picture to Wayne or Dave. Bee Jay PS. Drop the fuse box before you drill [This message has been edited by Bee Jay (edited 09-19-2001).] |
||
|
09-19-2001, 06:37 PM
|
|

|
|
Registered

|
Quote:
P.S. I will post the pics if you like, just email them to stray15@hotmail.com Porsche, through and through Tim '83 944  My Photo Page My Home Page |
||
|
09-19-2001, 07:14 PM
|
|
|
Registered
Join Date: Dec 1969
Location: Lompoc, Ca. 93436
Posts: 178
|
Latest status
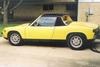
I decided that "while I was in there", to replace the basket weave vinyl with faux leather like my door panels and center console I recovered. Pulling the lighter and vent trim out was a challenge, but with that done, I pulled the basket weave vinyl, and the metal plate behind it, out. To my surprise, there are two pre-drilled holes under the vinyl, one on each side of the lighter. What are these for? If I had known, I might have used one of them for the starter button. I put the recovered plate back in the car and replaced the lighter, vent trim and light switches. Looks real good. I didn't get to the starter switch. Maybe tonight, and for sure this weekend. Bee Jay A picture of my car http://pelicanparts.com/swapmeet_pics/SLO_concours_July_01/Pic6.jpg |
||
|
09-21-2001, 09:09 AM
|
|
|
Guest
Posts: n/a
|
Great to here it's coming along. Don't forget
to send pictures. ShawnO |
||
|
09-21-2001, 11:18 AM
|
|
|
Registered
Join Date: Dec 1969
Location: Lompoc, Ca. 93436
Posts: 178
|
It's in.
The Miata installation article was very helpful. http://www.miata.net/garage/pushstart/ Without it, I would have had to do a Dave Darling Dance with an ohmeter. Since I have a Bosch relay back near the starter, I just wired the starter to the fuse box, ground, and the yellow wire comming from the ignition switch. You can either cut this wire, or do like I did. I spliced the starter button to the yellow wire. I can start the car with either the key or the button. The nicest thing about the button, if the car dies, you don't have to return the key all the way back to the off position to restart, just push the button if the key is on. I am very pleased. I will try to take and post a picture tomorow. Next weeks project: BMW front brakes |
||
|
09-21-2001, 09:07 PM
|
|
|
Registered
|
Here is Bee Jay's starter button.
 [This message has been edited by stray15 (edited 09-28-2001).] [This message has been edited by stray15 (edited 09-28-2001).] |
||
|
09-28-2001, 06:08 AM
|
|


 1974 Porsche 914 2.0 l 4 Cyl. / 2.0 Liter

 1973 Porsche 914 2.0
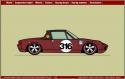 Nordica
 Moneypenny
 2010 Electra Super Deluxe
 1983 Porsche 944 2.5

