
Well, I'll start at the ending. Here's a spoiler photo -- where the project ends up. We've camped in it twice already, but now it's officially 'ready for camping.' Over the years, I want this thing to facilitate my kids discovering the National (and State) Park System as they grow older. And I hope I can give it to one of them one day.

Here was my starting point. I wanted two somewhat-contradictory things. I wanted a camper that was ready to use, and also a rough/inexpensive enough example that I could take it as a blank slate and make it just the way I wanted it. I found exactly that in Edmonton. The only catch was that it was in Edmonton -- 1,700 miles (2,735 km) from my door. And I only had a four-day window to drive up, get it, and bring it back. I managed, and the camper was exactly as described and it made the trip without a single surprise. (How often does THAT happen in life?)

One of the first little projects was to replace the plexiglass front and rear windows, which were 48 years old. It was honestly one of the more difficult jobs I've done on the camper so far. But if you're patient, you'll get through it.

The tangerine and white paint scheme was fine. But I knew I wanted something else. So the first big project was to choose two 'vintage' shades of blue, and sand, and sand, and sand, and mask, and sand, and prime, and sand, and paint it. Somewhere in my head was a 1950s take on modern design, which maybe doesn't make a lot of sense for a 1970's camper. But I think I got what I wanted. I love the look of it.

I also love the look of baby moon hubcaps, so I got a set in chrome. It wasn't initially my idea, but someone suggested vintage whitewall tires and I'm very glad I listened to them. (They're from Diamond Back Classics.)
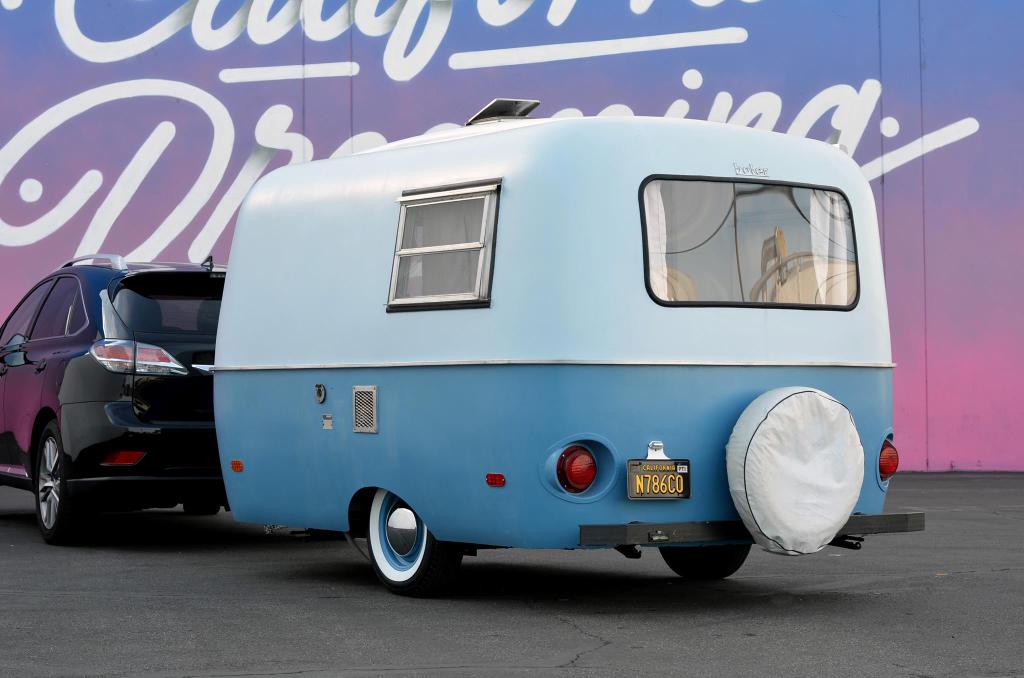
A 1960s-style California black license plate was the last piece of the exterior visual scheme for me. I know, that's not a 1950's modern thing either. But it's what was in my head.
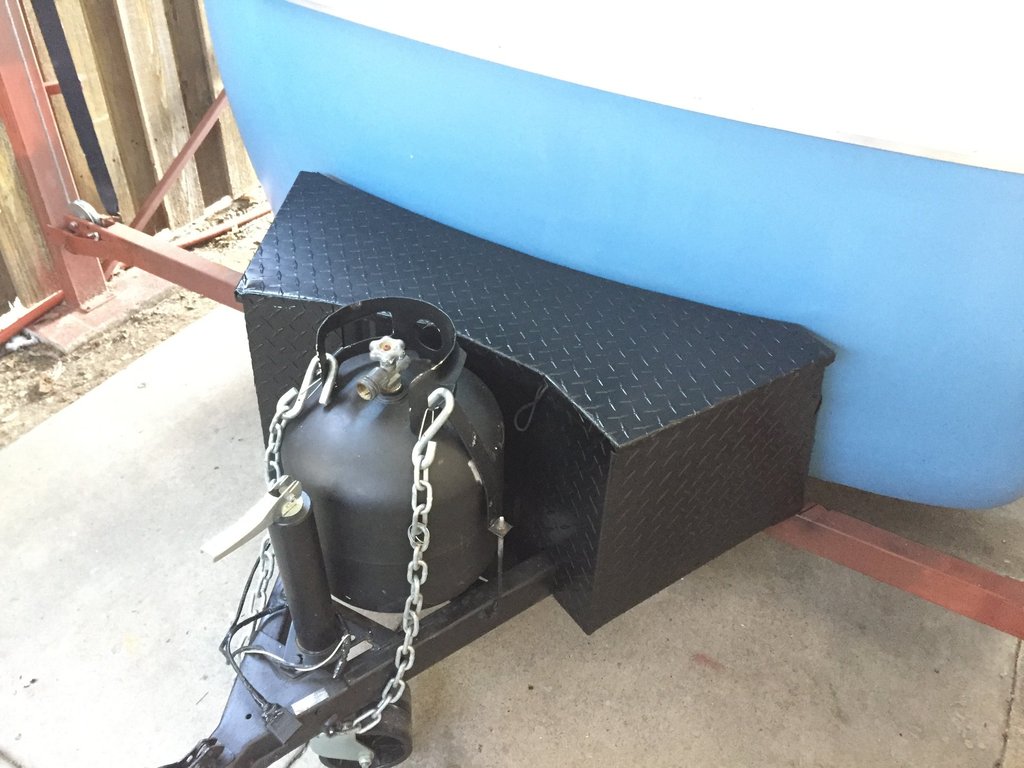
Up front, I wanted a tongue box to hold the stuff you need to grab when you're first getting the trailer in position and set up at a campsite. I didn't like the off-the-shelf options, so I made one out of diamond pattern aluminum plate. I also added a crank-type tongue jack with wheels, to make the thing more maneuverable in the driveway.

Now, the first little project on the INSIDE was to improve the floors. Or cover them. The Birch plywood the previous owners had put in was nice to look at, but not really camping-ready. You had to take your shoes off before you went in. So I covered it with a sheet vinyl that looks like wood flooring, but cleans up easily when the kids walk mud everywhere.

The kitchen had been painted white. The sink didn't work, the water tank was 48-years old, and the ice box was a not-very-efficient early-70's insulated box.
Oh, and the heater didn't light at all. So my main focus was going to be on the kitchenette, even though I was going to keep their idea of the fake plant.

After a lot of work, this is where I got. I dumped the heater, installed an electric-propane refrigerator, put in a new sink and stove top, put in a new counter-top, re-faced the lower part of the cabinet box, and added a backsplash that looks like subway tiles. There's also a soap dispenser by the sink, instead of a hand pump. And now the cabinet faces have a sort of consistency to them.