|
|
|
|
|
| Author |
|
|
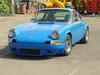
Porsche Nut
|
Looks great John. I will be there soon. Do you shoot Epoxy over the filler? Or do you only do it once when you are at the first coat and then continue with sanding primer? That is what I will be doing. Hope to shoot E primer tomorrow, if the wife lets me out of my cage

|
||
 02-26-2011, 07:29 AM
|
|
|
Bird. It's the word...
|
Hi Mark
I used filler over the seam where the wider SC flares had been added and where I removed the lower portion of the quarter to repair the kidney bowls. I've shot epoxy over the top and will continue with minor imperfections with the sanding primer and/or finishing filler (sometimes called knife putty). Cheers
__________________
John Forcier Current: 68L 2.0 Hotrod - build underway |
||
|
02-26-2011, 03:12 PM
|
|
|
Registered
|
Ahhh.....end of thread!!!
This is amazing. The skills that some people have blow me away. Any updates?
__________________
tk 08 911 C2S - Sold 13 Audi A4 14 Jeep SRT 500HP |
||
|
03-15-2011, 04:54 PM
|
|
|
Bird. It's the word...
|
Quote:
The further I get the more I want to go back and re-do some aspects... Yeah, there's some updates but it's really more of the same... I figured I wouldn't bore people with a stroke by stroke account of sanding and grinding. And sanding and more grinding  I'm just finishing off the chassis for superfluous A/C holes and lazy electrical groundings (sheet metal screw holes). I'll be starting on the door shells and hood soon followed by filler primer and lots of block sanding! Thanks for reading
__________________
John Forcier Current: 68L 2.0 Hotrod - build underway |
||
|
03-15-2011, 06:47 PM
|
|
|
Tired Member

|
Quote:
__________________
Glenn Daily Driver - '78 911SC RoW Endurance Racer - '85.1 944 Street/Track Project - '86 951 Race Project - 944 Spec |
||
|
03-16-2011, 12:45 PM
|
|
|
Registered

Join Date: Aug 2004
Location: Ottawa
Posts: 325
|
John (Fishcop), I noticed you mentioned getting some of your repair panels from Restoration Design. Is it located in the US somewhere ?? The reason why I ask is because we have one in Canada with the same name. Just wondering if were talking about the same place !!
__________________
Gilles... ------------------------------------ 1970 Targa 911T |
||
|
03-16-2011, 01:29 PM
|
|
|
Registered

Join Date: May 2003
Location: Winnipeg
Posts: 750
|
Restoration Design is under new (better) management/ownership. Though the new location was a surprise to me too.
Tim K Last edited by Tim K; 03-16-2011 at 10:29 PM.. |
||
|
03-16-2011, 01:35 PM
|
|
|
Bird. It's the word...
|
Gilles
Restoration Design... the one and the same  They're now in your fair country. And it still costs me a fortune to get them shipped here They're now in your fair country. And it still costs me a fortune to get them shipped here A lot of their stuff is Dansk - the same as everybody else sells, but they are continuing to produce more rarer replacement panels such as the rear firewall on <'71 cars. I used their rear floor pan reproduction. It's not perfect and needs a hammer massage, but far better than fabbing from scratch! Pretty much all of the reproduction panels will need some hammer and dolly work to get them right.
__________________
John Forcier Current: 68L 2.0 Hotrod - build underway |
||
|
03-16-2011, 08:11 PM
|
|
|
Registered
Join Date: Aug 2004
Location: Ottawa
Posts: 325
|
Thats great news...at least for me !! I'm still dismantling my 70 911T. Hoping to start stripping paint and undercoating within a few weeks. I will be following your foot steps very closely. Hopefully, you will keep your thread going until the very end. Cheers!!
|
||
|
03-16-2011, 09:00 PM
|
|
|
Registered
Join Date: Jan 2008
Location: Ireland
Posts: 8
|
Fantastic thread John, really lapping it up over here.
Looks like its gone global :-) Following in your footsteps on this one, have a question if I may. Can you talk to us about your wiring loom/harness removal? I've spotten on other threads here the thing to do is to split into a front and rear and pull from front to back. Did you do this? What was your experience on removal? Warm Regards Tom. |
||
|
03-18-2011, 02:40 PM
|
|
|
Bird. It's the word...
|
Hi Tom
Pelican really is quite global these days! I've cheated a bit having two spare looms, so I actually cut it at the junction where it passes through to the front section knowing I have the luxury of building a new loom out of the three I've got... Even with the floor out and free access to the tunnel, the loom did not like to come out! As a strategy, I've laid a steel fishing trace line in the tunnel to pull the new loom through. I hope that helps.
__________________
John Forcier Current: 68L 2.0 Hotrod - build underway |
||
|
03-21-2011, 02:47 AM
|
|
|
Bird. It's the word...
|
This weekend I finally got the entire chassis in water proof epoxy primer! It's been a bit of hard work here due to my climate - hot and steamy, so metal was stripped and prepped in small areas bit by bit.
So since my last update I did the other rear quarter panel, the roof, and all the nooks and crannies that make up the door hinge post and front quarter support panel. The last area particularly is hard work as power tools and attachments don't fit in and your hand gets chopped up doing the work manually. I didn't entirely strip the roof as it was in great condition, I just took it back to its first coat of primer. There are still a couple of superfluous tabs and holes on the chassis to be cut and filled, but is is now ready to be rubbed down with red scotchbrite in preparation for seam sealer, and then primer filler. Then the many hours of block sanding will start. However I'll probably hold off on progress whilst I catch up with the rest of the panels (doors, hoods) which need to be stripped and similarly prepped.          
__________________
John Forcier Current: 68L 2.0 Hotrod - build underway |
||
|
03-27-2011, 01:23 AM
|
|

|
|
Bird. It's the word...
|
Some more...
  
__________________
John Forcier Current: 68L 2.0 Hotrod - build underway |
||
|
03-27-2011, 01:27 AM
|
|
|
Registered
Join Date: Nov 2004
Location: calgary.ab.ca
Posts: 252
|
That's quite something to see it all one colour again!
__________________
Keith - Calgary 1969 912R (911 engine) - Blutorange |
||
|
03-28-2011, 07:45 AM
|
|
|
Registered
Join Date: Aug 2004
Location: Ottawa
Posts: 325
|
John, I just noticed that you took off the bottom horizontal supports on your Octisserie. Are they not needed or were they just taken off so the car could be sprayed easier ??
__________________
Gilles... ------------------------------------ 1970 Targa 911T |
||
|
03-28-2011, 06:28 PM
|
|
|
Bird. It's the word...
|
Hi Gilles
They're pretty much not needed once the sills are welded back in place, however the main reason is the necessity to fit, unfit, and refit the doors (over and over again ) to get shut lines right, particularly in the area of the sill/rear quarter join. In hindsight, the lower octisserie bars should be attached/welded lower again to facilitate the doors opening and closing (only a minor thing). I've worked out I'm probably better off removing the bars (and perhaps the hoops) once the topcoat painting is required as they are a little in the way when you start swinging the spray gun around
__________________
John Forcier Current: 68L 2.0 Hotrod - build underway |
||
|
03-28-2011, 08:49 PM
|
|
|
Bird. It's the word...
|
Today... some door work!
  
__________________
John Forcier Current: 68L 2.0 Hotrod - build underway |
||
|
04-02-2011, 02:12 AM
|
|
|
Porsche Nut
|
Looks great. Doors are next on my list as well.
|
||
|
04-02-2011, 07:35 AM
|
|
|
Registered
|
John,
Fantastic project and coverage. I had been considering a similar project but with a 356 to take me into retirement, but the thought of the work involved in such an old car reminded me of an axe that was handed down to me from a great grandfather, it has had 3 heads and 7 handles! meaning, like your car what has been "restored" previously and to what quality. Keep up the good work, it will be well worth it when you are finished knowing that you have done such a thorough job. Rosie |
||
|
04-13-2011, 03:34 AM
|
|
|
Bird. It's the word...
|
More fun...
This weekend I decided to tackle the front guards. I'm by no means finished, but I figured you might appreciate the update The early guards are now very hard and very expensive to get in good condition... quite a few have been lost to the ravages of time, and it would seem a lot have found homes on backdates. Anyway I was scared about mine. The flange where guards meet the monocoque is (in my opinion) a relatively poor design. It requires a layer of 'dum dum' (a black mastic like substance) to bed the flanges in and then they are bolted together. Crucially it also relies on a well fitting bonnet seal to keep water from finding a way into the gap. Unfortunately a previous owner was too tight to spring for the correct seal after a repaint in 1996 and settled for a generic rubber strip (no water channel). This has allowed a lot of water to find its way into the flange with only the respective layers of paint on each flange keeping water from steel. When I first removed the guards last year I could see the paint had failed and that there was quite a bit of rust along the flange. Cut forward to today and it would seem I've dodged a bullet with the rust being pretty superficial - it will still get a sandblast to be sure though and maybe a patch or two where it's a bit thin. First thing to do is remove that gawd-awful black schutz from inside, and as with everywhere else on this old car - a thin layer of rust has developed underneath areas of it and I'm once again pleased to have caught it all in time. My method once again is to use paint stripper and a scraper, followed with a bit more stripper and steel wool to clean the metal up (which I haven't done yet)    
__________________
John Forcier Current: 68L 2.0 Hotrod - build underway |
||
|
04-17-2011, 03:03 AM
|
|
 |
|
|
| Tags |
| full restoration |


 912
912 FJ45LV
 SL
SL 911S
911S

 1969 Porsche 911T 2.7RS Spec with Webbers
 "The Porsche"
 Endurance Racer
 944 Spec "The green car"
 Scalded Cheetah?
