|
|
|
|
|
| Author |
|
|
Registered
Join Date: Aug 2011
Location: Roanoke, VA
Posts: 142
|
Wow! I didn't know that was an option. There was previous repair to the front end on mine, most of which I'll need to redo. I'll save that for last, though.
|
||
 01-06-2025, 06:53 AM
|
|
|
Registered
Join Date: Oct 2024
Posts: 2
|
This thread is incredible. I'm in awe of your skills, effort, and attitude. Thanks for bringing us along for the ride!
|
||
|
01-08-2025, 02:02 PM
|
|
|
Registered
Join Date: Aug 2011
Location: Roanoke, VA
Posts: 142
|
Quote:
I made some progress this weekend that I'm pretty happy with. As I was comparing to the existing lateral panel, I'm wondering if the intent of RD was to be able to use the inner longitudinal piece without the panel that I fabricated. They provide a flange on the seat mount bracket that extends to the floor, whereas the factory part doesn't - requiring the panel that I made to support it on the outside. I wasn't able to get photos to show what I mean, since the driver's side is still mostly covered and the passenger's side was rusted to oblivion, but I'll try and remember to get a phot later.   I treated and painted where I could reach, but everything will get hit again before it is sealed up, to cover the back of the welds.  I was finally able to get the corner and bottom of the door post on, although there is still a gap to fill between the RD piece and the piece that I made to wrap around the corner. I don't really like having to quilt together several small pieces, but don't see an alternative.  When I was welding the diagonal seam of the corner piece, I was getting a lot of contamination from burning paint (and whatever else was in there) and had to grind out and redo it. I may do some isolated sand blasting to try and clean out those crevices in any similar scenarios in the future, but I don't know if it would really help if I can't reach to nooks and crannies. The front and back halves still need to be joined up and the bottom of the heel panel, but I'm going to drag the doors and roll bar cover out and try to check the alignment of the window to where the seal would be before making those welds. I'm a little suspicious of the factory manual dimensions for the Targa opening, so I want to verify that I have enough space to fit the top, without having a gap at the back of the windows. Last edited by rotundapig; 01-13-2025 at 02:19 AM.. |
||
|
01-13-2025, 02:17 AM
|
|
|
Registered
Join Date: Aug 2011
Location: Roanoke, VA
Posts: 142
|
Dang. It did not occur to me how heavy and unwieldy those doors are. I thought that I'd pop them on after I got off work and before dinner.
I'll spend the evening looking up proper method, but I get the sense that the experience will be somewhere between a boondoggle and a kerfuffle. Last edited by rotundapig; 01-13-2025 at 03:27 PM.. |
||
|
01-13-2025, 03:17 PM
|
|
|
Registered
Join Date: Aug 2011
Location: Roanoke, VA
Posts: 142
|
After exhausting obscenities in English with no success, I gave it the old "Verdammte Unzucht! Du miese Pfütze Mäusepisse musst gehorchen vermaledeite, Scheiße nochmal!" and the door at least relented enough for me to wrestle it onto the hinges, but it seems like the adjustment is still pretty far off.
I was not encouraged by the factory repair manual's suggestions on how to adjust the doors (wail on it with a BFH), considering that the door used to fit OK. The 2 shims that were previously installed are in place, but it still seems to sag. I plan to watch Mike's restoration and other detailed videos to see how close I can get it to a decent fit without the front fenders in place.  
|
||
|
01-15-2025, 06:28 AM
|
|
|
Registered
|
Quote:
__________________
1977 911S - high mileage and a bit rough but mostly original. Soon to become a bit of a hot rod. |
||
|
01-15-2025, 07:22 PM
|
|

|
|
Registered
Join Date: Aug 2011
Location: Roanoke, VA
Posts: 142
|
Quote:
I was told that it is best to do some sanity checks, rather than strictly use the dimensions given in the repair manual for the Targa opening, since the car will flex some, but I'm a little concerned that the top isn't snug at all. All of the vital suspension measurements on the bottom of the car are good, so I don't really want to make any adjustments, but I also would like a second set of eyes on my sanity check measurements before I weld everything back up. Since there's no rear quarter panels, rockers or front fenders to reference, I need to use the windshield and roll bar to check, but I don't see any specs to know what is reasonable. I got the door to be parallel at the the back of the window and at the front of the window frame. Could someone with a Targa and a scale let me know if anything looks off? Or are there any good, very detailed reference photos that I should know about? I have 25mm exactly from the back of the window to the roll bar and 9mm +/- 0.25mm from the windshield to the window frame on both sides. Seems like a good sign that it is symmetrical! I'm leaving for Tokyo for 2 weeks on Sunday, so I have some good contemplation time if I need to figure out how to make some precise adjustments. 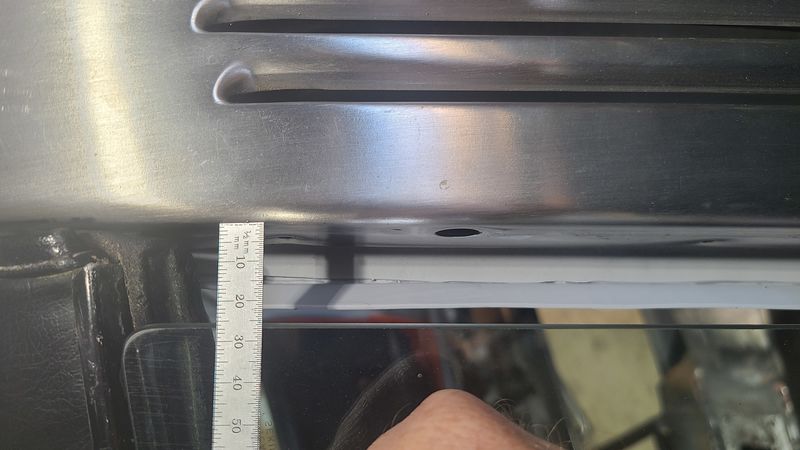   
|
||
|
01-16-2025, 02:14 PM
|
|
|
DIY wrencher
Join Date: Apr 2015
Location: Vienna
Posts: 228
|
You made one hell of a recovery rotundapig, after starting off with a project that would have usually been a "I bit off much more than I can chew" situation for most people, me included!
You also did a great job on the jig-issery and the bracing for the chassis, good thing you did because there sure was not a lot of strength left in it after everything you had to cut out. I'd love to learn more about the tools you are using to fabricate patch panels, e.g. the shrinker+stretcher, the bead roller and the dies. I have one of those cheap 10mm thick flat frame versions from China, but haven't really used it yet. Sounds like it will need reinforcements to use on 1mm thick steel. By the way fantastic resources for sheet metal bodywork and fabrication techniques are "Make it Kustom" and "Fitzee's Fabrication on YOutube. Subscribing and looking forward to follow along with your restoration! Cheers, Lukas
__________________
88 911 Carrera 3.2 G50 - driver 77 911S - rust bucket backdate project IG: @lukas.matzinger |
||
|
01-17-2025, 10:25 AM
|
|
|
Registered
Join Date: Aug 2011
Location: Roanoke, VA
Posts: 142
|
Quote:
I have a vice-mount bead rolled from Eastwood (probably the same manufacturer as yours) with some extra dies. The urethane die for shaping is very handy. The shrinker- stretcher is just from Harbor Freight. It is OK, but I'd consider investing a bit more to get one with rounded jaws and / or a deeper reach Last edited by rotundapig; 01-18-2025 at 03:15 AM.. |
||
|
01-18-2025, 03:13 AM
|
|
|
Registered

|
The amount of progress you have made is unreal. Makes me feel like I've been moving at a snail's pace. Great work!
__________________
1968 911 S Searching for transmission # 2281852 |
||
|
01-20-2025, 06:34 AM
|
|
|
Registered
|
What is the green paint you’re using on the bare steel parts after replacing and welding?
__________________
1977 911S - high mileage and a bit rough but mostly original. Soon to become a bit of a hot rod. |
||
|
01-20-2025, 07:51 AM
|
|
|
Registered
Join Date: Dec 2024
Posts: 18
|
Looking good!
|
||
|
01-20-2025, 07:59 AM
|
|

|
|
Registered
Join Date: Aug 2011
Location: Roanoke, VA
Posts: 142
|
Quote:
|
||
|
01-20-2025, 03:28 PM
|
|
|
Registered
Join Date: Aug 2011
Location: Roanoke, VA
Posts: 142
|
Quote:
On the occasions that I do consider the work that I'm doing from the perspective of the overall goal of getting the car back on the road, it seems like I'm crawling along, but I try to only do that often enough to plan for long lead times (like lining up paint & body shop). Setting significant but realistic milestones and 'deadlines' on a weekly and monthly basis is really what helps me keep a momentum. I feel like keeping the motivation and momentum consistent is even more important than pace. I'm excited to follow your YouTube and see your progression, too! |
||
|
01-20-2025, 06:07 PM
|
|
|
Counterclockwise?
|
I just read all your posts.
Wow man! Wow! Very impressed with your skills and ability to work through pitfalls.
__________________
Rod 1986 Carrera 2001 996TT A bunch of stuff with spark plugs |
||
|
01-21-2025, 01:22 PM
|
|
|
Counterclockwise?
|
I just read all your posts.
Wow man! Wow! Very impressed with your skills and ability to work through pitfalls.
__________________
Rod 1986 Carrera 2001 996TT A bunch of stuff with spark plugs |
||
|
01-21-2025, 01:23 PM
|
|
|
Registered
Join Date: Aug 2011
Location: Roanoke, VA
Posts: 142
|
Seeing some interesting sights on the streets in Tokyo and even took a few hours on Sunday afternoon to see what was going on at the infamous Daikoku parking lot.
This was right in front of my hotel  On a walk near Akihabara  I only snapped a few bad photos at Daikoku, as it was mostly bejazzled Lambos  There were a few P-cars, but they really were overshadowed by the other interesting design choices on display.  I am still interested in seeing if another Targa owner could make some measurements around the top of the door to sanity check my current setup, but after thinking about it this week, I'm going to just start welding when I get home if I don't get any indication that something is amiss. |
||
|
01-25-2025, 11:28 PM
|
|
|
Registered
Join Date: Aug 2008
Location: Portland, OR
Posts: 184
|
It might be worth asking for the targa measurements at the 912 bbs board?
|
||
|
01-26-2025, 08:16 AM
|
|
|
Registered
Join Date: Aug 2011
Location: Roanoke, VA
Posts: 142
|
Between the 2 weeks in Japan (where I picked up a nasty flu), a few days of travel last week, house guests this weekend and travel next weekend for my mom's B-day, there isn't much garage time this month.
I did go ahead and weld up the laterals, since the doors at least have even, straight gaps and the roll bar to windshield gaps is exactly on spec. I also got the heat tube back in and did a first coat on the internal space. I'll use the hose and messy sprayer to coat again after all the welding is done.  My hole punch broke right as I was getting started on the inner fender panel, but the supplier got a replacement in mail right away.  This time I had to drill all the holes for the plug welds.  It does feel nice to have this back on. It goes a long way to make it kind of look like a car. I'm hoping to have the other side done by the time it warms up enough to paint outside again. 
|
||
|
02-08-2025, 04:33 AM
|
|
|
Registered
|
Looks great. Quite a nice milestone. What is the bronze coating on the flanges?
__________________
1968 911 S Searching for transmission # 2281852 |
||
|
02-09-2025, 06:46 PM
|
|


 Ace of Spades
