|
|
|
|
|
| Author |
|
|
Registered
Join Date: Jun 2014
Location: Sydney Australia
Posts: 28
|
997 IMS Solution Installation.
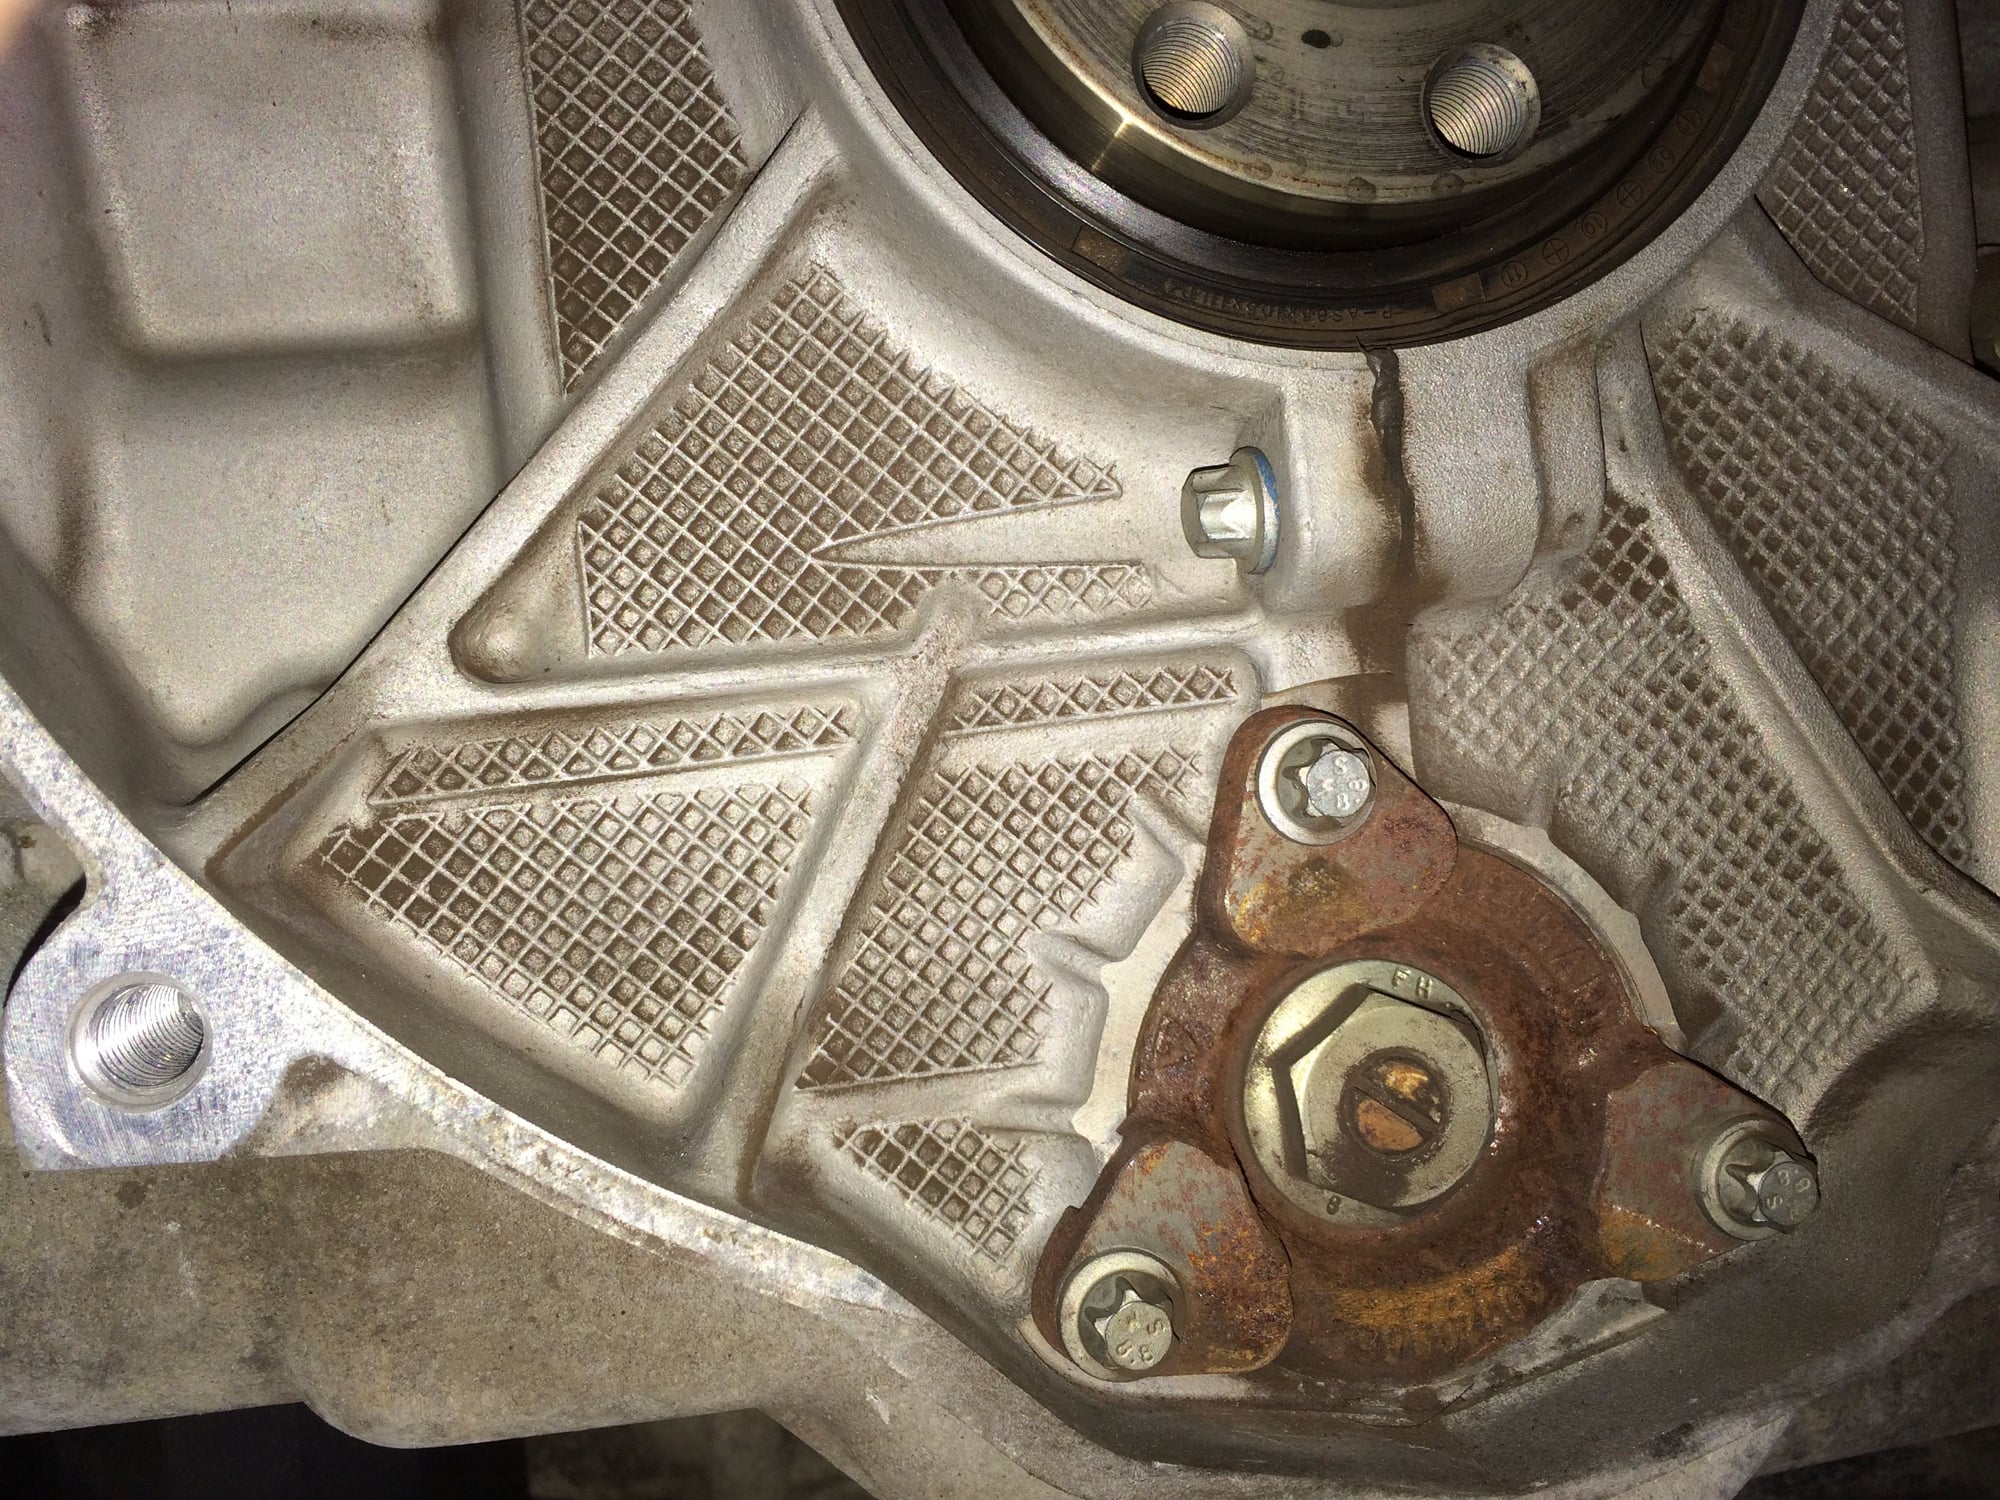
Three years ago I acquired my newto me2005 997 manual coupe with 95000 kilometres on the clock and have just finished installing the IMS Solution pressure fed IMS bearing.
Over the past six years, I have worked on several Porsche sports cars including a 1986 3.2 litre 911 plus several Boxsters and have accumulated much in the way of homemade ramps, blocks, engine and gearbox trolleys which proved very useful in carrying out multiple tasks such as engine/gearbox drops, clutch replacements etc. I was able to put these items to good use in completing my latest project and hope the following write up will be of some benefit to anyone contemplating going solo on a similar undertaking. Before proceeding further I carried out some necessary engine checks using my Durametric diagnostic cable. Camshaft deviations on both banks were less than one degree, the oil filter and bottom of sump showed no sign of metal or plastic shavings and the engine over rev. indications were limited to 30 seconds in range one only, ie, >7300rpm and <7500rpm. At first, I considered removing only the gearbox in preparation for the Solution installation. However, after making several careful measurements and taking into account the absence of a four post lift I realised I would be unable to raise the car high enough in an essentially level attitude to be able to extract the box from under the car, or even to be able to pull it back far enough to allow work to be performed comfortably in the flywheel/IMS bearing area. For this reason, I opted to drop the engine and gearbox as a unit. The car was initially run up onto four ramps and then progressively raised at the front using a homemade jack cross beam and at the rear using the chassis cross member underneath and slightly in front of the engine/ gearbox mating surface.  Jack cross beam. In order for the engine/gearbox unit to be lowered and pulled out from the rear my measurements determined the minimum distance required from the bottom of the engine sump plug to garage floor level to be 30.5 inches or 77.5 centimetres. To achieve this the front wheels were placed on blocks as high as practicable using the jack cross beam with the rear of the car raised up to the required level employing jack stands under the rear jacking points.  Front wheels on blocks.  Rear jack stands. A custom built engine trolley and tray was used for the drop and following disconnection of all necessary items, the operation proceeded smoothly.  Engine trolley and tray.  Tray in position for drop.  Gearbox and trolley. The gearbox was separated from the engine using a three-wheel trolley to which were mounted two scissor jacks placed to lock into the drive shaft flanges and one into the fore and aft webbing underneath the box. The jacks allowed rotation of the box clockwise and anti-clockwise as the need arose as well as enabling the rear of the box to be raised or lowered as desired. these jack enabled adjustments were not necessary during separation but were very useful when it came time to mate the gearbox with the engine prior to installation back in the car. When removing the dual mass flywheel I found it handy to use two old flywheel bolts with the heads cut off for use as dowels following removal of all the original flywheel bolts. The dual mass flywheel is quite heavy and can suddenly become loose following a couple of persuasive taps with a rubber hammer or like object. The dowels also provided added insurance when re-installing the flywheel.  New IMS bearing fitted and cap installed. Following locking of the crankshaft, camshafts and the removal of all three chain tensioners the old IMS bearing was removed before installing the new bearing and bearing cap with the distinctive blue oil line fitting. It is worth noting here that in order to make sufficient room for the oil line to be installed the aluminium boss to the left of the fitting had to be shaved back approximately one millimetre. The torx head bolt which screws into the boss had to be shortened by a similar amount. Although the IMS Solution installation instructions allow for the new bearing to be-for want of a better wordhammered into position, I have never been 100% happy with this procedure. I opted instead to press the bearing in using the Faultless IMS toolset marketed by LN Engineering USA. To enable pressing in the new pressure fed bearing I needed to make up a driver plate from three aluminium pieces epoxied together using JB Weld epoxy. The topmost plate was drilled to take the small bearing supplied in the Faultless toolset into which the threaded driving rod could be located. The new IMS bearing was then pressed in slowly and evenly.  Driver plate with inset bearing. The flywheel bolts are stretch bolts and as such can only be used once. The torque specs. call for an initial tightening to 19 ft/lbs followed by additional rotation of each bolt through 120 degrees in stages. There are several methods of doing this but the simplest and most effective method involves the use of nothing more sophisticated than an HB grade lead pencil.  Examination of the torx insert head of a typical flywheel bolt shows a six-point star pattern separated angularly by 60 degrees. It is a simple matter to extend each point to the edge of the head using an HB pencil and then vertically down the side to where the base of the head contacts the flywheel surface. The aluminium strip substitutes here for the flywheel surface and as can be seen, when the pencil lines down the side of the bolt head are extended onto the flywheel surface an immediate ready reference is created for the amount of angular rotation required. Quick, easy and effective! It can be quite a physical exercise tightening these bolts, especially over the final 30 degrees or so. For this reason, I recommend using a breaker bar, preferably one with a ratchet which allows placement of the handle more or less in the best position for maximum leverage.  Final oil line position. I found it best to leave the tightening of the IMS bearing oil pressure line till after the engine/gearbox had been re-installed, the rear wheels and sway bar installed and the car lowered back onto the blocks. This allowed the sway bar to move through most of its range and provide a reference for the final position of the oil line and thus avoid any chance of inadvertent contact between the two. A word or two here regarding the disconnection and reconnection of the clutch slave cylinder is timely. I found the disconnection process was facilitated by first lowering the engine/gearbox a few centimetres to allow greater access but reconnection was another matter entirely. In short, I found it extremely difficult attempting to push the slave cylinder into position against the internal spring pressure with the limited access available and opted instead to lower the engine/gearbox and disconnect the slave cylinder from the pressure line. The slave cylinder was then installed on the gearbox before raising gearbox/engine back into position and reconnecting the pressure line. Bleeding the slave cylinder was necessary but fortunately, I found the bleed nipple fairly easy to access with the box in position and the bleed process itself was accomplished without difficulty using a pressure bleeder. The other notable point was that I had to cut down the length of the 11 millimetre spanner used for opening and closing the bleed nipple due to the full-length spanner striking the underside of the car during operation. Following replenishment of engine oil, coolant and power steering fluid I was now ready to take the car off the blocks and head out for the long-awaited test drive. Installation off the IMS Solution will not provide greater power, better handling, or any other performance benefit but it is a permanent fix for a problem that has been around for a long time and provides, at least for me, the greatest benefit of all,-peace of mind! |
||
 04-09-2019, 04:18 AM
|
|
|
Carrera S junkie
Join Date: Apr 2019
Location: Nashville, TN
Posts: 4
|
Freaking EXCELLENT read, mate! And thanks for the ideas regarding jacks and stands. I plan on doing all of this to my 2008 997. Peace of mind indeed.
|
||
|
04-09-2019, 01:44 PM
|
|
|
Occasional User
Join Date: Sep 2013
Location: Alberta
Posts: 1,023
|
Great writeup - you have clearly built an impressive collection of tools for doing the work. How did you know that your 2005 had the earlier version bearing? I had thought that the change to the later larger version bearing that is only serviceable by splitting the case happened sometime in the model year 2005, but there is no firm data available on when.
I am asking because the 2005 997 with the earlier bearing seems like a sweet spot for price / performance - especially if you can replace the ims for peace of mind as you have done.
__________________
Vince 2015 Boxster S, Black & Black 1989 Carrera Silver Coupe, Silk Grey - sold 2009 Cayman S White, Full Cocoa - sold 1972 911E Silver Coupe, Pepita & Black - sold Last edited by Cook&Dunning; 04-11-2019 at 03:06 PM.. |
||
|
04-11-2019, 03:04 PM
|
|
|
Registered
Join Date: Aug 2010
Location: Earth.............
Posts: 2,894
|
Quote:
__________________
Accrochez-vous bien de vos rêves..........." |
||
|
04-11-2019, 03:29 PM
|
|
|
Registered
Join Date: Jun 2014
Location: Sydney Australia
Posts: 28
|
Cook & Dunning,-----JFP is absolutely correct. The ONLY foolproof way of ascertaining whether your car has the large or small IMS bearing is to pull the flywheel off and have a look. If your IMS bearing cap has the 13mm centre bolt as opposed to the larger 22mm variety, then you are good to go.
I had already determined my clutch needed replacing so there was little extra effort involved,-----after pulling the engine/gearbox out of the car----in removing the flywheel to check the size of the bearing contained within. |
||
|
04-11-2019, 04:39 PM
|
|
|
Administrator

Join Date: Aug 2016
Location: Los Angeles, CA
Posts: 6,087
|
Great job, you should definitely add this to our DIY forum contest..
|
||
|
04-11-2019, 04:51 PM
|
|

|
|
Registered
Join Date: Jan 2003
Location: Langley,B.C.
Posts: 12,040
|
Good write up, and JFP is correct.
__________________
Turn3 Autosport- Full Service and Race Prep www.turn3autosport.com 997 S 4.0, Cayman S 3.8, Cayenne Turbo, Macan Turbo, 69 911, Mini R53 JCW , RADICAL SR3 |
||
|
04-12-2019, 09:40 PM
|
|
|
Carrera S junkie
Join Date: Apr 2019
Location: Nashville, TN
Posts: 4
|
Quote:
|
||
|
04-15-2019, 02:54 PM
|
|
|
Registered
Join Date: Jan 2004
Location: Pittsford, NY
Posts: 3,703
|
The IMS bearing in the 08 is NOT replaceable unless you dismantle the engine. You can do an oil feed to the stock bearing however.
__________________
Tony G 2000 Boxster S |
||
|
04-15-2019, 03:10 PM
|
|
|
Occasional User
Join Date: Sep 2013
Location: Alberta
Posts: 1,023
|
Quote:
As these cars are now more than a decade old, does the ims bearing failure rate increase with age? (seems probable) even on the later 997.1 larger version? earlier ones seem like they most will likely get replaced or have been replaced. Or of course they have cratered already. Perhaps another novice question - is there an access point or could you drill a hole through case flange to run a borescope to identify size of ims nut 13 or 22mm? is this worthwhile?
__________________
Vince 2015 Boxster S, Black & Black 1989 Carrera Silver Coupe, Silk Grey - sold 2009 Cayman S White, Full Cocoa - sold 1972 911E Silver Coupe, Pepita & Black - sold Last edited by Cook&Dunning; 04-16-2019 at 05:33 AM.. |
||
|
04-15-2019, 03:37 PM
|
|
|
Registered
Join Date: Aug 2010
Location: Earth.............
Posts: 2,894
|
Quote:
There is no realistic way to borescope the IMS center bolt, take it apart.
__________________
Accrochez-vous bien de vos rêves..........." |
||
|
04-16-2019, 03:32 AM
|
|


