|
|
|
|
|
| Author |
|
|
New User
|
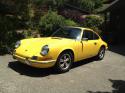
The Canary Files: 69' 911T Engine rebuild with video
Well It's been a long time coming and I was beginning to think I'd never type these words but I've started the engine rebuild!!
I have a thread going on The Porsche 911 Technical Forum for the whole car project but I thought I'd start a separate thread here so I can get more granular on just the engine rebuild section as I need all the help I can get! I have all the parts and the engine case has been sitting in a box for way too long so I decided to stop thinking about it and just take the leap. I've got the first stage done, the short block complete. Following Wayne's book and the Haynes manual it went a little like this: The case from Ollies machine shop.  Align bored back to standard  Oil bypass modification by Jay at Jay's precision machine shop  Right side of the case mounted on the engine stand.  Time certs for the head studs and transmission mounts.  Crankshaft and rods all honed, polished with new bushings etc.  New 4 rib oil pump from Ebay. Like brand new for only $200! The old magnesium pump was showing signs of wear.  Crankshaft mounted to the flywheel ready for the rod install.  With new bearings I use some Plastigage and the old rod nuts and bolts to check clearance.  All is good between 0.038mm and 0.05mm 
Last edited by kav; 09-26-2018 at 10:12 AM.. |
||
 05-07-2018, 10:37 PM
|
|
|
New User
|
New ARP rod bolts and the stretch gauge
 Measuring the stretch is the way to go (0.009 - 0.0095 is the value) I also checked the torque value too.  In an old case the intermediate shaft rode on the surface of the case, Ollies machined it for a standard bearing.  Bearings all lubed up  Rods are on the crankshaft and the journals are lubed up. New nose bearing too.  The crank is back in the case with no drama  New SC oil pump with intermediate shaft and new timing chains all ready to go.  Installed in the case with a standard bearing.  Loctite 574 spread on all the mating surfaces.  Through bolts with o-rings torqued down to 25.8 ft lbs 
|
||
|
05-07-2018, 10:39 PM
|
|
|
New User
|
Installed the new head studs with some Loctite 271
 They all came out to be between 134mm - 135mm  Checking the deck  Checking the head studs  We have a completed short block with flywheel, timing chain ramps and crank pulley etc  All very exciting! Next is working out the correct clearance from the new high compression pistons to the heads? What is the best way to measure that? Cheers! -Kav. |
||
|
05-07-2018, 10:40 PM
|
|
|
Registered
Join Date: Nov 2004
Location: calgary.ab.ca
Posts: 252
|
Awesome Kav! I'm about 2 months behind you so you're getting me revved up!
__________________
Keith - Calgary 1969 912R (911 engine) - Blutorange |
||
|
05-08-2018, 07:47 PM
|
|
|
New User
|
Quote:
|
||
|
05-09-2018, 07:14 AM
|
|
|
New User
|
When I took my engine apart all the timing chain ramps were brown, is that correct for a 1969 911T motor? Or should some be the black type?
Cheers -Kav. |
||
|
05-09-2018, 07:15 AM
|
|

|
|
Registered
Join Date: Dec 2013
Location: Minneapolis, MN
Posts: 202
|
Cool vid, excited to go through this myself.
Left me wondering though... why didn't you make the assembly tools as detailed in the book to keep the rods and chain pointed in the right direction for case assembly? Surely it can't be a cost thing since it should be under $10 in materials and you went out and got a stretch gauge.
__________________
Instagram = glen.cordle for my Porsche artwork and 3D models. |
||
|
05-09-2018, 09:30 AM
|
|
|
Ingenieur
|
I love seeing a plan coming together! Nice work.
|
||
|
05-09-2018, 09:44 AM
|
|
|
Registered
Join Date: Jul 2005
Location: Atlanta
Posts: 1,241
|
whatcha doin with the cams etc? gonna make it breath a bit more?
__________________
No physical quantity completely explains its own existence |
||
|
05-09-2018, 10:54 AM
|
|
|
New User
|
Quote:
Cheers! -Kav |
||
|
05-09-2018, 11:36 PM
|
|
|
New User
|
Quote:
There is very little I can do with this little 911T. It only came from the factory with 8.5:1 compression etc. I'm following Wayne's suggestion in his book for this motor and: Boring out the cylinders to 81mm 81mm 911S Pistons with an 9.5:1 compression ratio (I will get to explaining that in the next video) E cams. SSI heat exchangers M&K 2 in 2 out exhaust I'm not counting HP numbers, all I know is it will have a few more ponies than before and I'm fine with that. Cheers. -Kav Last edited by kav; 10-01-2018 at 10:00 AM.. |
||
|
05-09-2018, 11:42 PM
|
|
|
Registered
Join Date: Nov 2016
Location: Phoenix
Posts: 210
|
Excellent video!
Nice work. |
||
|
05-10-2018, 07:13 PM
|
|

|
|
Moderator

Join Date: Dec 2001
Posts: 9,569
|
Kav, nice work!
I recommend returning the Porsche flywheel bolts in favor of the ARP. These are not single-use and a lot cheaper.
__________________
'66 911 #304065 Irischgruen 96 993 Carrera 2 Polarsilber '81 R65 Ex-'71 911 PCA C-Stock Club Racer #806 (Sold 5/15/13) Ex-'88 Carrera (Sold 3/29/02) Ex-'91 Carrera 2 Cabriolet (Sold 8/20/04) Ex-'89 944 Turbo S (Sold 8/21/20) |
||
|
05-11-2018, 07:56 AM
|
|
|
New User
|
Building out the top end
Well I got busy with work again and spent the summer working in London. It was great to be able to see my extended family every weekend, eat wonderfully crap British food and drink many pints of warm beer but terrible for building Porsche engines in California!
It's time to get back on track and get this thing done! We left off with the short block complete, it's time to build out the top end! I made a little video of the process. Everything is laid out on my clean tray ready to build out the top end of the engine.  I bought a set of JE 81mm pistons with a compression ratio of 9.5:1. The cylinders were bored and honed to match.  Firstly I will gap the piston rings in the cylinders to 0.014" for the first ring & 0.016" for the second according to the spec sheet that came with the pistons.  I bought a piston ring filler from Amazon.  Measuring and setting the gap.  Oil ring and other rings get installed.  And then installed in their corresponding cylinders with a piston ring compressor ahd a light tap.  Time to measure the deck height, the distance from the piston to the top of the head. I'm looking for 1.25mm - 1.5mm. I install a 1mm barrel shim to start.  Blobs of clay are placed on top of the piston (No circlips are installed yet on the wrist pins). I have no idea where to but these things!  We'll install the heads on cylinders 1 and 4 and crank the engine over to crush the clay. We'll take it all apart and measure the thickness. 
|
||
|
09-26-2018, 08:36 AM
|
|
|
New User
|
I got a reading of 2.2mm, so according to a bit of math I should use the 0.25mm barrel gasket and I will be in the zone.
Time for another go! and the blobs on top were not crushed so we'll do away with those! I got a reading inbetween 1.25 & 1.5mm, we are all good!  I bought the Stomski Racing Circlip injection tool.  Takes a bit of getting used to but I install all the circlips on the right side of the pistons along with the 0.25mm barrel gasket. I use some Curl T on the base gaskets.  Installing the wrist pin, light tap. The engine is covered in cling wrap, not that I don't trust Mr Stomski.  Ready to inject!  Boom! snaps right in! Bloody fantastic tool! I called Mr Stomski and told him!  All the pistons and cylinders installed.  The heads are torqued down.  Checking the heads are level to eachother, and they are.  With that we are done with the top end!! Moving on! Lily and I are going to Rennsport and would love to say hi and meet other Pelican's as we wander around and watch the races so please give us a wave!  Hopefully see you there!! Cheers! -Kav. Last edited by kav; 10-01-2018 at 10:03 AM.. |
||
|
09-26-2018, 08:36 AM
|
|
|
Registered
Join Date: Jan 2007
Location: Western Mass
Posts: 421
|
One of the best engine build threads I've seen. Looking forward to part 3.
__________________
1986 Carrera coupe - black on black 1972 CB500/4 |
||
|
09-26-2018, 10:36 AM
|
|
|
911 2.2 T targa
Join Date: Jun 2012
Location: Netherlands
Posts: 89
|
If I see this correctly you are using original T spec cast iron cylinders with forged pistons. If this is the case you need to make sure you have enough clearance between piston and the cast iron cylinders. I have used forged Mahle (S spec) pistons in original Mahle (T spec) cylinders with fatal results. Only then to learn that the original T spec pistons are casted aluminium with a metal insert to reduce expansion to match the expansion of the cast iron cylinders.
In your post you mention that the cylinders have been reworked so hopefully you have added some clearance to compensate for the difference in expansion. Just a warning, hopefully you were aware. The build looks very impressive! |
||
|
09-28-2018, 07:09 AM
|
|
|
Registered
|
THIS will be my goto video and thread when it's time for my rebuild.... just amazingly well done sir.
|
||
|
09-28-2018, 03:14 PM
|
|
|
New User
|
Quote:
I talked at length with Jay the machinist who bored the cylinders to match the pistons. Jay is extremely experienced and knowledgeable about air cooled engines. He likes the combination for a forged 2618 aluminum piston with a cast iron cylinder. As he explained the 2618 alloy JE use is a low expansion and hard wearing. That combined with a cast iron cylinder gives you more dimensional stability and a more durable combination but you need to add in the correct clearance for the different rates of expansion. My cylinders have 0.003" of clearance, measured from the set JE of pistons installed. The Mahle piston uses a different alloy that may have different expansion qualities. It was also way cheaper to buy a set of JE pistons (which I got a deal on) and bore the cast iron cylinder to match. We'll see how we go I suppose but I feel confident in Jay's work and knowledge. Cheers! -Kav. Last edited by kav; 10-02-2018 at 05:09 PM.. |
||
|
10-02-2018, 04:24 PM
|
|
|
Registered
Join Date: Nov 2004
Location: calgary.ab.ca
Posts: 252
|
I really enjoyed your videos Kav! My engine rebuild has been sidelined a bit by a move in house and wife with a new job - so watching you put yours back together was some great vicarious living!
Cheers, Keith
__________________
Keith - Calgary 1969 912R (911 engine) - Blutorange |
||
|
10-09-2018, 10:17 AM
|
|


 The Canary


