|
|
|
|
|
| Author |
|
|
Mo money = mo parts
|
Top End and Reseal
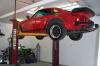
I am planning a top end and reseal to my '86 3.2 / 90k. It runs well, but is consuming significant oil - 350-400m/qt. Compression and leakdown good on all (185/less than 10%), but #4 (150/50%). I intend to split the case to make sure the bottom end is Ok and to replace the intermediates.
I'll share my work, but I am really slow, so bear with me. I need to do double duty photographing, bagging, and documenting my disassembly, so it will slow me down. This is a winter project and if it takes me five or six months, I don't care. Here is the motor out of the car, plus intake and exhaust ports. My goal is to address my oil consumption problem and fix #4. If parts are in spec, they are going back in. I am documenting this to give back to the board. The experienced guys won't learn anything, but maybe some new folks will find some value. There is someone on the board that I have in mind that I am hoping will coach me if I need it, since sometimes the varying opinions can be a little overwhelming. Motor on stand. Edit: I sometimes feel a little silly posting my rebuild because this probably seems so completely elementary to many people that post routinely and do stuff that completely blows me away. However, I found a lot of inspiration from the people that, like me, are novices. Totally need the help and guidance of those more experienced, but to the 'greenies" out there that went before me - I salute you.   Intakes look pretty clean - techron works.   Exhaust not so hot. Barrel nuts were a bear. Cut a slot in them with my dremel, got them cherry red, then used a big screw driver with a vice grip attached for torque. It was a lot of work.  This is my problem cylinder. The only thing unique is that there seems to be something flaking off the back of the valve. I am hoping the compression and leak down issues are related to the head and not the p&c. I'll know more in a week or so once I get the head off. 
__________________
Greg 86 Coupe (stock - pretty much like Butzi designed it) - gone, but not forgotten 65 Ducati Monza 250 & 66 Monza Junior (project) "if you are lucky enough to own a Porsche, you are lucky enough" Last edited by gregwils; 12-03-2009 at 01:09 PM.. |
||
 11-22-2009, 06:44 PM
|
|
|
Almost Banned Once
Join Date: Feb 2009
Location: Adelaide South Australia
Posts: 38,665

|
Good luck with the rebuild Greg.
I'll be watching this one.
__________________
- Peter |
||
|
11-23-2009, 04:30 AM
|
|
|
Registered
Join Date: Dec 2003
Location: Centreville, MARYLAND
Posts: 938
|
Make sure you have Waynes book. Go slow. Don't skip steps.
Clean your work bench. You are going to need 2 1/2 times the flat space of the work bench for storage and cleaning . Pick a machine shop that has Porsche knowledge and experience. I had to have all my head work re-done to the tune of another $800.
__________________
Old Tee all 911s sold |
||
|
11-23-2009, 04:35 AM
|
|
|
Mo money = mo parts
|
Old Tee - Thanks, all good suggestions. I have owned Wayne's book for about five years (longer than the car, lol) and have carried it to work every day for the past six months. I have a storage shelves not in view of the pictures, but wish I had a bigger bench area. Also, there is one shop not too far that has Porsche jigs, but I plan to ship them to one of the supporters of this board.
__________________
Greg 86 Coupe (stock - pretty much like Butzi designed it) - gone, but not forgotten 65 Ducati Monza 250 & 66 Monza Junior (project) "if you are lucky enough to own a Porsche, you are lucky enough" |
||
|
11-23-2009, 05:34 AM
|
|
|
Registered
|
Let me know if you need any help....I'm learning too.
__________________
Dave K |
||
|
11-26-2009, 03:41 PM
|
|
|
Registered
Join Date: Apr 2007
Location: wisconsin
Posts: 2,567
|
Good luck!
I just took out a 930 motor to reseal some leaks, adjust the valves, etc. Probably will spend time polishing/powdercoating, etc... Seems like a fun winter project  . .I am tempted to just take the motor completely apart, and like you, just fix stuff falling out of spec. But it seems that its tough to "just" replace what needs to be done. If you crack open the bottom end, you pretty much have to replace all of the gaskets. If you want to see what the main bearings look like, you pretty much have to get new rod bolts/etc as they aren't reused... etc, etc. Pandora's box comes to mind. Is there any "economical" way to disassemble the bottom end? I look forward to your pics . Good luck!
|
||
|
11-27-2009, 06:21 PM
|
|

|
|
Registered

|
Subscribing...
Who did the valve adjustments in the past? Was it a shop? Just wondering.
__________________
Ed Paquette 1983 911SC 1987 944S 1987 944 Manual (Donated to the Nat. Kidney Foundation) 1987 944 Automatic (Recently sold to another Pelican) |
||
|
11-28-2009, 12:48 AM
|
|
|
Mo money = mo parts
|
Quote:
Keep in mind, my goal is NOT a rebuild, it's a top-end and reseal. The only thing I am doing for sure on the bottom is on the intermediates.
__________________
Greg 86 Coupe (stock - pretty much like Butzi designed it) - gone, but not forgotten 65 Ducati Monza 250 & 66 Monza Junior (project) "if you are lucky enough to own a Porsche, you are lucky enough" |
||
|
11-28-2009, 05:22 PM
|
|
|
Registered
Join Date: Feb 2006
Location: Oahu
Posts: 2,304
|
signing-up. Thanks Greg.
__________________
Jon |
||
|
12-01-2009, 07:04 AM
|
|
|
Mo money = mo parts
|
Quote:
11 of 12 exhaust studs are out and the 12th is about 60% drilled. I purchased the stud drilling guide from the guy on the board that makes them. I probably could have made it 12 for 12 with only heat and a pair of vice-grips, but didn't perfect my technique until exhaust stud #2.
__________________
Greg 86 Coupe (stock - pretty much like Butzi designed it) - gone, but not forgotten 65 Ducati Monza 250 & 66 Monza Junior (project) "if you are lucky enough to own a Porsche, you are lucky enough" |
||
|
12-01-2009, 11:08 AM
|
|
|
Registered
Join Date: Oct 2008
Location: Nash County, NC.
Posts: 8,549
|
Why are you removing the exhaust studs? I didnt see anything on your posting for that job.
Bruce |
||
|
12-02-2009, 05:48 PM
|
|
|
Mo money = mo parts
|
I soaked them in PB Blaster for more than a week, but even with heat the nuts were too badly corroded to be griped by a wrench or socket and the interiors of the barrel nuts were too badly corroded for a long allen to bite. The combination of a lot of corrosion on the stud, screwing up the top of the studs with my dremel and the four studs came out instead of the nut coming off, I figured I would just remove the others. I know there was some risk in that approach, but no price to pay on this one.
__________________
Greg 86 Coupe (stock - pretty much like Butzi designed it) - gone, but not forgotten 65 Ducati Monza 250 & 66 Monza Junior (project) "if you are lucky enough to own a Porsche, you are lucky enough" Last edited by gregwils; 12-04-2009 at 07:13 PM.. |
||
|
12-03-2009, 12:54 PM
|
|
|
Registered

|
Hope all goes well. Much like you, I'm doing my first engine drop in the upcoming weeks, and then top end and reseal as well. I have high oil consumption like you and will likely inspect all pistons and rings also, seeing as it's a turbo. Keep the pictures coming.
Subscribed.
__________________
1987 930 1956 Chevy 3100 2009 Subaru Forester 2003 KX250 X2(I like my toys!!) |
||
|
12-03-2009, 02:52 PM
|
|
|
Mo money = mo parts
|
Here's my hosed up studs and the exhaust stud drilling fixture. The drilling fixture works well, but I was still paranoid and kept taking it off to verify that I wasn't destroying my head. It's far better not to drill if you can avoid it.

__________________
Greg 86 Coupe (stock - pretty much like Butzi designed it) - gone, but not forgotten 65 Ducati Monza 250 & 66 Monza Junior (project) "if you are lucky enough to own a Porsche, you are lucky enough" |
||
|
12-04-2009, 07:21 PM
|
|
|
Registered
|
Greg:
You were right about taking those awful studs out. They look bad; like you said earlier. Now, just so I am clear on this point, when you said you "drilled them" out, did you drill the stud to get them out? Or, did you drill out the hole for the stud and now will re-tap the head? Thanks.
__________________
Ed Paquette 1983 911SC 1987 944S 1987 944 Manual (Donated to the Nat. Kidney Foundation) 1987 944 Automatic (Recently sold to another Pelican) |
||
|
12-04-2009, 07:53 PM
|
|
|
Registered

Join Date: Oct 2005
Location: Idaho
Posts: 2,357
|
Quote:
Thanks for taking the time. Tom
__________________
'74 911 Red Sunroof Coupe, 3.6L, etc... '76 912 Yellow SPEC 911/911CUP |
||
|
12-05-2009, 07:39 AM
|
|
|
Mo money = mo parts
|
Quote:
Progress was slow this weekend with holiday activities and schlepping a xmas tree back to the house, plus all the lights. I did manage to complete the drilling, removed the fan shroud and took one of the chain covers off, but that's it. I am doing a lot of cleaning as I go, which is also slowing me down. 
__________________
Greg 86 Coupe (stock - pretty much like Butzi designed it) - gone, but not forgotten 65 Ducati Monza 250 & 66 Monza Junior (project) "if you are lucky enough to own a Porsche, you are lucky enough" Last edited by gregwils; 12-08-2009 at 10:32 AM.. Reason: Bit to Stud |
||
|
12-07-2009, 06:05 AM
|
|
|
Mo money = mo parts
|
My administrative skills are generally pretty weak, like my desk at work typically reveals. However, I have been pretty disciplined photographing and documenting. Wayne says in his book to take lots of photographs, and I can tell you that even though I have taken a lot, I go back to check on a few things and realize I don't have good photos - going forward I will take even more.
One thing I hope will help is making notes on the bag as I bag items. I am listing what is in the bag and if there are any special notes about the stuff. Here is an example. PS - Good documentation, photos, and everything to stay super organized helps ease any anxiety and thoughts like "I must be an idiot to think I can actually do this". 
__________________
Greg 86 Coupe (stock - pretty much like Butzi designed it) - gone, but not forgotten 65 Ducati Monza 250 & 66 Monza Junior (project) "if you are lucky enough to own a Porsche, you are lucky enough" |
||
|
12-07-2009, 07:15 AM
|
|

|
|
Registered
Join Date: Oct 2008
Location: Nash County, NC.
Posts: 8,549
|
Greg, You ll have bags of directions but that piece in the bag is suposed to have 3 8mm nuts and wavey washers....looks like youre having a great time.
Bruce |
||
|
12-07-2009, 07:33 AM
|
|
|
Super Moderator

|
Greg,
Actually I think it's really cool every time someone starts a rebuild for the first time. I remember mine like it was yesterday, and I've done around 30 since then. (Not all mine!) The feeling you get when you first start the engine that you rebuilt is priceless. Enjoy the process, take your time, and do it right. It's especially temptng to start hurrying when you get close to the end. My biggest tip besides extensive bagging which you're doing? Before you start assembly, lay everything out. Count the parts and be sure of the ones you're going to need. There's no feeling worse than finding an oil-pump seal laying on the floor after you've sealed the case and wondering if it's an extra, or if you forgot to put it in.
__________________
Chris ---------------------------------------------- 1996 993 RS Replica 2023 KTM 890 Adventure R 1971 Norton 750 Commando Alcon Brake Kits |
||
|
12-07-2009, 08:27 AM
|
|


 1986 Porsche 911

 1988 Porsche 911 Targa
 1983 Porsche 911SC Targa
 Eggplant
 Porsche
 1970 Porsche 911 S
