|
|
|
|
|
| Author |
|
|
Project Addicted
Join Date: Jul 2012
Location: Eastern Shore. MD
Posts: 919
|
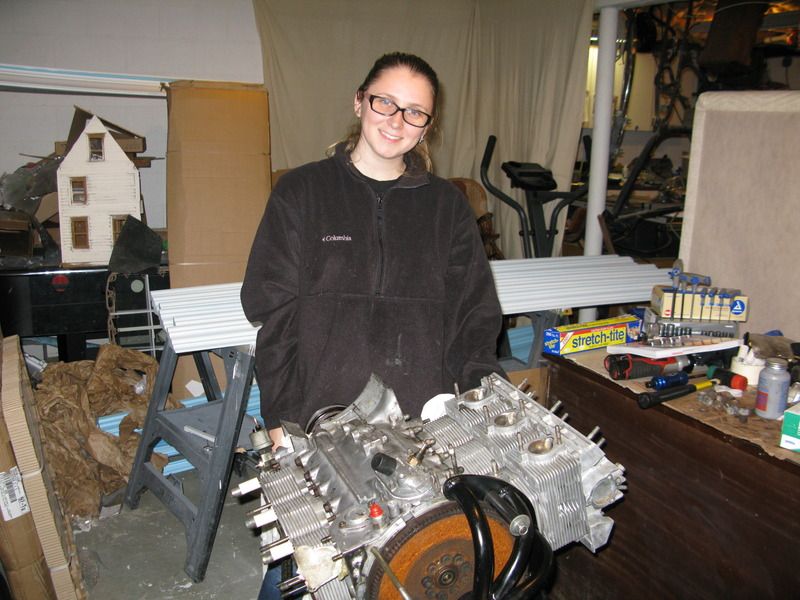
My Daughter's 3.4 Build
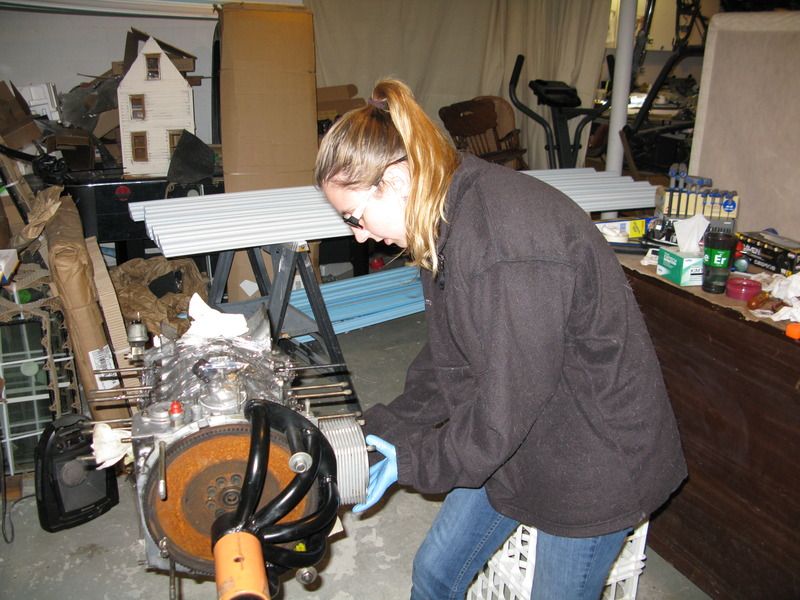
Allie began the build up of her 3.4 (from 3.2) this past weekend. I have been doing the grunt work over the past month; cleaning, getting parts sourced and gathered, etc. Allie lives in DC and the engine and car are here in NY so we have to plan it for when she's home. She did well until she made a rookie mistake and broke a ring on the 3rd set of rings when installing into the cylinder. I think she got the ring compressor cocked a bit and the allowed the top ring to jam a little bit and then when she pushed a bit harder it chipped. It's not a disaster but it did keep us from getting them installed onto the rods and the heads bolted on. I have a new set for the one piston coming from JE and she will be home again this weekend for Easter so we will have another go at it.
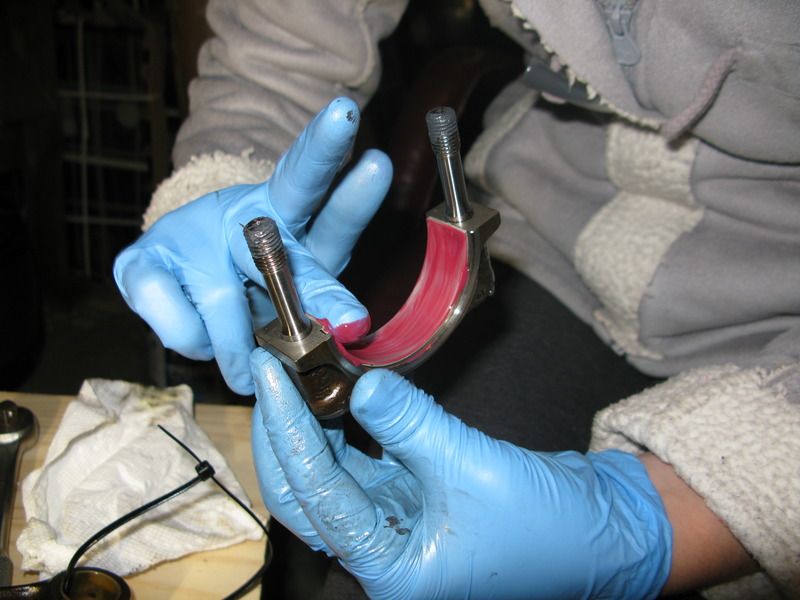
First she measured the rod bearing thickness for the Glyco bearing thread. 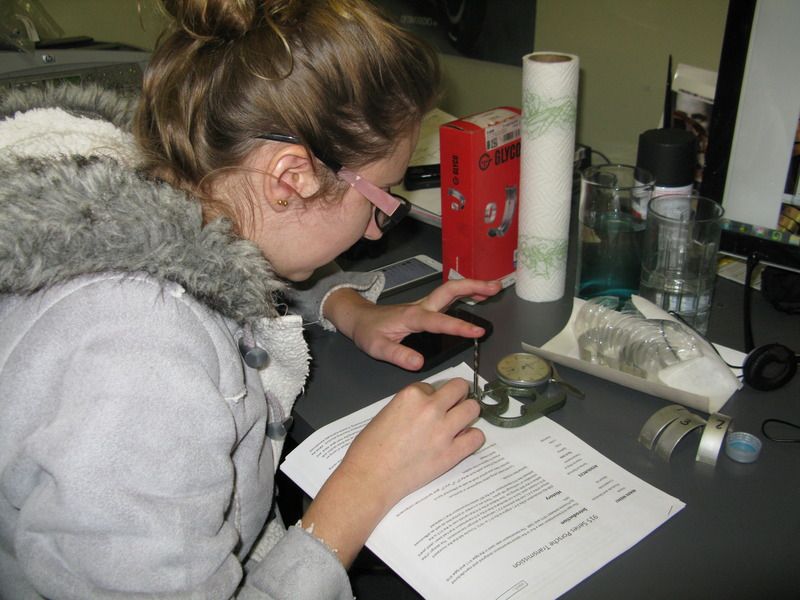 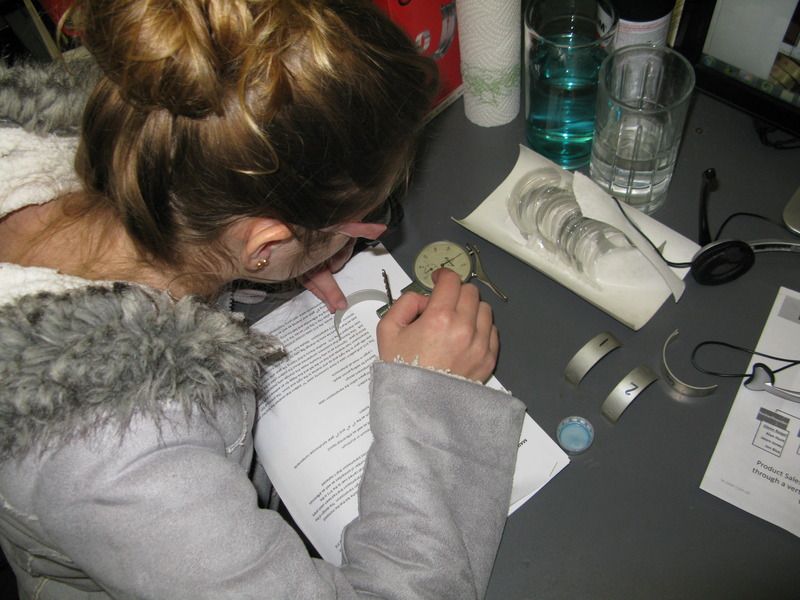 Then she got busy with chasing/cleaning out the lower head bolt threads. She made a chaser by cutting 2 slots into one of the old studs that were removed by me. She then welded a nut on top so she could run it in and out with the electric ratchet ( a WONDERFUL TOOL) and then blow out any debris. 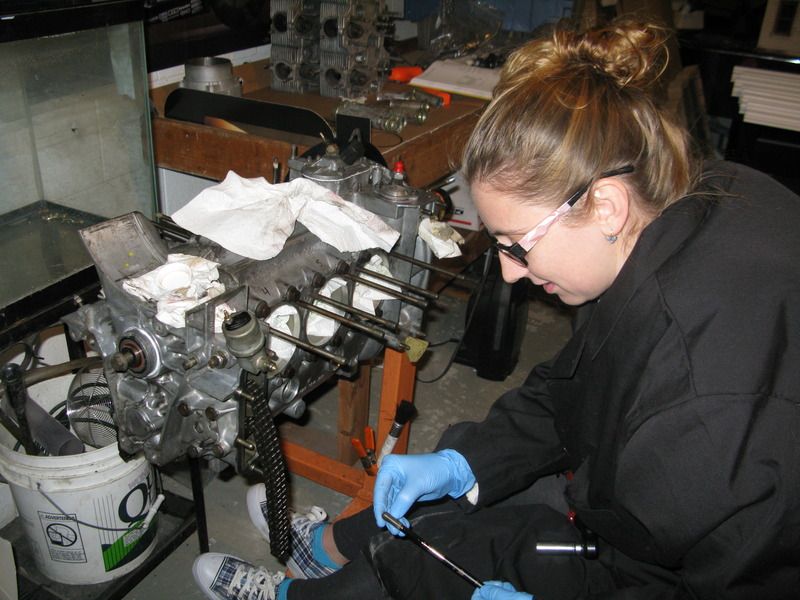 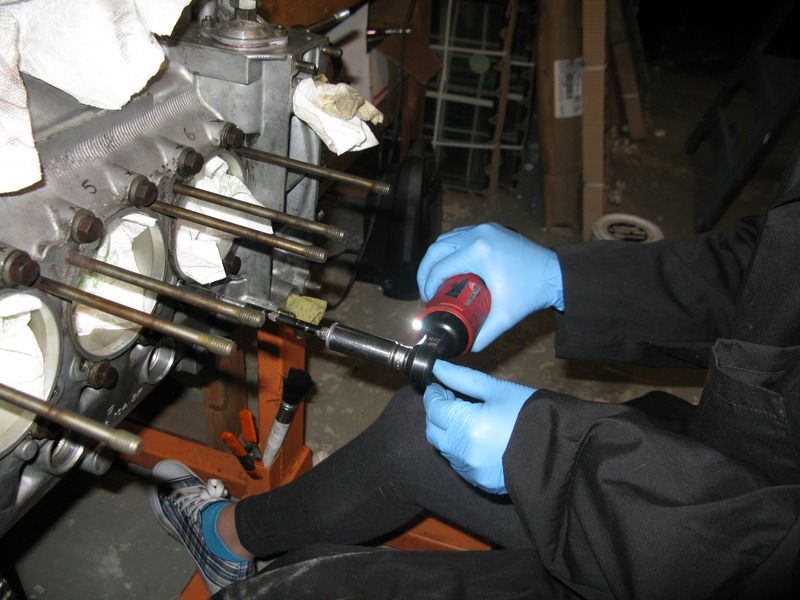 She wanted to do the crank measurement with Plastigauge (I had measured so I could get bearings) because she had never done this step. It measured to within the spec on the low side. Crank journals were in very good condition. We changed the rod bearings because of the scratches on the #2 rod bearing. 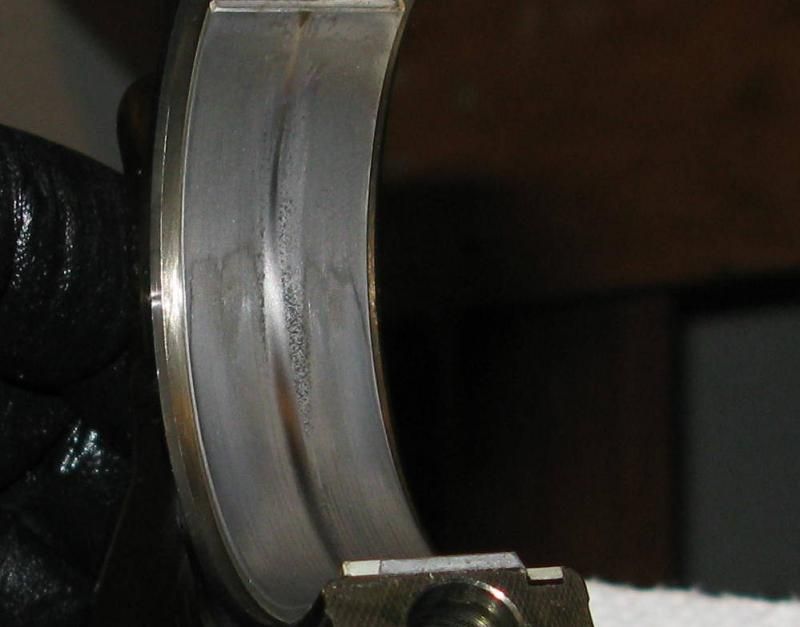 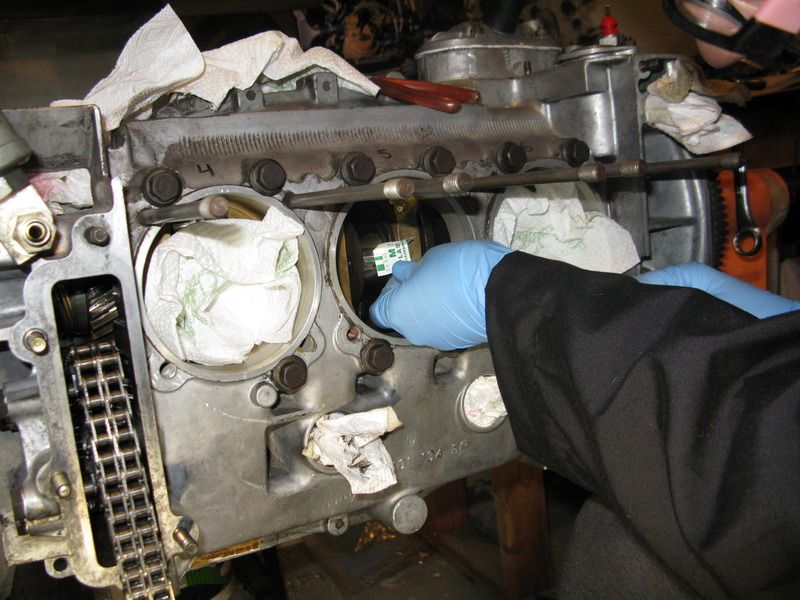 Getting rods and assembly lube set up and ready to go. 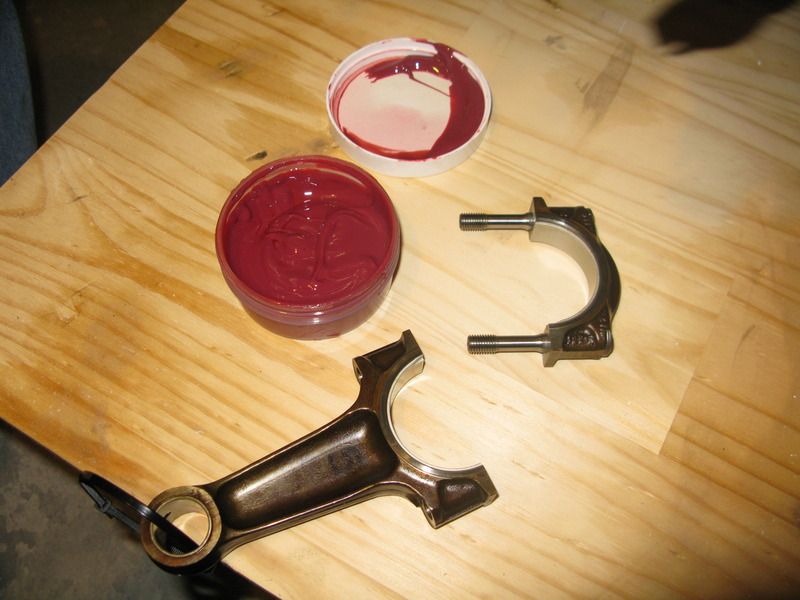 Getting the rod caps held in place with lube while the top of rod is put in place is a 4 handed job. This was a change to ARP rod bolts for the 3.2. 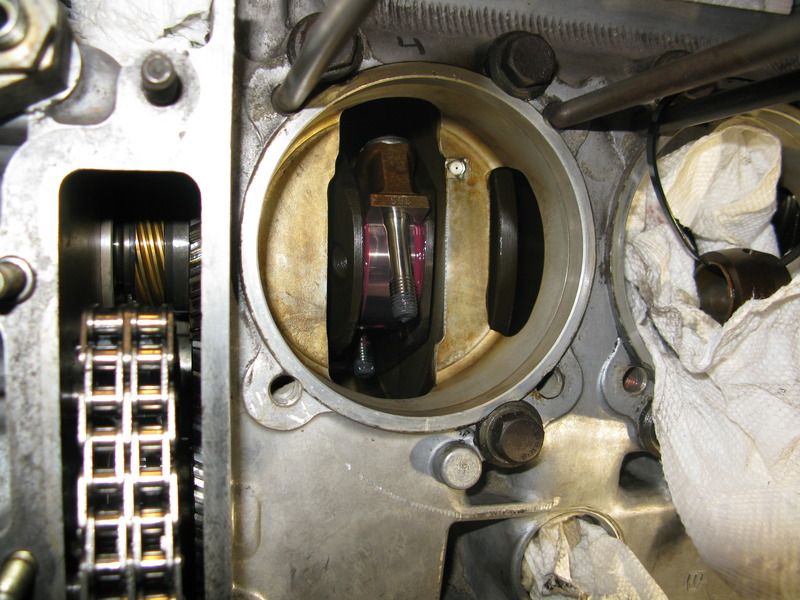 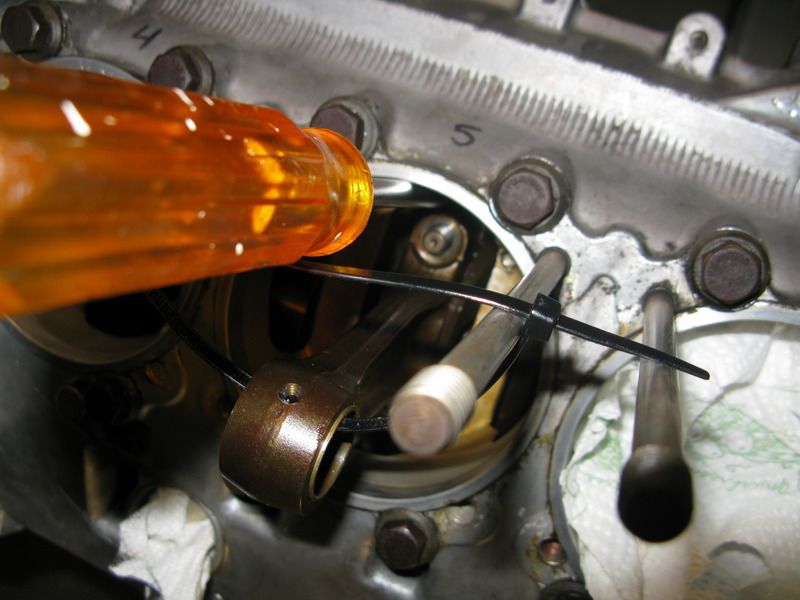 
__________________
Jon 1966 912 1976 911 3.4 Backdate Project 1986 944 |
||
 03-31-2015, 10:16 AM
|
|
|
It's a trap...
|
Sweet. Just did that the end of last year. Still assembling. :-(
Is that going into the '76?
__________________
Run like the wind, straining the limits of machine and man.... 2006 Atlas Gray Carrera 4, '81 911SC Black on Tan (SOLD), 2006 Acura RSX Type S, '13 Dodge Durango (wifeys). |
||
|
03-31-2015, 10:22 AM
|
|
|
Project Addicted
Join Date: Jul 2012
Location: Eastern Shore. MD
Posts: 919
|
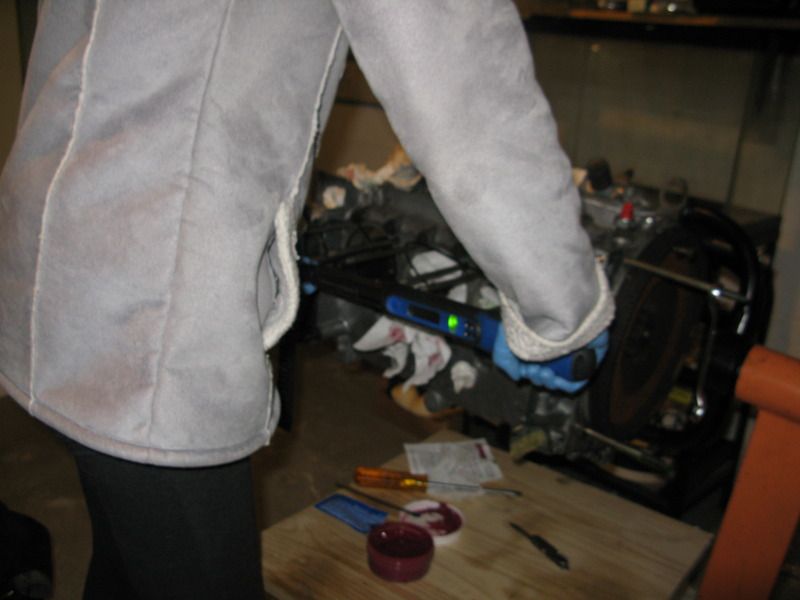
As each rod was installed it was interesting to feel the level of friction when moving the rod up and down changed. Most had a little bit of what I will call stiction when just tightened with the little hand ratchet. But once torqued (40 Ft. Lbs) to spec they became nice and smooth feeling with no stiction at all. Just a nice kind of thick greasy feel.
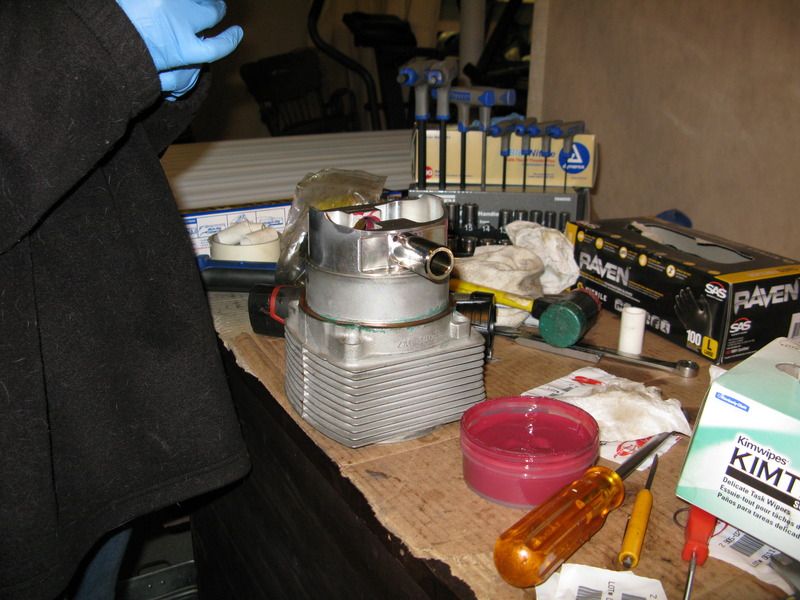
   Once the rods were installed it was cocktail time!! Pistons for the morning. Allie set up a nice clean and well lighted work area and laid out the parts. 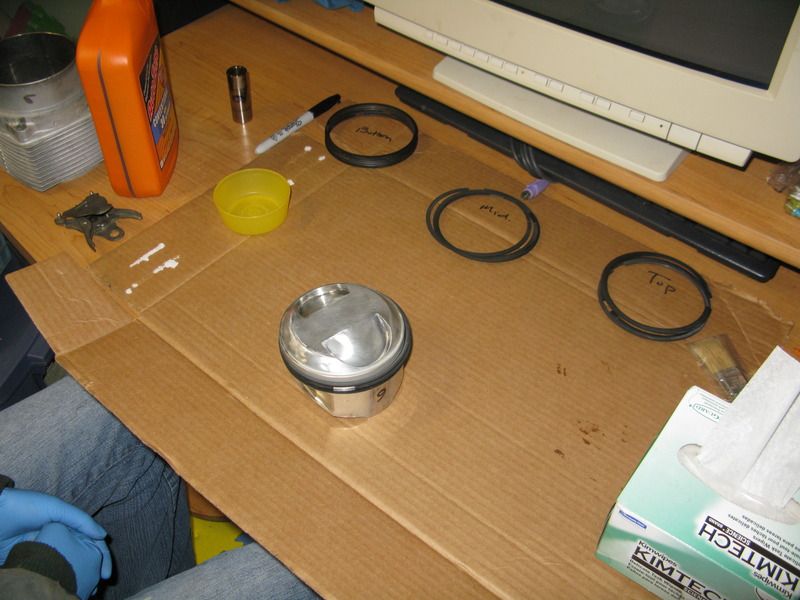 She then got out the 30x oil and began lubing up the cylinders and rings and made sure everything was slippery. Get out the piston ring compressor, give a big squeeze, tap around the od with a plastic hammer to make sure we have 100% compression, set it squarely on top and give a push with the plastic hammer handle. All but one went right in. 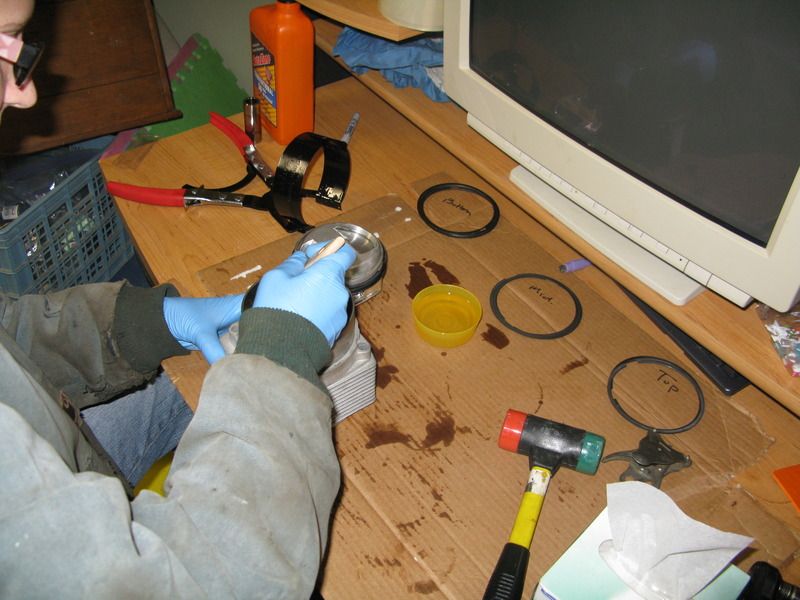 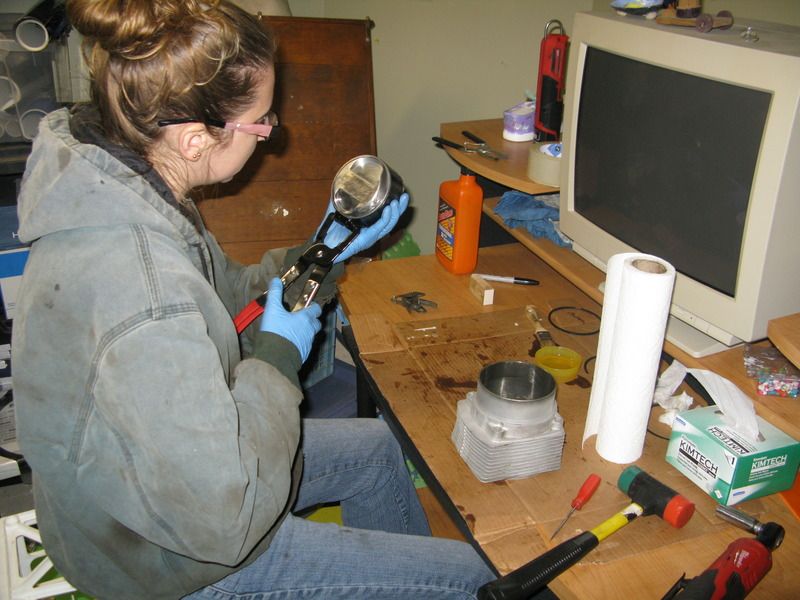 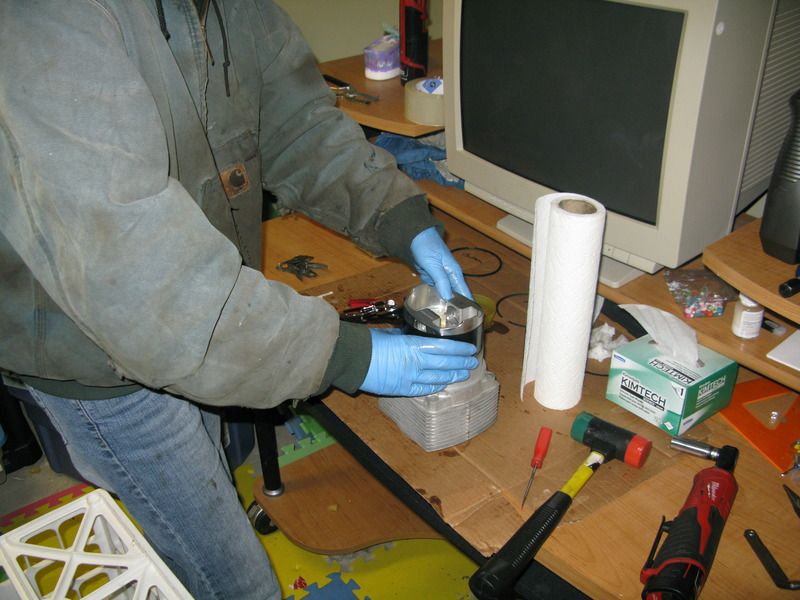 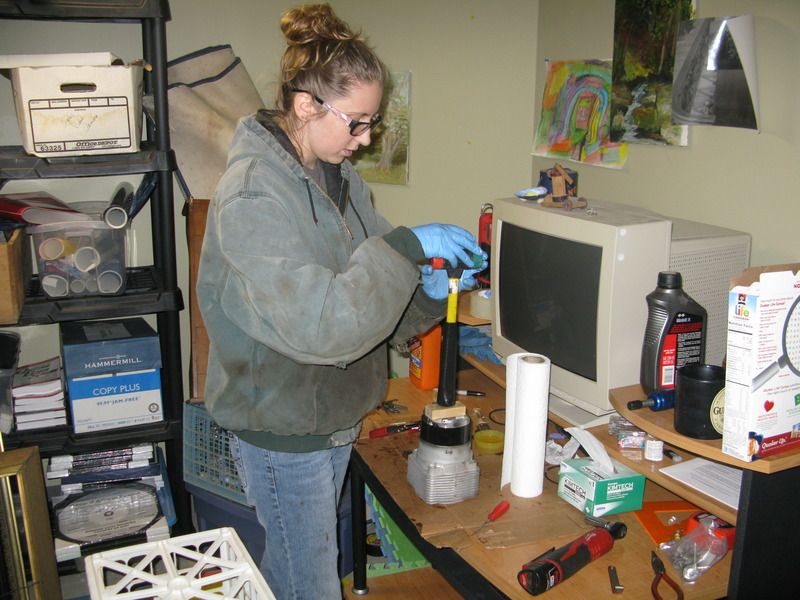 All done with that one, time for the next victim. Pull the wrist pin out and lather, rinse, repeat. 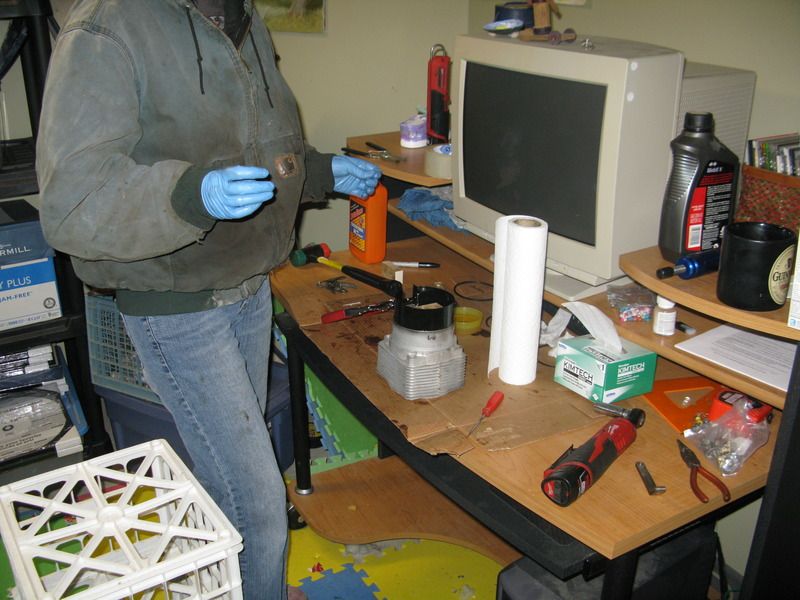 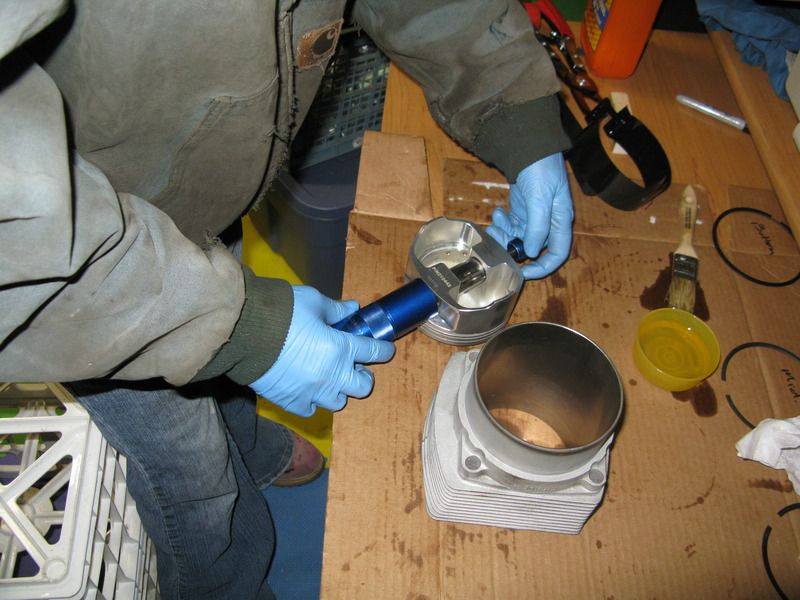 New ring set will be here later this week and then she will work towards getting the top end fully built.
__________________
Jon 1966 912 1976 911 3.4 Backdate Project 1986 944 Last edited by Jcslocum; 03-31-2015 at 10:31 AM.. |
||
|
03-31-2015, 10:27 AM
|
|
|
Registered
Join Date: Aug 2014
Posts: 228
|
Love this thread!!!! very informative as I have to do mine soon
|
||
|
03-31-2015, 02:20 PM
|
|
|
Project Addicted
Join Date: Jul 2012
Location: Eastern Shore. MD
Posts: 919
|
Quote:
__________________
Jon 1966 912 1976 911 3.4 Backdate Project 1986 944 |
||
|
03-31-2015, 03:08 PM
|
|
|
Under the radar
Join Date: May 2007
Location: Fortuna, CA. On the Lost Coast near the Emerald Triangle
Posts: 7,129
|
Wow. You are one lucky family. As much as I tried, I could not get either my daughter or son interested in Porsches or mechanics.
__________________
Gordon ___________________________________ '71 911 Coupe 3,0L outlawed #56 PCA Redwood Region, GGR, NASA, Speed SF Trackrash's Garage :: My Garage |
||
|
03-31-2015, 08:28 PM
|
|

|
|
Project Addicted
Join Date: Jul 2012
Location: Eastern Shore. MD
Posts: 919
|
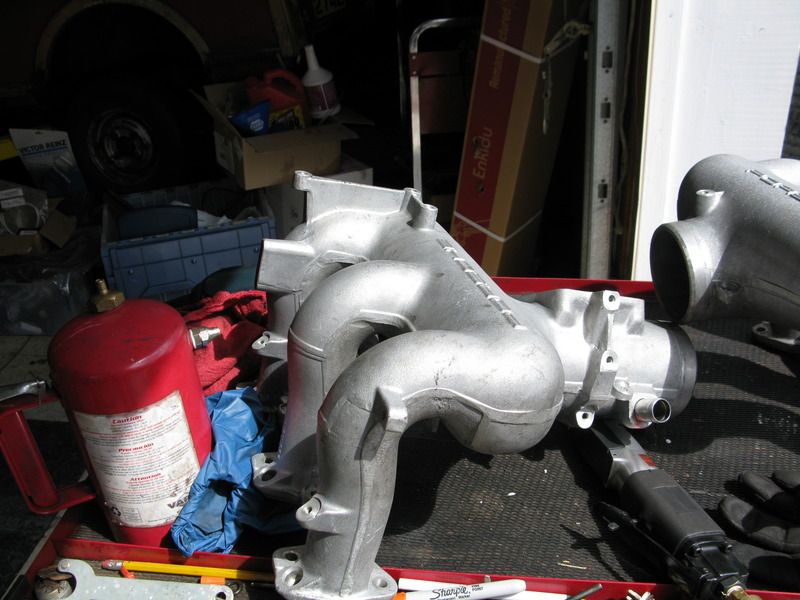
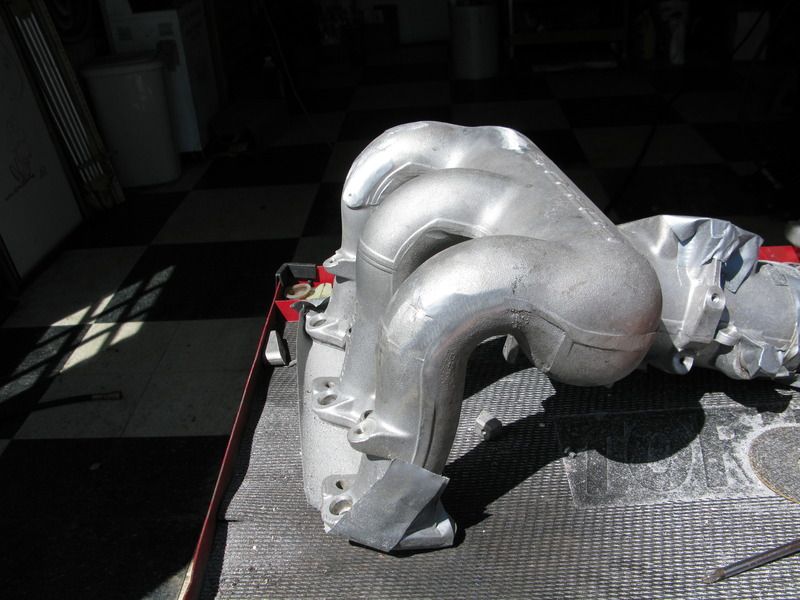
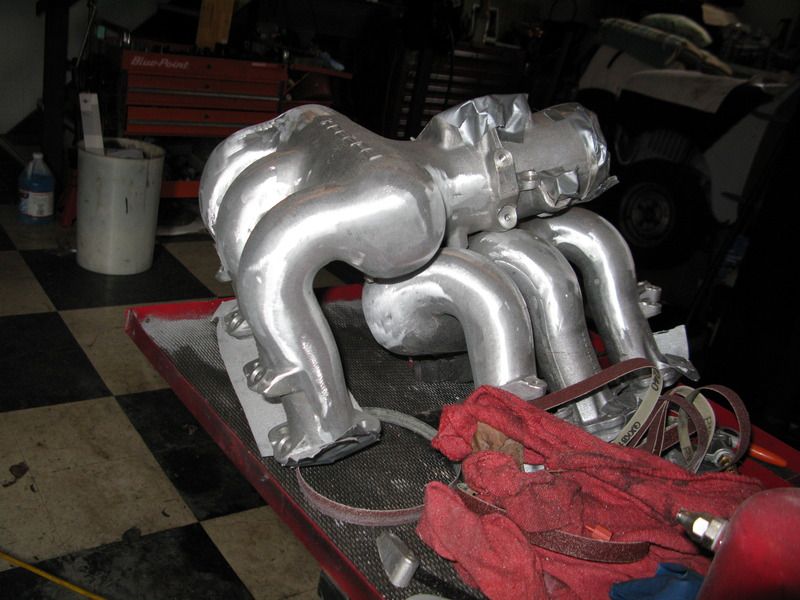
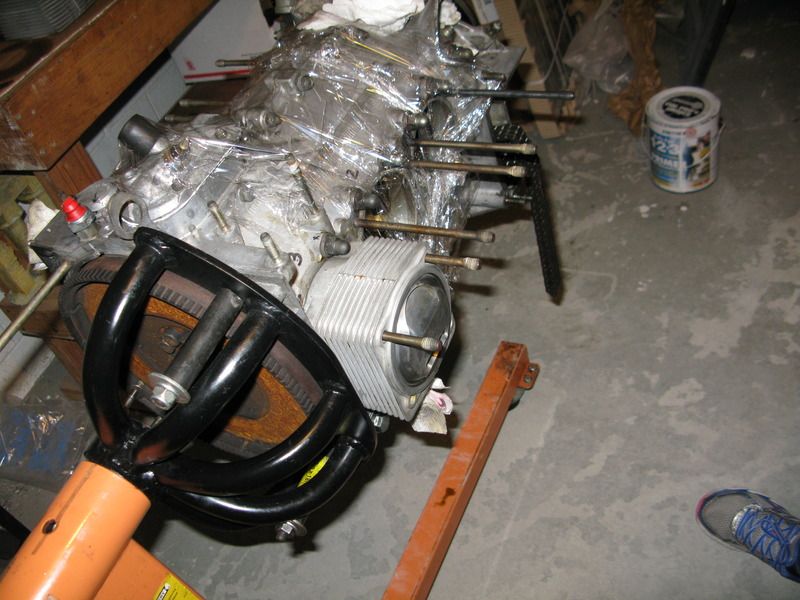
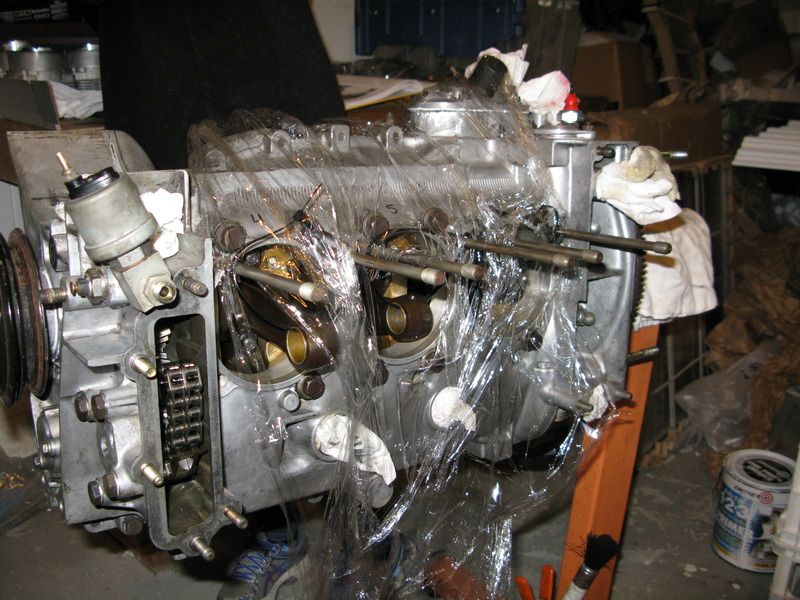
This weekend was a busy one. With the Easter, Allie was able to get home for a long weekend to continue the build and keep up the momentum. She cleaned up the intake by cutting off some of the fugly lugs that we will not be using before the manifolds go off for powder coating.
   More to come!!
__________________
Jon 1966 912 1976 911 3.4 Backdate Project 1986 944 |
||
|
04-07-2015, 06:30 AM
|
|
|
Project Addicted
Join Date: Jul 2012
Location: Eastern Shore. MD
Posts: 919
|
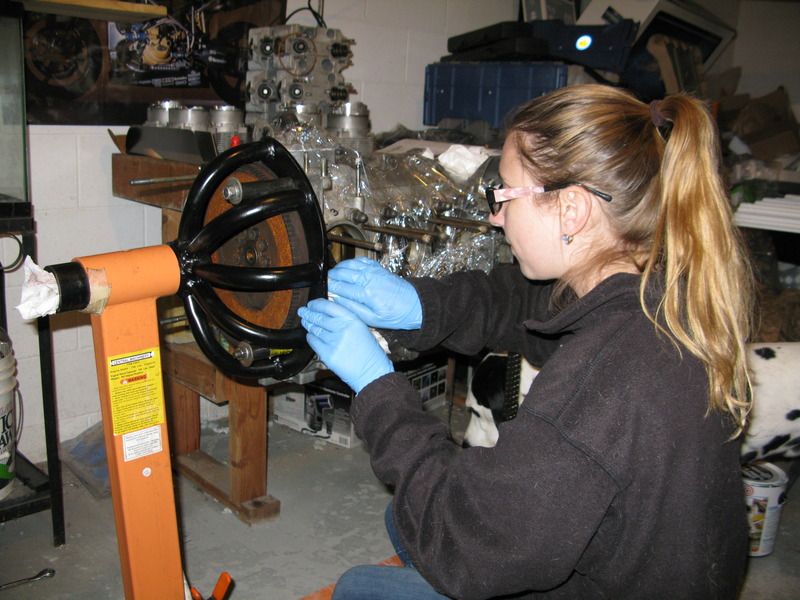
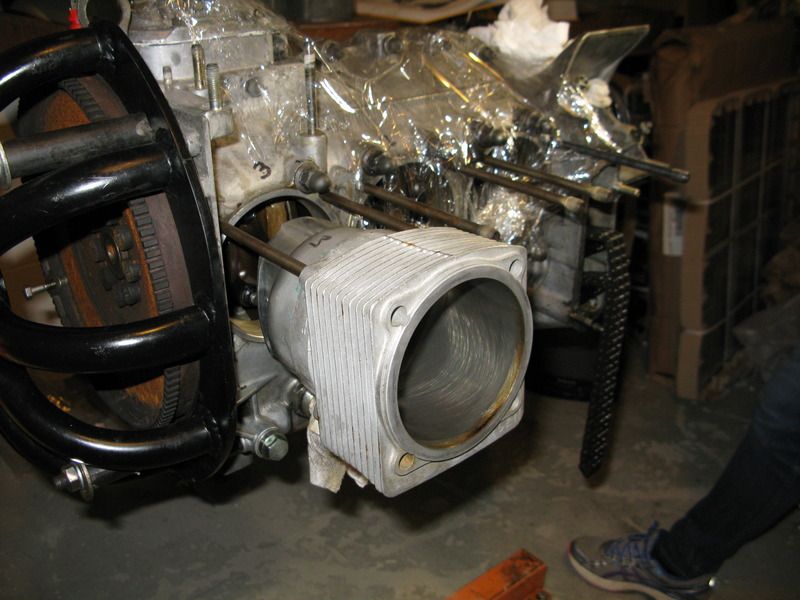
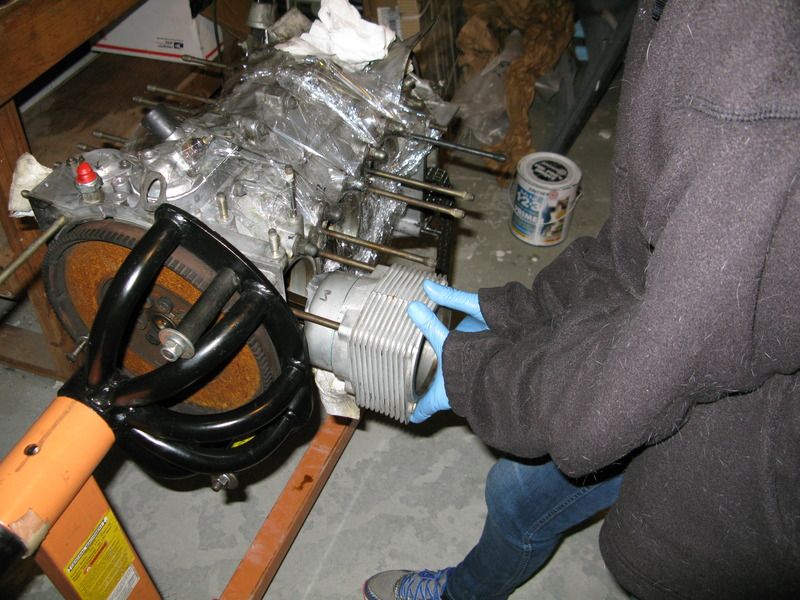
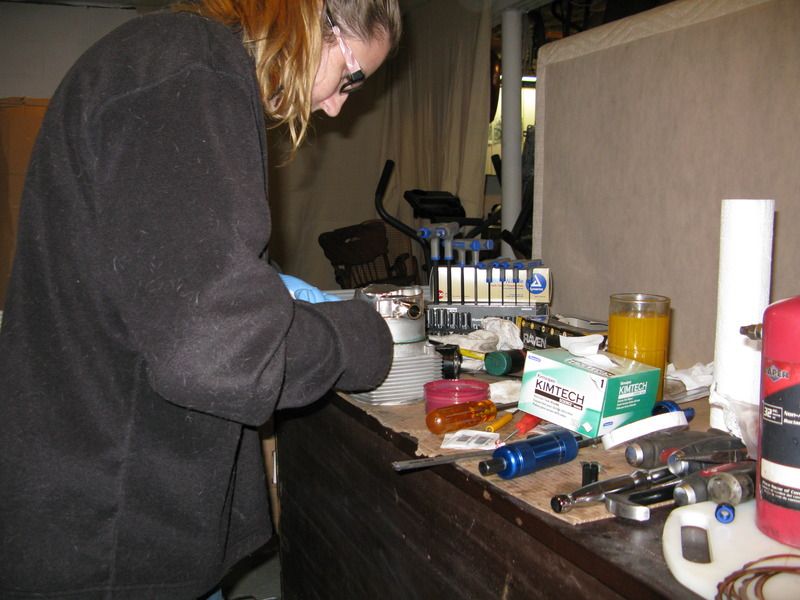
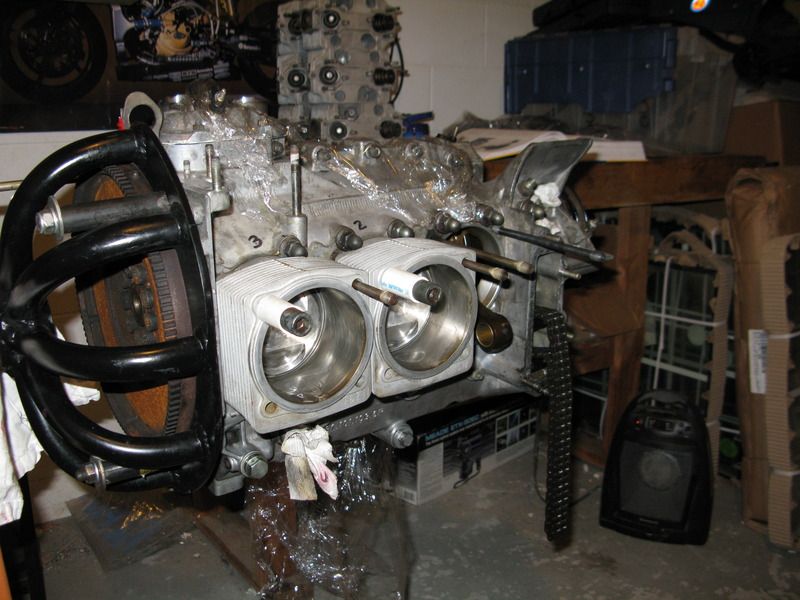
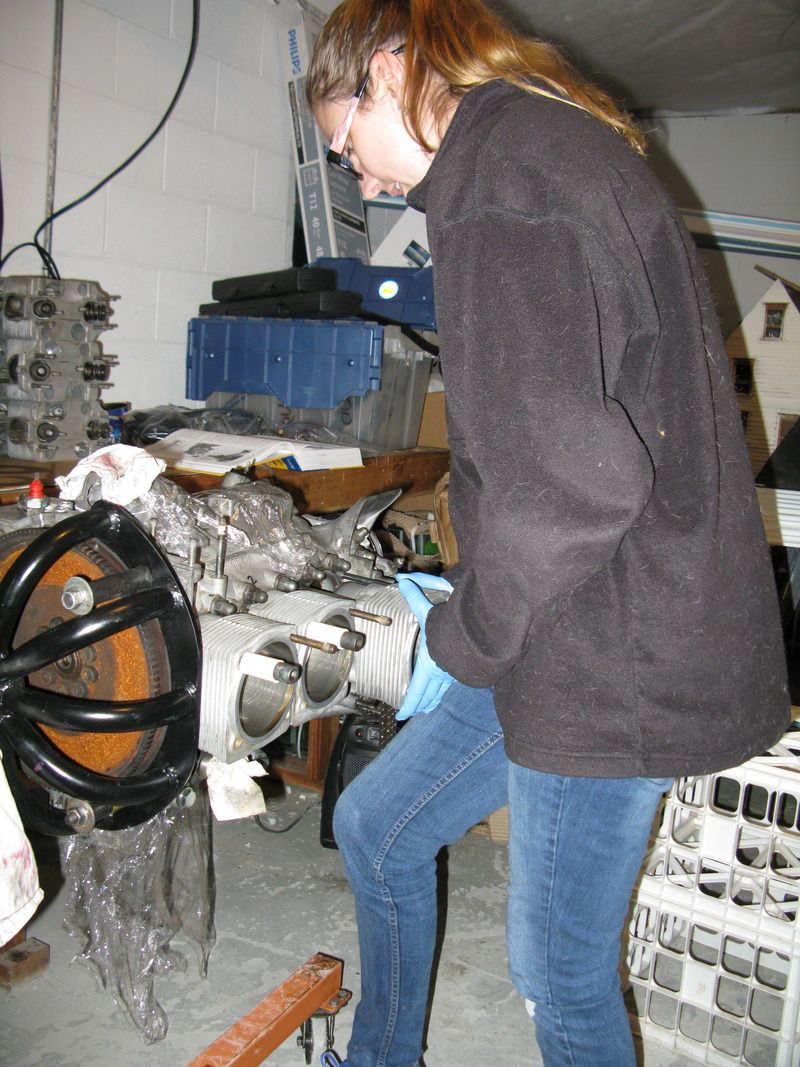
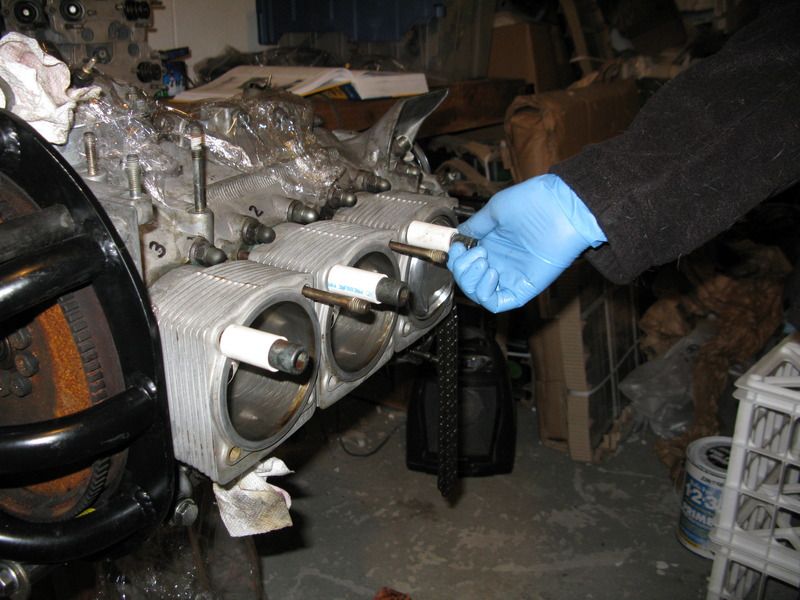
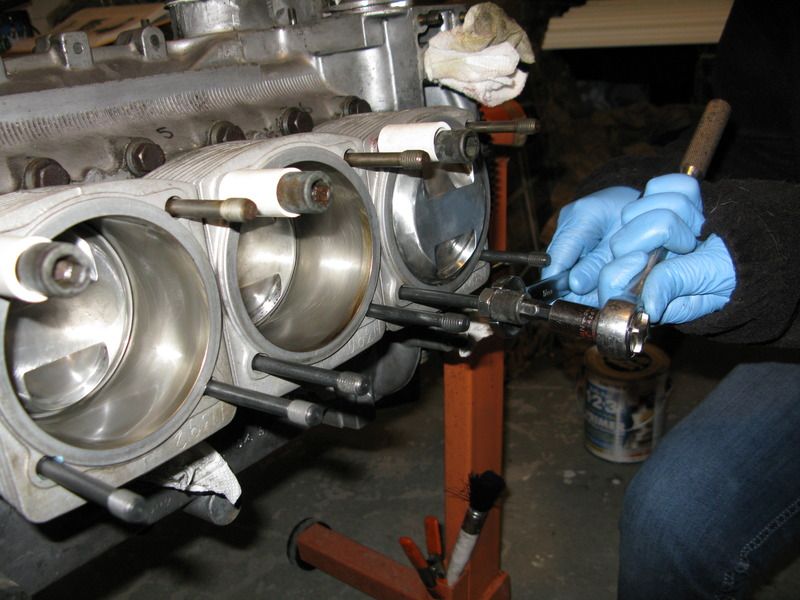
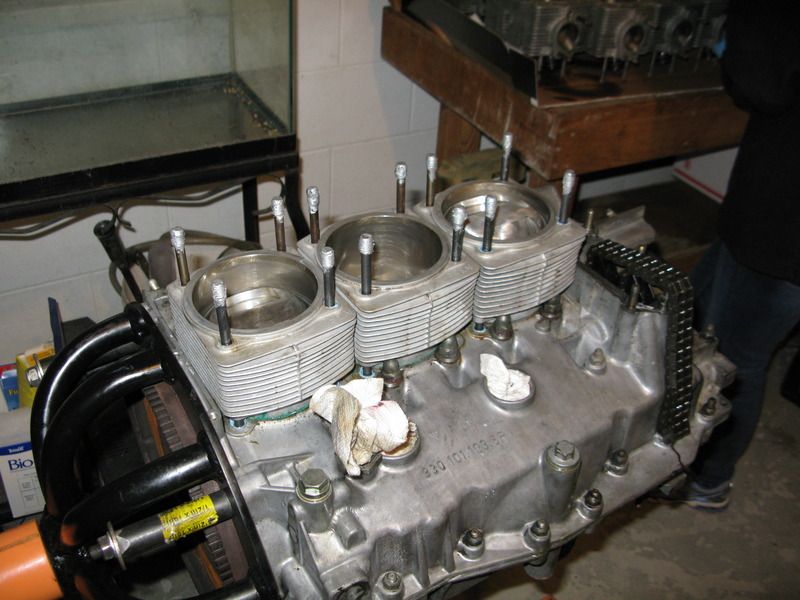
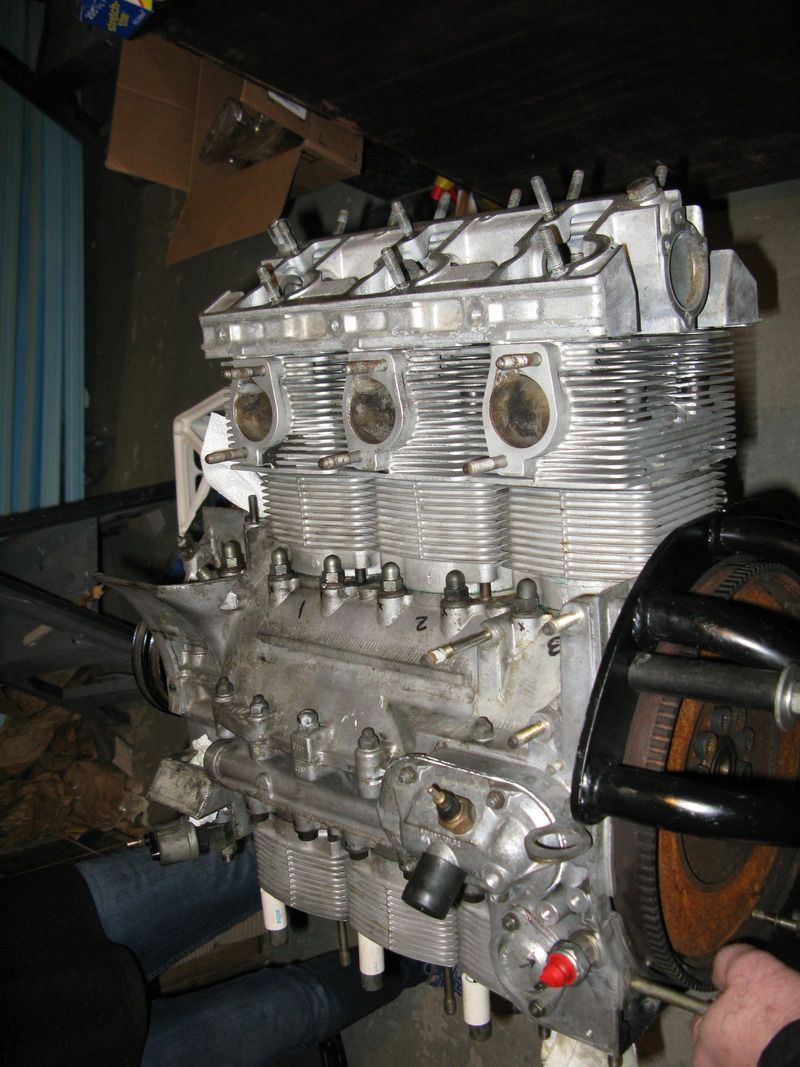
On to engine building. We are using Wayne's book as well as the factory manual, i think as most do. She got the Saran Wrap out and cover up all places the piston pin clip could ge to when they shoot out at the speed of light. Clean, clean, clean. She like this part as it goes well with her level of OCD. She installed the piston pins and then cut up some PVC pipe to make the cylinder holders. I think she said they were 36mm long. We left the lower studs out to make it easier to push the wrist pins in and get the clips in. She used a screw driver to pop them into place. Not that hard to do for her little hands and I have the plans for a clip installing tool found here on Pelican, if it was needed. We got one side fully installed last night and she will finish up this morning before heading home to DC later this afternoon.
       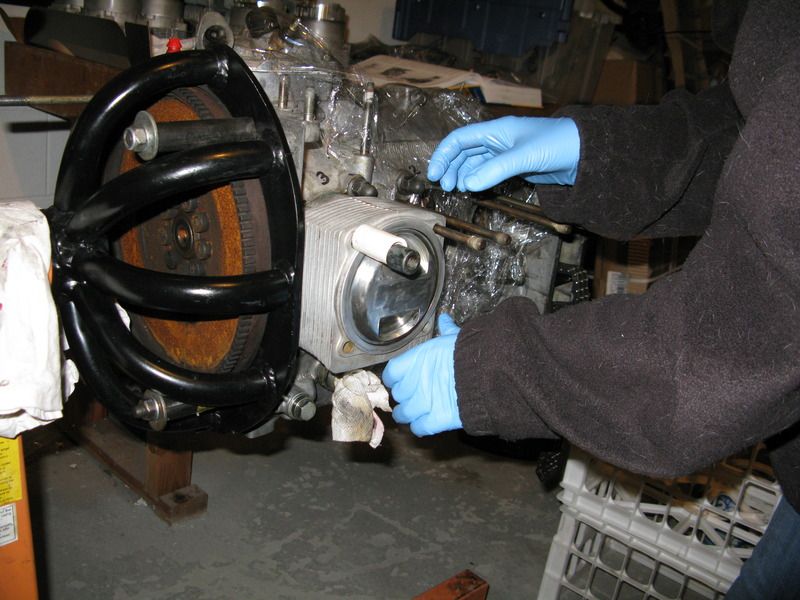  
__________________
Jon 1966 912 1976 911 3.4 Backdate Project 1986 944 Last edited by Jcslocum; 04-07-2015 at 06:41 AM.. |
||
|
04-07-2015, 06:36 AM
|
|
|
Project Addicted
Join Date: Jul 2012
Location: Eastern Shore. MD
Posts: 919
|
Only 10 pics per post so here are some more. She even got a pic of old dad dropping washers onto the studs. The only part of the actual build I have performed :-)
__________________
Jon 1966 912 1976 911 3.4 Backdate Project 1986 944 |
||
|
04-07-2015, 06:39 AM
|
|
|
E-85 sippin drunk
Join Date: Jan 2002
Location: Warner Robins, GA
Posts: 1,554
|
This is absolutely AWESOME!!!!! Way to go, Allie!!
__________________
Brad...930 gt-1 racecar, increased displacement to 3.6L, JB racing Cylinders, JE 8 to1 pistons, stroked crank, Carrillo rods, extrudehoned 3.2L intake, full bay Bell I/C, GT-2 EVO cams, Rarly8 headers, GTX-3584RS turbo, twin plug, P&P heads, Link G4 EFi system, G-50/50 with LTD slip and oil squirters/oil cooler, zork tube, full race coilover system, with carbon fiber body, full cage, E-85 sippin drunk |
||
|
04-07-2015, 07:37 AM
|
|
|
Registered
|
I'm book marking this for my daughter :-) Sweet!
Mike
__________________
2015 Panamera Hybrid, 2008 Cayenne Twin Turbo 2001 996 GT2 1999 Spec Boxster, 1996 993 Cabriolet 1992 964 Cabirolet, 1975 911 RSR Replica Race Car |
||
|
04-07-2015, 09:05 AM
|
|
|
Registered User
|
so very cool. keep up the good work. and keep us posted.
__________________
Toby ____________________ '77 Carrera 3.0 '07 C2S |
||
|
04-07-2015, 09:16 AM
|
|

|
|
Registered
Join Date: Apr 2002
Location: Omaha, NE
Posts: 3,522
|
what a great father-daughter project! Did I miss the thread where you actually started putting the case together?
__________________
1980 911SC Targa 3.6L |
||
|
04-07-2015, 11:03 AM
|
|
|
PCA Certified D.I.
|
Great job for a really interesting father/daughter bonding experience! Does she do Driver's Ed>?
__________________
1986, '87,'88 928S4, 2006 Cayman S Cabluey, 2006 Cayman S "Burn Notice" Last edited by Sapientoni; 04-07-2015 at 02:28 PM.. |
||
|
04-07-2015, 02:26 PM
|
|
|
Schleprock
Join Date: Sep 2000
Location: Frankfort IL USA
Posts: 16,640
|
Nice father daughter job for sure. Great attention to detail!
Regarding the rod bolts, have you previously done these via stretching? Reason I ask is because I recently did a set of 930 rods which use the same bolts. I use the ARP moly lube goop on the shank, threads, nut flange and rod surface & measured with a 0.0001" resolution indicator. At 40 lbs they were only around 80-85% of the way there based on my stretch measurements. When incrementally stretching them to 0.0100" (do both bolts 20 lbs, then both 30, then 35, then 40 and creep up on the stretch amount) with a torque wrench, I found most of them needed at least 45 lbs to get the recommended stretch amount. Some needed up to 48 lbs and incidentally not every bolt was torqued the same amount to get nearly equal stretch on both bolts. I recognize that the torque amount is dependent on ensuring the nut is actually rotating to overcoming force of friction, and incremental torquing has the potential for running into that frictional resistance when applying a slight increase in torque. That's why I make sure to use large enough increments to get nut rotation going before the wrench clicks. But with stretch, the actual torque amount is somewhat meaningless. As long as I hit my stretch spec at or above 40 lbs, i'm good with it. If I was less than 40 by a considerable amount, i'd discard the bolt as being yielded. Just throwing that out there for consideration with respect to what stretch amount you can generally expect to see by just torquing them all to 40
__________________
Kevin L '86 Carrera "Larry" |
||
|
04-07-2015, 03:40 PM
|
|
|
Registered

|
Wow, what a fantastic thread!
__________________
1981 911SC restomod "Minerva" 2004 Boxster S 2021 Cayman GTS 4.0 manual "Olive" 2014 Cayenne GTS V8 (wife's lover) The slope is not slippery; in fact it is entirely frictionless. |
||
|
04-07-2015, 06:49 PM
|
|
|
Registered User
Join Date: Nov 2012
Posts: 305
|
wow lucky you
|
||
|
04-08-2015, 03:20 AM
|
|
|
UnRegistered User
|
Great job on the build!
Great job building the daughter!
__________________
Bill K. "I started out with nothin and I still got most of it left...." 83 911 SC Guards Red (now gone) And I sold a bunch of parts I hadn't installed yet. |
||
|
04-08-2015, 05:35 AM
|
|
|
abides.
|
I found the same thing... generally 45-48 ft lbs to reach the stretch spec. I actually wound up using a beam type torque wrench, rather than having to reset the click-type wrench repeatedly.
I don't think you could fit a stretch gauge in the case, though... and I wonder how people use the stretch gauge without an extra pair of hands. I needed a buddy to help hold the gauge while i torqued the bolts. Quote:
__________________
Graham 1984 Carrera Targa |
||
|
04-08-2015, 09:46 AM
|
|
|
Project Addicted
Join Date: Jul 2012
Location: Eastern Shore. MD
Posts: 919
|
Thanks for all the kind words!! I don't have any sons, so my girls have to deal with the motor head dad. Allie is the only one who is really into it.
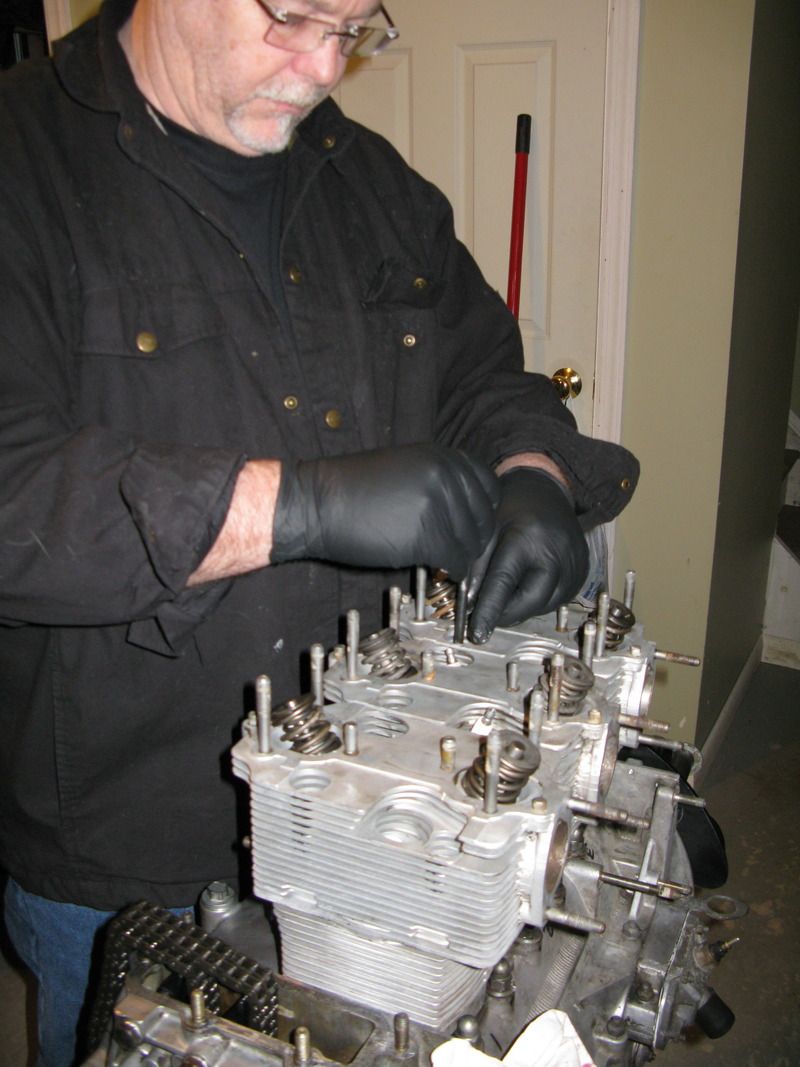
To answer some questions:\ We didn't open the case up, so no you didn't miss that aspect of the build. We spotted some rod bearing wear so we went with new rod bearings and rod bolts from ARP. No drivers ED yet in her 944 but she wants to start once we get the 911 together. She calls the car Scrappy. My wife needs to get 7/8ths of the credit for raising a great bunch of kids. I'm a negative influence and a big Man-Baby as well. We did use torque as the stretch gauge would not have fit in the case. We used a calibrated, SnapOn electronic torque wrench that allows you to hold the load and watch/feel the nut keep turning until it stops moving. This is better than a clicker wrench where you can hold the load. I think we are very good and I have read that 40 Ft. Lbs. was giving the proper stretch. Allie installed the last 3 heads and cam towers yesterday and now we move on to cams and cam timing.
__________________
Jon 1966 912 1976 911 3.4 Backdate Project 1986 944 |
||
|
04-08-2015, 10:33 AM
|
|


 Speed Buggy
 My Garage
 1971 Porsche 911
 Baja Bug
 Moby
Moby 2007 Porsche 997
 Blue Streak
 Burn notice
 Boxster S
 Minerva
 Olive
Olive 1983 Porsche SC
 1984 Porsche Carrera Targa
