|
|
|
|
|
| Author |
|
|
Registered
|
"i punted!" wetsanded my headlights.
i was sitting around pricing new headlights for my wife's Subie forester. it was depressing. my tacoma headlights were equally as bad. i was looking at big money to replace them. like "new rifle money".
i figured WTF..if i was going to toss them into the garbage can, why not sand them down first. i dug around and found my stash of 2000 grit paper. big bucket of clean water, some rags for splashing it around. i masked off all four headlights and got medieval on them. my tacoma was meh. barely milky colored looking after i used some headlight polish compound to take off the sanding haze. serious improvement tho. then i went to my wife's car. it even felt different sanding. it was rough at first and it immediately got glass smooth. the water was super milky colored. i think i could have stopped there. i dried it off and it was pretty good. after the headlight compound..WOW. as good as new! there wasnt a bigger skeptic than myself before starting the process. i am amazed it worked. i coated them with some UV coating. fingers crossed. i will reapply the UV stuff at every carwash. the bottle was kinda huge for the amount it requires at each application. you need like half a squirt. eyeballing that $1000 i was going to have to spend on aftermarket lights, made me want to at least give it a try. my biggest regret was not taking a "before" pic.
__________________
poof! gone |
||
 05-05-2014, 08:04 AM
|
|
|
i'm just a cook
Join Date: Apr 2006
Location: downtown vernon,central new york
Posts: 4,868
|
now you can spend the grand on something that goes bang!
|
||
|
05-05-2014, 08:06 AM
|
|
|
Registered
|
Quote:
I'm working that angle right now. Not looking good   Sent via Jedi mind trick.
__________________
poof! gone |
||
|
05-05-2014, 08:06 AM
|
|
|
Registered
|
I've used the Meguaire's kit that has the pad for the drill motor. Works pretty good if you don't want to sand them.
__________________
Scott '78 SC mit Sportomatic - Sold |
||
|
05-05-2014, 08:50 AM
|
|
|
Registered
|
Vash, I did the same procedure last year to my wife's Honda Pilot. It's about 90%, still some haze.
__________________
74' 911 w/3.2L (sold) 95' 993 C2 Triple Blk Cab. 02 Honda Superhawk (sold) 2018 Toyota Tundra Limited 2004 CRF250X |
||
|
05-05-2014, 09:37 AM
|
|
|
Eva
|
WOWZER That's big coin!!!
I just scored a set of OE replacements from Parts Geek for my '06 Altima for $55each...
__________________
'78 SC Targa ~Brynhild~ Insta: @911saucy "The car has been the cave wall on which Industrial Man has painted his longings and desires." -Eddie Alterman- |
||
|
05-05-2014, 10:03 AM
|
|

|
|
Registered
|
I sanded my daughter's Honda Accord's lights with a Scotch pad and water. Seemed easier than sandpaper. Then I used the polish and drill/foam ball device. Not perfect but 90% better.
__________________
Jacksonville. Florida https://www.flickr.com/photos/ury914/ |
||
|
05-05-2014, 10:08 AM
|
|
|
Registered
|
Headlights on my Z were pretty much yellow. I used Meguiar's PlastX on them. Took less than 10 minutes on each headlight and they're crystal clear.
__________________
Guy '87 944 (first porsche/project car) |
||
|
05-05-2014, 10:25 AM
|
|
|
Misunderstood User
|
I have done it too. Worked ok for me.
__________________
Jim 1983 944n/a 2003 Mercedes CLK 500 - totaled. Sanwiched on the Kennedy Expressway |
||
|
05-05-2014, 10:36 AM
|
|
|
Registered User

Join Date: Jan 2013
Posts: 1,724
|
Looks like you got pretty good results on the scooby, vash.
I tried everything from toothpaste to plastic polish on one car. Finally went the wet-sand route with meguiars plastx to clean up and was pleased with the results. $1,000 for replacement headlights for a dd is highway robbery... 
__________________
bunch of random cars and bikes. |
||
|
05-05-2014, 10:46 AM
|
|
|
Platinum Member

Join Date: Jul 2001
Location: Leave the gun. Take the cannoli.
Posts: 21,189
|
I wetsanded, then used a buffer and plastic polish. Worked well, but can melt, so feel them and don't let get too warm if you machine buff.
Lasted a few years, but I didn't clearcoat or use any UV coating. |
||
|
05-05-2014, 10:48 AM
|
|
|
Registered
Join Date: Jul 2006
Location: Honolulu, HI
Posts: 9,895
|
My Sam's Club does headlight refinishing for $29.98 with a 5 year warranty.
__________________
The fun - '06 Carrera, '79 930, '06 S4 Avant, '16 i8 The mundane - '24 Tesla Model 3, '22 Tesla Model Y, '19 Tacoma |
||
|
05-05-2014, 04:24 PM
|
|

|
|
Double Trouble
Join Date: Nov 2002
Location: North of Pittsburgh
Posts: 11,706
|
for $79.00 I replaced both front units on my Caravan. Done....that included the bulbs as well.
__________________
I used to be addicted to the hokey pokey..........but I turned myself around.. 75 914 1.8 2010 Cayenne base |
||
|
05-05-2014, 04:54 PM
|
|
|
MAGA
Join Date: May 2004
Posts: 10,806
|
I simply use my buffer with the same 3m product I use on paint. It takes very little time to make headlights and taillights look like new again (at least for awhile).
__________________
German autos: '79 911 SC, '87 951, '03 330i, '08 Cayenne, '13 Cayenne 0% Liberal Men do not quit playing because they get old.... They get old because they quit playing. |
||
|
05-05-2014, 04:56 PM
|
|
|
Registered
Join Date: Oct 2004
Posts: 15,612
|
Yup, I used the Meguire's kit that goes on the drill too. It works well.
Whatever you do, do not buy aftermarket lights. Just spring for factory lights if you have to replace. |
||
|
05-05-2014, 05:41 PM
|
|
|
one of gods prototypes
|
We have a Mobile guywho does them for our shop. .... less than 100 bucks, sands, polishes, and uv clear coat......
It is an art, this guy is really really good..... Well done |
||
|
05-05-2014, 05:44 PM
|
|
|
Almost Banned Once
Join Date: Feb 2009
Location: Adelaide South Australia
Posts: 38,642

|
Quote:
UV causes this but not so much from the sun IMO. The lights themselves probably do most of the damage. Unlike you I only used a buffer and some polishing compound. Next time I'll try wet rubbing them and see if it lasts longer.   
__________________
- Peter |
||
|
05-05-2014, 05:45 PM
|
|
|
Registered User
|
Here's a brief tutorial:
Ok..get your materials in order. Masking tape, 2000, 2500, 3000 grit sandpaper, bucket of water, PlastX polish and microfiber cloths 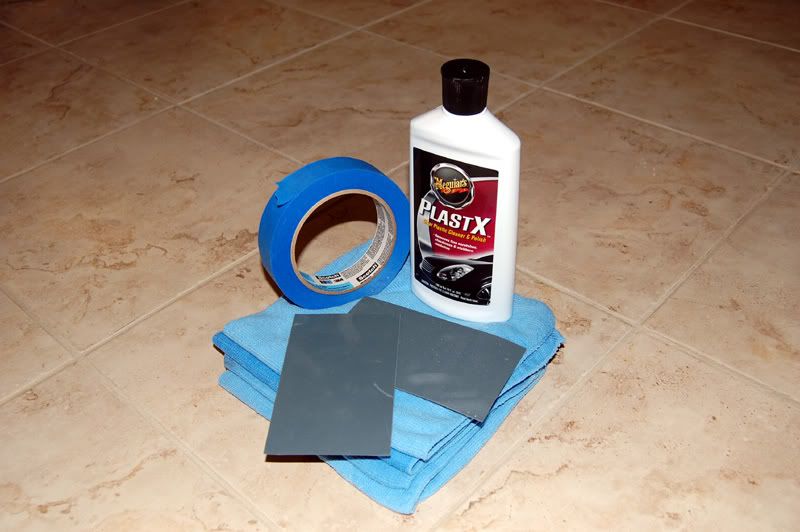 Mask off around the light. If you slip and sand your paint, you'll hate yourself. 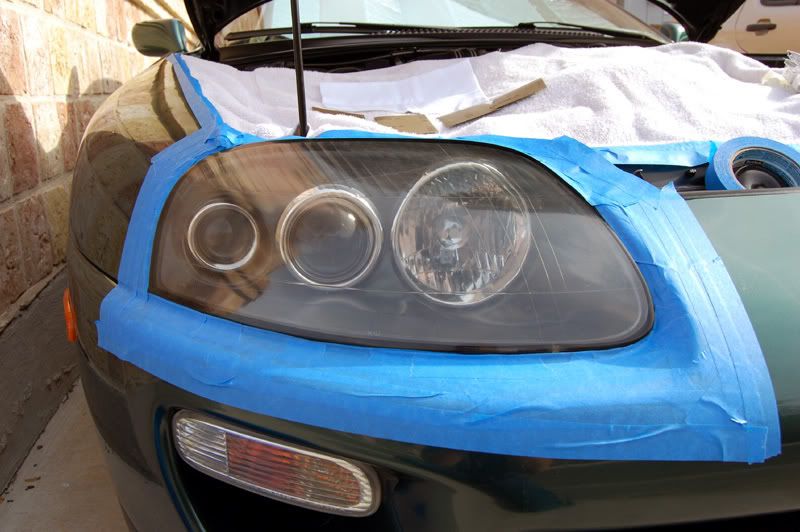 Soak the paper for at least 15 minutes. The more water the merrier! Using the lowest grit, start sanding in ONE DIRECTION ONLY,(side to side). Keep the sandpaper wet and dip it in your bucket of water frequently! Dry it off, and admire how bad it looks now!. Don't panic..we're not done yet! 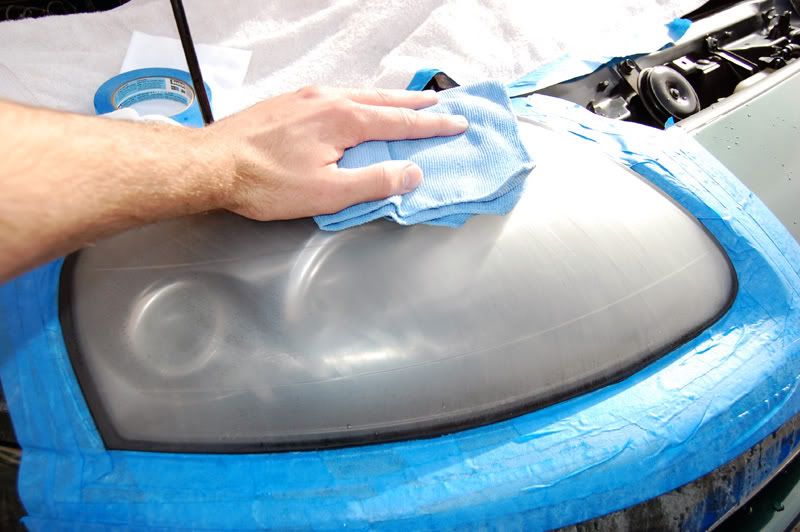 Switch to the next finer grit, and repeat the step above, but this time go in the OPPOSITE DIRECTION (up and down). Remember, water is our friend! 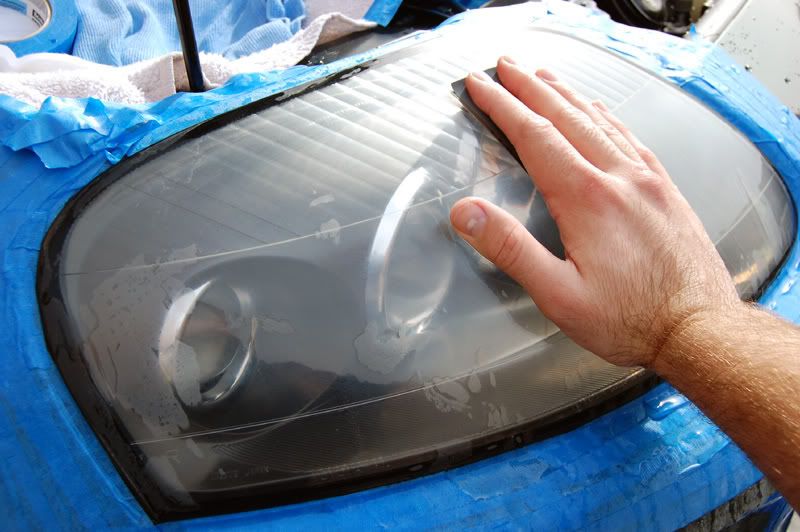 Dry it again, and you can see it looks better as we go up in grit. 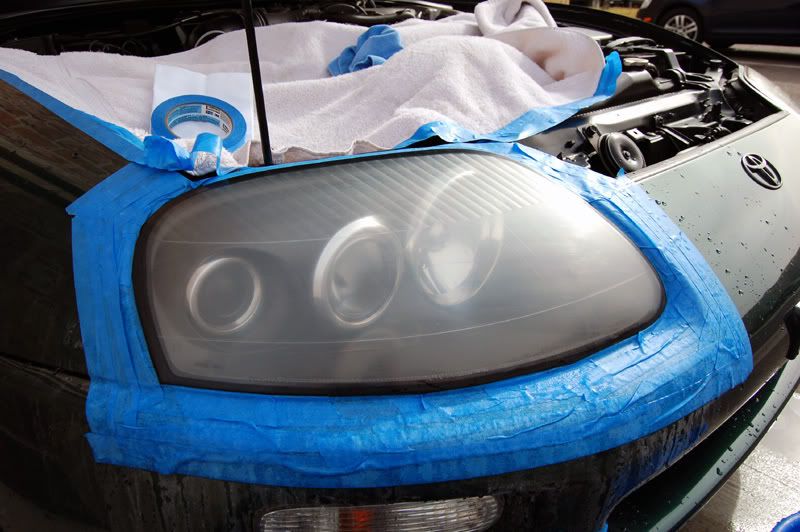 Repeat the process again with your finest grit. Again, OPPOSITE DIRECTION with plenty of water. Dry it off. It looks pretty good at this point. You can choose to remove the tape, since it will have some grit and debris on it from the sanding. You don't want this grit to contaminate the final polishing process.  Generously apply the PlastX. Don't skimp. I prefer using a cloth instead of my bare hand. 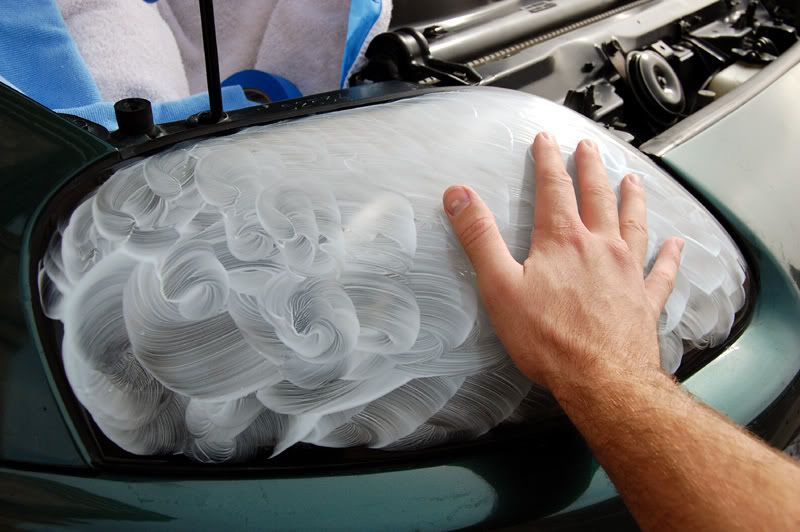 Using your microfiber cloth, rub off .. repeat several times with FRESH rags until the PlastX is dry and gone. Be sure to polish until it's dry, since PlastX has diminishing abrasives in it. 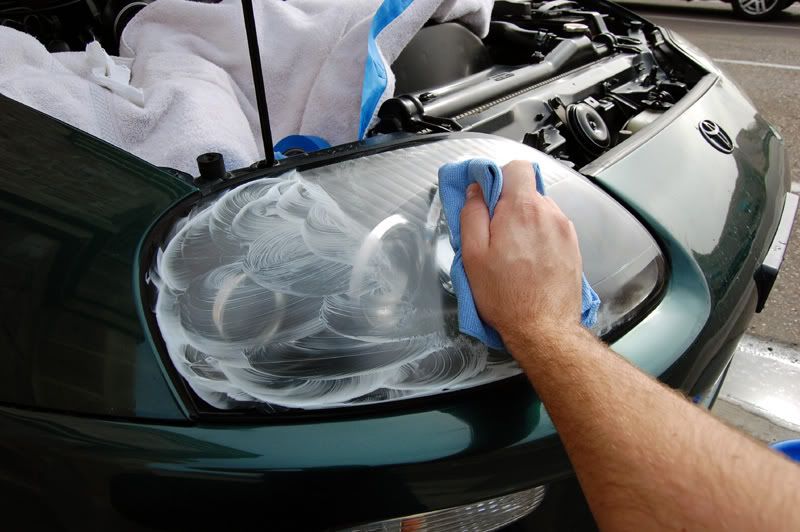 Finished: 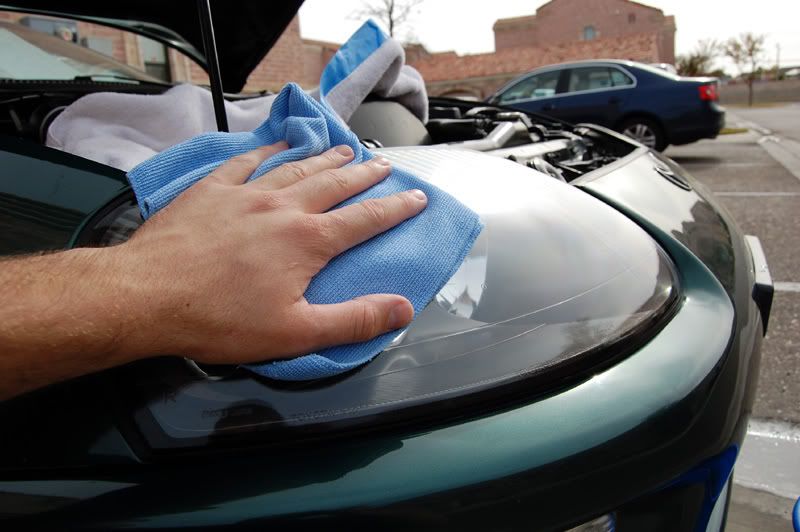 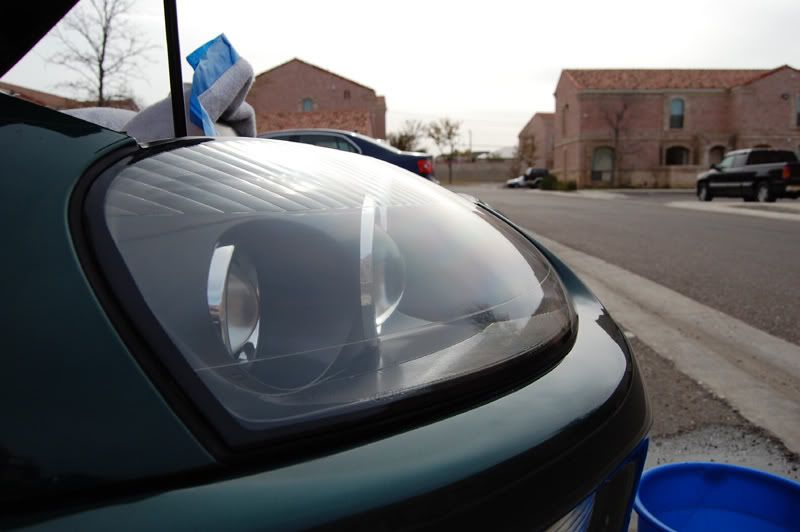
__________________
1986 911 Targa We affirm that the worlds magnificence has been enriched by a new beauty: the beauty of speed. A racing car whose hood is adorned with great pipes, like serpents of explosive breath - a roaring car that seems to ride on grapeshot.... |
||
|
05-05-2014, 06:07 PM
|
|
|
Edministrator

Join Date: Aug 2003
Location: SF east bay
Posts: 25,023
|
I've got a girl who touches-up paint chips and scratches, and also refinishes headlights professionally for $80 a pair. Finishes the job with a clear coat. For all the work and practice to get good at it, that seems like a bargain to me. Prior to that, I used to buy OEM headlights on eBay for a fraction of new, but $80 trumps that.
__________________
Good post? Leave a tip! O - $1 O - $2 O - $3 |
||
|
05-05-2014, 09:18 PM
|
|
|
Run smooth, run fast

Join Date: Aug 2008
Location: South Carolina
Posts: 13,450
|
Why do the instructions for these restorations always have you sanding one way for the first grit, then perpendicular for each one after that... but the final polishing is done in a circular motion?
Is it because most people can't modulate pressure when sanding in a circular motion?
__________________
- John "We had a band powerful enough to turn goat piss into gasoline." |
||
|
05-05-2014, 10:04 PM
|
|


 My former car
 1974 Porsche 911 2.7
 1995 Porsche 993
 Eva
Eva Das Eos-Gone But Not Forgotten...
 Battle Wagon
 1973 Porsche 914 1.7 very modifed
 1987 Porsche 944
 2009 Ford Mustang
 1985 Porsche 911 carrera targa 3.2

