|
|
|
|
|
| Author |
|
|
Registered

|
Attaching Fibreglass Flares
If one wanted to put fibreglass flares front and rear, what is involved in the process of attaching them and prepping for paint?
Obviously the corresponding front and rear bumpers will mount as the existing ones do. Just curious for future reference. I was looking at the RS and RSR pieces from Rennspeed. And what's the deal with long hoods? Jim
__________________
Jim Dean LL.B. - London, Ont, Canada. 1969 911T "Blood Orange" Euro (Brought over from Germany in 86) Engine and brake system rebuilds 2006 & 2007 "Oversteer scares passengers, understeer scares drivers." |
||
 12-08-2004, 12:14 AM
|
|
|
Administrator

Join Date: Feb 2000
Location: Los Angeles
Posts: 13,334
|
KevinP73 did a thread on this when he bonded fiberglass flares to another Pelicanite's car.
__________________
Jack Olsen 1972 911 My new video about my garage. A video from German TV about my 911 |
||
|
12-08-2004, 12:45 PM
|
|
|
Registered
|
I did a search but couldn't locate a thread on fiberglass flares that was specific to adhesion...
__________________
Jim Dean LL.B. - London, Ont, Canada. 1969 911T "Blood Orange" Euro (Brought over from Germany in 86) Engine and brake system rebuilds 2006 & 2007 "Oversteer scares passengers, understeer scares drivers." |
||
|
12-08-2004, 03:19 PM
|
|
|
1.367m later
Join Date: Feb 2002
Location: small farm town Iowa..........at last
Posts: 6,357

|
give me a couple minutes to finish in the booth and I'll run you thru the process.
__________________
non velox ad propitiare, verisimile non oblivisci If it's not The Original Automotive Innovations and Restoration, then it's just hot AIR. |
||
|
12-08-2004, 03:34 PM
|
|
|
1.367m later
Join Date: Feb 2002
Location: small farm town Iowa..........at last
Posts: 6,357
|
It would help to have photo's for reference but I'll try to describe the process the best I can.
First your going to position the new flares on the side of car. You can use the bumper and rocker panels to do this. Once your happy with the position of the flares scribe a line around the outer perimeter of the flare. The flare will need to be held in place as your adhesive cures so it's best to drill all your holes now. I like to use as few screws as possible but this is actually determined by the quality of the fiberglass. Locate these screws about an inch from the outer edge of the panel. Some people use rivits or clamps to hold the panel in place but I prefer screws because it lets you fine tune the pressure needed to hold the new panel without squeezing out all the adhesive. Most adhesives reccommend about an .020 to an .030 thickness for the adhesive to work best. I'll tell you how to determine this thickness later. Now that you've positioned the flare and you've drilled all the screw holes needed and you've scribed the outer edge, remove the panel and set it aside for now. Trim the original panel back about 4" inside the scribed line. This 4" will be the mating surface for the two panels. Using a fresh 36 grit disc on a grinder remove all the paint and any fillers that might be on the panel. You will also have to clean the underside of the original panel of all paint or undercoating. Now also grind the backside of the fiberglass panel that you are going to add.
__________________
non velox ad propitiare, verisimile non oblivisci If it's not The Original Automotive Innovations and Restoration, then it's just hot AIR. Last edited by KevinP73; 12-08-2004 at 04:57 PM.. |
||
|
12-08-2004, 04:54 PM
|
|
|
1.367m later
Join Date: Feb 2002
Location: small farm town Iowa..........at last
Posts: 6,357
|
I like a product called "fiberglass resin jelly" made by "Bondo" or I've used with good result a 3M product called "panel adhesive". Both are a two part mixture that allows about a 40 minute working window. It should only take 15 to 20 minutes to apply the adhesive to the mating surfaces and install all your screws if you work quickly.
"Butter" both panels with enough adhesive to cover the surfaces completely. No need to use too much as you don't want or need this stuff dripping out as you work. As for that .020 to .030 thickness for the adhesive. I roll out a length of wire from my mig welder, it's .030 but if you don't have a mig welder use small paper clips and position them about 10" apart along the edge of your steel panel. These will stay in the mix forever so try to use as few as you can while being confident in the thickness of your adhesive. Place the new panel on and screw it down. Again you don't want to screw too tight and squish all the adhesive out. Sit back now and marvel at how easy it really was, maybe even pop a top and watch closely as the glue dries. At least 24 hours.
__________________
non velox ad propitiare, verisimile non oblivisci If it's not The Original Automotive Innovations and Restoration, then it's just hot AIR. |
||
|
12-08-2004, 05:10 PM
|
|

|
|
1.367m later
Join Date: Feb 2002
Location: small farm town Iowa..........at last
Posts: 6,357
|
Break time !! I'm heading home for the night but will continue after navigating the 405 and a quick dinner.
Two hours tops.
__________________
non velox ad propitiare, verisimile non oblivisci If it's not The Original Automotive Innovations and Restoration, then it's just hot AIR. |
||
|
12-08-2004, 05:12 PM
|
|
|
Registered

Join Date: Sep 2003
Location: Colorado Springs
Posts: 1,381
|
Kevin,
I'll be tackling this soon for my rear RSR flares. My flares have a little flange on them. Where does this go? Also, any one have pics of the process???
__________________
GruppeB #935 84 Carrera Targa B.A.S.T.A.R.D. (for sale) 82 SC RSR Project (on ebay) 95 Dodge Ram 2500 03 Toyota 4runner |
||
|
12-08-2004, 06:09 PM
|
|
|
1.367m later
Join Date: Feb 2002
Location: small farm town Iowa..........at last
Posts: 6,357
|
Quote:
__________________
non velox ad propitiare, verisimile non oblivisci If it's not The Original Automotive Innovations and Restoration, then it's just hot AIR. |
||
|
12-08-2004, 06:27 PM
|
|
|
1.367m later
Join Date: Feb 2002
Location: small farm town Iowa..........at last
Posts: 6,357
|
Once the adhesive has cured you'll want to remove the screws.
Now comes the ugly part. You've cleaned the underside of the original panel, no doubt a little of the adhesive has been forced out on the underside of the mating surface and has hardened. This will have to be cleaned off. The grinder with a 36grit disc should do the trick. Using a combination of fiberglass mat and fiberglass cloth (one layer 3ounce mat and one of cloth)I patch over the back of the mating surface the entire perimeter of the joint between the new panel and the original. Just imagine a fiberglass band aid half on the new fiberglass panel and half on the original steel panel. This will double the the surface area of the bond. You new panel is not just bonded on the outside but on the inside as well. I've seen one car that I did this way after it slide down a gaurd rail. It seperated the laminated fiberglass flare but didn't break the bonded surface. It will be very strong. Finishing the outer surface is easy. Grind the joint smooth and apply filler to the panel. Taper the new panel into the original and prime and paint as desired. There thats it. Hope I made it clear enough.
__________________
non velox ad propitiare, verisimile non oblivisci If it's not The Original Automotive Innovations and Restoration, then it's just hot AIR. |
||
|
12-08-2004, 06:41 PM
|
|
|
Registered
Join Date: Sep 2003
Location: Colorado Springs
Posts: 1,381
|
Kevin,
My flares have a slightly indented edge where the flare mounts. It goes all the way around. It looks as though it is a mounting point for the metal to meet flush with the flare. I don't have a picture. I've seen other flares with the same "lip".
__________________
GruppeB #935 84 Carrera Targa B.A.S.T.A.R.D. (for sale) 82 SC RSR Project (on ebay) 95 Dodge Ram 2500 03 Toyota 4runner |
||
|
12-08-2004, 06:42 PM
|
|
|
Registered
|
Thanks a bunch Kevin
Jim
__________________
Jim Dean LL.B. - London, Ont, Canada. 1969 911T "Blood Orange" Euro (Brought over from Germany in 86) Engine and brake system rebuilds 2006 & 2007 "Oversteer scares passengers, understeer scares drivers." |
||
|
12-08-2004, 07:12 PM
|
|

|
|
1.367m later
Join Date: Feb 2002
Location: small farm town Iowa..........at last
Posts: 6,357
|
your welcome, if any questions pop up don't hesitate to ask
__________________
non velox ad propitiare, verisimile non oblivisci If it's not The Original Automotive Innovations and Restoration, then it's just hot AIR. |
||
|
12-08-2004, 07:35 PM
|
|
|
1.367m later
Join Date: Feb 2002
Location: small farm town Iowa..........at last
Posts: 6,357
|
Quote:
__________________
non velox ad propitiare, verisimile non oblivisci If it's not The Original Automotive Innovations and Restoration, then it's just hot AIR. |
||
|
12-08-2004, 07:37 PM
|
|
|
1.367m later
Join Date: Feb 2002
Location: small farm town Iowa..........at last
Posts: 6,357
|
Here's a picture originally posted by Adam Chaplin of a 934 with the flares attached as intended.

__________________
non velox ad propitiare, verisimile non oblivisci If it's not The Original Automotive Innovations and Restoration, then it's just hot AIR. |
||
|
12-08-2004, 07:43 PM
|
|
|
Registered
Join Date: Apr 2003
Location: Terre Haute, IN
Posts: 2,949
|
Thanks for your time and advice for all of us not in the "craft" who might attempt this. You make me feel a little more comfortable going this route versus metal only. I've done steel flares and the usual OEM quarter replacements, but this would be first FG flares. Again, thanks.
__________________
Luke S. 72 RS spirit 2.7mfi, 73 3.2 Hotrod on steelies, 76 993 3.3efi TT, 86 trackrat, 91 C4s widebody,02 OLA winning 6GT2, 07 997TT, 72 914 v8,03 900 rwhp 996TT |
||
|
12-08-2004, 08:03 PM
|
|
|
Registered

|
Jim,
My buddy just did fiberglass flares on a 914 for a friends 914 vintage trans am racer clone... we've both been restoring and tweaking Porsches for years and do very detailed work on everything we touch. Here's a URL with some progress shots, the first 12-24 shots will probably help you out. http://community.webshots.com/scripts/misc.fcgi?action=invitePickup&uri=album/111692488bpXAzU If you have trouble just get to Webshots.com and search for Nick Cole's 914 Have fun! Chris 99Boxster 88 911 99 A4 Avant .
__________________
Coz 88 911 72 914-6 Vintage Racer 76 914-6 Vintage Racer |
||
|
12-08-2004, 08:08 PM
|
|
|
Registered
Join Date: Sep 2003
Location: Colorado Springs
Posts: 1,381
|
Kevin,
No, they are RSR flares meant for bonding. I wish I had a picture... Thanks...
__________________
GruppeB #935 84 Carrera Targa B.A.S.T.A.R.D. (for sale) 82 SC RSR Project (on ebay) 95 Dodge Ram 2500 03 Toyota 4runner |
||
|
12-08-2004, 08:47 PM
|
|


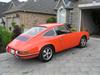 1969 Porsche 911T
 Cup04
Cup04 Trackster
