|
|
|
|
|
| Author |
|
|
Registered
|
Although I can tape off the hardware on the outside of these seats, my preference would be to remove it to allow me to dye the entire leather. In the photo, there are two screws at the top and a bolt at the bottom. Before I mess things up, does anyone know:
1) Will removal of the two screws and single bolt on each side allow the hardware to be removed? 2) Is there anything attached to these screws and bolts inside the seat that will come loose or are they just screwed into threaded holes? 3) Any other potential issues I should be aware of in disassembly? 4) Any suggestions for keeping the side bolsters away from the seat bottom so I can dye down between them? Any help will be appreciated. 
|
||
 01-21-2005, 10:51 AM
|
|
|
Registered
Join Date: Nov 2004
Location: Hermitage, TN
Posts: 126
|
Removing the screws and the bolt will allow the hardware to be free from the seat sides, but the release cable will still be connected. There should be a C-clip on the actual hook that you can remove and will let the side pieces be free of the seat. Once you see the back of the actual hinge it will make more sense. The rod that connect both hinges operates on a gear for the reclining feature. Make sure when you reassemble the seats that the hinges are lined up or the recline won't work correctly. Removing these will basically separate the seat into two halves. Hope this helps.
__________________
Chris '80 SC |
||
|
01-21-2005, 11:12 AM
|
|
|
Registered
|
Thanks Chris. This is very helpful information. I'll try separating the pieces tonight. Do you know if the screws and bolts just thread into holes or whether there is anything inside like a nut that has to be held in place? Also, is the hook you mention on the back where the release cable connects?
|
||
|
01-21-2005, 02:11 PM
|
|
|
Registered
Join Date: May 2004
Posts: 2,052
|
On mine, ('87 Carrera) I simply unbolted them, nothing on the inside. Unbolt, disconnect the cable and done. Really quite easy
 -Chris
__________________
1987 Guards Red Targa (sold) 2006 Toyota Tundra DC 4x4, the "man-e-van" 1998 CR500 Well on the fringe...... |
||
|
01-21-2005, 02:15 PM
|
|
|
Registered
Join Date: Nov 2004
Location: Hermitage, TN
Posts: 126
|
Chris is correct. The screws and bolt simply thread in. The hook that I referred to is where the cable connects and the "hook" is the actual piece that locks the seat in place unless it is released by the sliding knob on the side of the seat. Once you get into it, it will seem much simpler.
__________________
Chris '80 SC |
||
|
01-21-2005, 03:29 PM
|
|
|
Registered
|
Got it.
The instructions were perfect. By removing the two top bolts, I am able to lift the back an inch or two without completely removing the back. This is plenty for me to reach the area between the back and bottom to prep and dye the leather. I can also access the area behind the hinge without taping it off. Now I'm on to a few days of wet sanding.
much thanks. |
||
|
01-21-2005, 09:11 PM
|
|

|
|
Banned

Join Date: Jan 2004
Location: San Jose, Ca
Posts: 1,897
|
Chris,
Did you dye your seats? I still have the Black Leather 6-way Power seats! Hope you are enjoying your 911. Jason |
||
|
01-22-2005, 05:58 PM
|
|


 2020 BMW X3M competition
 1979 Porsche 911SC
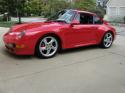 1996 Porsche 993 C4S
 2003 BMW e39 M5
 2005 Porsche 911 Turbo S

