|
|
|
|
|
| Author |
|
|
Registered
Join Date: Apr 2004
Location: San Francisco
Posts: 77
|
Rust
Midways in my rust repair project. I have been very happy to have a mini die grinder with cut off wheels, and with 25 grit grinding pads, as well as a air saw. Got them from Auto Body Store online. Making pieces now for the repairs. Anyone have any thoughts on how to match those compound curves ?
   
|
||
 04-06-2009, 08:19 PM
|
|
|
Registered
|
__________________
Robert Currently Porsche less (but the wife has 2) |
||
|
04-07-2009, 08:34 AM
|
|
|
Registered
Join Date: Apr 2009
Posts: 5
|
Quote:
|
||
|
04-07-2009, 08:31 PM
|
|
|
Registered
|
Shawn, I wasn't very clear I was replying to Dans query, 68's, and earlier are different than the later cars. It's not to hard to find later car repair pieces, pretty hard for a 68
__________________
Robert Currently Porsche less (but the wife has 2) |
||
|
04-07-2009, 10:37 PM
|
|
|
Registered
|
Incredible project !!!!!
What a work !!!!
__________________
LIGHTER = FASTER !!! |
||
|
04-08-2009, 03:54 AM
|
|
|
Registered
Join Date: Apr 2004
Location: San Francisco
Posts: 77
|
Rust
I called around for tubs to cut pieces out of. The ones I found were from later cars and were more rusty then mine. Plus the cheapest one was $850. So I elected to make pieces out of 18 gauge sheetmetal (thanks Milt for mentioning the thickness needed). Got one mostly shaped up last night. I'll send photos of progress when I make some more.
|
||
|
04-08-2009, 09:36 AM
|
|

|
|
Registered
Join Date: Dec 2001
Location: Cambridge, MA
Posts: 44,625
|
Quote:
__________________
Tru6 Restoration & Design |
||
|
04-08-2009, 10:17 AM
|
|
|
Registered
|
Has anyone seen threaded mounts on the rear shelf like in these pics? They are not the rear window defroster ports. I was thinking that they were non-factory but they appeard to be covered with the factory paint/coating. They are threaded on the inside and did not poke through the rear vinly covering. The car is a '68 US 911.
  
__________________
--Dan 1968 911 Coupe 1970 911T Targa 1995 993 Coupe 1997 993 Targa (sold) |
||
|
04-08-2009, 12:42 PM
|
|
|
Registered
Join Date: Apr 2004
Location: San Francisco
Posts: 77
|
Rust
Jesus that looks nasty. The older 911s seem to have those things, but I have no idea what they do.
|
||
|
04-08-2009, 12:48 PM
|
|
|
Registered
|
fortunately the rust isn't too bad but I still need to attack the innder fender area where the shelf attaches. Already started cutting out the other areas. The guy from the UK is stating it will be about $200 for the shelf but it would have to be shipped from the UK too.
__________________
--Dan 1968 911 Coupe 1970 911T Targa 1995 993 Coupe 1997 993 Targa (sold) |
||
|
04-10-2009, 09:50 AM
|
|
|
"farking Porsche hero"
|
Quote:
__________________
Rich '66 911 #303872 '07 Cayman '17 Macan '58 Land Rover S2 88" |
||
|
04-10-2009, 10:50 AM
|
|
|
Registered
|
Update: Engine Removed
Update:
I spent a little bit more time with the wire wheel grinding rust away, and soon decided that I'd eventually need access to the same areas from the engine side. So, I dropped the engine+trans today.  It was my first drop and all went smoothly. I spent a lot of time reviewing this thread: supporting engine at removal Lots of good ideas. I went to the hardware store with intentions of buying some nice medium duty casters and building a dolly from scratch, but in the end I went with buying a "heavy duty" furniture dolly, and adapting it. It turned out really well, and was easy on the pocketbook. All it took to make it suitable was adding some blocks of 3/4 inch plywood to the center of it to provide the support for the case. I thought I had taken a picture of it but.....I can't find it. I hit a snag trying to separate the trans from the engine. I've done this before with the VW, so I figured it was just a matter of supporting it and unscrewing the 4 bolts. After wrestling with it a bit and getting more than a little tired I stepped back and looked for anything missing that might be holding the trans on. Then I saw this was still connected.... NOTE: Picture was taken before the drop and only serves to illustrate the throwout bearing fork actuator.  and it was pushing against the exhaust cross over tube. So, I took a guess and broke out the cir-clip pliers removed it and knocked the fork off. As soon as I did that the trans pulled away very easily. As I'm sure any experienced readers can attest. But, now I'm worried that the wiggling I did trying to get the trans to part with the engine prior to removing the fork may have done to the input shaft bearing. Should I be worried about this? Is there something I should check?
__________________
1973 911T | Four owner car | My stewardship (2008-Present) 1972 VW Super Beetle | Two owner car always in the family | Gone, but not forgotten |
||
|
05-02-2009, 10:20 PM
|
|

|
|
sancho
Join Date: Sep 2008
Posts: 129
|
nice work, loving the progress
keep it up |
||
|
05-03-2009, 09:22 AM
|
|
|
Warren Hall Student

|
I had less rust than you but I opted to do the whole seat pan. It was just a 2- day job. Easy as far as bodywork goes.
Here's the tutorial on the Paint and Body Forum. Part 1 Part 2
__________________
Bobby _____In memoriam_____ Warren Hall 1950 - 2008 _____"Early_S_Man"_____ |
||
|
05-03-2009, 12:49 PM
|
|
|
Warren Hall Student
|
Also thought I'd mention that in the 1st photo you posted with the circled areas. The area to the left in the picture that you circled is not part of the seat pan but part of the longitudinal which runs from the front wheel well all the way back to the rear cross member. This piece is actually several layers and difficult to work on. I would avoid cutting on it as it probably isn't rusted through and still structurally in good shape. Just take a wire wheel to it and then do some rust treament.
__________________
Bobby _____In memoriam_____ Warren Hall 1950 - 2008 _____"Early_S_Man"_____ |
||
|
05-03-2009, 01:02 PM
|
|
|
Registered
|
Bobby,
Thanks for the links and info about the longitudinal. This afternoon I was spending some time cleaning out some old AC hoses in the engine bay, and thinking about possibly outsourcing the rust repairs as a way to save sometime. But, after reading your write up and seeing some of your pictures I'm re-invigorated to tackle this myself. So, Thanks for that too! The pan does look pretty straightforward. I just need to find some donor metal that is local. Where did you find the replacement metal?
__________________
1973 911T | Four owner car | My stewardship (2008-Present) 1972 VW Super Beetle | Two owner car always in the family | Gone, but not forgotten |
||
|
05-03-2009, 03:13 PM
|
|
|
Warren Hall Student
|
A great Pelicaneer named Dave Winters (DTW) helped me out by cutting a donor piece from an SC he cut up. It was a lot of work for him and he's since swore of cutting up sheet metal to sale. It can be a lot of work and no real profit when you figure what your time is worth. Shaun (Shaun 84 Targa) cuts up cars from time to time so you might check with him.
If you can find a local donor car then you can go cut it out yourself which I've done before. Get yourself a spot weld cutter so you won't have to put holes in your longitudinals. Also get yourself a can of WD40 to spray the cutter and keep the RPMs down to control the heat. Heat dulls blades in no time. You might practice on a scrap to get the feel for it.
__________________
Bobby _____In memoriam_____ Warren Hall 1950 - 2008 _____"Early_S_Man"_____ |
||
|
05-03-2009, 04:55 PM
|
|
|
Registered
Join Date: Dec 2001
Location: Cambridge, MA
Posts: 44,625
|
Quote:
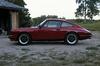
Did some work on this 72 yesterday. Sad story. Everyone said this car was too far gone (when I posted here) but I kept it thinking I could weld in a new front suspension pan, left rear quarter, some patchwork here and there and it would be good body. A lot of work, but worth it as a signal yellow 72. I tried to sell the entire thing for the price of the oil system, still no takers, but plenty who need sheetmetal. My suspicions were correct. This is (was) a very solid car and shouldn't have been cut up. The entire rear deck and seats are factory new, already new that, but the rest of the car was really solid as well. Too late now.  At least the metal is going toward cars that are getting back on the road. Going to try to get the wiring harness out in one piece. At least the metal is going toward cars that are getting back on the road. Going to try to get the wiring harness out in one piece.hope you are well Bobby.   
__________________
Tru6 Restoration & Design |
||
|
05-03-2009, 05:58 PM
|
|
|
Warren Hall Student
|
Doing great Shaun. When you coming back out to the west coast? It was greaqt gettin together when you were out here.
Poor Targa. They just don't get the respect that coupes do. There day will come.I have no doubt you'll come out ahead parting that car. Even the 71'S Targa I parted was worth more in parts. Go figure.
__________________
Bobby _____In memoriam_____ Warren Hall 1950 - 2008 _____"Early_S_Man"_____ |
||
|
05-03-2009, 07:10 PM
|
|
|
Registered
|
Update: Engine Bay Cleanup
Earlier this week I spent some time cleaning up the engine bay. I started by removing the old AC lines and followed that up by removing the engine bay wiring harness.
Here's how it looked when I called it a day.  Some rather strange foam jamed up in here. Tough to tell if it was from the factory or not...... Anyone know where I can get a replacement rubber tube for the wiring harness? Mine is rotten.  I'm thinking the upper rubber shock mounts are toast......  Now I need to drain the gas tank so I can remove the fuel pump and lines. Then get the sheet metal from Shaun. Shouldn't be too long now, before I can start cutting out the panels. I also need to remove the rear window.....maybe I'll tackle that tomorrow.
__________________
1973 911T | Four owner car | My stewardship (2008-Present) 1972 VW Super Beetle | Two owner car always in the family | Gone, but not forgotten Last edited by DSouth; 05-08-2009 at 03:14 PM.. |
||
|
05-08-2009, 03:11 PM
|
|


 1968 Porsche 911T
 1986 Porsche Carrera
 Porsche 996 turbo Techart GT street TA096 / T3
 1970 Porsche 911T 2.2E
 1968
1968 1970 and 1997 Porsche 911 and 993
  1966 Porsche 911
 1973 Porsche 911
 73' Porsche Targa
