|
|
|
|
|
| Author |
|
|
Registered
Join Date: Aug 2003
Location: Westchester, NY
Posts: 889
|
What's the secret to cutting good patch panels for rust repair?
What techniques do you guys use? I find myself grinding and grinding and grinding to get the panels to fit right. I've been using the cardboard method of cutting a piece of cardboard to fit the patch area and then using that to trace the cut on the sheet metal panel for the patch.
What's a better approach?
__________________
Sean 1982 SC D-Stock #372 NASA GTS2 1971T restoration in progress, read about it here: http://911restorationmadness.blogspot.com/ |
||
 11-24-2009, 04:45 AM
|
|
|
Almost Banned Once
Join Date: Feb 2009
Location: Adelaide South Australia
Posts: 38,598

|
I have used the cardboard method too. I don't think there's a better way.
One thing to try. Take your time measuring and re measuring before cutting. Obvious I know but sometimes it's helpfull if someone suggests it anyway. To be honest I think fixing rust is one of the worst jobs in restoring a car. It's like you're never 100% happy with the results regardless of how long it took you to get there. ....Bang Bang, Grind Grind... More bondo? No less... looks like crap... Cut it out try again.. Not again... More rust behind. Bang Bang,.... Change cutting disk. Goggles down ear muffs in place... More cutting. Take a break... Back again. More cutting... Making the patch panels... Now the welder. Sparks flying more sparks... That smell from burning metal... Not bad but that can't be good for you. Finally getting somewhere. Looking pretty good. Just a smear of bondo and she's ready for the primer. There goes another weekend but the end is in site. More sheet metal needed but what gauge to use?... My pants have holes in them! Do I buy a whole sheet or just a bit? A whole sheet only costs $20 more than a small piece but I only need a small piece! What to do? I need more primer... Use POR15 or something else? What am I doing? My friends have lives and relationships. I haven't seen my girl friend for weeks ....Bang Bang, Grind Grind... More bondo? No less... looks like crap... Cut it out try again.. Not again... More rust behind. Bang Bang,.... Change cutting disk. Goggles down ear muffs in place... More cutting. Take a break... Back again. More cutting... Making the patch panels...
__________________
- Peter |
||
|
11-24-2009, 05:47 AM
|
|
|
(the shotguns)
Join Date: Feb 2006
Location: Maryland
Posts: 21,915
|
Great question! Looking forward to reading the answers.
Prob'ly should be in the bodywork forum though.
__________________
***************************************** Well i had #6 adjusted perfectly but then just before i tightened it a butterfly in Zimbabwe farted and now i have to start all over again! I believe we all make mistakes but I will not validate your poor choices and/or perversions and subsidize the results your actions. |
||
|
11-24-2009, 05:50 AM
|
|
|
1980 911 SC
|
I try to cut the patch panel a little bigger than the rusted area, and then fit it on top of the rusted area. Use self tapping screws to hold it in place over the rusted area. Then cut using a wheel or air saw going thru both panels at the same time. They should be identical in size and shape.
This method works well when butt welding fender flares. It works if its an area that allows this technique, otherwise the grinding and fitting process can be a PIA.
__________________
Life's a Beach Last edited by sailchef; 11-24-2009 at 06:12 AM.. |
||
|
11-24-2009, 06:04 AM
|
|
|
Registered
|
If possible do what sailchef said. If it's a square patch you can shave off very thin slices on a metal shear. Finally the bench grinder and a hand grinder..
__________________
Gary R. |
||
|
11-24-2009, 06:40 AM
|
|
|
Registered
Join Date: Aug 2003
Location: Westchester, NY
Posts: 889
|
I can hear the crickets chirping in the bodywork forum.
sc_rufctr - LOL! That's exactly it. I'll give sailchef's approach a try - seems like great idea for a flat area with room around it.
__________________
Sean 1982 SC D-Stock #372 NASA GTS2 1971T restoration in progress, read about it here: http://911restorationmadness.blogspot.com/ |
||
|
11-24-2009, 07:05 AM
|
|

|
|
1980 911 SC
|
It works well, go slow, take your time cutting, you will be going thru two thicknesses of metal, you need a compressor large enough to power up an air saw, and put in enough screws to keep it from moving. After that you just need to tack the holes shut.
__________________
Life's a Beach |
||
|
11-24-2009, 07:13 AM
|
|
|
Senior Advisor

|
Sheet metal work is like drywall, most can do it but it takes a craftsman to really make it look great. Repairmen take years to perfect there skills in doing this so the more you try the better you will get. I loath doing this type of work and my hats off to you for attempting this yourself. Keep banging away! There is a place that makes a lot of sheet metal replacement parts (Staddarts) not correct spelling.
__________________
08 Cayenne Turbo Last edited by James Brown; 11-24-2009 at 08:10 AM.. |
||
|
11-24-2009, 07:53 AM
|
|
|
1980 911 SC
|
Once you get your panels matched up and the screws holding it in place you will need to drill a hole on the perimiter large enough to insert the saw blade and start cutting. I'm no expert but I've had some success with this technique.
__________________
Life's a Beach |
||
|
11-24-2009, 08:33 AM
|
|
|
Registered

Join Date: May 2003
Location: Winnipeg
Posts: 750
|
Quote:
Regarding the body saw blades, I just cut hack saw blades down and use them. (<<<$). |
||
|
11-24-2009, 11:55 AM
|
|
|
Evil Genius

|
Sean,
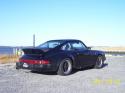
best wishes on your new panels and project..........keep us informed on how my panel cuts meld into your car. For Cutting, I don't use air saw, a sawsall with bi-metal blade is like a hot knife through butter...........trust me I know. Sean got the final cuts out of my '82 SC that broke the camels back, he wanted both front door body lower hinge areas........just as the second piece (drivers doorside) came free the lower pan folded in half and almost fell off the jack stands.........note the 2x6 emergency brace, and the rear torsion tube is above the dash gauge line in this photo. Sean, I like your cardboard idea, and also the over-lay both panels and trim for a marriage line between them. MEASURE TWICE, CUT ONCE. A Sawsall is your friend when cutting up a porsche, "I know a thing or two about that task" - sigh, 15 months ago this was a mint '82 SC till a little old lady hit us head on with her going the wrong way on a one way road: 
__________________
Life is a big ocean to swim in. Wag more, bark less. 
|
||
|
11-24-2009, 12:29 PM
|
|
|
I would rather be driving

Join Date: Apr 2000
Location: Austin, TX
Posts: 9,108
|
I have used the "lay over patch and make a slice to size" method many times. It works great. If you cut carefully you will leave a perfect gap for butt welds. I use a combination of air-saw, grinder with cut-off wheel, jig-saw and whatever else is needed depending on the shape and curvature of the parts.
good luck.
__________________
Jamie - I can explain it to you. But I can not understand it for you. 71 911T SWT - Sun and Fun Mobile 72 911T project car. "Minne" - A tangy version of tangerine #projectminne classicautowerks.com - EFI conversion parts and suspension setups. IG Classicautowerks |
||
|
11-24-2009, 01:15 PM
|
|

|
|
Registered
Join Date: Aug 2003
Location: Westchester, NY
Posts: 889
|
Thanks for the responses. Just out of curiosity, what kind of welder settings are you guys using? I'm using .025 wire and a voltage setting for 24 gauge but still having blow-through problems.
__________________
Sean 1982 SC D-Stock #372 NASA GTS2 1971T restoration in progress, read about it here: http://911restorationmadness.blogspot.com/ |
||
|
11-24-2009, 01:21 PM
|
|
|
1980 911 SC
|
I found that .030 wire worked better for me. Set the voltage a tad lower than recomended and the wire speed a little faster.
You need to watch what else you have drawing current in your garage/shop. The welder wont be pulling enough Amps and you wont know it. You can run the same setting and get different results by turning a couple lights on or off. I ran a dedicated line just for the welder. I ran 30# on the gas flow, kept everything nice and clean.
__________________
Life's a Beach |
||
|
11-24-2009, 01:34 PM
|
|
|
Registered
Join Date: Aug 2003
Location: Westchester, NY
Posts: 889
|
Interesting. I'll try more gas first and then try the .030 again. The setup I'm using works well on new sheet metal, but not the car.
__________________
Sean 1982 SC D-Stock #372 NASA GTS2 1971T restoration in progress, read about it here: http://911restorationmadness.blogspot.com/ |
||
|
11-24-2009, 01:39 PM
|
|
|
1980 911 SC
|
Remember to hold your tip at an angle and just "stitch" weld. Short mini burst 2-3 inches apart and then go back and fill in the gaps. You need to keep everything clean. Both sides of the metal.
__________________
Life's a Beach |
||
|
11-24-2009, 01:40 PM
|
|
|
Registered
Join Date: Aug 2003
Location: Westchester, NY
Posts: 889
|
That's what I'm doing, but as soon as the puddle touches the car sheet metal I get popping and blow through. I've ground the area down a lot, but maybe it's still not clean.
__________________
Sean 1982 SC D-Stock #372 NASA GTS2 1971T restoration in progress, read about it here: http://911restorationmadness.blogspot.com/ |
||
|
11-24-2009, 01:43 PM
|
|
|
I would rather be driving
Join Date: Apr 2000
Location: Austin, TX
Posts: 9,108
|
I usually run a higher voltage and wire speed. This way you get a good clean weld in a short time period. This reduces warping. I always use 0.024" for sheet metal work. Strike the arc on one side of the gap and quickly drag the puddle to the other side. release the trigger while holding the nozzle in place. Let the weld puddle cool for a few seconds in the C25 curtain. Then bump the trigger whilepulling the now separated wire away.
I lilke to tack the seam every 6" on larger parts. Then split the difference on each weld until they are about 1/2" apart. Now turn down the voltage as mentioned before and stitch them all together. Make sure to move around to minimize warping. I like to find a front, middle and end. Stitch a segment in each section then wait a minute or so for them all to cool before stitching the next segment in a section.
__________________
Jamie - I can explain it to you. But I can not understand it for you. 71 911T SWT - Sun and Fun Mobile 72 911T project car. "Minne" - A tangy version of tangerine #projectminne classicautowerks.com - EFI conversion parts and suspension setups. IG Classicautowerks |
||
|
11-24-2009, 01:47 PM
|
|
|
1980 911 SC
|
Keep your tip really clean to allow proper gas flow. If a little ball forms on the end of the wire between each stitch you need to cut it off every time. Just one stitch at a time, very short burst. You barley tap the trigger. The next stitch should be just touching the last. Give it a second between stitches to allow the metal to cool and be sure to overlap just a bit, the last weld will help keep the next weld from burning thru. Slow down. Don't forget to breath. :>)
__________________
Life's a Beach |
||
|
11-24-2009, 01:54 PM
|
|
|
Registered
Join Date: Jan 2005
Location: cooperstown NY
Posts: 894
|
i used a slightly different technique to cut a patch to fix speaker cutouts in an otherwise solid rear package shelf.
i cut the hole square then secured the rough cut patch behind it. then i did a quick shot of spray paint around the cut edge. when you pull the patch panel it will be easy to cut an exact fit. then grind and weld as usual using the above short stitch technique.       
__________________
bob 1972 E pos correction: expensive pos someday.... "shut up and drive!" |
||
|
11-24-2009, 05:18 PM
|
|


 911SC
911SC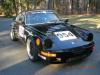 Blackbird
 2005 Porsche 997S 3.8L


 1982 Porsche 911SC 3.0L warmed over
