|
|
|
|
|
| Author |
|
|
Registered
Join Date: Mar 2008
Location: Pittsburgh, PA
Posts: 2,587
|
I used a torch, then I used Marine Clean and a Scotch pad.
|
||
 09-26-2011, 04:31 AM
|
|
|
Tired Member

|
If having the right tools for the job is one of the best things in life, then having new Pelican friends willing to lend you the right tools is right up there, too.
A great big "THANKS" to Greg for the loan of a slide hammer puller and his Home Depot sourced rear bearing tool. I was able to get the hubs out in about 20 minutes and just popped out one of the rear bearings. Greg, I can see how you could stretch the all thread. It was mega tight before it "popped" and started cooperating. I hope to have time this weekend to get the second bearing out, clean up the arms and install the new bearings. BTW - you were absolutely right about the Trailing arm inner bushings. They do have metal sleeves. So I've got another challenge ahead of me. Pictures of old bearings and inner bushing sleeve calling to follow.
__________________
Glenn Daily Driver - '78 911SC RoW Endurance Racer - '85.1 944 Street/Track Project - '86 951 Race Project - 944 Spec |
||
|
09-27-2011, 05:17 PM
|
|
|
Registered
|
Run Forest.........Run............
|
||
|
09-27-2011, 10:16 PM
|
|
|
Tired Member
|
When I pulled the rear hubs, the outer bearing races came out with them. So here is what 33 year old bearings can look like...
  and finally, I've got to figure out how to pull these metal sleeves out. I haven't tried anything yet so any ideas would be appreciated. My first thought is to try to get a screwdriver under one of the edges. 
__________________
Glenn Daily Driver - '78 911SC RoW Endurance Racer - '85.1 944 Street/Track Project - '86 951 Race Project - 944 Spec |
||
|
09-28-2011, 04:10 AM
|
|
|
Registered
Join Date: Mar 2008
Location: Pittsburgh, PA
Posts: 2,587
|
Don't use a screwdriver. You want to avoid gouging the aluminum. I used (recommended buy Chuck Moreland) a cutting disk from a Dremel. Once you get a pretty good slice in it, it comes right out.
|
||
|
09-28-2011, 04:36 AM
|
|
|
Tired Member
|
Quote:
__________________
Glenn Daily Driver - '78 911SC RoW Endurance Racer - '85.1 944 Street/Track Project - '86 951 Race Project - 944 Spec |
||
|
09-28-2011, 05:15 AM
|
|

|
|
Registered
Join Date: Mar 2008
Location: Pittsburgh, PA
Posts: 2,587
|
Quote:
See the attached picture. You want to slice across the sleeves. It's tough to get a cutting wheel in there, so work slowly and cut across it how ever you can. The sleeves are held in by pressure created by the OD of the sleeve being bigger than the ID of the trailing arm. When you slice across the sleeve, it relieves that pressure. Then it can be tapped out using a hammer and very small punch. I wish I had a pic of it, but if you look very closely in the bore of the trailing arm, between the gap in the 2 sleeves, there is another hole in the trailing arm casting. After I sliced the sleeves, I set my punch against the lip of the sleeve directly over that hole. That way the edge of the punch is setting in that hole so it won't gouge the aluminum. 
|
||
|
09-28-2011, 06:14 AM
|
|
|
Tired Member
|
Got it! Thanks.
__________________
Glenn Daily Driver - '78 911SC RoW Endurance Racer - '85.1 944 Street/Track Project - '86 951 Race Project - 944 Spec |
||
|
09-28-2011, 06:18 AM
|
|
|
SC Ray
|
Subscribed!!! Keep up the great work. Please continue to keep us informed with pics. Love to watch the progress. I have a lot of respect for all of you on this site that have kept our beloved cars on the road.
|
||
|
09-28-2011, 07:55 AM
|
|
|
Tired Member
|
Removing the trailing arm bushings.
As Will mentioned there is a hole in the arm under the bushings. This is where you want to cut because it reduces the risk of going too deep and cutting into the arm. Jumping ahead so you can see the hole. This is after the bushing was removed.  I used a dremel type tool but because of the size I could not cut a straight line But had to cut a curve over the hole. Cut slowly and carefully. You really don't want to get so deep that you hit the aluminum of the arm underneath.  Then place a screwdriver or punch on the inner lip and give it a few taps. And out it comes. Just like that. 
__________________
Glenn Daily Driver - '78 911SC RoW Endurance Racer - '85.1 944 Street/Track Project - '86 951 Race Project - 944 Spec |
||
|
09-30-2011, 04:43 AM
|
|
|
Mo money = mo parts
|
Glenn - glad the tools worked out. Please be careful with my valuable Home Depot specials, I think I might have over $10 invested in them, possibly as much as $11.
On a more serious note, the challenge when installing the bearings is to keep them properly aligned as you draw them into the trailing arm. The bearing needs to be pretty straight - aligned with t-arm openeing. If it is off a degree or two, it will probably straighten itself out as it gets deeper. If it is too great an angle, it can get jammed as you continue to crank down on the all tread. I would throw the bearings in the freezer the night before, it may only buy you a thousandth, but every little bit helps. It is tight going in too. You may want to take a few measurements in advance so you can be sure you know when the bearing will be fully seated in the arm.
__________________
Greg 86 Coupe (stock - pretty much like Butzi designed it) - gone, but not forgotten 65 Ducati Monza 250 & 66 Monza Junior (project) "if you are lucky enough to own a Porsche, you are lucky enough" |
||
|
09-30-2011, 06:04 AM
|
|
|
Tired Member
|
Greg, you have no idea how helpful they were/are. I was able to use one of the smaller gear pullers to help get the bearing races off the hubs.
I've taken the day off and am currently siting in front of the parts washer scrubbing nuts, bolts springs and other odds and ends from the rear suspension. Later I'll slide over to the blast cabinet and strip a couple other parts so I can paint them.
__________________
Glenn Daily Driver - '78 911SC RoW Endurance Racer - '85.1 944 Street/Track Project - '86 951 Race Project - 944 Spec |
||
|
09-30-2011, 07:00 AM
|
|
|
Registered
Join Date: Mar 2008
Location: Pittsburgh, PA
Posts: 2,587
|
I'm really glad it worked out for you. And that my brain isn't so broken that I was remembering something else!
The rear bearings are something that's scarey at first, but once you install 1, it isn't nearly as scarey. Just make sure that after you install the bearing that you install all the emergency brake parts before installing the hub. Ask me why I'm offering that advice. |
||
|
09-30-2011, 07:21 AM
|
|
|
Tired Member
|
I can imagine why. I don't want to go there. I'll leave the hubs for very last.
__________________
Glenn Daily Driver - '78 911SC RoW Endurance Racer - '85.1 944 Street/Track Project - '86 951 Race Project - 944 Spec |
||
|
09-30-2011, 07:42 AM
|
|
|
Registered
Join Date: Mar 2008
Location: Pittsburgh, PA
Posts: 2,587
|
I had a 2 brain fart moments. I was waiting for stub axles to finish putting my car together, so it had no axles installed, but was otherwise together. While I waited for the stub axles to be delivered, I figured I'd change my gearbox fluid. My jack wouldn't fit under the front with the back in the air. So I put it on 4 wheels, lifted the driver's side, heard a crack, and realized like a dummy that without the axles installed to secure the hub laterally, when I applied the weight of the car on 2 wheels, I broke the wheel bearing. So I didn't think much of myself at that moment.
So I ordered a new wheel bearing, put it back in the air, re-installed my bearing and then the hub. I then grabbed the E-brake hardware and held it up to the hub. Then I shouted a series of profanities in my garage. So I proceeded to ruin the new wheel bearing while pulling the hub so that I can fix the giant blunder I had committed. If learning from your mistakes makes you wiser, I'm going to be the wisest old fart in Pittsburgh. |
||
|
09-30-2011, 08:11 AM
|
|
|
Tired Member
|
Well then there is a competition in Pittsburgh. 'Cause I'm getting wiser everyday in the same (but not as extreme) manner.. :-D
__________________
Glenn Daily Driver - '78 911SC RoW Endurance Racer - '85.1 944 Street/Track Project - '86 951 Race Project - 944 Spec |
||
|
09-30-2011, 08:56 AM
|
|
|
Tired Member
|
First rear bearing in! I used some wheel bearing grease to lube the arm, froze the bearing, got it all lined up with Greg's tool and started cranking. I needed a couple taps with a hammer to get it started straight but once it was going, there was no problem.
 Then a couple bolts and the backing plate (if that is what its called) was on.  Got wiser by doing the next step twice. ") Trick is to assemble the e-brake before putting it on the arm. Trick is to assemble the e-brake before putting it on the arm. And Done!! I'll leave the hub and axle for after the arm is back on the car. 
__________________
Glenn Daily Driver - '78 911SC RoW Endurance Racer - '85.1 944 Street/Track Project - '86 951 Race Project - 944 Spec |
||
|
10-03-2011, 04:35 AM
|
|
|
Tired Member
|
Pulled the oil tank today and found this...
 I am interested to see what I find when I strip the paint of the right rear fender.
__________________
Glenn Daily Driver - '78 911SC RoW Endurance Racer - '85.1 944 Street/Track Project - '86 951 Race Project - 944 Spec |
||
|
10-10-2011, 02:11 PM
|
|

|
|
Tired Member
|
Rear suspension parts back from the East Liberty Electroplating.
 So the next big question is, do I lube or glue the Neatrix bushings?
__________________
Glenn Daily Driver - '78 911SC RoW Endurance Racer - '85.1 944 Street/Track Project - '86 951 Race Project - 944 Spec |
||
|
10-19-2011, 03:30 PM
|
|
|
Registered
Join Date: Aug 2008
Posts: 844
|
ER rubber bushings use glue....
as for the trail arm... I used a hack saw just to relieve the pressure, then pry right off. 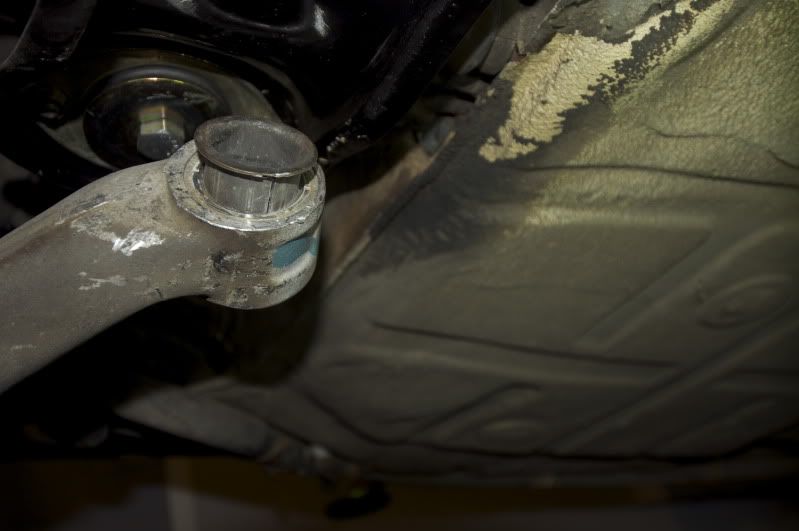 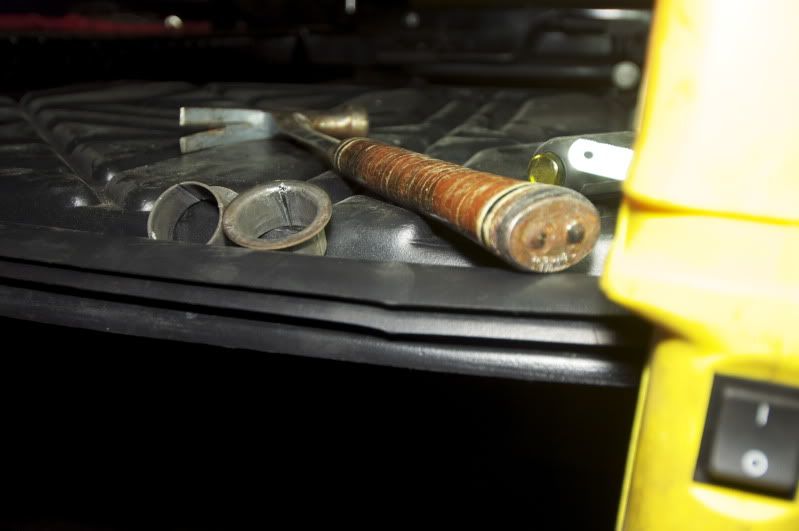 use bolts to squeeze in the new bushings... 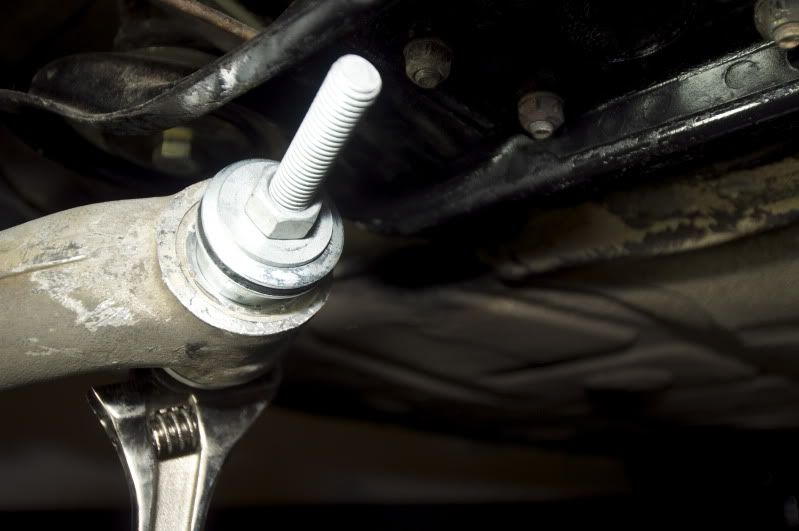 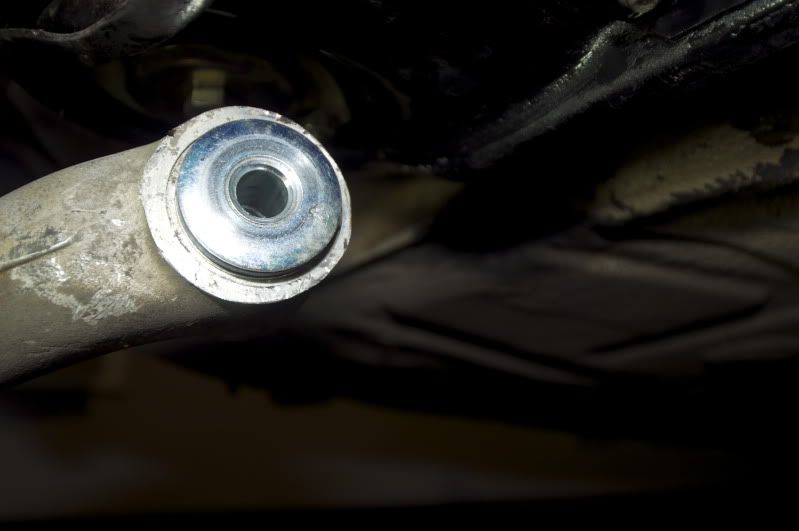
|
||
|
10-19-2011, 03:53 PM
|
|


 "The Porsche"
 Endurance Racer
 944 Spec "The green car"
 Scalded Cheetah?
 Black Beauty
 1995 993 Carrera 2
 1981 Porsche 911 SC
 1986 Porsche 911
