|
|
|
|
|
| Author |
|
|
Registered
|
Removing CIS with engine in the car - the writeup
A while back I had to remove my CIS due to a blown airbox and with no garage available I had no choice but to do it without a partial or full drop, something that is usually recommended.
Here is how I did it (on a 1980 SC with backdated heat and no AC) for those that might find them self in the same situation. Remember to mark everything as it is removed or disconnected. Also take pictures along the way. Put nuts, washer and other bits and pieces in separate zip-bags and mark them. 1. Remove the air filter and air dome that leads air to the throttle housing. Disconnect the vacuum hoses to the ignition distributor. 2. Pull the injectors, cover the holes and get the fuel lines out of the way. I wrapped them with some masking tape and stuffed them in the airbox (assuming you have the flexible kind). Also remove both the fuel lines to the WUR. Cover the connections and put some masking tape on each line where you write "WUR". 3. Disconnect the throttle linkage and cruise control. 4. Remove the fastening nuts (and washers) for intake runners 1, 2, 3 and 4. Remove the throttle spring from nr 2 intake runner. Loosen the hose clamps and remove the intake runners (mark them). Cover/stuff the holes! Support the airbox with something that doesn't scratch the engine shroud. 5. Remove the fastening nuts for intake runners 5 and 6. Disconnect both breather hoses from the oil tank. Stuff the holes. 6. Disconnect all the electrical plugs on the back of the airbox and at the AAR. Put some masking tape on each and write where it goes. Disconnect the vacuum line (fig 6). 7. Remove the top connector to the fuel filter. Remove the fuel line to the freq. valve. Disconnect the vacuum hose at the T-connector. Cover all the connections and mark where they go (fig 7). 8. Remove fuel line holder (fig 8a). Remove the nut at the back of the bracket for the airbox (fig 8b). 9. At the back of the fuel distributor, disconnect the right-most banjo bolt. This gives you access to the second right-most connector, remove it. Cover the connections and mark where they go. 10. Lift the airbox of the throttle bracket and support it as high as it will go without hurting the 5 and 6 intake runners. Disconnect the breather hose from the top of the engine (this was a struggle for me). 11. Turn/lift out the remaining CIS while making sure nothing gets stuck. You might have to disconnect the bracket for the breather hoses and get them out of the way. Cover the 5 and 6 intakes. Installation is reverse of removal. I had a removable engine pad (magnets) that made things easier, might be too tight with one in place. I was also not careful enough and scratched the engine shroud when lifting out the CIS. Consider covering it with something. My car stood outside while the CIS was off and I covered the whole engine lid with a plastic bag to avoid water from getting in. Good luck! fig 6  fig 7  fig 8a  fig 8b  The pictures where shot at installation so they are a bit inconsistent...
__________________
1980, 911 SC. Ex-US car in Sweden since June 2010. Insta: @911scowner Last edited by bsimonson; 08-31-2012 at 02:16 PM.. |
||
 08-31-2012, 11:58 AM
|
|
|
PhD on Pending Projects

|
This will sure come handy... I am picking up another project next week... SC. And the CIS was taken out so I need to put it all back together... Not the same as when I am the one that takes it apart... may the Porsche gods help me... and Pelican members

__________________
Drive safe! 1967 - Porsche 912 1981 - Porsche 911 SC 1991 - Porsche 911 C4 Wide-body Cabriolet |
||
|
08-31-2012, 01:48 PM
|
|
|
ROW '78 911 Targa
|
Nice write up, I have R&R'd my entire CIS in the car 3-4 times over my one year of ownership due to a blown airbox, a second used slightly cracked airbox and finally installing my stainless airbox that I ended up pulling to repair a poorly designed pop off system.
I used a partial engine drop each time and did not have to take the runners off. I feel like I could do it blindfolded now... 
__________________
Dennis Euro 1978 SC Targa, SSI's, Dansk 2/1, PMO ITBs, Electric A/C Need a New Wiring Harness? PM or e-mail me. Search for "harnesses" in the classifieds. |
||
|
08-31-2012, 01:59 PM
|
|
|
Registered
|
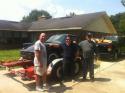
Here are some pictures of the CIS ready to go back in.
 
__________________
1980, 911 SC. Ex-US car in Sweden since June 2010. Insta: @911scowner |
||
|
08-31-2012, 02:21 PM
|
|
|
Registered
Join Date: Nov 2009
Posts: 16
|
Hi, I've enjoyed your blog and also found this posting very useful. I'm in the throes of removing my airbox to try and address some vacuum leak issues and wondered if you might be able to offer a little help. I'm having a real hard time accessing the bolts that hold down runners 5 and 6 and it seems that you're removing 1, 2, 3, and 4 runners to then gain access to 5 and 6. Is that correct? Do you actually even remove runners 5 and 6? Also, any thoughts on how hard to tighten the 6 allen head bolts with springs that hold down the fuel distributor to the box. When I looked at the gasket to the airbox, it seems very dirty which made me think it wasn't sealing properly and possibly part of my vacuum leaks. The sprung bolts is a curious idea.
Steve in France, working on his 1983 911sc cab. |
||
|
02-18-2015, 10:03 AM
|
|
|
ROW '78 911 Targa
|
No vacuum at the airbox to fuel distributor seal. All vacuum is after it goes past the metering plate. It is just a dust seal.
Use 1/4" sockets, universals and extensions on number 6 runner. |
||
|
02-18-2015, 10:57 AM
|
|

|
|
Registered
Join Date: Nov 2009
Posts: 16
|
are there any torque specifications for re-fixing the runners?
|
||
|
02-19-2015, 01:24 AM
|
|
|
Registered
|
This is a most excellent guide! Thank you very much for posting. Just performed complete removal of CIS ('78 Targa) with engine in car in 3 hours incl. repair of airbox, and installation in another 3 hours. Car is running better than ever
I believe if you have tried this before, it could probably be done much quicker! A lift helps the working position a lot though. |
||
|
03-25-2016, 09:31 AM
|
|
|
Registered
Join Date: Nov 2002
Location: venice ca
Posts: 928
|
i did my 81 w/out any drop. including the epoxy reseal to the airbox it took me 4 days.
its a lot of work, car runs totally different. to get the box back in- i installed intake runners 5-6 onto the motor then slid the box onto those runners. you can take the rubber boots and slide them on to the runners past the point where they normally sit, silicone lube works here, then once the box is in place just slide the boot home. that way there is no fighting to try to line up 50 things perfectly. using this method each runner is done separately so one can make sure each one is done right. i would say use the oem gaskets, the reintz pieces are flimsy. i sanded the mating surface on the bottom of the runners lightly atop a piece of glass and used some hitack spray gasket sealer that comes in a can for the final install
__________________
Jason 81 SC 97 328is 87 Jeep Comanche (RIP) |
||
|
03-25-2016, 01:34 PM
|
|
|
Administrator

Join Date: Feb 2015
Posts: 3,359
|
This is great. I know this is older, but bsimonson if you wanted to submit this for our DIY Project Expert Submissions you can get up to 10% off your next order with us. Info here. You could also submit any other DIY's that you have done as well.
|
||
|
03-25-2016, 02:42 PM
|
|
|
83 SC
|
This is great, thank you guys for submitting it. I think I may need it..,.Tim
|
||
|
03-25-2016, 03:17 PM
|
|
|
Registered
|
I've removed mine with the intake runners attached makes it much easier and quicker. All you need to do is disconnect the fuel lines in the rear, electrical lines in the back, throttle linkage and cold start valve hoses. unbolt the intaker runnres and lift out.
I tried doing it the way mentioned above but it took much longer because of the runner connectors to the intake runners. I can remove mine in around an hour if all goes well.
__________________
SteveKJR Proud Owner of a 78 911 SC Targa "A Porsche does more then just go fast in a straight line" |
||
|
03-25-2016, 04:24 PM
|
|

|
|
Registered
|
Quote:
|
||
|
03-25-2016, 10:10 PM
|
|
|
Registered
Join Date: Nov 2002
Location: venice ca
Posts: 928
|
The o2 system complicates things a bit. Pre 80 would be less fiddly
__________________
Jason 81 SC 97 328is 87 Jeep Comanche (RIP) |
||
|
03-25-2016, 11:20 PM
|
|
|
Registered
|
Nux
Yes you can take it out complete. However i had to remove the rubber intake boot but that was it.
__________________
SteveKJR Proud Owner of a 78 911 SC Targa "A Porsche does more then just go fast in a straight line" |
||
|
03-26-2016, 08:26 AM
|
|
|
New-ish 911SC Targa Owner

|
Anyone have tips for getting to number 6 intake runner securing nuts? I can't for the life of me figure out how to get to that rear nut.
__________________
'83 Targa 300k w/ freshened 3.0 with 930/52 case# 6770540 ARP and Raceware hardware - AEM Infinity 506, Triumph T595 ITBs, B&B headers, Dynomax muff, Fidanza FW, Alum PP-203whp |
||
|
04-15-2016, 01:07 PM
|
|
|
Registered

|
Quote:
In order to get the last two nuts off, I had to use two universal joint extensions. I stuck my left hand in underneath to brace them and worked the wrench with my right. It was quite possibly the most awkward nut removal I've ever done. Once you get the bolts, I highly recommend you use a magnetic pickup to fish out the washers before you begin lifting the runner out. If one of them falls into the cylinder, you are in serious trouble. I had one non-ferrous washer back there and it fell in. Fortunately, the #6 intake valve was closed at the time. I almost had a heart attack.
__________________
Lillie - 1979 911 SC Targa, The Original 911 SCWDP Car. Rebuilt and roaring to go! |
||
|
04-15-2016, 01:32 PM
|
|
|
New-ish 911SC Targa Owner
|
number 5 runner wouldn't come off until i sacrificed the rubber connector on the end. I cut it with my knife and then i could remove runner #5 and that then allowed more access to the nuts for the #6 runner. Got them both out of the way now but looks like I have a few more fuel lines and electrical connections to get at before it'll come out.
Say, what is this 2 wire green connector on the back? It was just dangling there not plugged into anything.
__________________
'83 Targa 300k w/ freshened 3.0 with 930/52 case# 6770540 ARP and Raceware hardware - AEM Infinity 506, Triumph T595 ITBs, B&B headers, Dynomax muff, Fidanza FW, Alum PP-203whp |
||
|
04-15-2016, 01:43 PM
|
|
|
Registered
|
Quote:
By the way, I can now confirm removing the entire CIS én bloc - with all intakerunners attached - takes 1 hour. Assembly is maybe 1.5h but is much easier if nr 1-4 outside rubber connections are loose to allow some mild movement of the intake runners. Keep nr 5-6 firmly tight as they are impossible to tighten once the airbox slides into place. Remember to tighten 1-4 again.... Total working time incl new airbox = 3-4 hours. Last edited by Nux; 04-20-2016 at 07:26 AM.. |
||
|
04-20-2016, 07:21 AM
|
|
|
New-ish 911SC Targa Owner
|
all of the screw heads on the hose clamps for mine were facing the firewall. How gawddang convenient of the previous wrench to do that for me.
Another tip that might save someone in the future some time: When i was trying to remove runner number 1, it just wouldn't come out. TOok me 30 minutes to notice that the WUR body was blocking the flange on runner 1 from a clean exit. ONce i removed the WUR i could pry the runner out. Tip number 2: Remove the deck lid. My bald head full of scrapes and scabs applauds this one.
__________________
'83 Targa 300k w/ freshened 3.0 with 930/52 case# 6770540 ARP and Raceware hardware - AEM Infinity 506, Triumph T595 ITBs, B&B headers, Dynomax muff, Fidanza FW, Alum PP-203whp |
||
|
04-21-2016, 07:03 AM
|
|


 The Varmint
 BlueFire
 1974 RSR Tribute
 Vrooom
 Franchesca
 Luigi
Luigi Oldie
Oldie

 Heinz
Heinz 1978 Porsche 911 Targa 3.0
 Jeanine
 Lillie
