|
|
|
|
|
| Author |
|
|
Registered User
|
door panel removal 1987 door handle paint
My 1987 Carrera had a pretty tired looking door handle so I decided to remove it and paint it, new ones are $300+. It looked like this:
 First disconnect the battery:  Next step was to remove the top piece of the door panel: remove the two screws on each end then the last two screws that hold it to the door      Next unplug the the mirror adjustment wires, there are two areas to release one on top one on the bottom: 
Last edited by Dublinoh; 12-11-2011 at 03:23 PM.. Reason: error |
||
 12-11-2011, 03:11 PM
|
|
|
Registered User
|
Then the four bolts on the inside handle:
  To reach the lower ones release the door handle from the metal rod, just lift up on the rod and it pops out:  Now remove the lower pocket which is held on by six screws, not hard to find these:    Now the screw at the end of the flap on top of the pocket:  release the door locking knob by removing the screw and then turn the larger trim circle to unscrew it I used a trim tool:    this helps the next amateur. Last edited by Dublinoh; 12-11-2011 at 04:26 PM.. Reason: error |
||
|
12-11-2011, 03:13 PM
|
|
|
Registered User
|
Then you can begin to release the snaps:
 At this point I was able to release the door panel and drop it down several inches, because I only wanted to remove the door handle I decided to not disconnect the window switches and speaker.    I didn't want the handle to fall so I taped it to the door:  The nuts that hold on the door knob are difficult to reach, they are 8mm, this is how I got them off:   One washer was just hanging and I couldn't get my fingers around it so I used duct tape:  So finally the handle is off and looks like this:   My plan is to sand and generally clean this up and then paint is black again. So I will add to this post when I get ready to reinstall. Last edited by Dublinoh; 12-12-2011 at 05:41 AM.. |
||
|
12-11-2011, 03:17 PM
|
|
|
Registered
Join Date: Dec 2008
Posts: 179
|
Great write up. I'm looking forward to the finish.
|
||
|
12-11-2011, 03:26 PM
|
|
|
Fleabit peanut monkey
|
Quote:
Where did you get the blue tool? |
||
|
12-11-2011, 04:04 PM
|
|
|
Registered User
|
|||
|
12-11-2011, 04:22 PM
|
|

|
|
Registered
Join Date: Jul 2008
Location: St. Petersburg, FL
Posts: 2,497
|
Nice write up. They also polish up nice if that look does it for you.
__________________
'87 Carrera - 2400 lbs of Track Beast!! '88 Carrera Cab - Too nice for the track. '85 Targa - Salvage title that was not caught! |
||
|
12-11-2011, 04:44 PM
|
|
|
Registered User
|
Now that the handle is off I wanted to remove the lock so I wouldn't scratch it/paint it etc.
First remove the screw at the top:   Then remove the clip from the side of the handle, this comes off very easily:   Then just slide the lock out of the handle it looks like this:  Then I sanded off the old paint with 150 sandpaper, my paint came off easily. I used foil and tape to mask off the handle. So now primer and the black paint. I have black semigloss rust-oleum. If you have a better suggestion for paint let me know I'll buy the primer tomorrow. I'll post again after paint.  
|
||
|
12-11-2011, 04:46 PM
|
|
|
Registered User
|
Quote:
Thanks for the kind remarks all. |
||
|
12-11-2011, 04:48 PM
|
|
|
ROW '78 911 Targa
|
Sand and paint the trigger too. You'll look at it and curse every time you open the door if you don't!
__________________
Dennis Euro 1978 SC Targa, SSI's, Dansk 2/1, PMO ITBs, Electric A/C Need a New Wiring Harness? PM or e-mail me. Search for "harnesses" in the classifieds. |
||
|
12-11-2011, 04:53 PM
|
|
|
Registered User
|
Quote:
|
||
|
12-11-2011, 04:56 PM
|
|
|
Registered User
|
So after sanding with 150 I applied two coats of primer with very slight sanding between coats (400 paper):
  after 24 hours two coats of semi gloss black Rust-oleum (about 45 min between coats) and then let it cure for 24 hours  some light cleaning of the other parts and some lithium grease between moving parts. Finally some graphite on the lock and ready to install. Used some tape to stabilize again but avoided tape on newly painted areas.  It was a little frustrating trying to get the door handle nuts started, I glued the washers to the nuts and after 15 minutes or so got them started. The rest of the install was the reverse of removal as they say. Pictures of the finished before and after:  
Last edited by Dublinoh; 12-14-2011 at 05:10 PM.. |
||
|
12-14-2011, 03:32 PM
|
|

|
|
ROW '78 911 Targa
|
Great job, looks almost new and very nice write up.
__________________
Dennis Euro 1978 SC Targa, SSI's, Dansk 2/1, PMO ITBs, Electric A/C Need a New Wiring Harness? PM or e-mail me. Search for "harnesses" in the classifieds. |
||
|
12-14-2011, 04:40 PM
|
|
|
Registered
|
Getting ready to do this myself - I had heard that before you take the lock cylinder out of the handle you should insert your key so the pins do not fly out - but that does not seem to be the case?
Nice job on the pics and process! Thanks! Mike
__________________
Mike S. 83 SC Coupe, Guards Red |
||
|
12-14-2011, 05:02 PM
|
|
|
Registered User
|
Quote:
|
||
|
12-14-2011, 05:08 PM
|
|
|
Registered
Join Date: Nov 2000
Location: Dallas
Posts: 3,600
|
I think the orig finish is anodized, mine looks very faded, this looks like a fun project for a Saturday. Any special paint that can take the constant handling?
|
||
|
12-15-2011, 09:08 AM
|
|
|
Registered User
|
Quote:
|
||
|
12-15-2011, 10:15 AM
|
|
|
Registered

|
Quote:
")
__________________
If it flows, it goes. If its smooth, it moves. Any questions? 96 993 C2 (Current) 87 911 Factory Turbo-Look Cab (Sold) 85 911 Factory Turbo-Look Targa (Gone) |
||
|
12-15-2011, 10:46 AM
|
|
|
Registered
Join Date: Nov 2000
Location: Dallas
Posts: 3,600
|
Maybe powdercoat is an option?
|
||
|
12-15-2011, 02:19 PM
|
|
|
Registered
Join Date: Jan 2009
Location: Germany
Posts: 1,241
|
Quote:
|
||
|
08-25-2013, 11:56 AM
|
|


 1981 Porsche 911 SC Targa
 Heinz
Heinz 1983 Porsche 911 SC 3
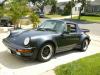 1987 Porsche 911 3.2
