|
|
|
|
|
| Author |
|
|
Registered
|
porsche0nut's 3.2 Carrera Engine Project
I've been dreaming of having my own project thread for years, since long before I even owned my 911. Will be posting my progress in this thread, am looking forward to sharing the project and learning from the community as I go - there will be many questions along the way as I seek the advice of those more experienced than myself!
Over the course of my ownership, my 911 has been relatively leak-free, (no more than dime-sized drops underneath the engine) and does not consume much oil (maybe 1L every couple thousand km). This winter I did the usual pre-storage oil change and put her away. To my surprise, a quite sizeable puddle developed beneath the engine. 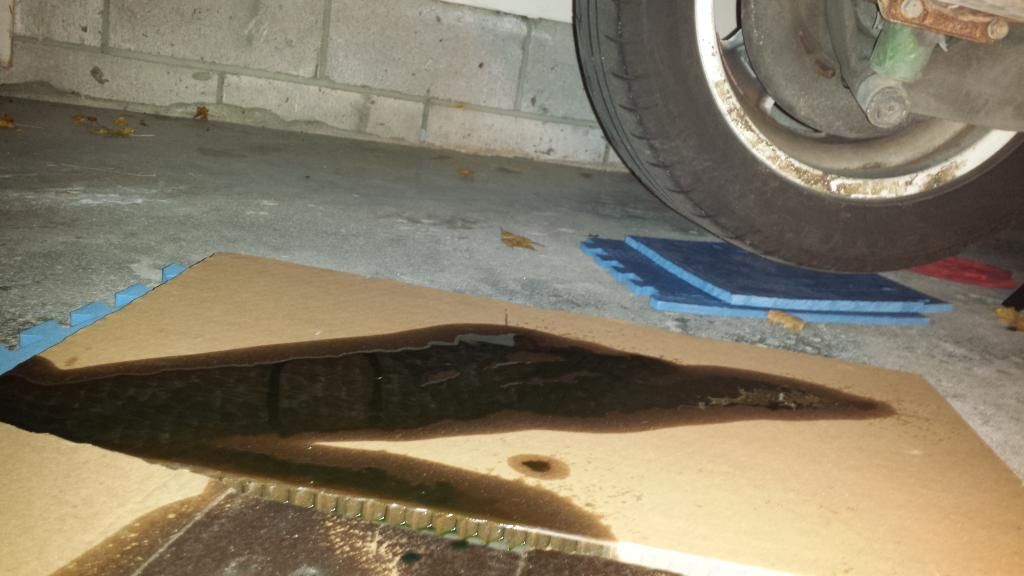 It appeared as if the oil was leaking from the return tubes, you can see in the photos where the fresh oil left a "path" down the side of the case. 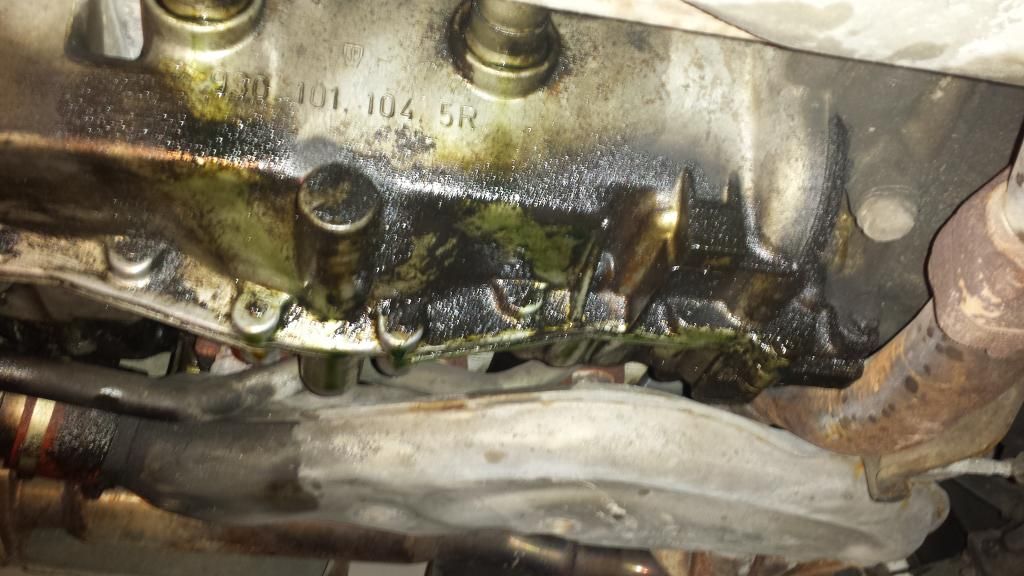  Here cylinder 5 looks like there's another oil leak coming from somewhere - this is strange to me. It was the only one. (see future post... cylinder 5 also was the only cylinder where I found oil collected on the top of the intake valve in the runner, leaking valve guide) 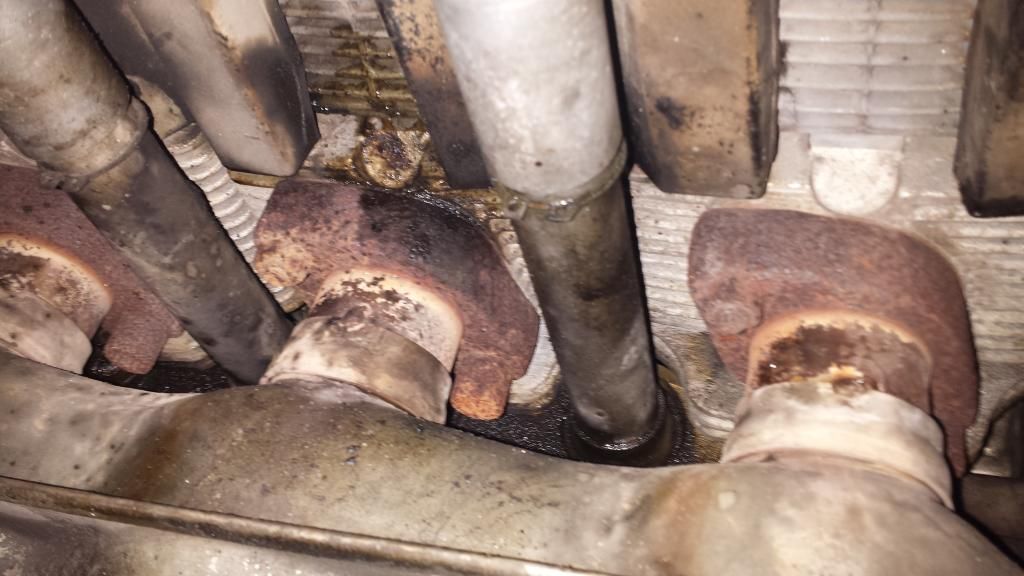 I spent some time cleaning the underside of the engine (it was pretty filthy, grime and oil-covered) so that I could confirm that this was the source of the leak. When I checked the next morning, it was obvious that the oil was leaking from the oil return tubes, fresh oil had collected and everywhere else was bone dry. It sure looked a lot nicer! (pic below is right after cleaning, not after given time to seep) 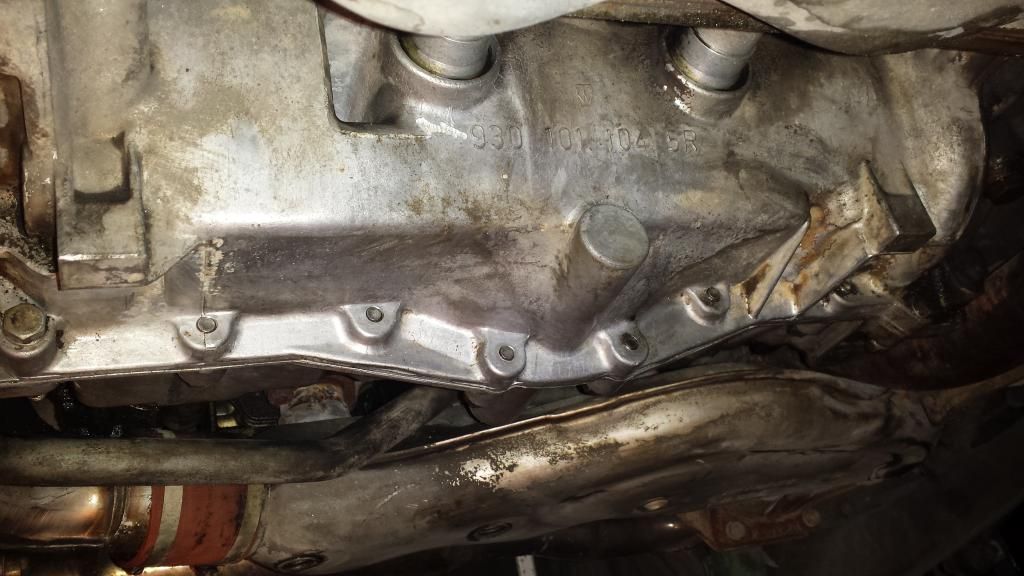 Excellent, the excuse I needed to drop the engine and get myself into a project! There have been a lot of "want to do" things on my list for some time, so I am going to take this opportunity to dive right in! The goal will be to have it all done in time to drive down to Hershey. Bold... I may end up riding shotgun in a friends car instead - we'll see how things progress! At the time of engine drop, my list consisted of the following:
Feel free to chime in with any suggestions - things I should add to the list, experience with different parts/suppliers, tips and tricks...
__________________
Jonathan '86 911 Coupe |
||
 02-22-2015, 06:41 PM
|
|
|
Registered
|
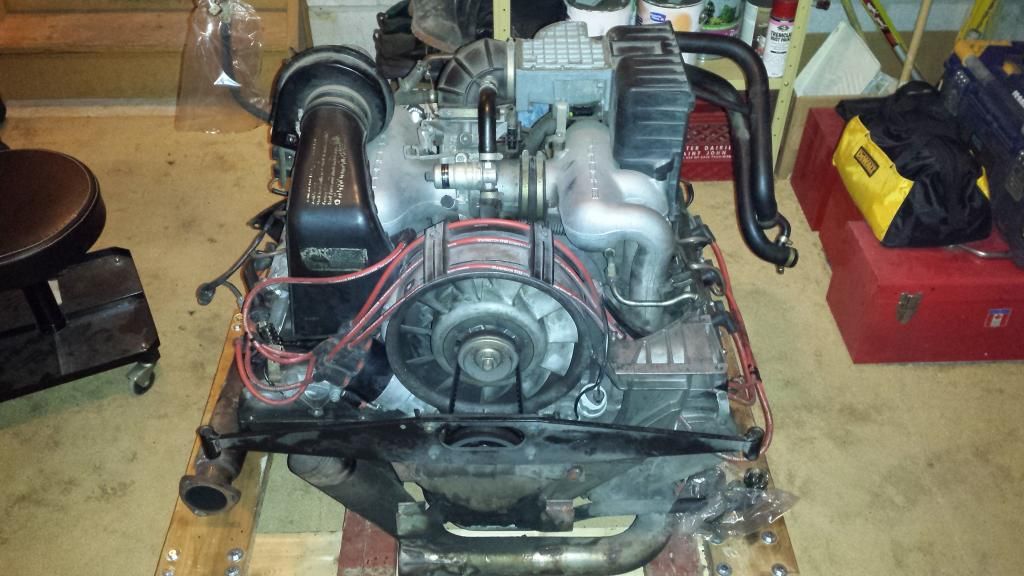
The engine drop went well, without complication. Unfortunately I had decided to do it on one of the coldest days, but we survived! My plan was to figure out a way to transport the engine downstairs from the garage into the workshop so that I could work on it in comfort and warmth, and have everything out of the way and in a cleaner environment than the garage could offer.
Some pics from the drop process... 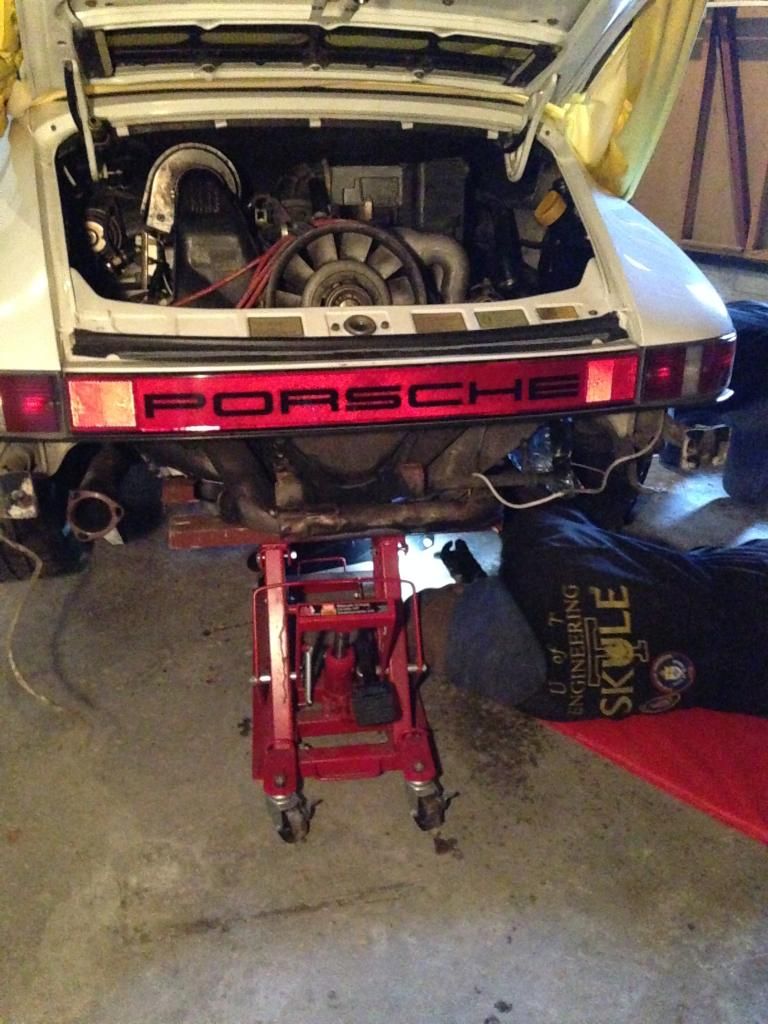 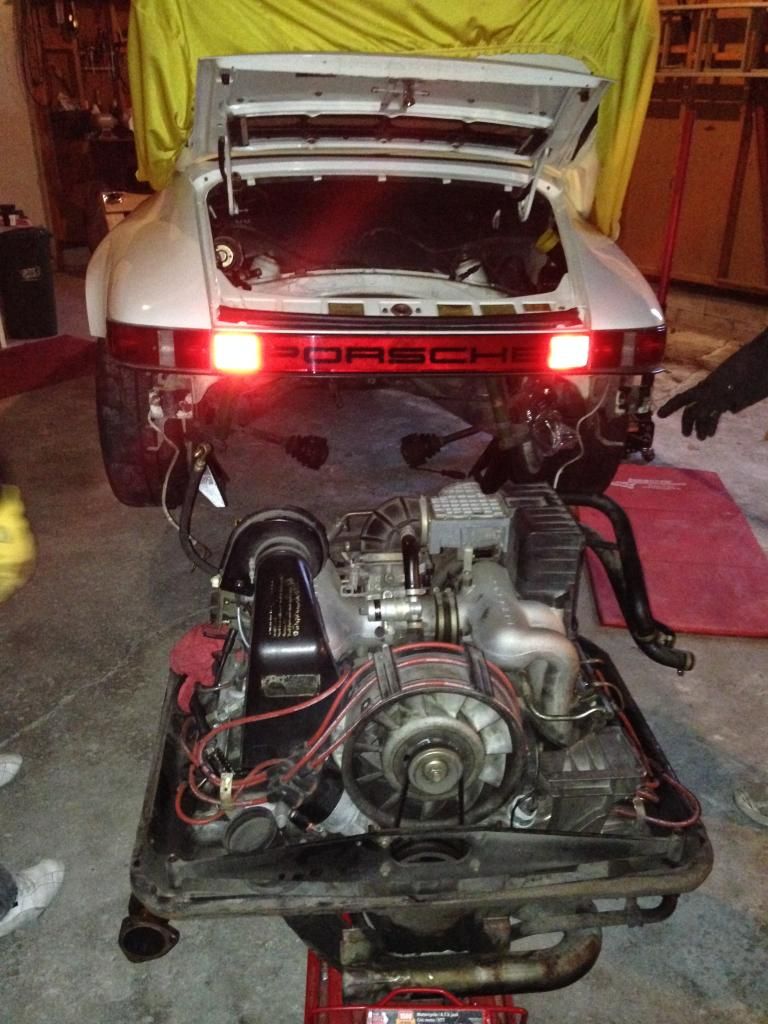 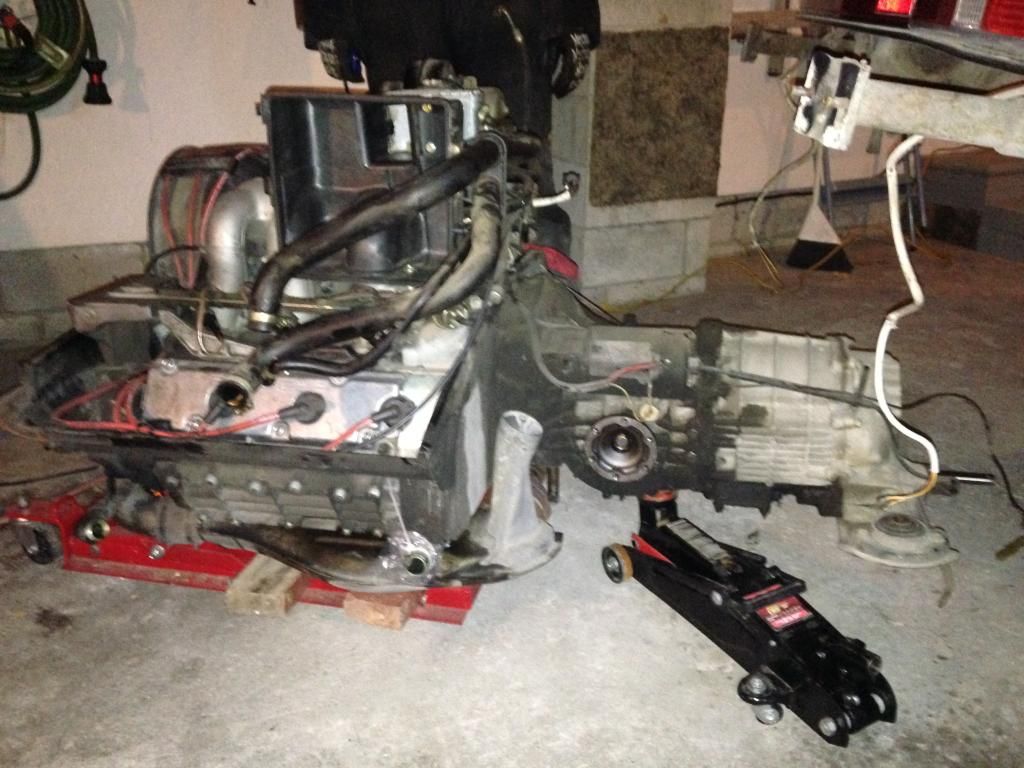 Only a couple minor snags... the fuel supply hose was caught on the top of the fuel filter as we were lowering the engine and bent the bracket the filter mounts to slightly before we noticed it, (no biggie, I can remedy that easily) and the electrical pins that connect into the front of the transmission broke from the wire when I pulled them out (also an easy fix). Obligatory engine bay pic:  To get the engine downstairs I built a cart, and the original plan was to build a ramp and lower the cart down the ramp with my jetta. My 2 friends and I ended up lifting it down the stairs on the cart step-by-step instead. I think our egos were larger than our muscles but we did it. 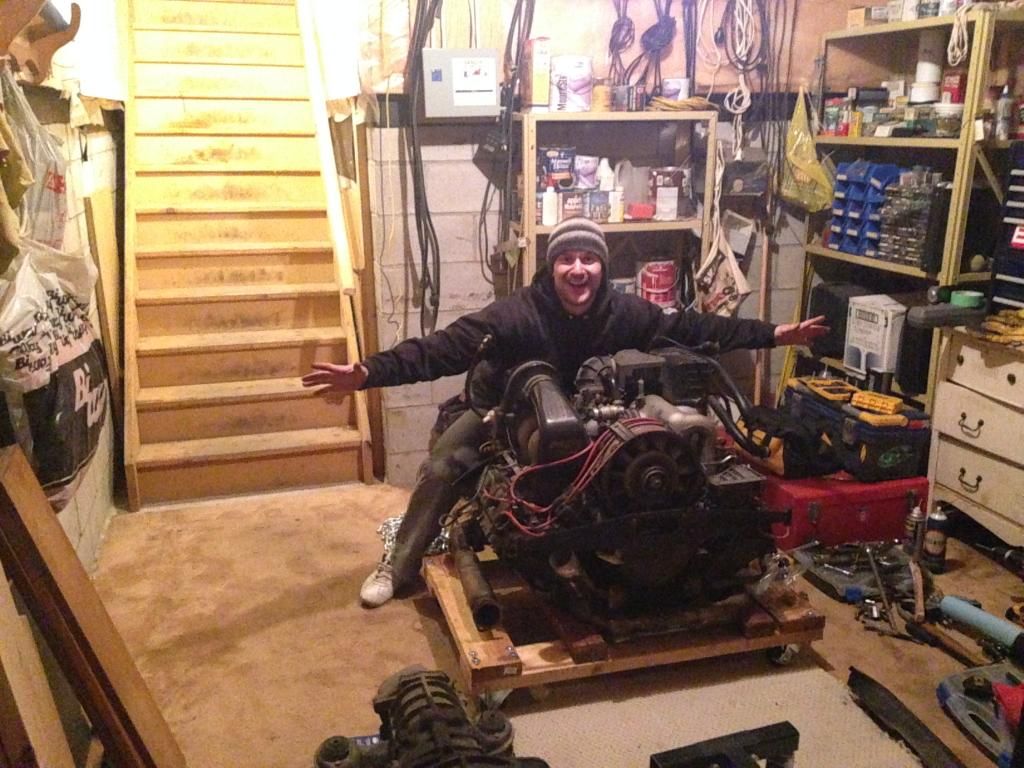
__________________
Jonathan '86 911 Coupe |
||
|
02-22-2015, 06:42 PM
|
|
|
Registered
|
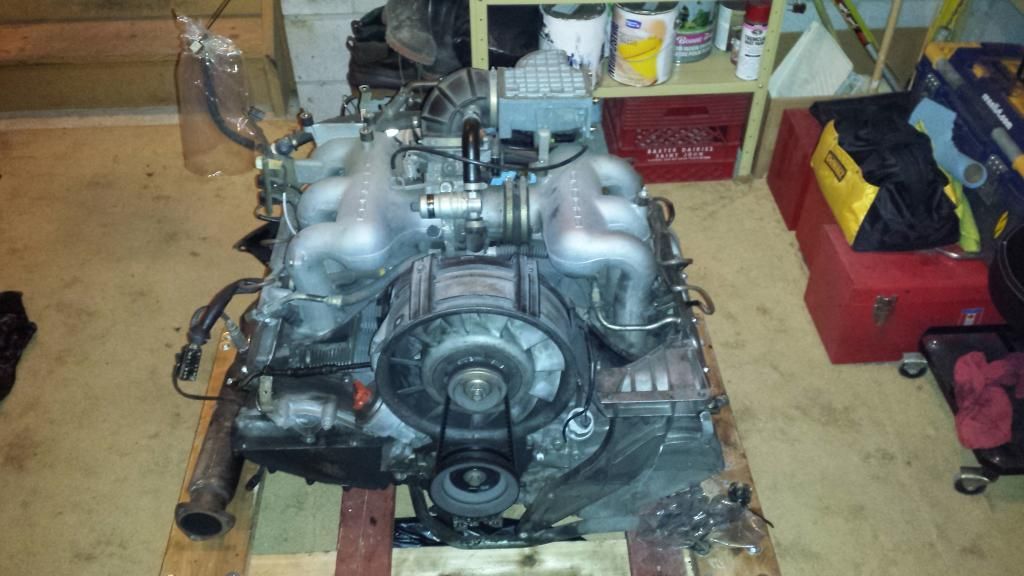
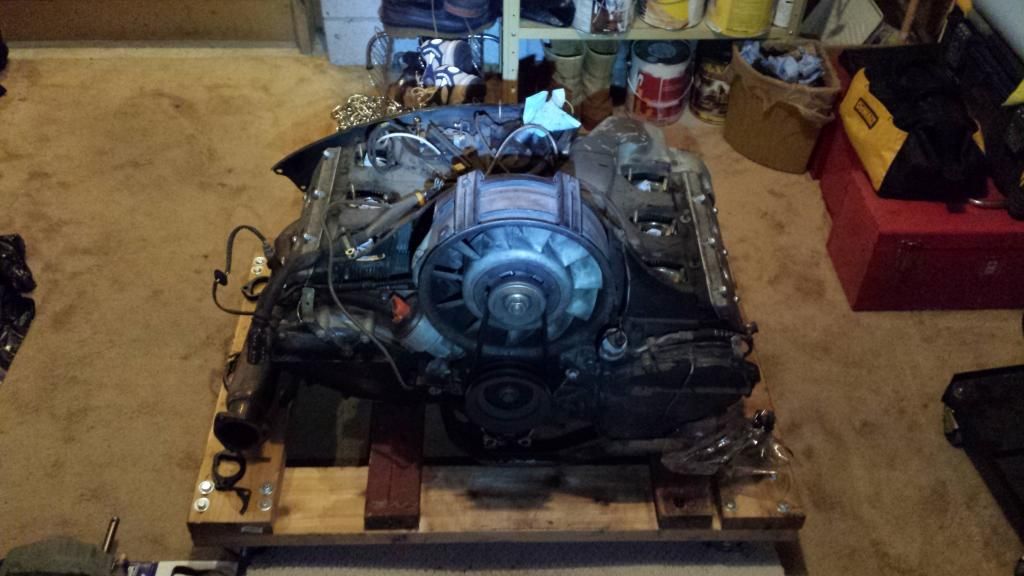
I spent some time this weekend starting to teardown the engine. My plan is to get it down to the long block before I put it on the engine stand. It makes me uneasy putting it on the stand earlier than I need to (silly, right) and with the engine sitting on the cart it is very easy and enjoyable to work away at anyway. I'm taking my time and organizing everything that comes off, labelling my hardware, and taking plenty of pics. So far everything has removed easily without struggle, but I'm sure that will change when it comes time to remove the heat exchangers!
   I took pictures of the intake runners for every cylinder. Check out #5, I think my valve guide is leaking on this one, in addition to the oil pooled up you can see the path it has left over time below the guide. 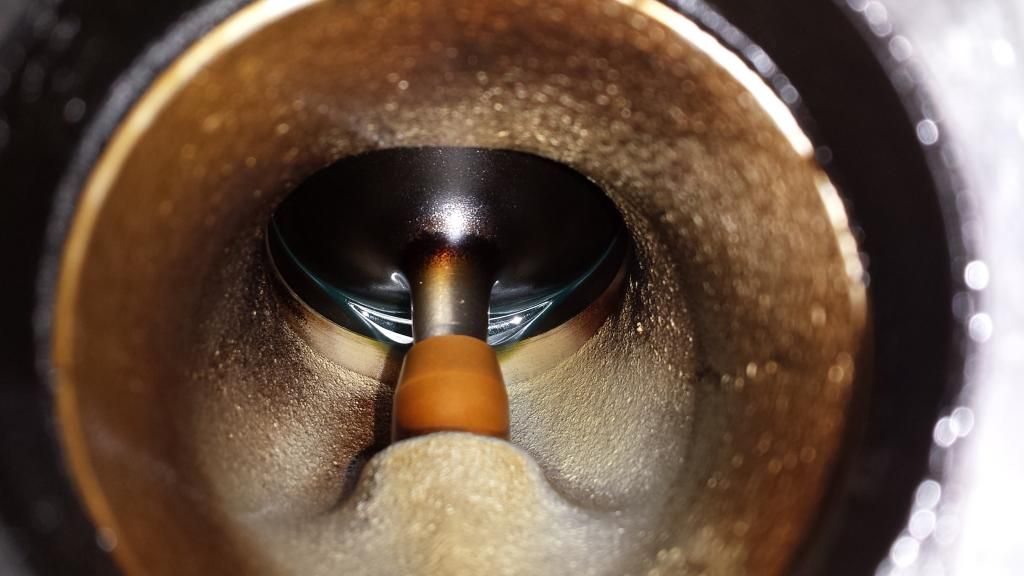 Questions: Does this mean I need to replace my valve guides? If so, should I do all of them or just this one? What about the exhaust ones? Also, my intake manifold was pretty dark inside (as in, the walls of the runners had dark coloration/stain). Is this normal to see?
__________________
Jonathan '86 911 Coupe |
||
|
02-22-2015, 06:42 PM
|
|
|
Registered
Join Date: Mar 2005
Location: Northern CA
Posts: 4,703
|
I didn't see listed the engine history - e.g. what has been done at various odometer readings.
If you have e.g. 150k without a valve/guide job then it could be time to do that. Others here can advise on how to check the play in the guides without removing the valves. There are a number of possible slippery slopes to explore.
__________________
Sold: 1989 3.2 coupe, 112k miles |
||
|
02-23-2015, 07:49 AM
|
|
|
Spiderman

|
I think your engine looks remarkably clean and fresh on the outside. I'd guess you'll be lucky and have no problem with any phase of the dissassembly including the exhaust. I know my 170k motor came apart with no fuss. Very nice now 5 years later and never a drip anywhere.
__________________
Midnight Blue 08 Cayman S, Fun/Track Black 12 VW-GTI, work Mexico Blue 87 Carrera, sold, sad, not enough garage space. |
||
|
02-23-2015, 08:13 AM
|
|
|
Registered

|
Enjoy the project! You are lucky to have a basement workshop this winter.
__________________
Chris https://dergarage.com 11 987.2 CS, '01 986S, '11 958S, '24 R1T, '87 Defender V8 |
||
|
02-23-2015, 08:22 AM
|
|

|
|
Crusty Conservative

|
Jonathan,
That looks like a great winter project! We'll be following you as you go. I'd recommend giving serious consideration to doing a valve job at this time, given the age & miles you have. If you can access the exhaust side now, it's a good time to start with PB Blaster or the like prior to actually trying to bust those rusty critters loose... 
__________________
Bill 69 911 T Targa, 2.4E w/carbs (1985-2001) 70 911 S Coupe, 2nd owner (1989- 2015) 73 911 T Targa, 3.2 Motronic (2001- ) |
||
|
02-23-2015, 09:10 AM
|
|
|
Slippery Slope Victim

Join Date: Oct 2001
Location: Brooklyn, NY USA
Posts: 4,435
|
Don't forget to do the fuel lines if you have not already done so.
__________________
Mike² 1985 M491 |
||
|
02-23-2015, 09:13 AM
|
|
|
Registered Loser
|
Subscribed. Just did this last winter ( Vermont First Engine Drop-87 Targa )
Definately send the heads off for a valve job. How is the compression?
__________________
Current Rides:: 1987 Red 911 Targa, 2007 R320 CDI, 2003 Red Dodge Ram Hemi, 1993 Beater Jeep Cherokee, Airbus A320 Gone but not forgotten: 1981 VW Scirocco S, 1989 Honda Accord Coupe LXI, F-16C (still my favorite vehicle!),MC-130P, C-130E, T-38, T-37, C150, C172, PA180 |
||
|
02-23-2015, 04:16 PM
|
|
|
Registered
|
Quote:
Quote:
Quote:
 Quote:
Quote:
__________________
Jonathan '86 911 Coupe |
||||||
|
02-23-2015, 07:16 PM
|
|
|
Chain fence eating turbo
Join Date: Dec 2008
Location: Austin, TX
Posts: 9,202
|
"cgarr" will rebuild your heads for an unbelievable price.
I mean, I was shocked what he charged me. Very happy customer! |
||
|
02-23-2015, 07:23 PM
|
|
|
Project Addicted
Join Date: Jul 2012
Location: Eastern Shore. MD
Posts: 919
|
Quote:
 
__________________
Jon 1966 912 1976 911 3.4 Backdate Project 1986 944 Last edited by Jcslocum; 02-24-2015 at 04:53 AM.. |
||
|
02-24-2015, 04:39 AM
|
|

|
|
Smoove1010
|
That was a quick drop! I did mine two years ago for a top-end and other assorted stuff, and it was a very satisfying project. (87 Drop Top - Drop-n-Top End) You already look like you're having a blast!
Definitely go for new fuel lines. If I had it to do over I'd have ordered mine from Len (BoxsterGT). It sounds like you already did what I did, i.e., read many, many engine-drop and project threads. This forum is a fantastic resource. I also studied the Bentley book and Wayne's engine book and found that doing all that homework really paid off. A few tips from a one-timer: - use the ziploc bag & label method to keep track of parts - it's a lifesaver; - take lots of pictures at various stages of dis-assembly. Take more than you think you need; - Be prepared to spend a lot of time cleaning things. Any time you open up an engine cleanliness is really, really important; Now that the engine bay is empty, there will never be an easier time to do that rear suspension over. What kind of shape are your rear wheel bearings in? Beware the slippery slope. Good luck! GK
__________________
1987 3.2 911 Cabriolet Grand Prix White Exterior Five Shades of Burgundy Interior |
||
|
02-24-2015, 09:46 AM
|
|
|
Registered User
Join Date: Nov 2013
Location: Main Line, PA
Posts: 1,226
|
Looks like you are off to a solid start. Off the top of your head, do you know what the clearances were to get that engine past the doorway? Ideally I'd like to bring mine to the basement as well.
__________________
1985 911 3.2 Carrera Coupe - Constant Project - 2550lbs 2005 E46 M3- Daily Beater - 3350lbs |
||
|
02-24-2015, 10:50 AM
|
|
|
Counterclockwise?
|
Looking good Jonathan!
How are you going to get it back up the stairs? 
__________________
Rod 1986 Carrera 2001 996TT A bunch of stuff with spark plugs |
||
|
02-24-2015, 11:27 AM
|
|
|
Registered
|
Quote:
Rod - to get it back up the stairs I'm probably going to build a ramp and tow it up on the cart with either a winch, or just hook a chain to my jetta with some friends to guide it. Or perhaps it will warm up and I can bring the long block and stand into the garage for re-assembly. I really love working in the basement. All my tools are right there, I can sit on my stool and tinker away with a beer while wearing my t-shirt. It's a luxury!
__________________
Jonathan '86 911 Coupe |
||
|
02-24-2015, 01:08 PM
|
|
|
Registered
|
Quote:
The rear suspension is in really good shape. Bushings still look nice, bearings seem ok from the very basis "grab and check for play" inspection. I'm very afraid to get into the rear suspension right now knowing that if I do, I won't be able to hold back from a full ER suspension refresh. I'm (read: my wallet) not ready for that yet! One project at a time...
__________________
Jonathan '86 911 Coupe |
||
|
02-24-2015, 01:11 PM
|
|
|
Registered
|
Quote:
I was lucky enough to be able to borrow the porsche heat exchanger wrenches, so I should be good on the tool front.
__________________
Jonathan '86 911 Coupe |
||
|
02-24-2015, 01:13 PM
|
|
|
Registered Loser
|
One thing I wish I would have done is have the rockers refinished and rebushed. They are still a little noisy for my tastes.
Lens new fuel lines fit perfectly.
__________________
Current Rides:: 1987 Red 911 Targa, 2007 R320 CDI, 2003 Red Dodge Ram Hemi, 1993 Beater Jeep Cherokee, Airbus A320 Gone but not forgotten: 1981 VW Scirocco S, 1989 Honda Accord Coupe LXI, F-16C (still my favorite vehicle!),MC-130P, C-130E, T-38, T-37, C150, C172, PA180 |
||
|
02-24-2015, 02:16 PM
|
|
|
Project Addicted
Join Date: Jul 2012
Location: Eastern Shore. MD
Posts: 919
|
Yes, MAPP can be used indoors it just burns a but hotter than Propane.
__________________
Jon 1966 912 1976 911 3.4 Backdate Project 1986 944 |
||
|
02-24-2015, 02:59 PM
|
|


 1986 Porsche Carrera
 Money Pit
 911 3.8 "RS"
 993 Cab
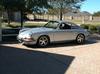 1970 Porsche 911S 2.2l MFI
 1987 Porsche 911 Cabriolet
