|
|
|
|
|
| Author |
|
|
Carlito

|
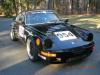
I've been looking for a scientific explanation regarding why backdating a 911 exhaust to the 1974 style is better for power. I understand various exhaust gas flow formulas etc so spare no technical detail. Obviously cars with air pumps the physically obstruct the exhaust port is a bad thing for power, but in terms of exhaust size and muffler type, what really nets the supposed +10hp? OD and wall thickness of both systems would be a helpful comparison. Also can anyone tell me if my oil lines have been moved already in this picture? The engine is a 1978 SC.

|
||
 04-23-2015, 03:25 PM
|
|
|
Registered
Join Date: Jan 2007
Posts: 11,758
|
When all the runners are equal in length, the right diameter and length, all the exhaust pulses arrive in sequence, and help to scavenge the other runners, increasing exhaust efficiency and flow. More exhaust gas out leads to more air and fuel being drawn in, and hence more power.
|
||
|
04-23-2015, 03:33 PM
|
|
|
Wer bremst verliert
Join Date: Jan 2005
Location: Toronto, Ontario
Posts: 4,767
|
Are those Bursch?
__________________
2007 911 Turbo - Not a toy 1985 911 Cab - Wife's toy 1982 911 3.2 Indiash Rot Track Supercharged track toy 1978 911 3.0 Lichtbau toy "Gretchen" 1971 911 Targa S backroad toy |
||
|
04-23-2015, 03:39 PM
|
|
|
Carlito
|
They're homemade, with a harbor freight mig welder and 1.4" ID for the primaries which I calculated based on some formulas from my dads old exhaust building book...but I didn't have exhaust valve size in the calculation.
Last edited by Carlito; 04-23-2015 at 03:44 PM.. |
||
|
04-23-2015, 03:40 PM
|
|
|
Registered
|
Yes, you have the backdated oil lines installed..
__________________
Gary R. |
||
|
04-23-2015, 04:09 PM
|
|
|
Almost Banned Once
Join Date: Feb 2009
Location: Adelaide South Australia
Posts: 38,665

|
Quote:
I suspect part of the reason people back date to the earlier exhaust is because it looks right, symmetrical, equal etc. And yes there is a small increase in power due to the unrestricted nature of the extractors. But you have to use the right muffler as well.
__________________
- Peter |
||
|
04-23-2015, 05:09 PM
|
|

|
|
Registered
|
Quote:
And that exhaust in the picture looks exactly like early HE's with the heat shrouds removed. |
||
|
04-23-2015, 05:53 PM
|
|
|
Almost Banned Once
Join Date: Feb 2009
Location: Adelaide South Australia
Posts: 38,665
|
Quote:
__________________
- Peter |
||
|
04-23-2015, 06:22 PM
|
|
|
Under the radar
Join Date: May 2007
Location: Fortuna, CA. On the Lost Coast near the Emerald Triangle
Posts: 7,129
|
Quote:
I want to make a set as well. Can you describe in detail your procedure for mocking up the bends before you did the bending? Show us a picture of your bender.
__________________
Gordon ___________________________________ '71 911 Coupe 3,0L outlawed #56 PCA Redwood Region, GGR, NASA, Speed SF Trackrash's Garage :: My Garage |
||
|
04-23-2015, 06:42 PM
|
|
|
Carlito
|
Thanks Gary! I just couldn't find a picture of a stock 1978 sc engines oil line locations online.
|
||
|
04-24-2015, 08:52 PM
|
|
|
Carlito
|
Quote:
|
||
|
04-24-2015, 08:56 PM
|
|
|
Carlito
|
Quote:
|
||
|
04-24-2015, 08:58 PM
|
|

|
|
Carlito
|
Quote:
I did it the old school way that isn't very accurate or professional. I made the template at home and then used my friends shop to bend it, he has a vintage industrial bender that takes a whole mess of dies, I don't have a picture of it but he made this chassis out of chromoly with it. He's got some really trick tools and skills.  I had a '74 with the heat exchanger cut off as a template so I used that to mock up the bends with welding wire (old school way) and then tacked them together. I first traced out the original exhaust flanges on cardboard. Then I cut them out of sheet metal with a plasma cutter. Then I marked and center punched each flange as accurately as I could get it. Then I drilled it with a hand drill. I should've used a drill press, ask me how I know. I'm used to working on hi performance chevys and american muscle cars where the headers have a single plate for all the tubes in a flange usually so this was a bit different and definitely harder. I'm a visual person so to see the exhaust in my minds eye, I bent wire to copy it. I ended up with a wire version of the exhaust measured on the top most part of the tubes. My dad, who's 73, taught me this when I was a kid making exhaust for 2 stroke motorcycles and stuff. It's not a very accurate way to copy, but it helps me see what the bends should be. Each time there was a bend, I marked it with blue tape. Then I got PVC pipe and pipe glue and made a plastic version of the exhaust. This is a more professional way. You can watch a video on how to do that here. Frankly, I don't have the equipment or desire to do all the welding and precision fitting this guy did.(https://www.youtube.com/watch?v=Bc-KhMl-6ss&spfreload=10) I don't like to use screws like they do in the video. I used instant set plastic model airplane glue to connect the various bends, again marking them with blue tape for each section. I cut the section between the blue tape and numbered the pieces with sharpie and did straight and squiggly lines next to each other in different color ink to ensure the angles were maintained. Then I cleaned off some banged up 16 gauge steel pipe I had in the garage and brought the template and the pipe to my friends shop and bent it up, via measure angles with the blue lines. I screwed up twice because I got the angle wrong. I tack welded it. Flared some parts of the pipe for a tight fit and then welded on the flare. The owner of the original exhaust wanted to do the close cut to collector RSR style to his exhaust so I used his original '74 rear most flanges. Then slowly welded it together, because the little mig has a terrible duty cycle. There's no space in between the big U shapes so I did these individually and then put them into the "collector" which isn't really one. And that's the process basically. If you do it, make sure you have extra pipe on hand. (EDIT) Free Idea: Someone really needs to make a specialized exhaust mockup tool that allows one to select a size of pipe and bend it like sillly putty and then cure it somehow to make it hard so one can cut it into sections and then weld it up, no one has anything like that and you could make some really trick exhausts way faster and easier. Last edited by Carlito; 04-25-2015 at 05:49 PM.. |
||
|
04-24-2015, 09:34 PM
|
|
|
Under the radar
Join Date: May 2007
Location: Fortuna, CA. On the Lost Coast near the Emerald Triangle
Posts: 7,129
|
Really nice job. Impressive how you could do it without welding many pieces together.
__________________
Gordon ___________________________________ '71 911 Coupe 3,0L outlawed #56 PCA Redwood Region, GGR, NASA, Speed SF Trackrash's Garage :: My Garage |
||
|
04-25-2015, 09:00 AM
|
|
 |
|
|
| Tags |
| 1974 , backdate , exhaust |


 Hildy
Hildy
 Blackbird
 2005 Porsche 997S 3.8L


 Red
Red My Garage
 1971 Porsche 911
 Baja Bug
