|
|
|
|
|
| Author |
|
|
Registered

|
I did buy 20 toothbrushes ($4 worth) at the dollar store on Sunday... I'll see if I can appropriate a flexible dish brush too. My wife is took kind. I also stole all her plastic baggies.
__________________
Lillie - 1979 911 SC Targa, The Original 911 SCWDP Car. Currently in open heart surgery. |
||
 06-22-2015, 06:00 AM
|
|
|
Registered
|
Cleaned the top of the engine well - it was super grimey. Also put the intake tubes into the Simple Green bath.
Tomorrow is probably time to clean out the tubes, and work on pulling old injector sleeves out. Then I've just got to get some new vacuum lines, figure out if I want something to secondarily wrap the fuel lines in back, and JB weld the hose. Then I wait for parts to arrive!
__________________
Lillie - 1979 911 SC Targa, The Original 911 SCWDP Car. Currently in open heart surgery. |
||
|
06-22-2015, 05:48 PM
|
|
|
Registered
|
Before
 After 
__________________
Lillie - 1979 911 SC Targa, The Original 911 SCWDP Car. Currently in open heart surgery. |
||
|
06-23-2015, 11:33 AM
|
|
|
Broke

Join Date: Apr 2004
Location: California Foothills
Posts: 1,567
|
This thread was like reading a good short story with a (presumably) happy ending. Congrats!
__________________
Beer is proof that God loves us and wants us to be happy. B. Franklin 93 968 Cab 81 SC Targa (Princess) Now Residing in Denmark 1973 RS Z28 Vash will never own it! |
||
|
06-23-2015, 01:42 PM
|
|
|
Registered
|
Took the headers out of their bath and used another 4 toothbrushes up. That's 16 of my 20 brushes in 3 days.
Hardware from MMC arrived and I now have 100 13mm bolts and washers (50/50 nylock/normal). I need to pull out the injector sleeves, I'll reference the info you guys have already given me. Need to JB weld the hole in the hard line. Got some plastic shield to put around it so it doesn't rub in the future. Parts arrive from PelicanParts on Thursday, so hopefully I'll have things back together this weekend!
__________________
Lillie - 1979 911 SC Targa, The Original 911 SCWDP Car. Currently in open heart surgery. |
||
|
06-23-2015, 07:36 PM
|
|
|
Registered
|
I thought the shiny headers merited a picture. So pretty! My engine is going to look great after this, although it won't whistle at me any more.

__________________
Lillie - 1979 911 SC Targa, The Original 911 SCWDP Car. Currently in open heart surgery. |
||
|
06-24-2015, 05:01 AM
|
|
|
El Duderino

|
Looks good!
EDIT: Bub Rub called and said he is disappointed you got rid of your whistle tips! 
__________________
There are those who call me... Tim '83 911 SC 3.0 coupe (NA) You can't buy happiness, but you can buy car parts which is kind of the same thing. Last edited by tirwin; 06-24-2015 at 08:38 AM.. |
||
|
06-24-2015, 08:29 AM
|
|
|
Registered
|
Parts came today! I replaced the oil switch and the seal for the crankcase breather.
I popped the old injector sleeves out by using small socket (8mm I think) on an extension, and tapping them out from below. Didn't have to nix the metal nubs on the top. Pushed the new ones in after dipping them and their orings in engine oil. Used a small rubber mallet and they seemed to go in well. The top of the sleeve is flush with the top of the hole - is that deep enough? I looked at pulling the engine oil cooler to replace it's seals. I have a very slow drip, nothing bad. However the Bentley book tells me to lower the engine by a few inches, take off a heat exchanger, and all sorts of stuff. Seeing as its not leaking (at least not significantly) I'm inclined to put the seals in a box and do it next time I drop the engine instead. Thoughts? I'm out of time for tonight, but tomorrow I plan to reassemble the CIS tube-system outside the car, and then install it carefully. Unless my night gets eaten by something else. Still haven't determined a good way to plug the EGR hole in the airbox. Local hardware store was closed when I went by. The hole is 24 mm in diameter, and unthreaded. About 1 inch in, it becomes rubber and slightly smaller. It was a friction fit for the exit tube from the EGR. I really don't want to put that think back in... Ideas? Here's hoping to take a drive this weekend!
__________________
Lillie - 1979 911 SC Targa, The Original 911 SCWDP Car. Currently in open heart surgery. |
||
|
06-24-2015, 03:21 PM
|
|
|
Registered
|
Maybe tap it out with this, and then put a 1" plug in? Shouldn't remove the capability to put the EGR back in in the future, as I wouldn't tap as far as the rubber seal part.
6 Piece Pipe Taps
__________________
Lillie - 1979 911 SC Targa, The Original 911 SCWDP Car. Currently in open heart surgery. |
||
|
06-24-2015, 08:12 PM
|
|
|
Registered
Join Date: Dec 2009
Location: Wayne, PA
Posts: 2,010
|
Oso, your story is making me laugh. Not in a mean way. But it seems like you have hit on everything that can go wrong all at once. Keep the faith. You'll be back on the road in no time. Your endless patience will be greatly rewarded. And as a bonus, you will have done it all yourself.
__________________
Christopher Mahalick 1984 911 Targa, 1974 Lotus Europa TCS 2001 BMW 530i(5spd!), Ducati 900 SS/SP 2006 Kawasaki Ninja 250, 2015 Yamaha R3 1965 Suzuki k15 Hillbilly, 1975 Suzuki GT750 |
||
|
06-25-2015, 05:15 AM
|
|
|
Registered
|
Thanks CCM, I am excited and looking forward to being on the road soon.
I was incorrect in stating the EGR hole size. It is actually 0.59 inches in diameter, which is 15mm. The 1" was the outer diameter. EDIT: Looks like 15 mm is very non-standard. I could go to 16 mm, for around $30, but it would be hard to get locally. Tapping this is looking like a lengthy, difficult proposition.
__________________
Lillie - 1979 911 SC Targa, The Original 911 SCWDP Car. Currently in open heart surgery. Last edited by OsoMoore; 06-25-2015 at 05:41 AM.. |
||
|
06-25-2015, 05:21 AM
|
|
|
El Duderino
|
On the oil cooler, should you decide to tackle it now:
- There is a Porsche TSB about a little notch in the engine case near the bottom of where the oil cooler mates to the case. It was a casting defect and oil can weep through it. Easy fix is to use some JB Weld or epoxy (high temp of course) to fill in the notch. - There was some great discussion/debate about the oil cooler seals. It seems the green replacements have failed for a number of people after being replaced. The recommendation is to use the reddish/brown ones. I had to search around to find them but I could only find them for the top two, which is ok because the top two are he only ones under pressure. The bottom one is just a gravity feed under no pressure so it shouldn't be an issue. If you decide to do it now I'll dig up the details for you.
__________________
There are those who call me... Tim '83 911 SC 3.0 coupe (NA) You can't buy happiness, but you can buy car parts which is kind of the same thing. |
||
|
06-25-2015, 06:21 AM
|
|
|
El Duderino
|
I tried to make my injector sleeves look like the way they were done before, so the top of the sleeve sits just below the lip and is staked in place to prevent it from backing itself out.
When you go to put the CIS back in, take a deep breath. When you attach the intake runners and boots to the bottom of the airbox, make sure that you try to align the boot clamps in such a way that you can access them to tighten once they are in the car. The trick is you want to leave them loose enough that you can move them into place and adjust them but not leaving them so loose that they fall off when you're trying to get them in place. Then you can do the final tightening once everything is in place. Hold your tongue the right way. A helper makes a huge difference to help you hold it while you align everything and get it into place.
__________________
There are those who call me... Tim '83 911 SC 3.0 coupe (NA) You can't buy happiness, but you can buy car parts which is kind of the same thing. |
||
|
06-25-2015, 06:35 AM
|
|
|
Registered
|
Gave up on plugging the EGR. I'm just going to put that sucker back in like I found it.
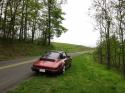
A previous owner (I blame Leland) had etched the cyclinder number on to the headers. Incorrect numbers. That wasted a few minutes... I am still picking over my pictures and notes. Where the heck does the driver-side airbox support tab sit? The passenger side one goes on the bracket attached to intake runner #6, but I can't figure out what went under the other side. I have picked over some of the older threads on airbox replacement (which is essentially what this amounts to) and think I have a plan to get it all back in nicely. The EGR assembly makes things much worse, because it has to be inserted into the airbox before you place it down in engine. But it totally blocks intake runner 6's nuts, especially the back one. I think 78 and 79 California SC's are the only cars with this uniquely painful setup ('80+ got oxygen sensors, non-CA didn't need EGR). Here are some threads I am examining to for help. I think I'm going to have 6 bolted in first. Then maybe in the airbox plus EGR as a unit. Connect intake 6 to it and tighten hose. Then put the other intakes in one-by-one, back to front? I suspect I am going to be a while, mostly because due to EGR I can't just assemble it outside the car and drop it in. My brother is visiting tomorrow and I hoped to go driving with him, but I think this has now become a task for Sunday evening after he leaves. *sigh* Relevant Threads/Links. My intake manifold hates me 911 SC air box replacement Dived right in https://www.flickr.com/photos/30575902@N03/
__________________
Lillie - 1979 911 SC Targa, The Original 911 SCWDP Car. Currently in open heart surgery. |
||
|
06-26-2015, 06:10 PM
|
|
|
Registered
|
Good progress today. I now have the runners back attached. Still need to tighten down some of the intake manifold gaskets, but the EGR is now back in place, runners are all torqued, I am ready to move to air and fuel hoses.
Here, for posterity's sake, is what I did. I have a '79 SC from California, so I am blessed with the Engine Gas Recirculator (EGR) valve. This is a really annoying hourglass-looking thing that sits behind the auxiliary air valve on the back right (looking into the engine). This is a step-by-step of how I put back in the airbox, intake runners, EGR, and the two brackets that hold the airbox from behind. I started with all these components, including the brackets, outside the car. The airbox had the fuel regulator and the throttle body detached. Intake runner seals (the ones against the engine) were already in place. First, I attached the three right hand intake runners to the airbox, tightening down the intake manifold gaskets. Cylinder 6 was tightened to full tightness, because I can't tighten it once it is in the car. Gaskets 4 and 5 I only tightened enough to keep them on the airbox, because I can reach them to tighten later. I then attached the back left bracket to the airbox, tightening the bolt on it. The bracket was now suspended from the airbox. Then I lowered the airbox into position after running the various wires and hoses across the engine shroud. I had to remove and adjust the runner's angles in their gaskets so it would drop into place properly. Next I inserted the EGR assembly. Holding the valve side of the EGR in my hand, I carefully poked the pipe around while holding my other hand against the bottom of the airbox near the hole, in order to aid in finding it. Once I had it in the hole, I rotated the the valve away, so it was not in the way for the next step. I then torqued the two intake runner bolts for cylinder 6. They are specced at 18 ft-pounds from what I read here. I had to use a couple extensions and my joint in order to get at it, but it wasn't bad. Next I moved the right rear airbox bracket into place. I had already bolted the rubber bumper onto the bracket. I lined it up with bolts on the back of the runner, and with the point where the airbox rests on the rubber bumper. I also had to tuck it under the EGR exhaust pipe. I kept the EGR rotated out of the way (although it was still inserted into the hole on the bottom of the airbox. I bolted the bracket to intake runner 6. I did not bolt it to the airbox, as I will need to put the AAV bracket on that bolt first. I did not yet bolt the EGR in place. Deep breath. Next, I moved to the left side of the airbox. When lowering it in, I had dropped the bracket onto it's mounting bolt. I now tightened that bolt. Then I took the intake runner for cylinder 3 (backmost left) and put the gasket onto it but did not tighten the gasket. Using the play allowed by the loose gasket, I maneuvered the intake runner into position, sliding the gasket onto the airbox and dropping it's end over the bolts on the engine. I ensured the gasket clamp screws were accessible. I repeated this process with cylinders 2 and then 1. The runner for 2 has a tab that wants to sit on top of the edge of 1, so I had to wrestle it a little. Now all the intake runners are installed. You can tighten all the gaskets at this point, I still need to do that. Next I swung the EGR valve around and adjusted it's insertion depth to light it up with the right rear bracket and exhaust pipe. I slid the gaskets and blocking plate into place there, and then slipped it's bolts through the gasket, plate, bracket, and pipe. Then I tightened it down. At this point, your EGR should be in place, and intake runner bolts and bracket bolts it blocks are already tightened. I then proceeded to tighten the rest of the intake runner bolts. Now I just need to put in hoses!
__________________
Lillie - 1979 911 SC Targa, The Original 911 SCWDP Car. Currently in open heart surgery. Last edited by OsoMoore; 06-27-2015 at 04:32 PM.. |
||
|
06-27-2015, 03:59 PM
|
|
|
Registered
|
I put some more parts in this morning. Intake runner gaskets are now tightened, the crazy larger air hoses are in place, and so is the AAR and AAV.
Next task is to put in the fuel system and WUR. Then follow that up with the throttle body and final air hoses. Here are some pictures from last night. I love the look of the clean runners and their new hardware, and new fuel injector sleeves.  
__________________
Lillie - 1979 911 SC Targa, The Original 911 SCWDP Car. Currently in open heart surgery. |
||
|
06-28-2015, 07:37 AM
|
|
|
El Duderino
|
Looks good! Keep up the good work.
__________________
There are those who call me... Tim '83 911 SC 3.0 coupe (NA) You can't buy happiness, but you can buy car parts which is kind of the same thing. |
||
|
06-28-2015, 07:55 AM
|
|
|
ROW '78 911 Targa
|
Injector sleeves don't look to be seated fully below the staking tabs compared to original photos you posted.
Tap them down with a sand hammer and a plastic screwdriver handle that fits the hole until the tabs are visible.
__________________
Dennis Euro 1978 SC Targa, SSI's, Dansk 2/1, PMO ITBs, Electric A/C Need a New Wiring Harness? PM or e-mail me. Search for "harnesses" in the classifieds. |
||
|
06-28-2015, 08:30 AM
|
|
|
Registered
|
It is now all back together. Didn't start, although it does a very weak putting sometimes. I suspect the mixture is way way off. I'll double check everything tomorrow after work. It is very pretty with its new bits and cleanliness! And I am very tired.
I can do the injector tapping pretty easily by just pulling the injectors. They fit so snug compared to the old ones!
__________________
Lillie - 1979 911 SC Targa, The Original 911 SCWDP Car. Currently in open heart surgery. |
||
|
06-28-2015, 08:27 PM
|
|
|
ROW '78 911 Targa
|
Near the bottom of page 2 in the CIS for dummies thread, I posted the factory procedure you need to follow to get back to a reasonable richness after rebuilding your system.
Get out the baby jars! 
__________________
Dennis Euro 1978 SC Targa, SSI's, Dansk 2/1, PMO ITBs, Electric A/C Need a New Wiring Harness? PM or e-mail me. Search for "harnesses" in the classifieds. Last edited by timmy2; 06-28-2015 at 09:30 PM.. |
||
|
06-28-2015, 09:28 PM
|
|


 Lillie

 1983 Porsche 911SC Coupe
 2011 Mercedes-Benz E350 Cabriolet
 Heinz
Heinz
