|
|
|
|
|
| Author |
|
|
'73 911 T Targa
|
Replacing targa rear window seal
Replacing the rear window seal in my 73 targa looks pretty straight forward,,, except - that the new seal was rolled up in the package and has some mild kinks. Should I do something to straighten it before installing it? I was thinking of soaking it in hot water, but I definitely want to be careful not to ruin it. Any guidance from someone who has done this?
|
||
 12-20-2015, 04:41 AM
|
|
|
Vintage Owner
|
There are some threads on replacing the rear Targa window, and they seem to make it sound tougher than the windshield install due to the different directions the seal must take. I imagine that fitting it onto the window and letting it sit in that position would help with some of the creases.
__________________
84 Targa (sold) 70 914-6 (sold) 73 914-6 2.7 conversion (sold) 75 GMC Motorhome (sold) 2016 Cayenne |
||
|
12-20-2015, 06:13 AM
|
|
|
Registered
Join Date: Aug 2008
Location: Clemson, SC
Posts: 500
|
Humongous pain in the rear! Have help and prepare for a fun couple hours. Creases or no, getting the seal to stay on the window is difficult. It doesn't sit on there with much tension because of the shape of the window, so it wants to fall off. Hot water on the seal would be fine, I think, but won't make that much difference. You'll need to get it wet and soapy anyway.
Below is a picture of mine, almost ready to install. Me and two other people got it to this point, with all hands on deck at several points. We had used soapy water to get the seal on all the way around, taping as we went (yes, trying to get the tape to stay on with everything wet and soapy was fun too). Then we inserted rope all the way around (untaping and retaping as we went), again needing copious soapy water to get it in all the way. Many recommend going around twice in case the first pull misses some spots. We didn't have that problem. Then we inserted the aluminum trim (only one on in this picture). Have to do this before install. Then set the whole assembly in place, pushing it hard against the flanges on the body. Then tape could be removed. Applying strong pressure to the outside of the window is critical as you pull the rope from the inside to pull the inner edge of the seal over the body flange. They say the targa windows are nearly unbreakable so have your assistants push hard. This part was relatively easy, compared to the headaches of just getting the seal, trim, and rope in place and ready.  Good luck! Mike
__________________
Michael Caterino Clemson, SC 1970 tangerine (=Tiger Orange) 'T' targa restoration: mk911.blogspot.com |
||
|
12-20-2015, 07:15 AM
|
|
|
Registered

|
If you don't have a bunch of strong assistants available, I've seen people use a wide fabric cargo strap with come-along, fastened to a thick piece of plywood under the rear wheels. Attachment points for the strap are perpendicular to the slope of the window, so you may need to brace the forward part of your plywood to the floor of the car. You have to crank the strap down hard to get both planes of seals within reach of the window flanges. Not a job for the faint of heart.
__________________
techweenie | techweenie.com Marketing Consultant (expensive!) 1969 coupe hot rod 2016 Tesla Model S dd/parts fetcher |
||
|
12-20-2015, 07:58 AM
|
|
|
Registered
Join Date: Dec 2008
Location: San Antonio, Texas
Posts: 3,591
|
This is not a job for the first timer!
__________________
1973 911S (since new) RS MFI specs 1991 C2 Turbo |
||
|
12-20-2015, 10:17 AM
|
|
|
'73 911 T Targa
|
Not that seal, this seal
Not that hard to replace seal, I meant this (should be) easy to replace seal (see pic). Note that it's torn-
It looks like it should be easy, but the new seal is all squiggly from being in the package. I'm hoping to get tips on how to straighten it before installing. Here's the pic: 
|
||
|
12-21-2015, 04:15 PM
|
|

|
|
Registered

|
That's beading. Just slap it on and cut it to length. The sun will take care of the rest. Cut it on 45 angles at the ends and maybe leave it long in case the kinks cause it to shorten (or something.) 10 min job, don't overthink it.
__________________
Jason - Austin, TX 82 911 SC targa (gone, but not forgotten) 92 968 coupe |
||
|
12-21-2015, 06:23 PM
|
|
|
Registered
|
PS there's a metal insert that you can bend/form by hand to straighten those kinks.
__________________
Jason - Austin, TX 82 911 SC targa (gone, but not forgotten) 92 968 coupe |
||
|
12-21-2015, 06:24 PM
|
|
|
Registered User
Join Date: Mar 2011
Location: Upstate, South Carolina
Posts: 267
|
My beading needs replaced and I'm wondering if the whole seal doesn't need it.
Thanks for the tips Mike... I'll be sure to keep you in mind when the time cones to do mine! |
||
|
12-21-2015, 07:51 PM
|
|
|
Registered
Join Date: Dec 2014
Posts: 14,034
|
Quote:
|
||
|
12-22-2015, 07:00 AM
|
|
|
Registered
Join Date: Oct 2008
Location: Nash County, NC.
Posts: 8,559
|
If you like worms, good, you'll have a whole can....
Bruce |
||
|
12-22-2015, 10:57 AM
|
|


 1970 Porsche 914-6 (sold)
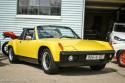 1973 porsche 914-6 conversion (sold)
 1984 Porsche 911 Carrera Targa - sold
 GMC Motorhome
 Sinister Dove
 Gemini Boomerang
 Porsche 996 Turbo Convertible
 996 Turbo
 911
911

