|
|
|
|
|
| Author |
|
|
Carmagic.us
Join Date: Feb 2007
Location: Virginia
Posts: 2,124
|
My new addition the 914
A few weeks ago I picked up a 914. It's a 76 2.0, Sunlight Yellow.
Here is the mandatory picture.  The car had already major surgery to fix the hell hole, so I cannot take credit for that, as well for the engine rebuild. Here some pictures from the surgery   The car was converted to Carbs by the PO.  So now it's to start work with some things these car have. The Tach was not working and I found one for replacement. So, out with the old and in with the working one. 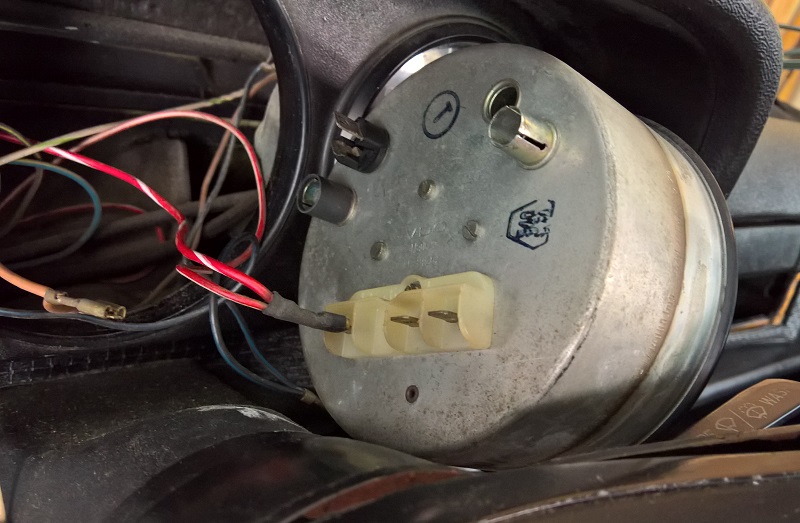 This was a good opportunity to replace the BA7s instrument lights with LED vintage white. 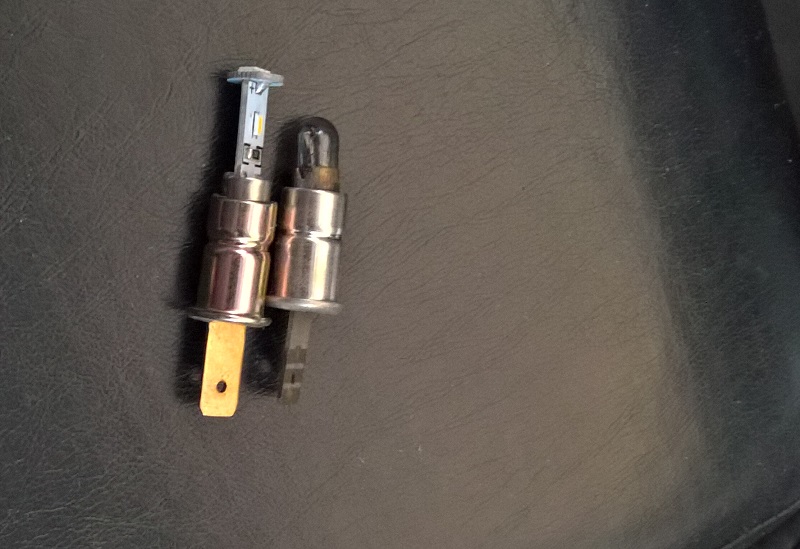 Here before 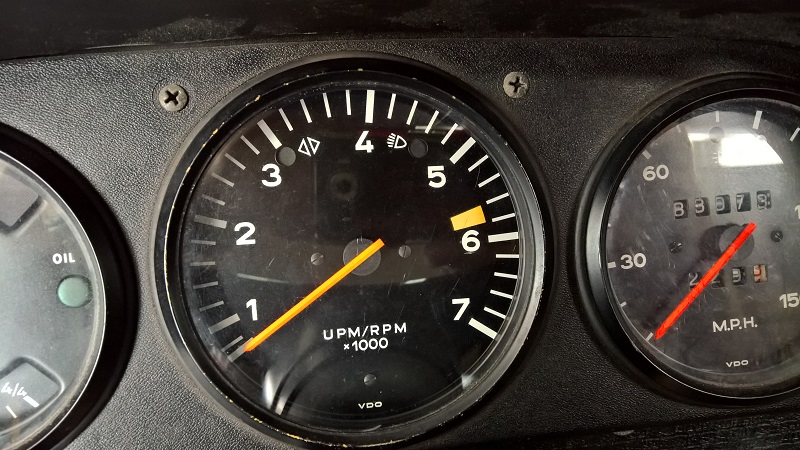 And here after 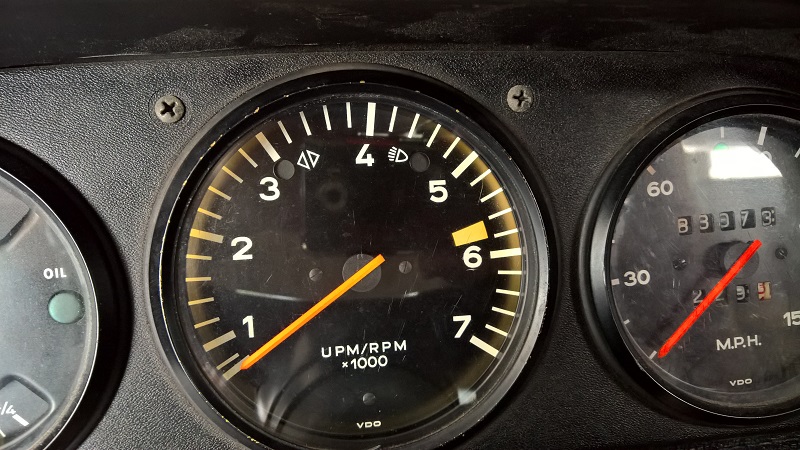 The next is the headlights, I cannot believe that people can still drive in the dark with those sealed beams. 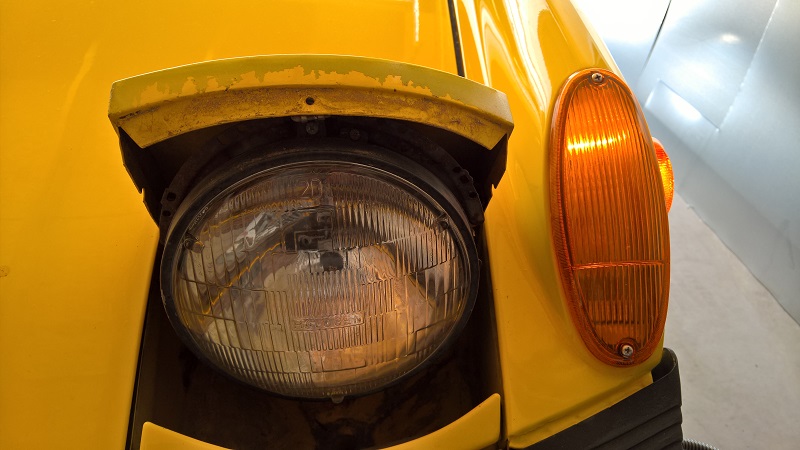 There you go. 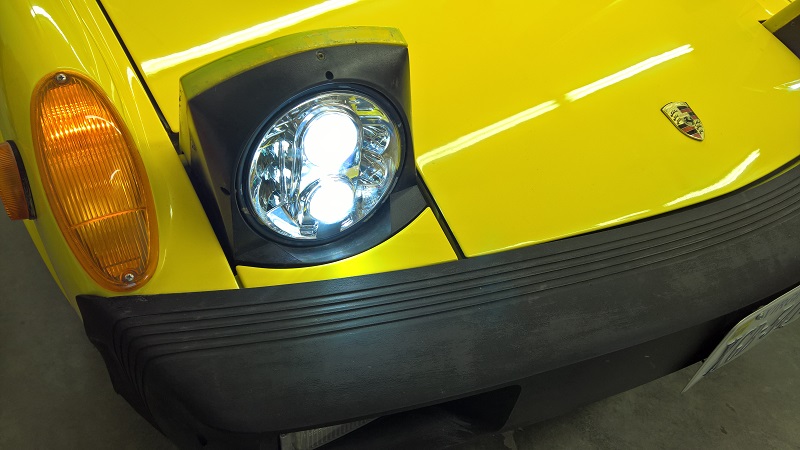 More in the next post - Picture limit.
__________________
For BA7s Dash LED, and External Marker LED go to carmagic.us - Now Luftgekühlt Emblems |
||
 06-26-2016, 10:13 AM
|
|
|
Carmagic.us
Join Date: Feb 2007
Location: Virginia
Posts: 2,124
|
The backup light was not working, and I ended up to install a new wire from thr backup switch at the tranny to the housing. I didn't want to dig into the electr. panel at this time.
It it is not possible to hide that the car was painted with everything on it. 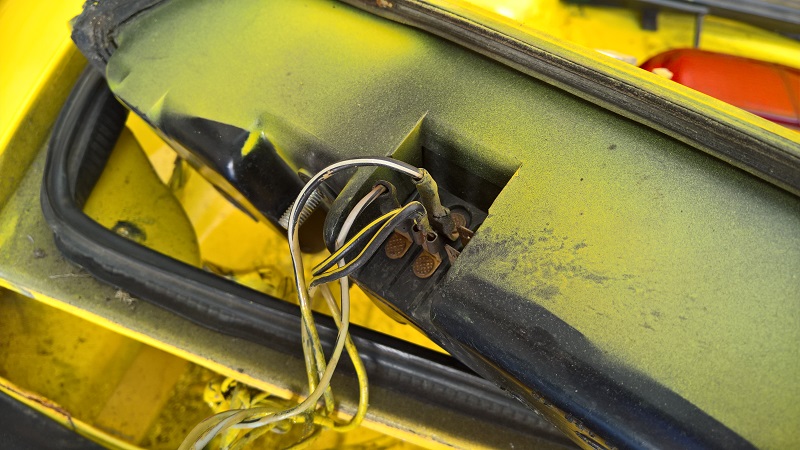 Also the cable had not chance to hide or escape from the painter. 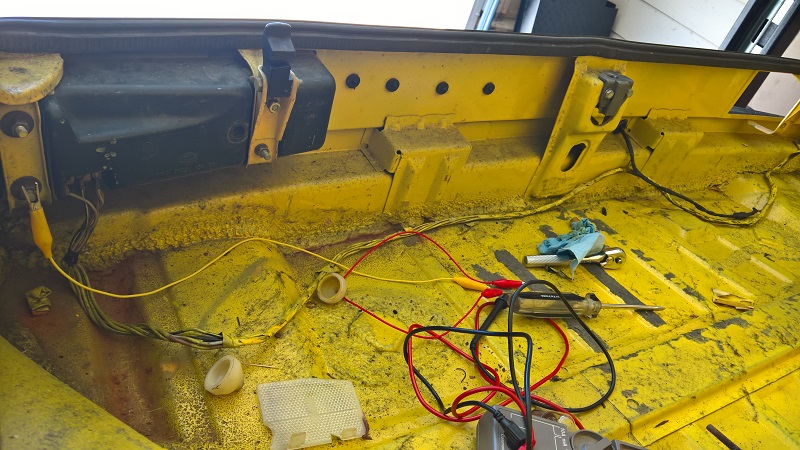 After opening the rear trunk a few times, it didn't looked right on the left hinge. Here already removed for repair. The sleeve was broken out from the mounting point 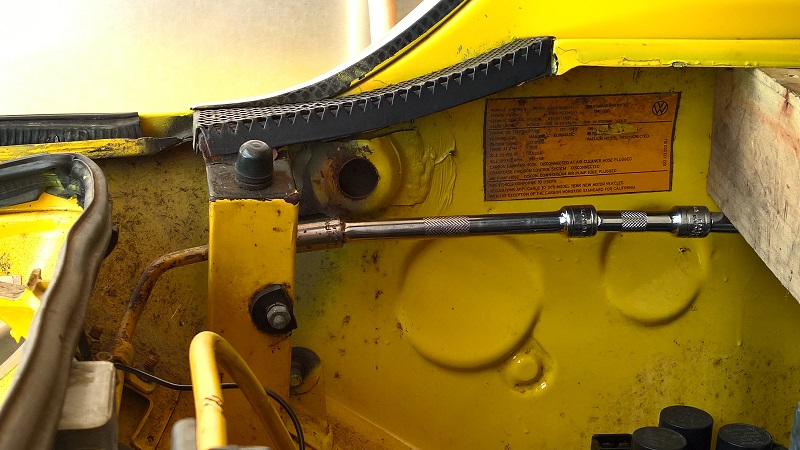 This is how it was installed. 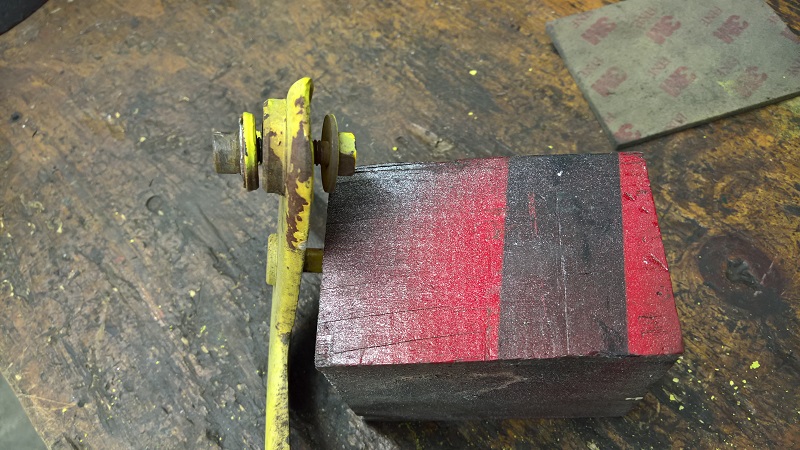 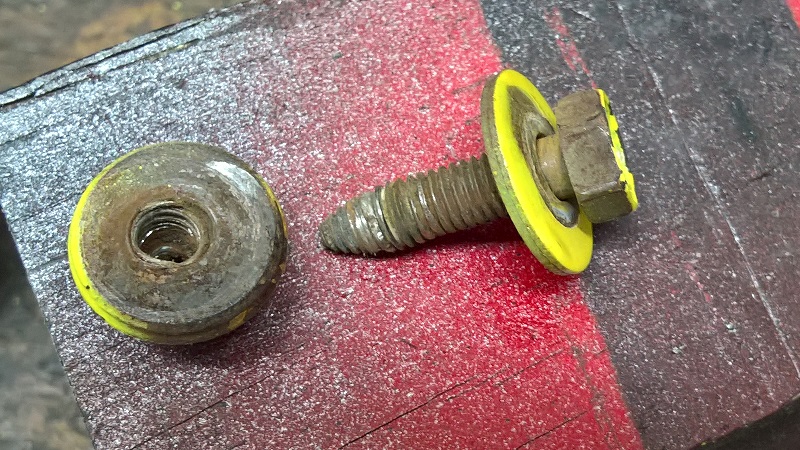  This is how it should be.  OK, lets fix it. Drilling all the way true, and cut the thread. 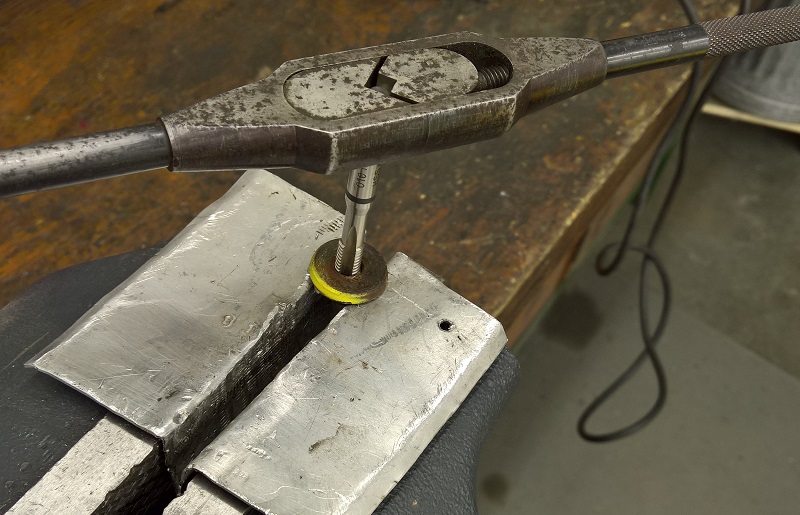 Weld on an additional nut from the backside. 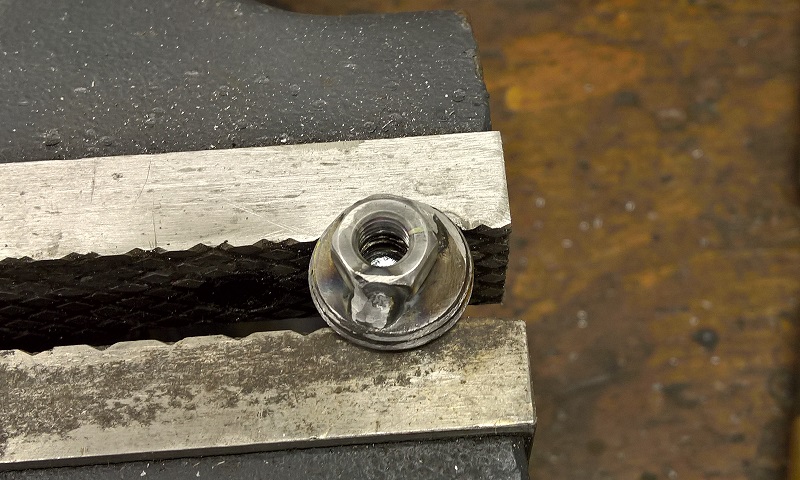 Ready to weld back in. 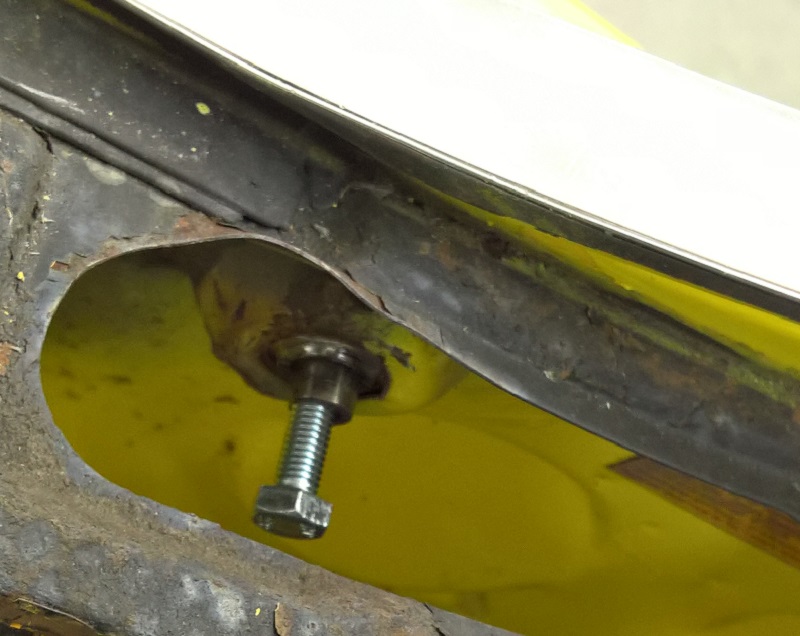 More in the next post, Image limit
__________________
For BA7s Dash LED, and External Marker LED go to carmagic.us - Now Luftgekühlt Emblems Last edited by rothaus; 06-26-2016 at 10:18 AM.. |
||
|
06-26-2016, 10:15 AM
|
|
|
Carmagic.us
Join Date: Feb 2007
Location: Virginia
Posts: 2,124
|
My new addition the 914
Hinge mounting point is done
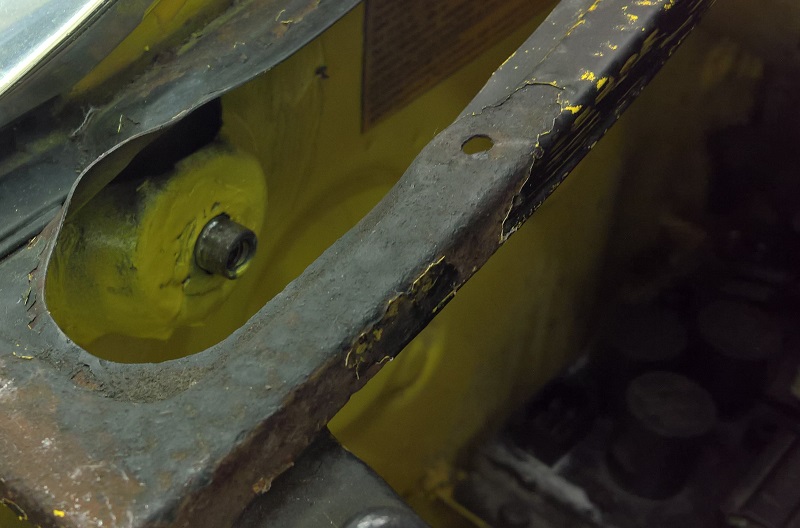 Hinge back in, and ready to install the lid. 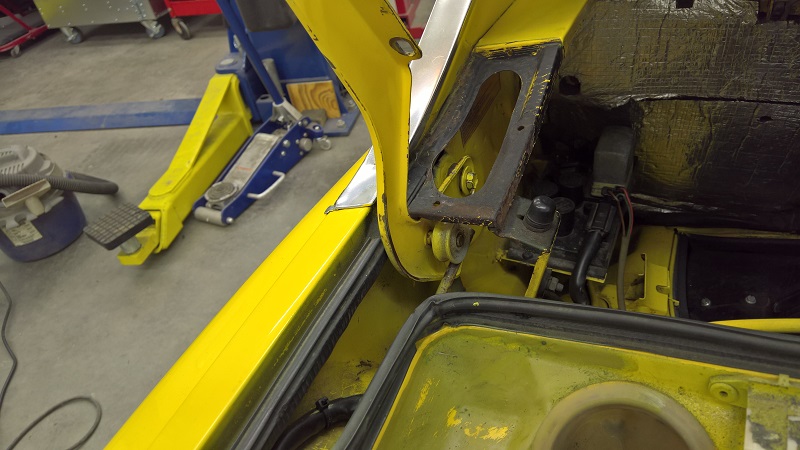 I will continue to fix all these little enoying things. More to come. Cheers Engelbert
__________________
For BA7s Dash LED, and External Marker LED go to carmagic.us - Now Luftgekühlt Emblems |
||
|
06-26-2016, 10:16 AM
|
|
|
Carmagic.us
Join Date: Feb 2007
Location: Virginia
Posts: 2,124
|
Here is more progress
Exhaust 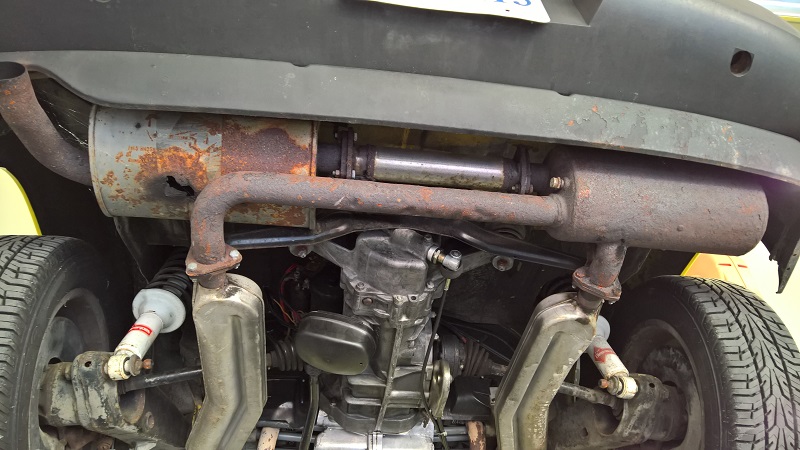 Looks like that muffler doesn't do anything. So I took it out and found that the pre muffler is in good shape, just a lot of surface rust. So I cleaned it up and gave it a coat of hi heat black paint. 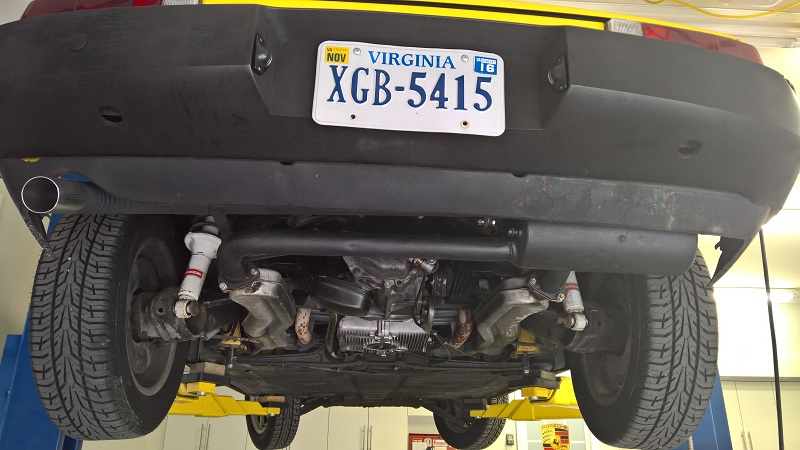 Instead of the additional muffler, I just installed a pipe, and it still is not that loud. LOL. 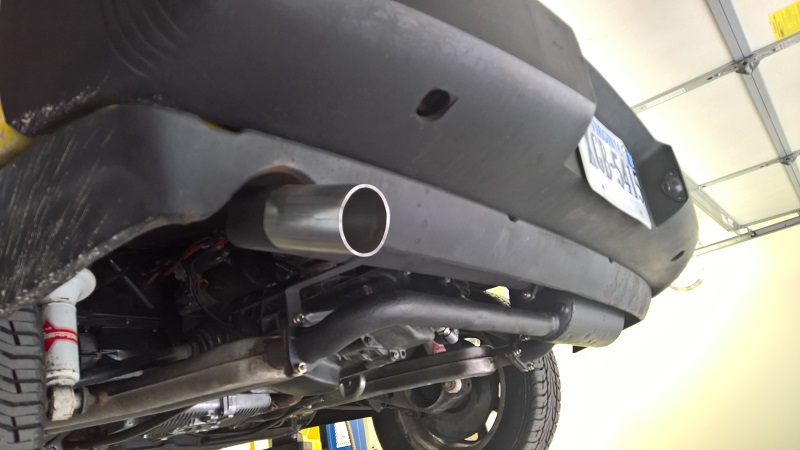 An other thing that needed some attention was the cover plate under the steering rack. 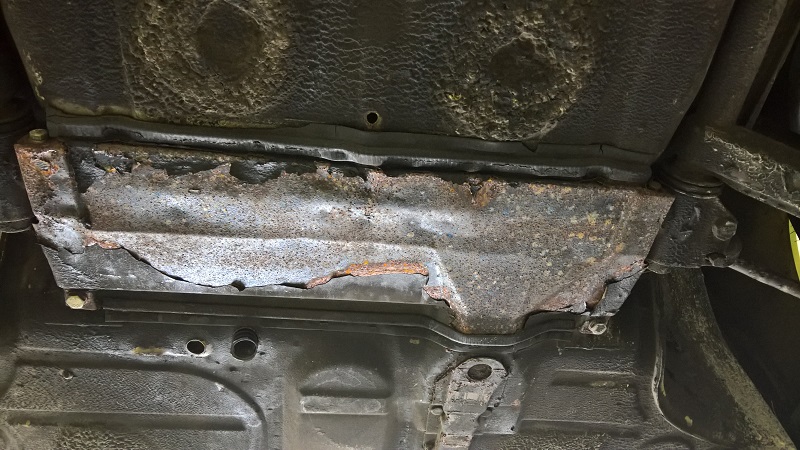  We will get to that later..... I also found that the inner nut of the tie rod was not tied, which would not go anywhere since the outer one was tied. 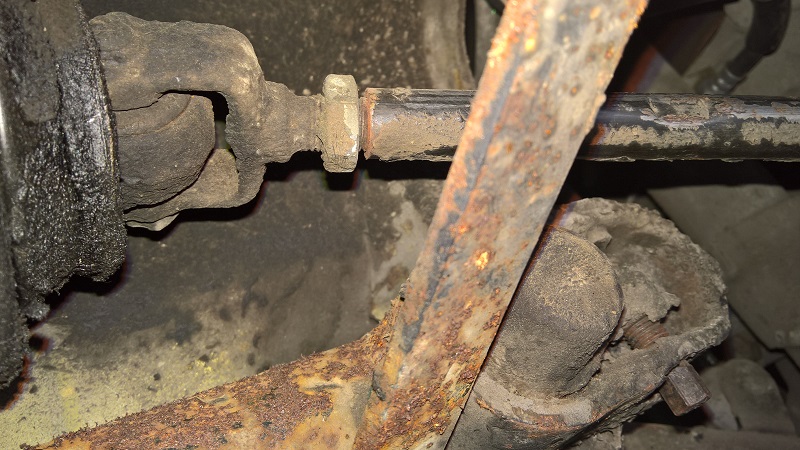 Here is the cover cleaned up. 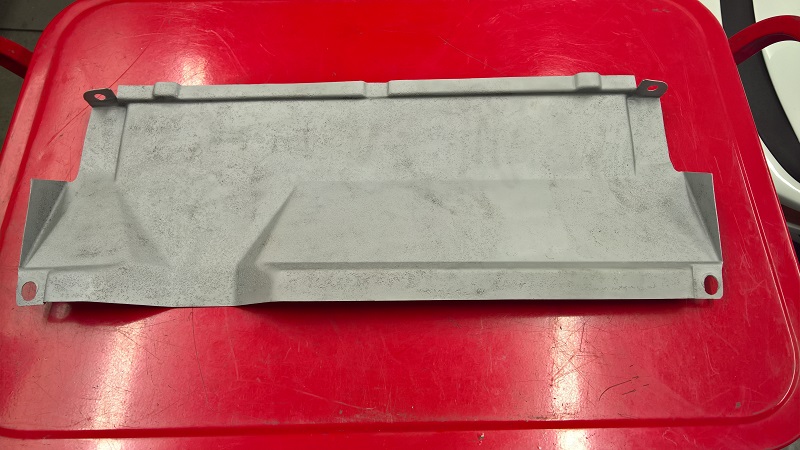 Now, there some issues that the windshield wiper would not stop, and if, it would stop anywhere, but not in parking position. So I started with the easy part, the switch. 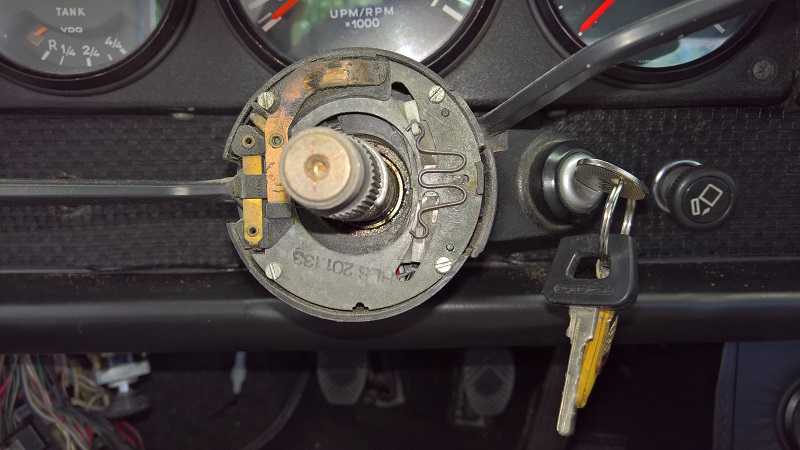 I removed it, and gave it a good cleaning with electronic cleaner and air, and gave it a try. 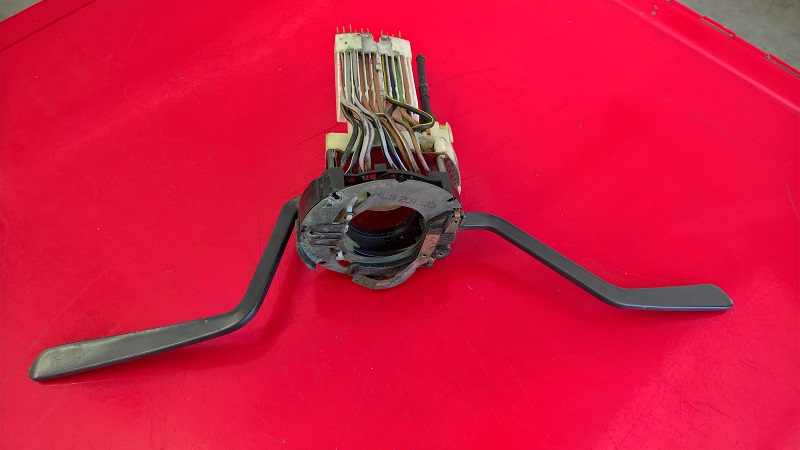 Continue in the next post
__________________
For BA7s Dash LED, and External Marker LED go to carmagic.us - Now Luftgekühlt Emblems |
||
|
06-30-2016, 06:48 PM
|
|
|
Carmagic.us
Join Date: Feb 2007
Location: Virginia
Posts: 2,124
|
Continue
Ha, now it was working, but the wiper stopped to park position in the middle of the windshield. OK the motor seam to work and park, but in the wrong position. To get to the wimpywipermotor you have to remove the air blower housing. To remove the air blower housing you have to remove the gas tank. OK, tank out 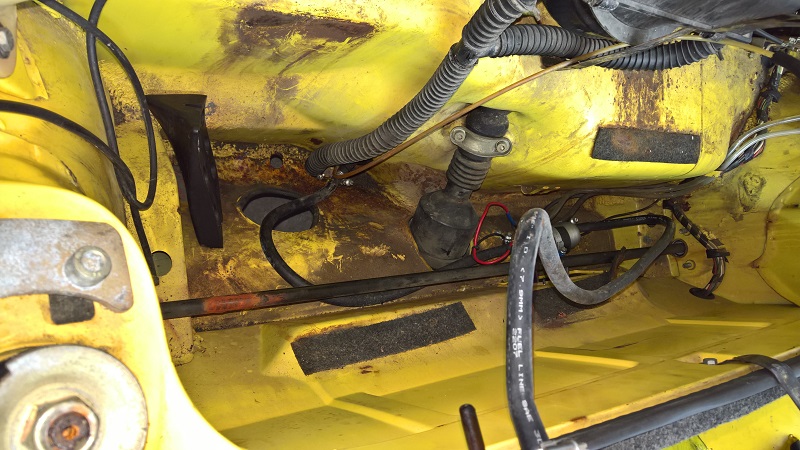 It's always interesting what can be found The fuel pump was a little to close to the brake fluid supply line for my, almost rubbing. 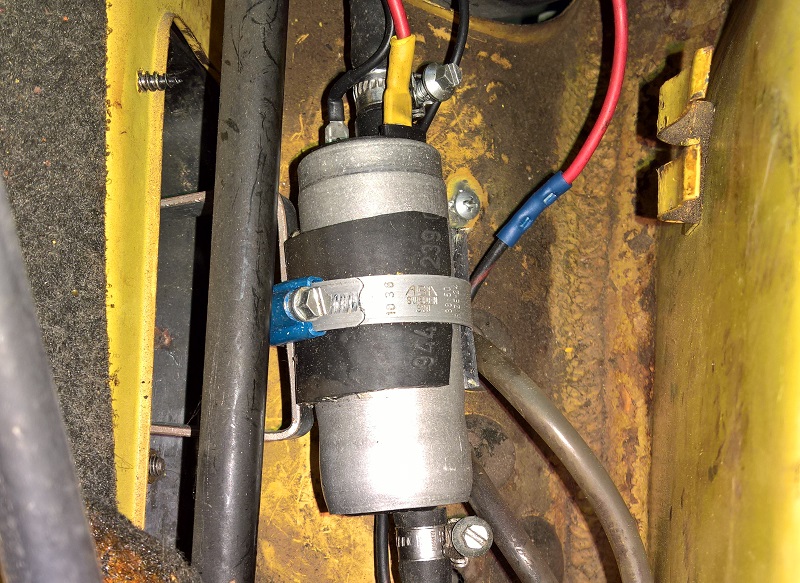 So I removed it and modified the holder Here before 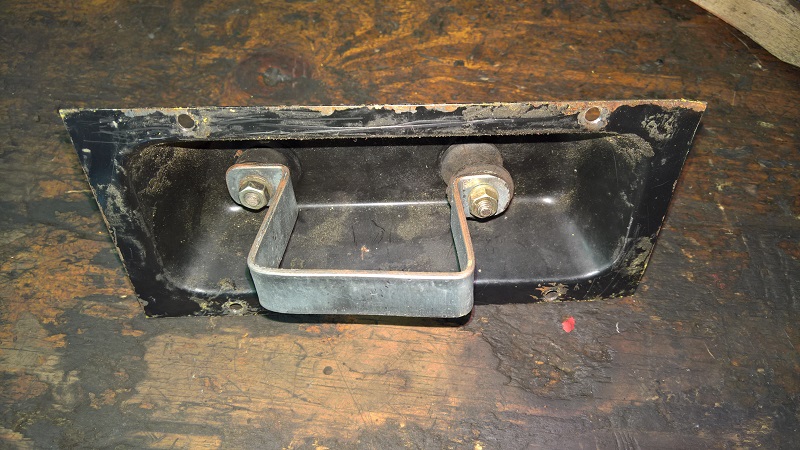 Here after 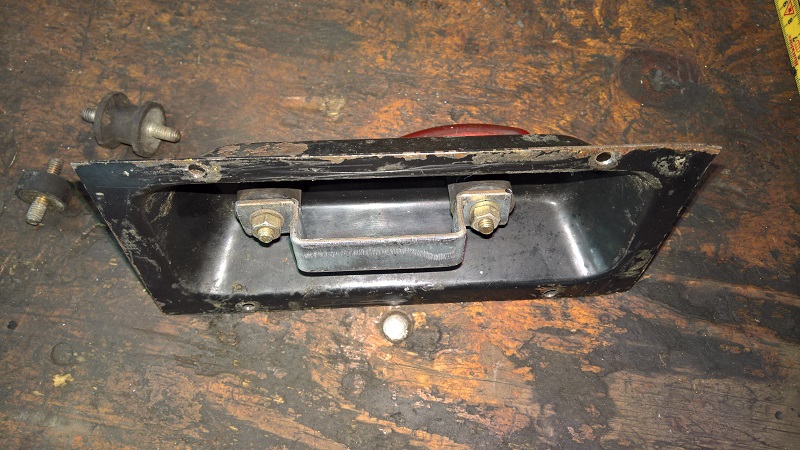 Much more betta 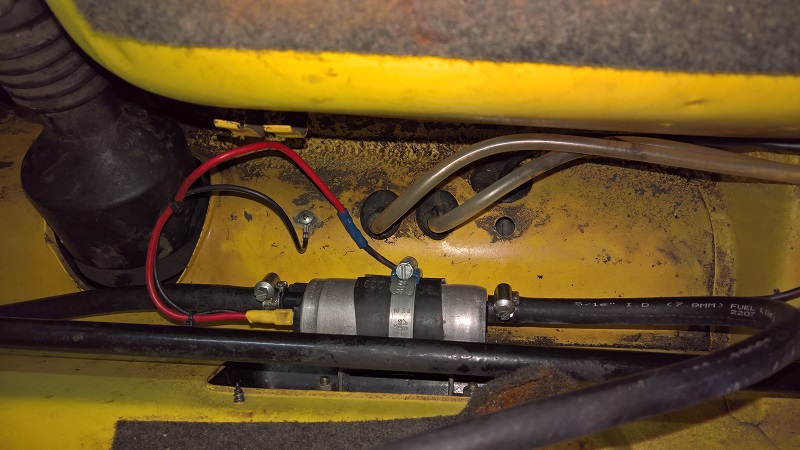 OK, back to the wimpywiper. Blower out. There was really nothing left without yellow paint. 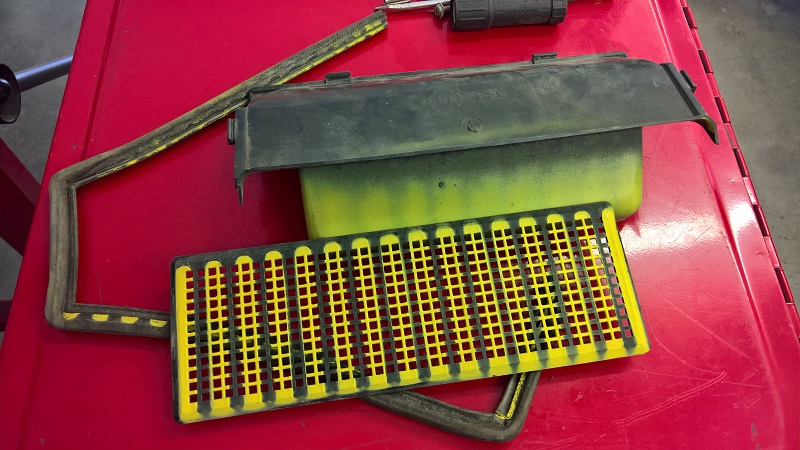 OK, finally access the wiper motor 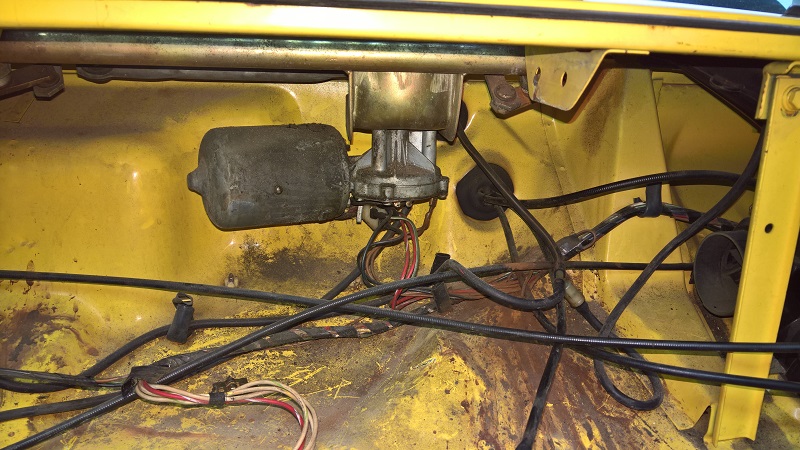 There is also a nut from the dash board. The best is tor remove the speedo to access it, unless you have 1 inch thin arms with 25 joints, LOL. 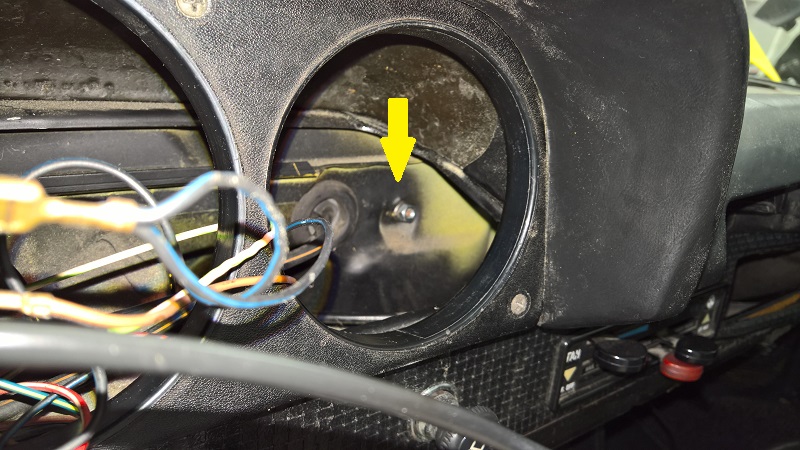 I took the opportunity to clean out 40 years of collected dirt. 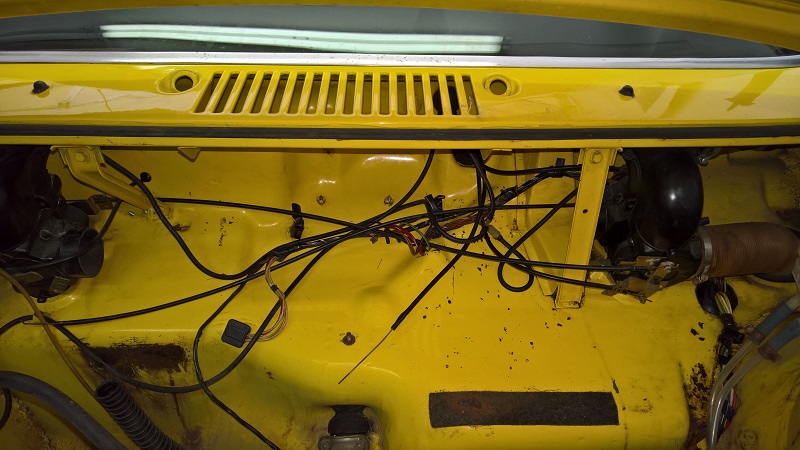 After the adjustment of the linkage, so that the wiper stops at the bottom of the driver side, motor goes back in. 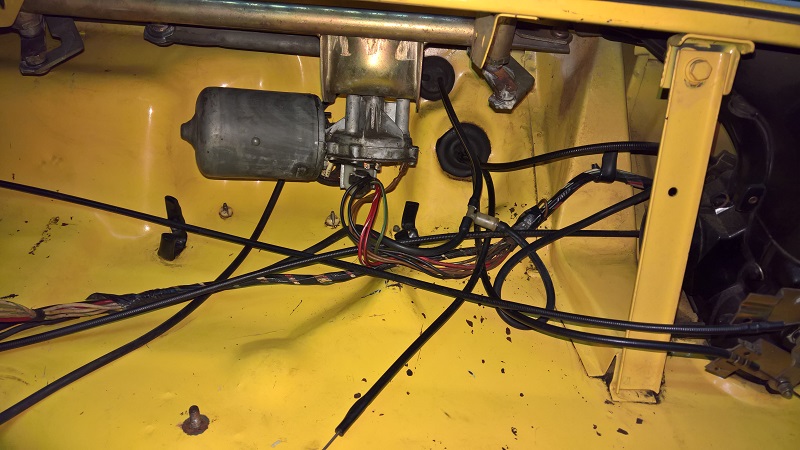 Continue in next post
__________________
For BA7s Dash LED, and External Marker LED go to carmagic.us - Now Luftgekühlt Emblems |
||
|
06-30-2016, 06:50 PM
|
|
|
Carmagic.us
Join Date: Feb 2007
Location: Virginia
Posts: 2,124
|
Continue
Next to clean out the blower 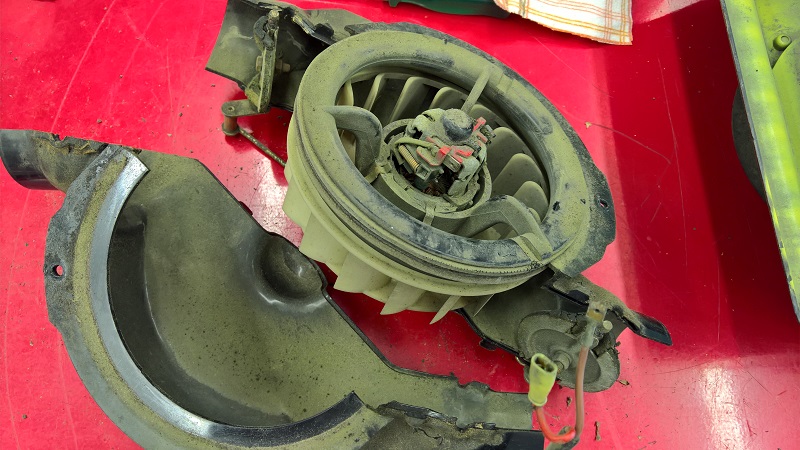 The motor looked good, the brushes were still good, and the motor bearings looked like sealed bearings and should be OK for another 40 year of dust. 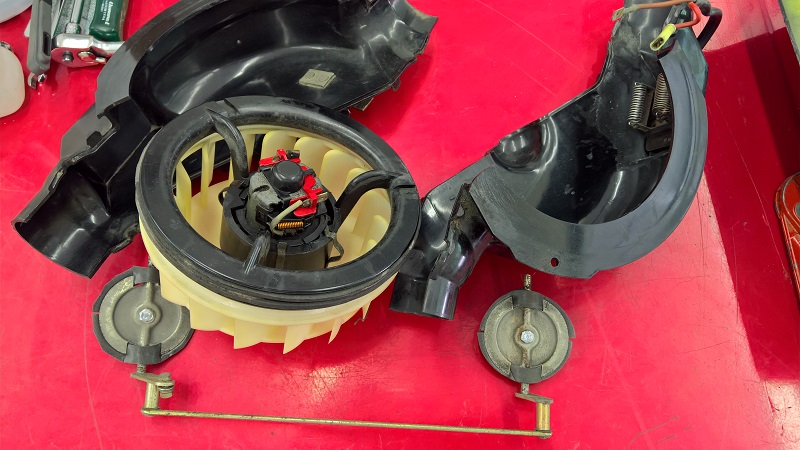 Ready to back in. 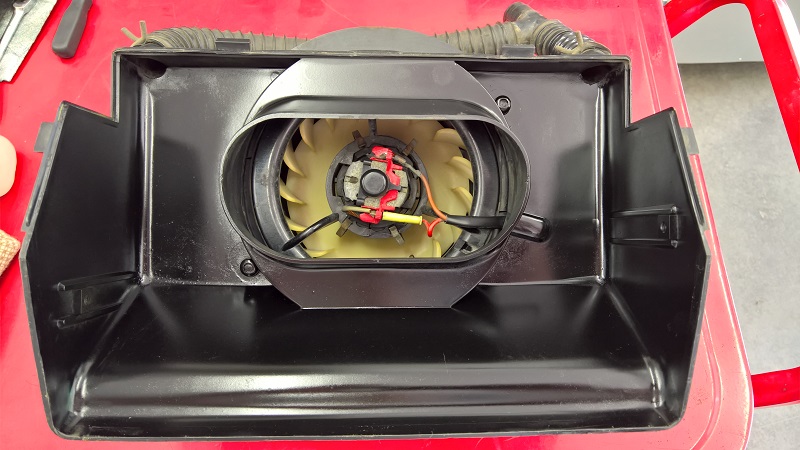 I could not get the yellow paint of the grill, but I had to paint it black. Back to Black. 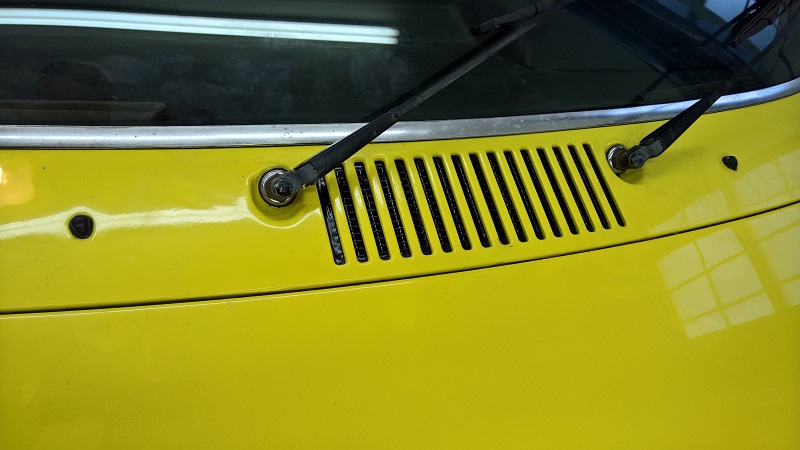 to be continued Cheers Engelbert
__________________
For BA7s Dash LED, and External Marker LED go to carmagic.us - Now Luftgekühlt Emblems Last edited by rothaus; 06-30-2016 at 07:03 PM.. |
||
|
06-30-2016, 06:51 PM
|
|

|
|
Carmagic.us
Join Date: Feb 2007
Location: Virginia
Posts: 2,124
|
A little update:
Here is the steering rack panel back in. It's funny this was the thing what looked worse, now the rest looks crappy.  So now that the wiper works correct, I can go back the LED's for the external marker. I was wondering why the turning signal does that hyper blinking. When I pulled out the fuse box to replace the flasher relay.... Tadaaa. The original relay must have gone bad, and somebody installed a replacement relay. LOL. That thing hanging on the 3 wires with electrical tape.  Since this section was in need of some cleaning, I also pulled the Light, Hazard, and Fog light switch, to give them a good scrub, with oileater and electronic cleaner. 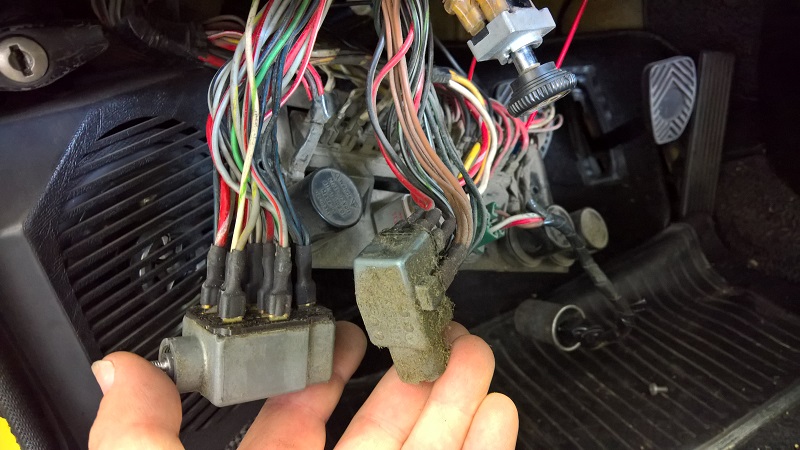 Here is the new flasher relay installed , it's # 3 from right. They all look so happy now nice and clean. 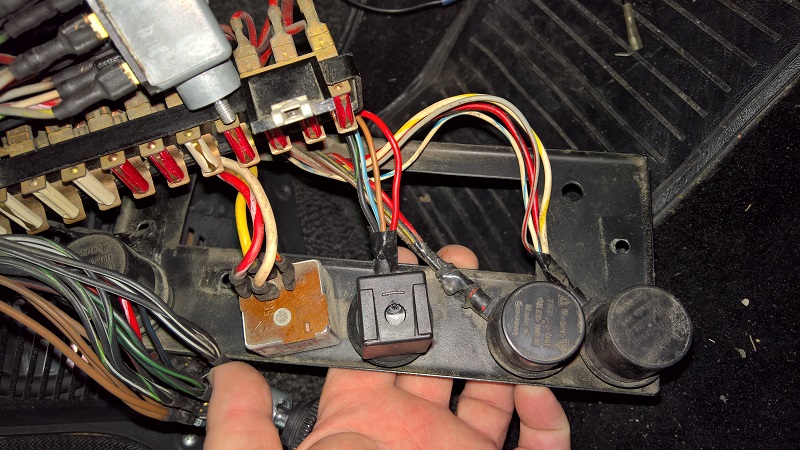 The new flasher work correct with the LED's, so all can go back in. Next I checked all the brakes, since I want to go to get the car inspected. The rear looked all good, but the front brakes needed some overhauln. That one pad had less than a mm left. New pads and the caliper rebuild. 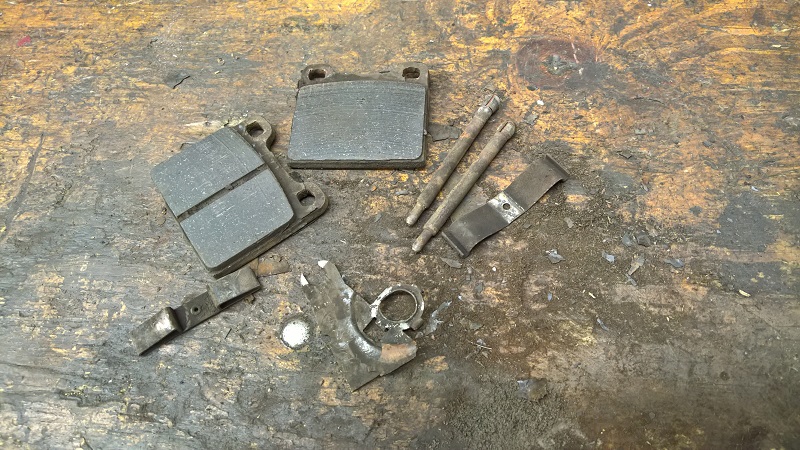 Here are they ready to get back on. 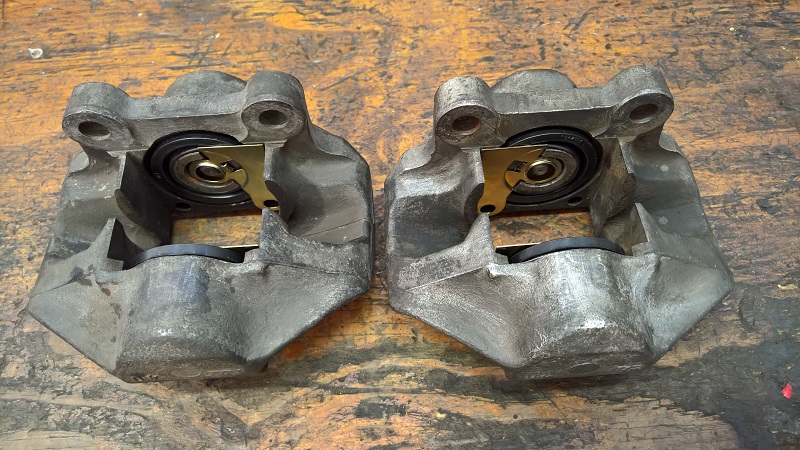 Next is the front spoiler, there were some cracks and on the right side it was broken out where it mounts to the fender. 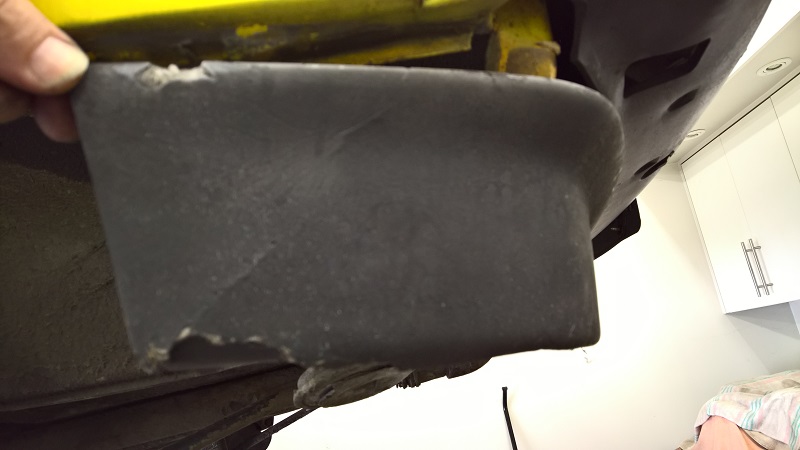 I took it off and re-enforced it from the inside. That spoiler is paper thin. 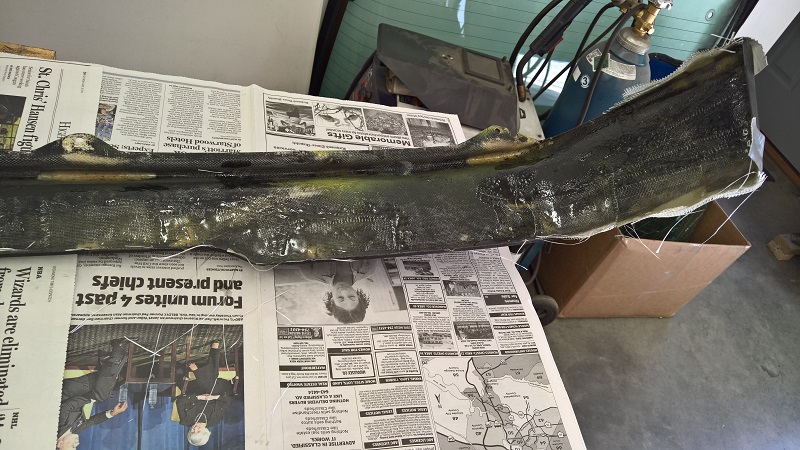 After that I gave it a quick Rustolium satin black paint job, and put it back on. Not sure what I going to do with that later, because I plan to backdate to metal bumpers, not sure yet. 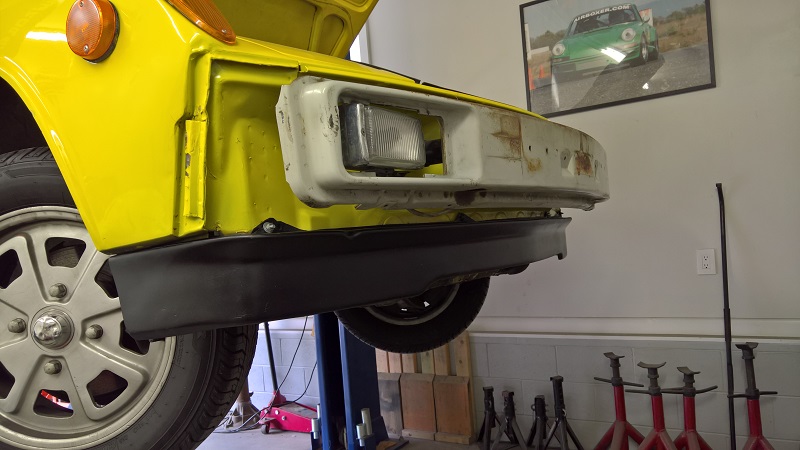 To be continued Cheers Engelbert
__________________
For BA7s Dash LED, and External Marker LED go to carmagic.us - Now Luftgekühlt Emblems Last edited by rothaus; 07-05-2016 at 02:48 PM.. |
||
|
07-05-2016, 02:45 PM
|
|
|
1974 Porsche 914
|
Nice Pictures!
That is a nice 914! Congrats!
Save the Porsche! Claus |
||
|
07-08-2016, 10:57 AM
|
|
|
Carmagic.us
Join Date: Feb 2007
Location: Virginia
Posts: 2,124
|
My plan was to replace the ugly rubber bumper with some metal bumpers.
So, I found a front and rear metal bumper and the top pieces in good condition. The bumper self were painted and need some work. Here is the front one where I have closed the hole from the bumperettes. It also needed a little banging to get it straight at those areas. 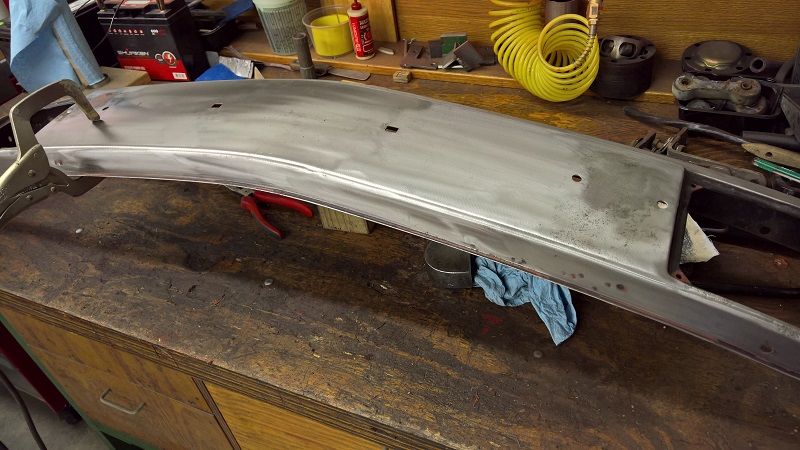 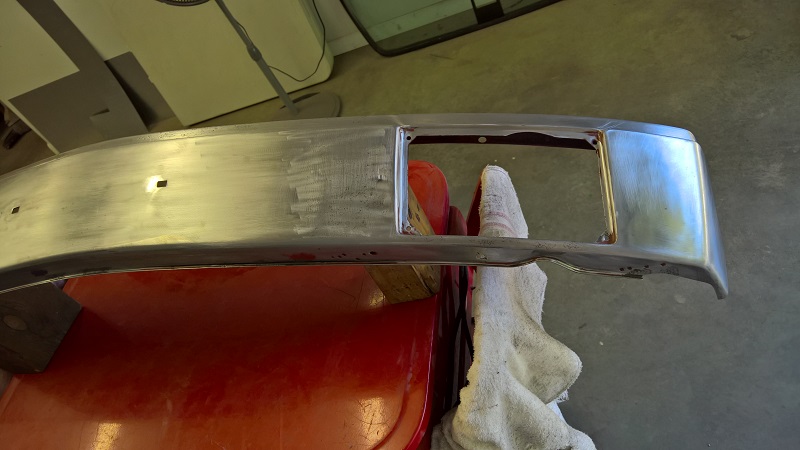 The rear bumper showed some rust once I removed the bumperettes (or Stosstangenhoerner in German). Here is it after stripping the paint off, and I used some acid to get rid of some rust on the inside. It looks worse than it is, it's only some flash rust from the acid. 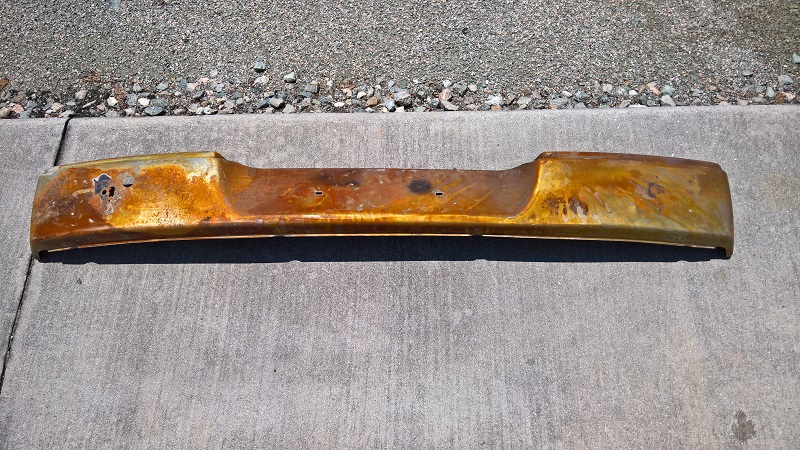 Here is the area that need repair 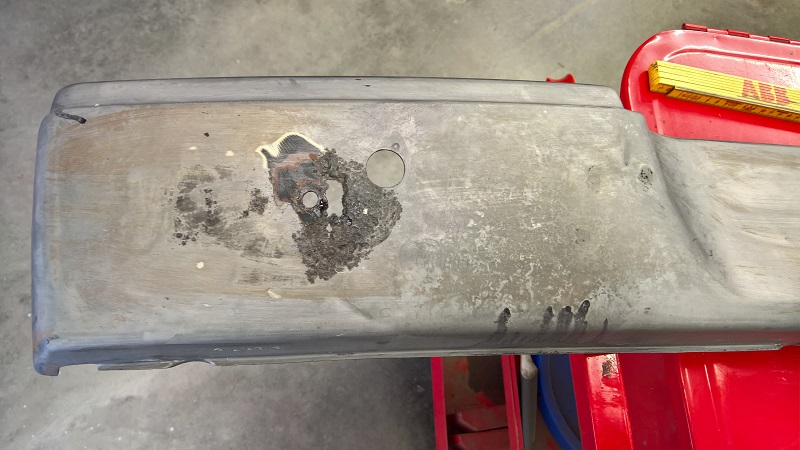 Cut out the bad section 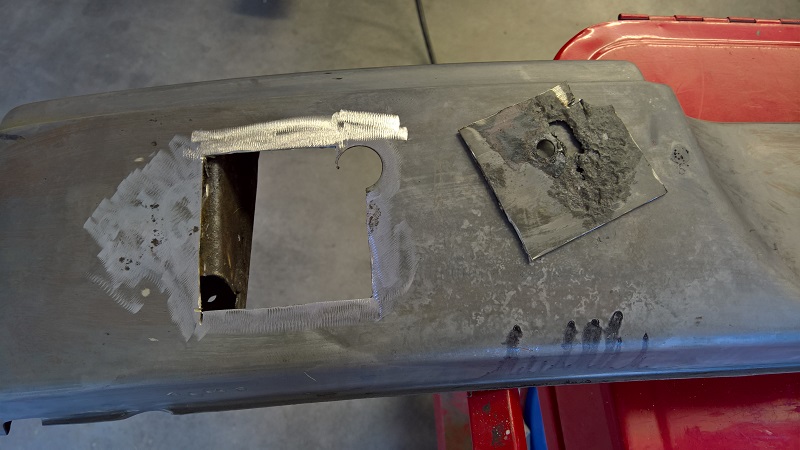 Fit the new piece 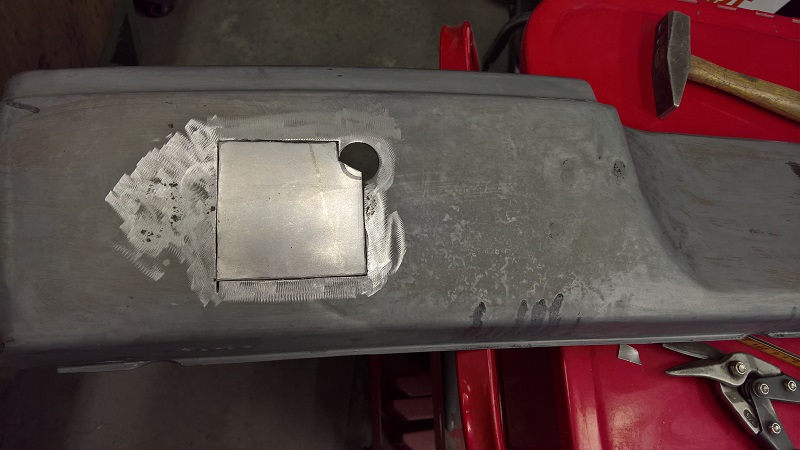 Weld it in 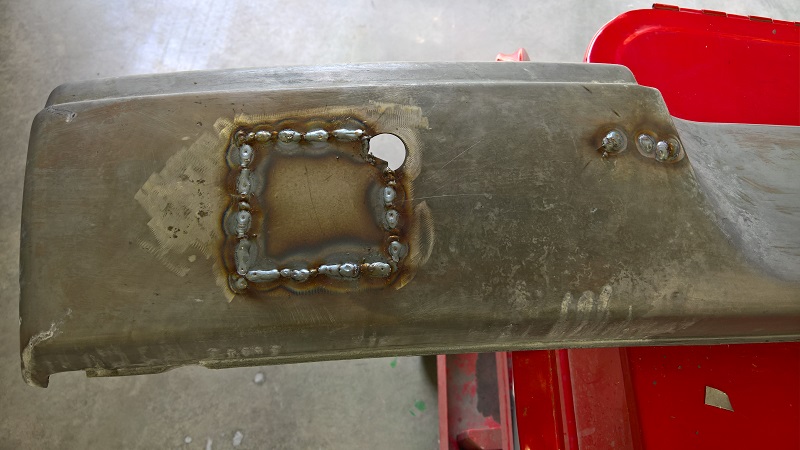 Clean up and done 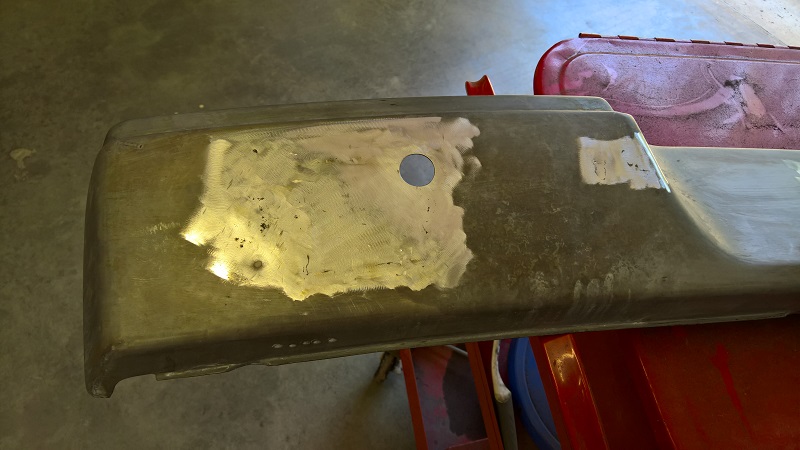 Cheers Engelbert
__________________
For BA7s Dash LED, and External Marker LED go to carmagic.us - Now Luftgekühlt Emblems |
||
|
07-22-2016, 05:55 PM
|
|
|
Registered
Join Date: May 2008
Location: Merrimac,WI
Posts: 895
|
Engelbert, how did you get your transmission so clean.....did you seal the mag. Very nice work. Best, Mark
|
||
|
07-23-2016, 11:44 AM
|
|
|
Registered
Join Date: Nov 2004
Location: Austin, TX
Posts: 29
|
What headlights did you put in.
__________________
Early 911 Racing |
||
|
07-23-2016, 01:24 PM
|
|
|
Carmagic.us
Join Date: Feb 2007
Location: Virginia
Posts: 2,124
|
Quote:
Cheers Engelbert
__________________
For BA7s Dash LED, and External Marker LED go to carmagic.us - Now Luftgekühlt Emblems |
||
|
07-23-2016, 02:34 PM
|
|

|
|
Carmagic.us
Join Date: Feb 2007
Location: Virginia
Posts: 2,124
|
Quote:
These are LED headlights. 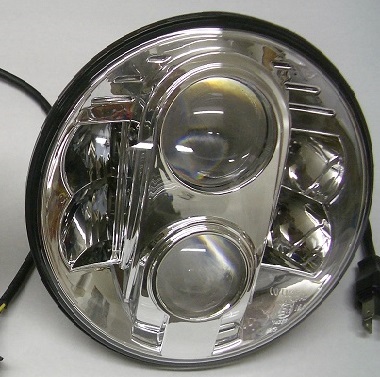 Here is the link LED Headlights Cheers Engelbert
__________________
For BA7s Dash LED, and External Marker LED go to carmagic.us - Now Luftgekühlt Emblems |
||
|
07-23-2016, 02:37 PM
|
|
|
Carmagic.us
Join Date: Feb 2007
Location: Virginia
Posts: 2,124
|
More work on the 914 bumper.
Got it primed and ready for final sanding and painting. 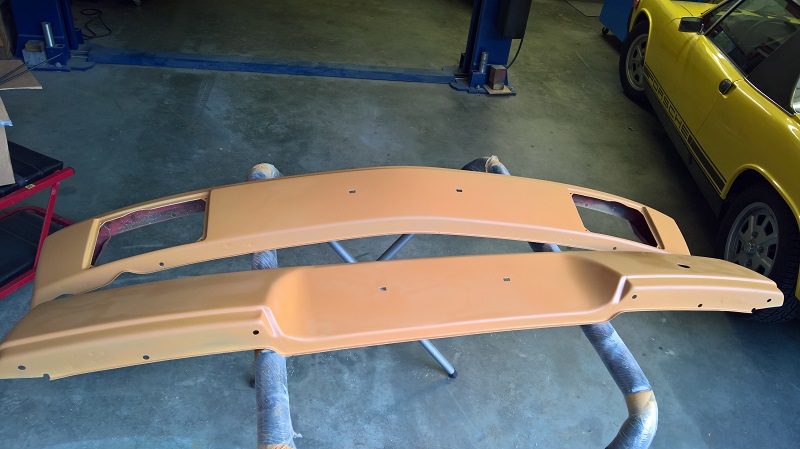 Here they are now painted. 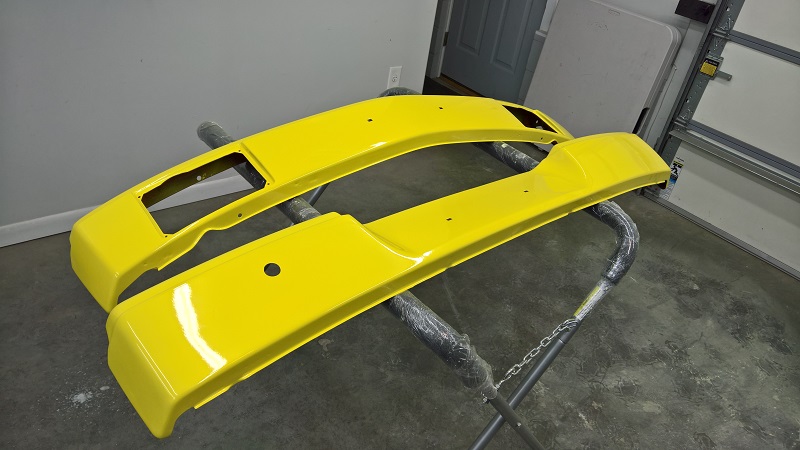 Cheers Engelbert
__________________
For BA7s Dash LED, and External Marker LED go to carmagic.us - Now Luftgekühlt Emblems |
||
|
11-22-2016, 05:34 PM
|
|
|
Carmagic.us
Join Date: Feb 2007
Location: Virginia
Posts: 2,124
|
I got to the point to see if the yellow bumper will fit and started to remove the rubber bumpers and support. I know when I bought the car that something happen at that rear corner.
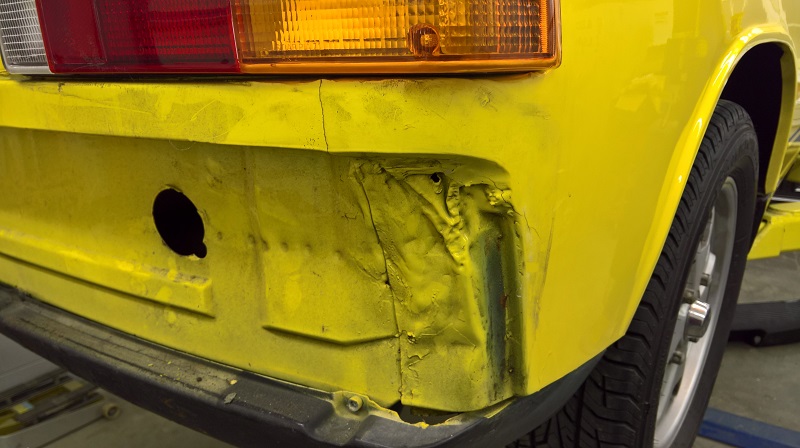 I did not expect that it will become such a project. 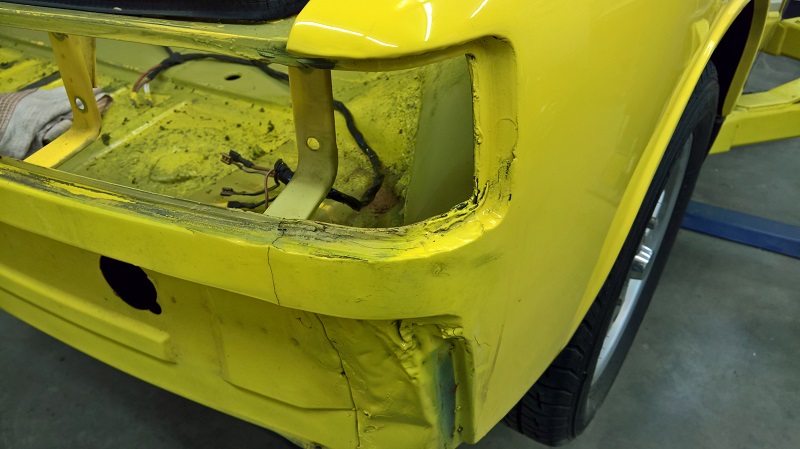 After seeing this, I started to dig in and get the body filler off. 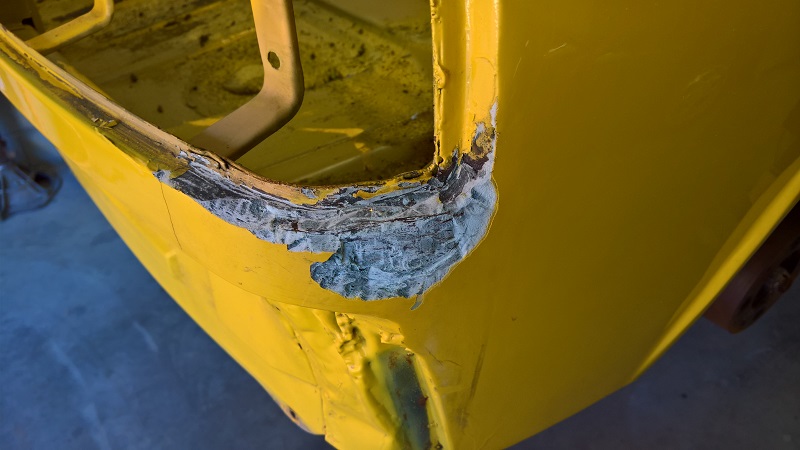 Oh boy, somebody did some hi-tech repair. 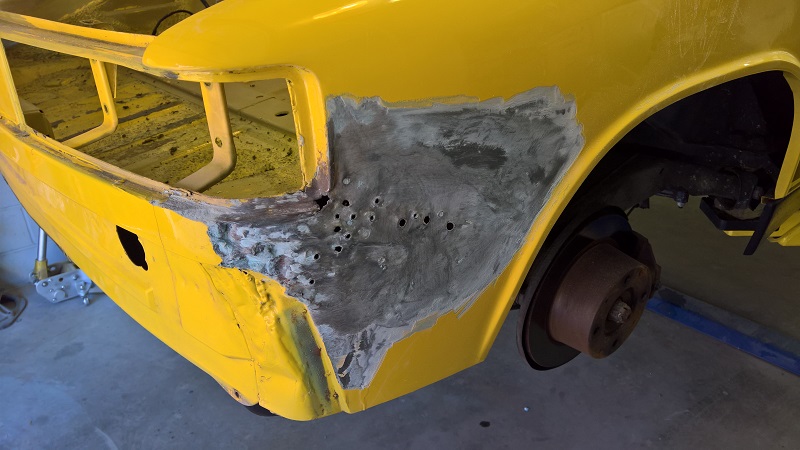 Looks like I found a panel piece, so I can cut out the section and put in a new piece. I want the piece first before I do any cutting. So I move to the front. At that corner it was also obvious that some repair was done at one time. 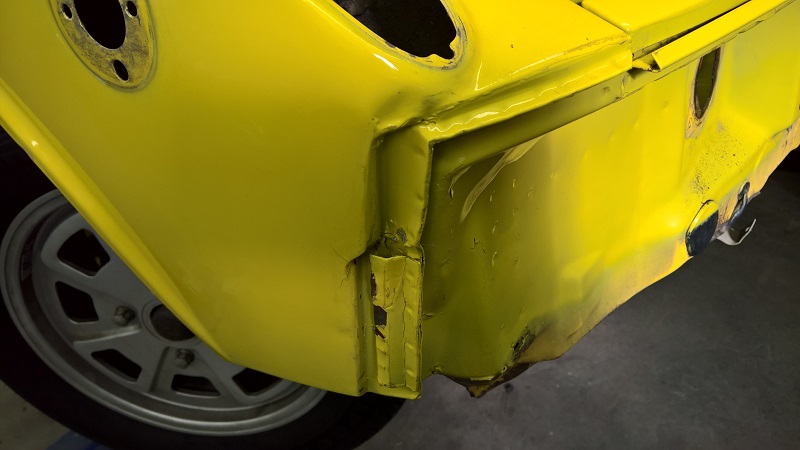 It was not as bad as at the rear end. 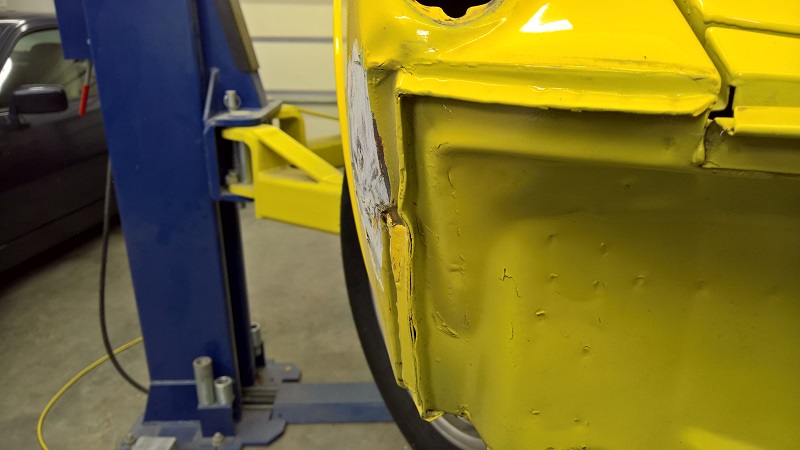 There were 3 holes when somebody tried to pull it out, so I welded the holes and massaged the rest. 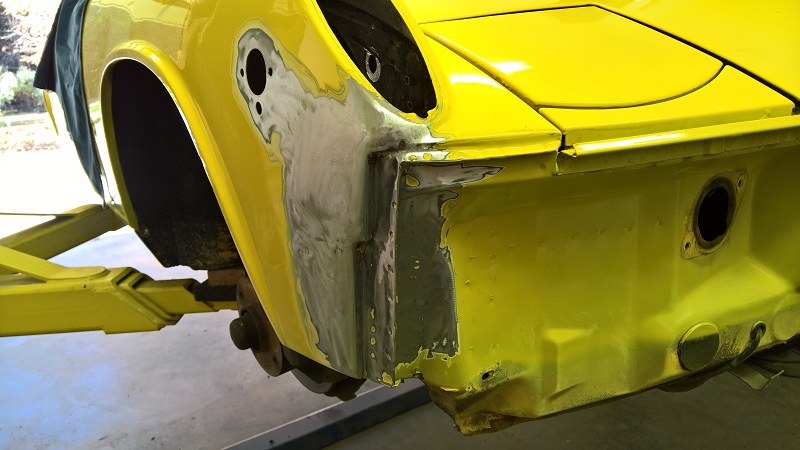 While I was on it, I welded the side marker hole. I never liked the look of them. 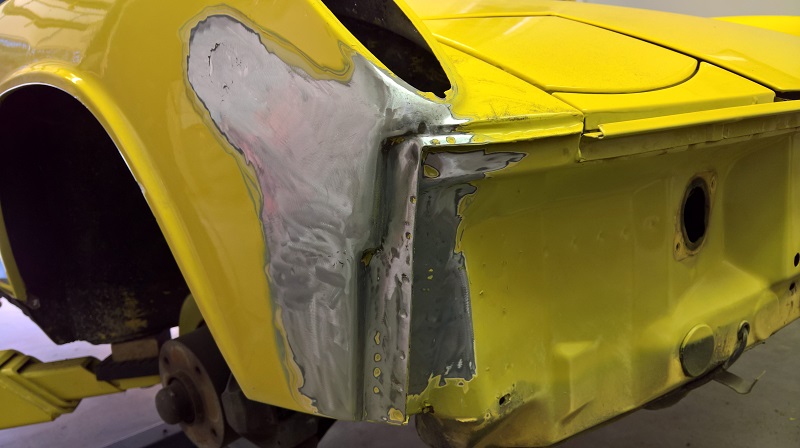 Cheers Engelbert
__________________
For BA7s Dash LED, and External Marker LED go to carmagic.us - Now Luftgekühlt Emblems |
||
|
11-22-2016, 05:36 PM
|
|
|
914 Geek

|
Quote:
 --DD
__________________
Pelican Parts 914 Tech Support A few pics of my car: http://www.pelicanparts.com/gallery/Dave_Darling |
||
|
11-23-2016, 07:39 AM
|
|
|
Registered User
Join Date: Oct 2010
Location: Sweden
Posts: 54
|
Looks like your car is in great hands, well done !

|
||
|
11-24-2016, 09:26 PM
|
|
|
Double Trouble
Join Date: Nov 2002
Location: North of Pittsburgh
Posts: 11,706
|
yer a wild man...you are truly saving that car.
__________________
I used to be addicted to the hokey pokey..........but I turned myself around.. 75 914 1.8 2010 Cayenne base |
||
|
11-28-2016, 07:41 AM
|
|
|
Carmagic.us
Join Date: Feb 2007
Location: Virginia
Posts: 2,124
|
Here is an update.
I keep finding more work as I go. I should not have started that Bumper conversion project, and now I'm on a point of no return. Anyway, this will not be a complete restoration at this time. I found a good replacement piece for the rear right corner.  Careful removed the spot welds  I found a small area which needed a little patch.  While I was fitting the new piece, I also made the patch.  One more small section to be fixed at the bottom, but no big deal.  Here it is, ready to get welded in.  I prepped the section of the car with some primer, chip guard, and paint, on the section, I cannot get easy later on.  Here is the new panel complete welded in.  Here is what it looked before.  Continue in the next post
__________________
For BA7s Dash LED, and External Marker LED go to carmagic.us - Now Luftgekühlt Emblems |
||
|
12-02-2016, 03:21 PM
|
|
|
Carmagic.us
Join Date: Feb 2007
Location: Virginia
Posts: 2,124
|
Continue:
With that I moved to the front bumper section. When I removed the trunk seal, I found some additional section, which need some repair.   OK, cutting out.  Welding in.  More pieces, this was above of the headlight cover, hidden under the trunk seal.  I painted that section for now, so I can concentrate later for the external section.  Cheers Engelbert
__________________
For BA7s Dash LED, and External Marker LED go to carmagic.us - Now Luftgekühlt Emblems |
||
|
12-02-2016, 03:22 PM
|
|


 1974 Porsche 914
 Chevy Blazer 4x4
 74 Porsche 914 2.0
