|
|
|
|
|
| Author |
|
|
Patrick
|
Rear Hatch Locking Assembly
I wish I took pictures during the repair but I didn't...
Anyway, I've been attempting to adjust the hatch pins so they will release properly when pressing the remote hatch release switch. It appears that I have the pins threaded in too much so I backed them out a little at a time; the hatch now operates very nicely. My next challenge was to repair/replace the key locking assembly. My key wouldn't fit in the key hole all the way so I first assumed that a previous owner may have replaced the ignition and door keys in the past. I removed the lock barrel and found the entire assembly was corroded so bad, it has seized. Since I never worked on a lock assembly before, I contacted a local automotive locksmith which informed me that the unit was too corroded thereby could not be repaired. Since I'm pretty stubborn, I took this as a challenge and performed the following operation. Please keep in mind that since this was my first go at this project, I'm not certain of correct terminology and not even sure if this the best way, however; it work for me while saving some cash. 1. Remove barrel by gently pushing the retaining pin, allowing for the barrel to separate from it's casing and rotating lever. Be aware of the coil spring's position when separating the assembly. 2. Since all the brass pins were corroded (a white substance presumably due to a chemical reaction from the brass pins and the metal tumble barrel. I gently wire-wheeled the barrel which revealed the brass pin ends. 3. The tumbler barrel was subjected to a 2 day soak utilizing Tri-Flo; a super lubricating and penetration oil. 4. After the soak, gently nudge each pin back and forth with a very small punch and jeweler's striking hammer, making sure that that the brass edges did not give. 5. Once all (7-8) pins were freed, remove each one and placed them, in order, on a clean cloth. I also gently wire-wheeled each pin to remove any gunk, corrosive deposits, and dried grease (28 years worth). 6. Using a 000 screwdriver (and I mean S-mall), place the tip over each pin spring and gently move along the spring as to loosen any debris. Performing this several times with each spring will kind-of "wake them up" by agitating any foreign material. 7. Then spray electrical contact cleaner to thoroughly clean the assembly and reinspect for additional corrosion. 8. Using a jeweler's file (boy am I glad I purchased those jeweler's tools years ago), VERY carefully remove any remaining material from the pin slides. respray with cleaner and re-soak in the Tri-Flo bath for a couple of hours. 9. Remove unit from bath and insert each pin, one at a time, working it back and forth until they move freely and spring back when pushed against the pin spring. You may insert and extract your key several times to ensure appropriate movement. As a note: I removed each pin and placed it in order after achieving full and proper action so as not to have them fall out during this process. 10. Once all the pins are operational, carefully insert all pins back into the tumbler and re-install in the casing with retaining pin. Be aware of properly lining up the pin ends to the casing slots and correct placement of the coil spring as it should butt up against the release rod lever boss (I hope that makes sense). 11. The assembly should now be locked until the key is fully inserted and then be able to turn. This procedure did take me a few hours of patience, working under a work table magnifying lens. I hope this helps; please contact me with any questions or comments if I left out a step. Patrick
__________________
1984 944 NA, constant tinkering 1983 "Beastie" - Safari Build |
||
 11-19-2012, 08:16 PM
|
|
 |
| Thread Tools | |
| Rate This Thread | |
|
|


 1984 Porsche 944 NA
 2015 BMW 328i XDrive
 2019 MB C300 Coupe 4Matic
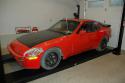 The Beastie


