|
|
|
|
|
| Author |
|
|
Petie3rd
Join Date: Jul 2000
Location: Philly PA
Posts: 4,528

|
The New 928 motor mounts with pictures
I got a set of the new style Motor mounts From Roger@************ for my 86 as the engine was sitting pretty low.
The mounts had been replaced a few years ago but i dont think these were good mounts to begin with.( they looked like Anchors and were filled with liquid) Anyway removal of the old mounts was straight forward. I use the 2, 2X4 method to support the engine, the new mounts are quite a bit taller than the previous Anchors. I measured about 90MM face to face on these new Volvo mounts. The new mounts required some different assembly techniques to install them. Normally with the Anchors a few fender washers are placed on the tops of each mount for an additional 3mm of lift. Then both of the mounts are bolted to the lower crossmember with the bolts slightly loose and the top mounting bracket is secured to the fingers and tightened. Anyway these new mounts didnt need any spacers. I found that the new mounts will be a bit harder to align with the crossmember and the engine mounting ribs, as they are pretty tall. This throws off the level of the mounting flange that attaches to the engine not by much but its enough to not want to be prying on parts to try to force the mounting brackets onto the engine while working on my back. Heres how I got around installing the new mounts. Had I done this to start with it would have saved some time, as i tried to install them the same way i would have installed the Anchors ( with both mounts attached to the crossmember) What i did was to install both of the top brackets to the mounts , note make sure the top bolt is centered in the mount . Then assemble this to the the crossmember . I also had to prealign the lower locating pins to match with the crossmember prior to tightening the top brackets, leave the finger pads off for this step. Next I decided to install the crossmember with both of the mounts attached to the crossmember and the finger pads installed. Well i got it jacked into place the there wasnt any way that the top mounts were going to slide into the engine ribs as both of the top mounting flanges were slightly bent sideways from the added height of the new mounts. So i removed the crossmember and removed the right mount from the crossmember and bolted this mount into the engine ribs with the bolts a few turns loose so it could move. ( note the finger pad will fall off ,it can be placed on the lower mount stud and held with an O ring, when the mount is removed from the crossmember) Then i put the crossmember back onto the jack and jacked it into position the left side went in no problem the right side I needed a small bit of prying on the lower stud to fit it into the crossmember mounting hole, but it went in rather quickly once i figured out the trick of one mount on the crossmember then one on the engine. After this it was simple reassembly and then once the weight was on the mounts the engine sits just above flush with the lower crossmember and this is , without the rack or lower plate on. Prior to tightening the lower mount bolts use a punch or screwdriver to move the lower mounts so they are as close to concentric with the lower pin cutouts, this should prevent the fingers from tapping on the upper flanges. All in all i am quite happy with these new mounts, the quality seems a few grades in quality higher than the previous Anchor mounts ,and they are taller. Note the bolts on the mounts though are thinner than the Porsche mounting bolts but its not a big deal there. I found the engine is sitting high in the saddle. I also strongly suggest that you look at the other parts of the engine, for clearance issues I did a bit of investigating . What i found was that, The fuel line cooler lines were a bit closer to each other so i bent them away from each other. The exhaust was hitting on the LF and center heat shields , so a bit of bending to the shields and all is well. Also with the Ott X pipe the O2 sensor was hitting so another bend to the RF shield cured this issue. Other than that its a straight forward install. Road test: the engine seems to be quite a bit smoother than the Anchors were , and these new mounts are also liquid filled. If your considering replacing the engine mounts in your car, I would strongly suggest that you consider these as an option, by following the assembly procedure I did, you shouldnt have any issues. Ahh the other thing i forgot to mention the A/C and oil pan, and Alternator are now about 1 inch farther from the ground, this is a good thing. I want to thank Roger for taking the time to search out a better alternative to the Porsche and Anchor mounts, these seem to be a great alternative, so now we get to see how long they last, Stan 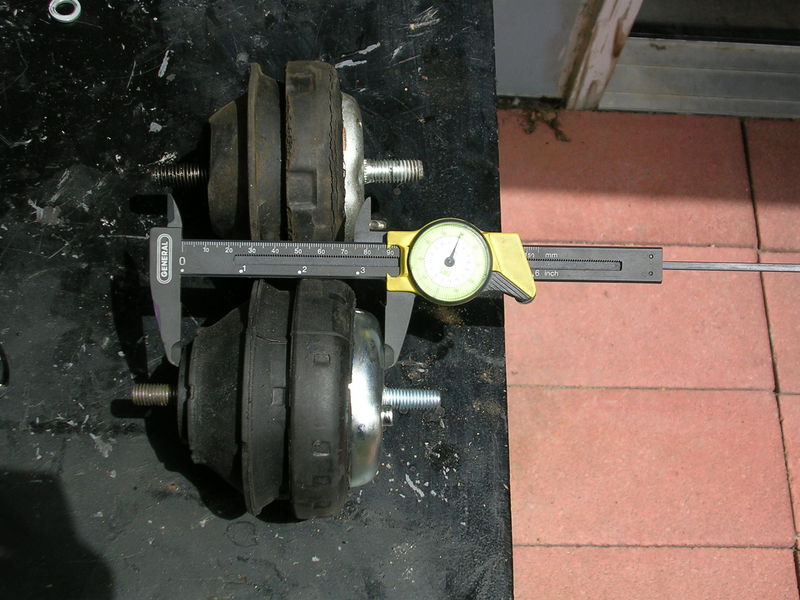 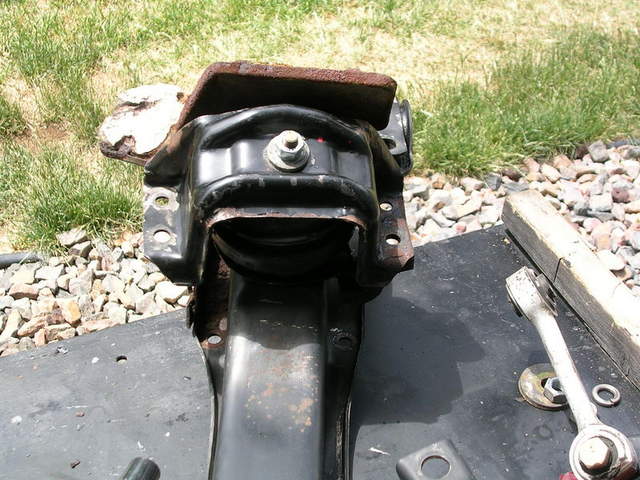 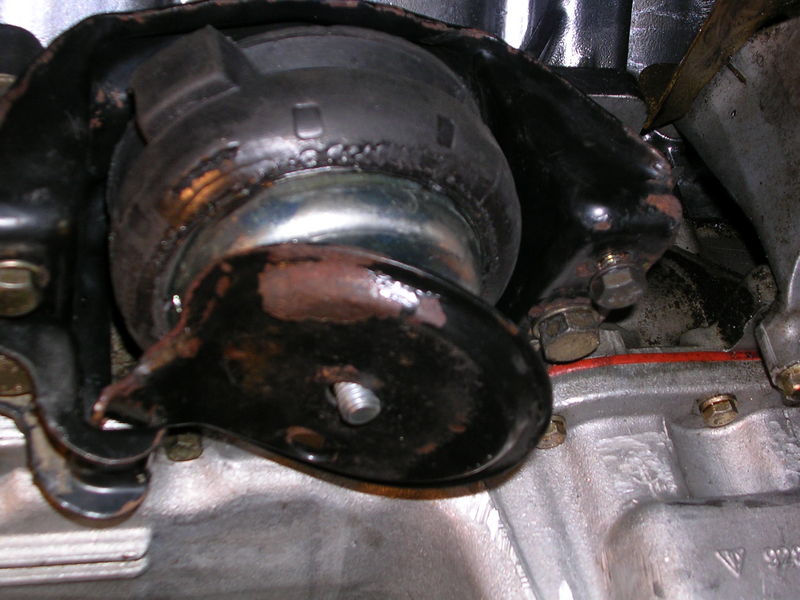  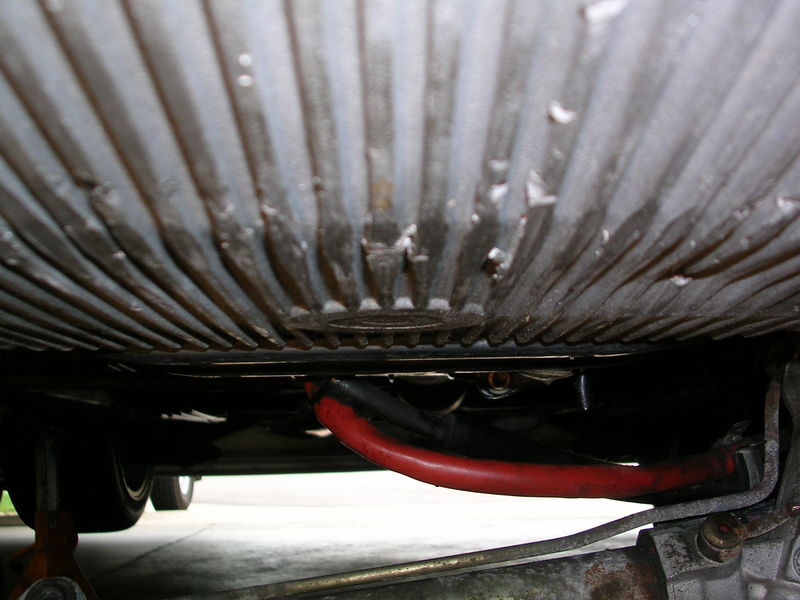 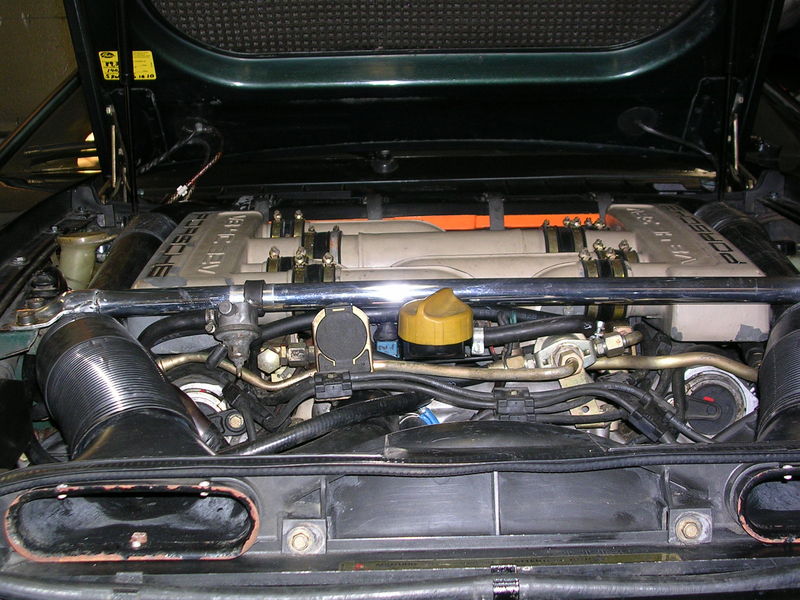
__________________
^^^ Stan ^^^ 2019 BMW K1250 GS 2016 HD RK 1988 S4 Auto , Elfenbein Perlglanz, Pearl Gray 1982 5sp Met black and tan sport seats Last edited by Mrmerlin; 06-26-2010 at 11:08 PM.. |
||
 06-26-2010, 10:59 PM
|
|
|
Moderator
|
Wow, incredible how much those mounts get mashed. Thanks for those old and new mount pics.
__________________
1981 Porsche 928 "Euro" Auto Gunsmoke Metallic Flat - Black Interior 1983 Porsche 928S "US" Auto Light Bronze (Copper) Metallic - Brown Interior **SOLD** 
|
||
|
06-27-2010, 08:35 AM
|
|
|
Registered
Join Date: Mar 2009
Location: Plano, TX
Posts: 511
|
Great write-up Merlin. Thanks for taking the time to put it together. Replacing the mm is on my short list, so I will using this when the time comes.
__________________
1982 928 S Euro 5 speed |
||
|
06-28-2010, 06:53 AM
|
|
|
Petie3rd
Join Date: Jul 2000
Location: Philly PA
Posts: 4,528
|
If you have any questions feel free to ask,
goodluck with your project
__________________
^^^ Stan ^^^ 2019 BMW K1250 GS 2016 HD RK 1988 S4 Auto , Elfenbein Perlglanz, Pearl Gray 1982 5sp Met black and tan sport seats |
||
|
11-22-2010, 08:05 PM
|
|
|
Registered
|
How long did it take to do this?
Quote:
|
||
|
11-23-2010, 04:16 AM
|
|
|
Petie3rd
Join Date: Jul 2000
Location: Philly PA
Posts: 4,528
|
To install the MMs it took me about 14 hours,
that includes washing all of the parts and cleaning and or painting any corroded parts. I was working with the car on 4 jack stands and supported the engine with 2 2X4s placed alongside the oil pan and under the ALT. and AC mounts
__________________
^^^ Stan ^^^ 2019 BMW K1250 GS 2016 HD RK 1988 S4 Auto , Elfenbein Perlglanz, Pearl Gray 1982 5sp Met black and tan sport seats |
||
|
11-23-2010, 12:39 PM
|
|

|


 1
1
