|
|
|
|
|
| Author |
|
|
Registered User
Join Date: Sep 2010
Posts: 264
|
A/C, P.S. and fuel lines-check. T
  
|
||
 06-22-2013, 05:11 PM
|
|
|
Porsche newbie
|
This is a real minor thing. I saw some post on that other forum about modern radios not matching the character of the Porsche 928 interior. Noticing that my Alpine had a little bling, I pulled the main chrome knob off and sprayed it satin black. Unfortunately, I did not take a "before" photo. I think it's a modest improvement.

__________________
87 928 S4 Exported for Japan |
||
|
12-29-2013, 03:22 AM
|
|
|
Porsche newbie
|
When Nicole had her going out of business sale (Hooked on Cars), I decided it was time to buy a new hood (bonnet for the rest of the world) insulation pad. Mine was long gone with a nasty yellow adhesive residue everywhere. I read Dwayne's write-up and tackled this job on Christmas. I removed the hood and brought it into my apartment and laid it on the carpet. I did not find that a stiff brush was adequate for removing the old glue. I actually used a a steel spatula and mineral spirits to work on the top layers of glue. After removing most of it, I was able to use a stiff brush to remove the remainder.
Since I could not find the recommended 3M spray-on adhesive or the DAP Weldwood product, I purchased a small can of brush-on adhesive from the local car parts place. I then put on the silver shark decal. Here's the finished result: 
__________________
87 928 S4 Exported for Japan Last edited by Niles; 12-29-2013 at 03:57 AM.. Reason: Spelling error |
||
|
12-29-2013, 03:37 AM
|
|
|
Porsche newbie
|
A few months ago, I noticed that my 5-spd shifter was really loose and floppy. Since the front ball socket was replaced when I purchased my car I suspected the rear coupling bushings were shot.
I could feel through the rubber boot that it was really loose so I knew, it need bushings. I contacted Roger (928sRUs) and ordered a replacement coupling. I started working on this Saturday. I could not seem to roll the rubber boot back, so I sliced it with the intention of repairing it or using wire ties on it when I completed the job. All of the posts warn about the cone set screw and sure enough, mine was very stubborn. I broke the first allen socket I inserted. I then tried a different allen wrench, but could not get the leverage I needed. it was too late to buy another allen socket, so it would have to wait until today. I also did some additional reading and all of the posts recommended heating it up. Today, with a new allen socket for a 3/8" ratchet, I was ready to tackle it. I used my pencil butane torch and heated it up for a couple of minutes, inserted my new 4 mm allen socket and it broke loose - yay! Here's the old coupling with some of the bushing remnants and the cone set screw.  After re-assembling it with the new coupling and adjusting it slightly, I then attempted to re-install the boot. I was not able to get it to seal up, so I got to thinking maybe I could wrap an old bicycle inner tube around it. I found a motorcycle inner tube and sliced a section out of it. I then realized I would need to disconnect my new coupling in order to install the inner tube sleeve. After re-installing the coupling, I slid the inner tube section over the coupling and cinched it at each end with zip ties. Below is the photo of the new coupling installed. 
__________________
87 928 S4 Exported for Japan |
||
|
12-29-2013, 03:55 AM
|
|
|
Porsche newbie
|
I forgot to mention in previous post, the shifting feels precise and crisp again. Someone else said that this repair was one of the best bang for bucks improvement and I have to agree.
__________________
87 928 S4 Exported for Japan |
||
|
12-29-2013, 04:00 AM
|
|
|
928-Electrics Guy

Join Date: Jun 2007
Location: Phoenix AZ
Posts: 715
|
Quote:
 This one (on a Parrot Asteroid) has a functional inside clicker, but its far easier (more obvious) without that. You may even be able to replace the whole knob with a Porsche one. Alan
__________________
1994 928 GTS Black/Black Manual Last edited by Alan in AZ; 12-29-2013 at 06:37 AM.. |
||
|
12-29-2013, 06:35 AM
|
|

|
|
Porsche newbie
|
Alan, I remembered your use of the odometer reset button and thought about it - it looks great. If I had a spare knob handy, I would certainly have been game to try it. One of these days I'll give it a go. By the way, I like the GTS clock in your console.
__________________
87 928 S4 Exported for Japan |
||
|
12-29-2013, 11:12 PM
|
|
|
928-Electrics Guy
Join Date: Jun 2007
Location: Phoenix AZ
Posts: 715
|
The clock came with the car...
It's actually a blower knob with only the insert from the odo reset (those pod knobs are huge). So you could pull off the head unit knob and see if your blower knob fits the shaft? if not it can still be adapted but more work... alternatively get a rear AC knob and cut/grind the back flush and glue to the stock head unit knob. All these have essentialy swappable inserts (perhaps with a little bit of work)... The "Asteroid" logo on the original head unit control lights up - so the Pod inserts are preferred as they illuminate - so at night you see the decal slightly illuminated. Alan
__________________
1994 928 GTS Black/Black Manual Last edited by Alan in AZ; 01-01-2014 at 06:17 AM.. |
||
|
12-30-2013, 07:46 AM
|
|
|
Antsmands
|
Quote:
Great Job!
__________________
1983S 5 Speed / Platinum Metallic / Dark Brown Interior / GE NightHawk LED Headlights / Super Bright LED / Flex-a-lite Cooling Fan / Dragon Gauges / Custom Auto Sounds Spare Tire Sub Woofer / H3R HalGuard Fire Bottle |
||
|
12-30-2013, 09:40 AM
|
|
|
Porsche newbie
|
Relay XXI - Interior Light Delay and stuff
Learned something new - Relay XXI (Interior Light Delay on 1986 -89 models) when removed will prevent the interior lights from illuminating with the doors open. BUT, the lights will work when the hatch is open. Oddly - the hatch release motor will only run when the hatch is open. This was useful for determining my excessive battery draw was due to a frayed wire on my hatch switch inadvertently grounding. After my solder repair and wrapping electrical tape around it to prevent inadvertent grounding, I was able to verify that my repair was effective. Relay XXI - labeled Innen-Leuchte:
 Another note, proper troubleshooting of excessive battery draw (should be less than 50 milli-amps or less than 0.050 amps) can be difficult with the battery in the rear and testing being done with the hatch open. The hatch switch may be disconnected allowing you to leave the hatch open. On my car it was a two wire connector near the spare tire well with a brown wire and brown with white stripe wire leading to the bottom of the hatch receiver assembly. With the hatch switch ground disconnected, my current draw was 0.020 amps. If you suspect the thatch switch is the cause, you will need to keep it connected and close the hatch. Hatch switch connection:  I am now confident that my battery will stay charged for longer than a few days.
__________________
87 928 S4 Exported for Japan |
||
|
02-24-2014, 12:54 AM
|
|
|
Registered
Join Date: Aug 2012
Location: Philadelphia Area
Posts: 3,663
|
Quote:
are you going to have a vinyl graphic made to cover the odo O symbol and replace it with a proper power symbol (IEC 5010, power on-off symbol (line within a circle) used on buttons that switch a device between on and fully off states.
__________________
Matt Mariani @the_r_institute Authorized Retailer FIKSE Wheels Mod Italian Wheels Maxilite classic wheels Last edited by The Fixer; 03-01-2014 at 07:03 PM.. |
||
|
03-01-2014, 06:59 PM
|
|
|
Network Native

Join Date: Jan 2007
Location: SoCal
Posts: 10,349
|
Quote:
 OTOH I do like matching knobs ... |
||
|
03-01-2014, 08:29 PM
|
|
|
Registered
|
dash re-do
while I don't actually have a drivable 928 yet I am getting ready to tackle this project (soon I hope) - so I'm accumulating parts and correcting things I can do inside during winter - here are some pics of my dash repair - I completely recovered it in sheet vinyl - filled cracks with bondo - and sanded it flat - then I used DAP landau top adhesive - very strong stuff - can says the bond improves with age so it should be really glued when I install it this spring or summer
         
__________________
84 928 S - SOLD 2012 Cayenne S |
||
|
03-02-2014, 09:35 AM
|
|
|
Registered
Join Date: Aug 2012
Location: Philadelphia Area
Posts: 3,663
|
Quote:
 Quote:
__________________
Matt Mariani @the_r_institute Authorized Retailer FIKSE Wheels Mod Italian Wheels Maxilite classic wheels |
||
|
03-02-2014, 02:21 PM
|
|
|
Kool
|
^^^^^ditto...I wonder if he is offering his services?
I don't have a pic to share, since I don't have my storage issue solved yet....but I got the parking brake pads installed, and (1) rear rotor and caliper reinstalled, got the drivers side left, and then to install the CV's.....
__________________
Ron 1978 5sp (#30) project-Wreckscue, 1979 5sp Euro Project 1982 5sp resto project, 1985 Auto S3 1984 Parts car (the fire car) 1987 s4 (parts, or maybe project) (Yes, I now have 4 project Sharks) |
||
|
03-02-2014, 04:42 PM
|
|
|
Porsche newbie
|
I did a couple of things recently. After disconnecting the power while doing some maintenance the LCD clock was displaying some extra horizontal bars. Having read that Infiniti used some oval shaped clocks, I ordered one off a well-known internet auction site. It was for an Infiniti M45 ($50.00 including shipping). I also tried Alan's trick of using a Porsche 928 knob to replace my Alpine stereo knob. I used a rear ventilation air flow control knob and added a little paint to make it look different. I'm not overly pleased with it. Any comments? Anyway back to the clock - photos:
Initial test fit of the new clock. It looks like it may work.  Disassembled the new clock. I want to see about removing the Infiniti logo. I painted it over with a dab of black paint. I also soldered leads to the connection tab for the positive, ground, illumination positive and illumination ground.  Disassembled the old clock. It does not look like the internals of the new clock will fit the clock bracket. I also used a Dremel to remove the mounting tabs of the new clock.  Removed the old LCD clock from the mounting bracket using a Dremel. I was thinking of using epoxy to cement the new clock to the old clock mounting frame.  I talked to an acquaintance who does plastic welding and for $50.00 he plastic welded the parts together. It is not pretty, but appears to be very strong.  I found another shifter/clock bezel on the internet and went ahead and purchased it in case I had problems. The new clock is a little deeper than the old one.  The new clock mounted in the bezel. I did have to trim a little on the back side of the bezel to make for a more flush fit.  Here's the new clock installed. The new stereo knob is also shown here.  The finished product all lit up.  What do you think? One downside for using the Infiniti clock, is that it cannot easily be made to fill the hole in the Porsche bezel. Maybe it could be trimmed out using some plastic painted black.
__________________
87 928 S4 Exported for Japan Last edited by Niles; 04-12-2014 at 09:25 PM.. Reason: Spelling |
||
|
04-12-2014, 09:21 PM
|
|
|
928-Electrics Guy
Join Date: Jun 2007
Location: Phoenix AZ
Posts: 715
|
Quote:
It it does do volume, input traverse, menu traverse and click to select. The existing logo has grown on me, I'm not sure what would really be better. A vinyl covering would not make sense as this is an illuminated knob. I'm thinking I will leave it as is. Alan
__________________
1994 928 GTS Black/Black Manual |
||
|
04-13-2014, 07:02 AM
|
|
|
928-Electrics Guy
Join Date: Jun 2007
Location: Phoenix AZ
Posts: 715
|
Quote:
Shame there aren't any medium sized Porsche knobs. Alan
__________________
1994 928 GTS Black/Black Manual |
||
|
04-13-2014, 07:11 AM
|
|

|
|
curtisr
|
Replaced the copper crush washers around the fuel pump banjo fitting and check valve. No more fuel leak!
Eight litres of Rotella T and a new filter. New turn-signal relay. Re-installed EC front cover. Installed a kill switch in the battery compartment.
__________________
1977 924 Guards Red (parted and sold) 1987 924s Alpine White (sold) 1987 924s Kopenhagen Blue (my Lowencash tribute track car -- sold) 1987 924s Garnet Red (currently becoming Lowencash II) 1982 928 Silver (sold) 
|
||
|
04-22-2014, 02:57 AM
|
|
|
928-Electrics Guy
Join Date: Jun 2007
Location: Phoenix AZ
Posts: 715
|
Quote:
 Alan
__________________
1994 928 GTS Black/Black Manual |
||
|
04-22-2014, 07:03 AM
|
|


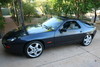 1987 Porsche 928 S4 5.0 L
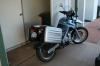 2001 BMW F650 GS
 1997 Jeep Cherokee
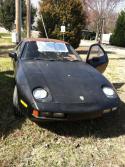
 1983 Porsche 928S
 TBA
TBA Whitey
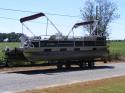 Pontoon
 1982 Porsche 928
 Uhhh, 'Sweetie'?! Never thought about giving it a
  Soon to be a race car (done)
 Whatamess
 Lowencash -- VARAC tribute/race car
 DD
DD
