The old thermostat is out and the new one in! For the possible benefit of others, this is what I did:
(1) I decided to use acetone to both wash the engine surface, removing loose debris and any 'sticky stuff', and to help soften the presumed hardened O-ring, assuming that the acetone could penetrate. I poured approximately 6 ounces of acetone through a funnel to direct the flow, trying to direct the flow under the thermostat lip.
(2) I modified my pry bar by adding a 'ring' made from a heavy duty cardboard staple (copper coated steel). Using a vice grip, the staple was firmly attached near the claw of the pry bar (see photo). The theory of this was to provide a pivot point much closer to the pry tip, about 1/4 inch, versus the ordinary pry bar pivot near the bottom of the "L" shape. This lever action multiplied the applied force by about four times versus what I had before.

. In addition, I clamped a vice grip on the end of the pry bar, increasing the length by about a factor of 2. These changes made the modified pry capable of about 8 times greater lifting force.
(3) Following the suggestions to whack the thermostat with a punch, I hit it twice in a direction to close the slight clearance with the studs and once directly on top. I saw no perceptible movement, but I think this helped (I'll clarify later).
(4) I then applied my modified pry, and while pushing with what I'd guess to be 50 pounds (applying a pry force of about 32*50 = 1600 pounds), I heard a loud crack and the thermostat shot out.

After removing the thermostat, I inspected it closely. (see photo)
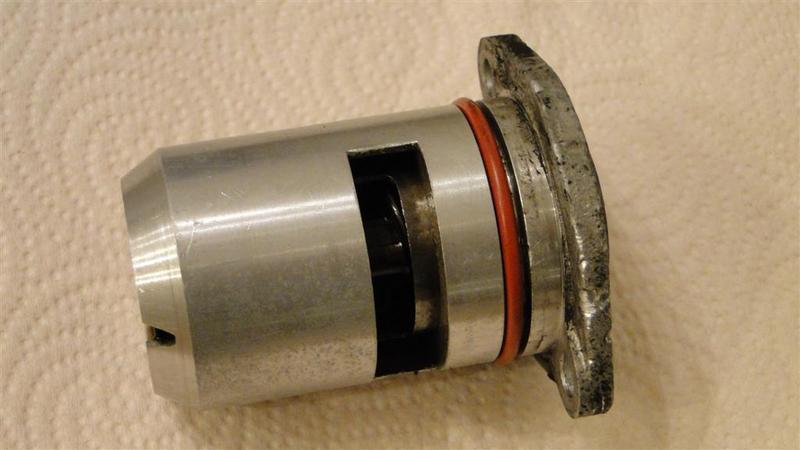
To my surprise, the O-ring was in "perfect" condition, not at all hardened or stuck. What I did find was a layer of hard 'varnish', possibly from cooked oil, that had coated the space between the thermostat lip and the engine. (some or most of the 'varnish' wiped away while the thermostat was being prepared for a photo). It appears to have been this hardened on deposit that was holding the thermostat. I think the acetone application helped dissolve the coating, that the punch blows helped weaken the bond, and these measures in combination with the greatly increased pry force broke the 'varnish' bond.
If you look at the removed thermostat closely, along the lower right hand flange, a gouge mark from the pry can be seen on the bottom of the flange lip, and just below this on the outer flange a narrow mark from the punch. The O-ring felt and looked 'new'.
Thanks again for everyone's quick and helpful advice. I hope I'll be able to pass the favor on.
Patrick Martin